2013 NISSAN LEAF climate settings
[x] Cancel search: climate settingsPage 50 of 275
2-12Unique EV functions
.When the climate control is set as the first
priority, the Climate Ctrl. Timer will not
operate until the remaining Li-ion battery
power displayed in the meter is 2 segments
(15%) or higher.
. The Li-ion battery will not charge when the
charge connector is connected to the
vehicle until the next scheduled charge start
time when the charge timer is active. If
necessary, use immediate charge or remote
charge to charge the Li-ion battery.
. Some charging stations used to perform
normal charge are equipped with timer
functions. If the charger timer function and
the vehicle timer are both set, and the two
timers are not set to operate at the same
time, it is possible that the charger will not
start or the battery will not be charged to the
level expected.
. The Li-ion battery may not charge to the
expected level when the Li-ion battery
warmer operates while charging using the
Charging Timer.
. Set only the Charging Timer End time when
charging in cold weather. The vehicle
automatically determines when to start
charging to fully charge the Li-ion battery,
even if the Li-ion battery warmer operates.
Charging ends before the set End time if the Li-ion battery is fully charged.
SETTING CLIMATE CTRL. TIMER
While the charger is connected to vehicle, this
function pre-heats or pre-cools the passenger
compartment of the vehicle to the set tempera-
ture before driving. This helps reduce power
consumption from the Li-ion battery.
“Temperature settings” (page 2-14)
The Climate Ctrl. Timer operates the air condi-
tioner using power from the charger. Electric
power from the Li-ion battery is not used.
The Climate Ctrl. Timer function allows two
different timer settings. Each timer charge
function can be set to activate on a different
day of the week.
Once the Climate Ctrl. Timer is set, it will
complete air conditioning by the time that is set.
It is not necessary to set the Climate Ctrl. Timer
everyday.
WARNING
Even if the Climate Ctrl. Timer is set, the
temperature in the passenger compart-
ment may become high if the system
automatically stops. Do not leave chil-
dren or adults who would normally
require the support of others alone in your vehicle. Pets should not be left
alone either. On hot, sunny days, tem-
peratures in a closed vehicle could
quickly become high enough to cause
severe or possibly fatal injuries to
people or animals.
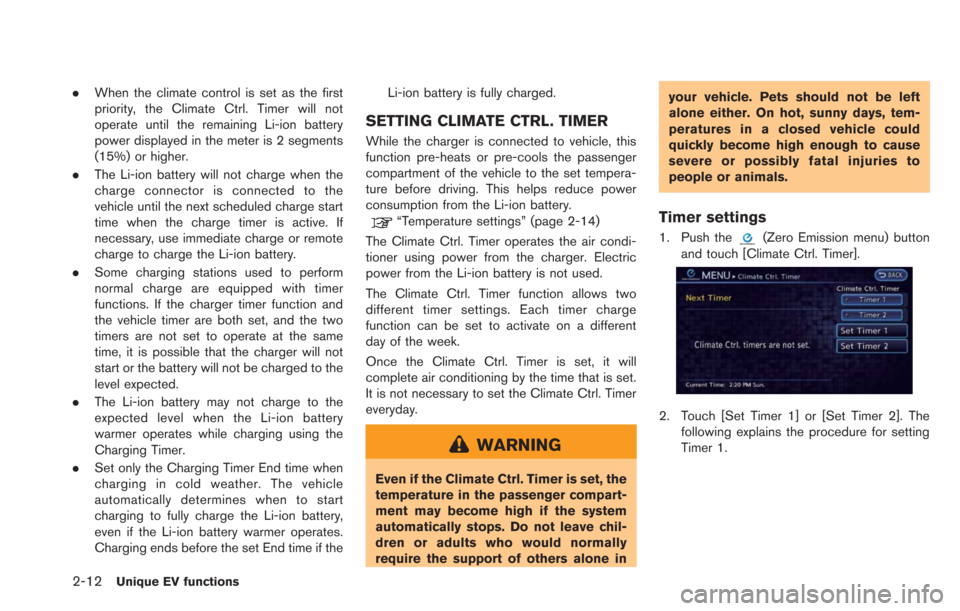
Timer settings
1. Push the(Zero Emission menu) button
and touch [Climate Ctrl. Timer].
2. Touch [Set Timer 1] or [Set Timer 2]. The following explains the procedure for setting
Timer 1.
Page 51 of 275
![NISSAN LEAF 2013 1.G Navigation Manual 3. Enter the departure time.
4. To set the Climate Ctrl. Timer for differentdays of the week, touch [Assign Days].
Select the preferred timer setting for each
day of the week. After setting, touch [OK NISSAN LEAF 2013 1.G Navigation Manual 3. Enter the departure time.
4. To set the Climate Ctrl. Timer for differentdays of the week, touch [Assign Days].
Select the preferred timer setting for each
day of the week. After setting, touch [OK](/manual-img/5/324/w960_324-50.png)
3. Enter the departure time.
4. To set the Climate Ctrl. Timer for differentdays of the week, touch [Assign Days].
Select the preferred timer setting for each
day of the week. After setting, touch [OK].
The previous screen is displayed.
5. When the settings are completed, touch [Save Timer]. The settings confirmation
screen will be displayed.
6. If the settings shown on the screen arecorrect, touch [Yes].
7. The [Timer 1] indicator illuminates after theClimate Ctrl. Timer is set. Use the same
procedure to set the Timer 2 setting.
8. Turn the power switch to the "OFF" position, and then connect the charge connector to
the vehicle.
INFO:
. The Climate Ctrl. Timer will only start when
the power switch is in the “OFF” position.
Always turn the power switch to the “OFF”
position after the Climate Ctrl. Timer is set.
. Touch [Timer 1] or [Timer 2] to turn off the
Climate Ctrl. Timer function. After this
operation has been performed, the indicator
turns off and the Climate Ctrl. Timer function
will be turned off. The start and stop time
settings are not deleted even if the Climate
Ctrl. Timer function is turned off.
. While the Climate Ctrl. Timer operates, the
Climate Ctrl. Timer indicator and the char-
ging status indicator lights flash. If the
Climate Ctrl. Timer is set to activate, the
Climate Ctrl. Timer indicator illuminates.
. If the timer charge function and the Climate
Ctrl. Timer are in operation at the same time
due to an overlap of the timer settings, either
function can be set to be preferentially
provided with electric power.
“Unique EV function settings”
(page 2-15)
. When the climate control is set as the first
priority, the Climate Ctrl. Timer will not
operate until the remaining Li-ion battery
power displayed in the meter is 2 segments
(15%) or higher.
Unique EV functions2-13
Page 52 of 275
2-14Unique EV functions
.If the Climate Ctrl. Timer starts operating
while the vehicle is being charged, the time
required for charging will be longer.
. Operating the Climate Ctrl. Timer or remote
climate control in an environment where the
temperature is low may decrease the rate of
battery charge.
. Timer setting can also be changed while
Climate Ctrl. timer is operated. When the
power position is switched to OFF, the air
conditioner starts or enters waiting mode
depending on the new timer settings.
. When charging is set as the first priority, the
Climate Ctrl. Timer does not start until 10
segments (80%) of the Li-ion battery avail-
able charge gauge are illuminated.
. When the difference in temperature be-
tween the air conditioner setting tempera-
ture and the temperature outside the vehicle
is large, the temperature inside the vehicle
may not be maintained at the setting
temperature.
. The charging status indicator lights illumi-
nate in a specific pattern when the Li-ion
battery warmer operates. The charging
status indicator lights use the same pattern
to indicate 12-volt battery charging, Climate
Ctrl. Timer operation or Remote Climate
Control operation. The charging status indicator lights do not change if the Li-ion
battery warmer operates at the same time as
the above features. See LEAF Owner’s
Manual for details of the charging status
indicator lights.
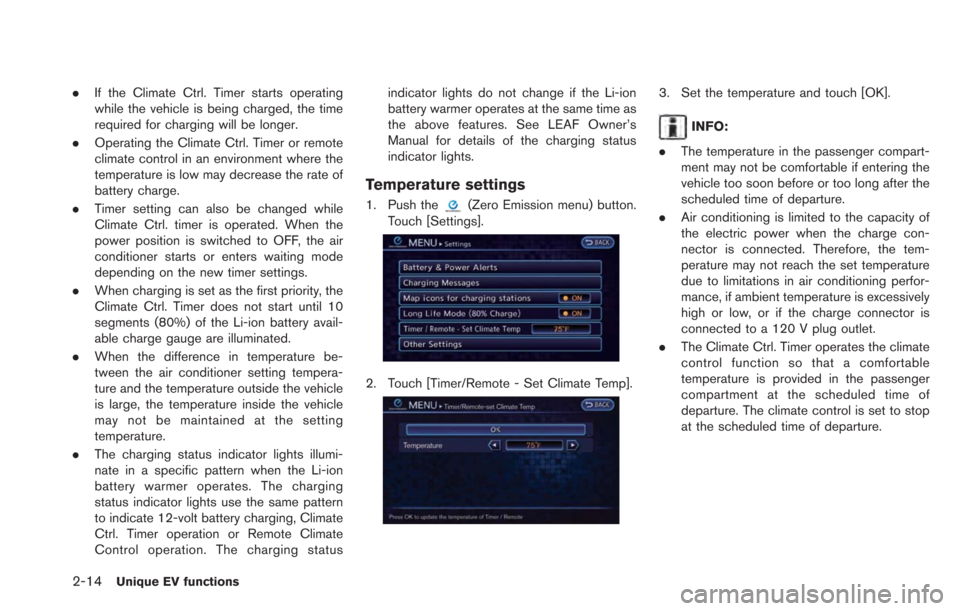
Temperature settings
1. Push the(Zero Emission menu) button.
Touch [Settings].
2. Touch [Timer/Remote - Set Climate Temp].
3. Set the temperature and touch [OK].
INFO:
. The temperature in the passenger compart-
ment may not be comfortable if entering the
vehicle too soon before or too long after the
scheduled time of departure.
. Air conditioning is limited to the capacity of
the electric power when the charge con-
nector is connected. Therefore, the tem-
perature may not reach the set temperature
due to limitations in air conditioning perfor-
mance, if ambient temperature is excessively
high or low, or if the charge connector is
connected to a 120 V plug outlet.
. The Climate Ctrl. Timer operates the climate
control function so that a comfortable
temperature is provided in the passenger
compartment at the scheduled time of
departure. The climate control is set to stop
at the scheduled time of departure.
Page 53 of 275
An active CARWINGSTMsubscription is
needed to remotely check charge status, battery
status, use remote charging, remote start Heat
and cooling and to receive e-mails/text mes-
sages.
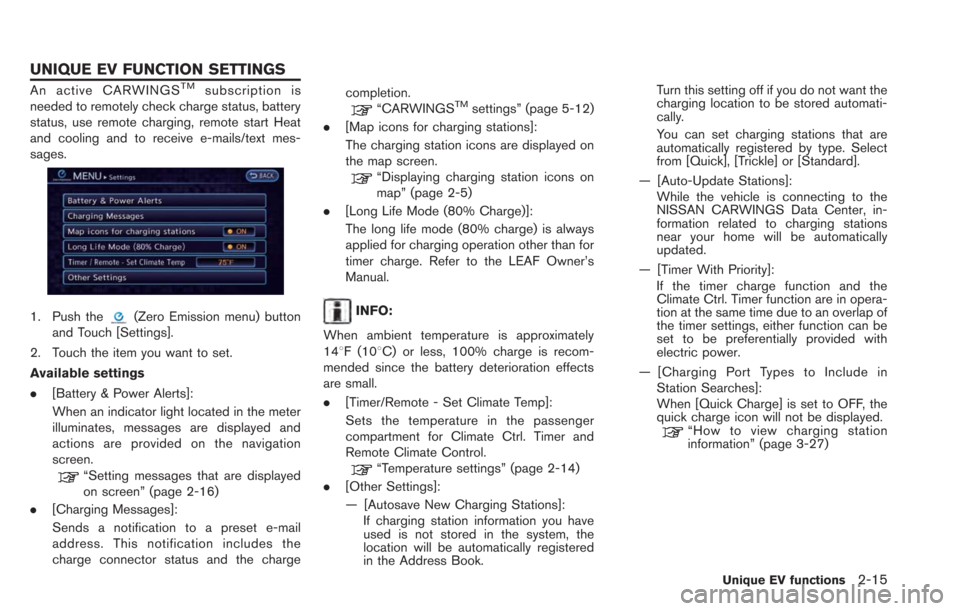
1. Push the(Zero Emission menu) button
and Touch [Settings].
2. Touch the item you want to set.
Available settings
. [Battery & Power Alerts]:
When an indicator light located in the meter
illuminates, messages are displayed and
actions are provided on the navigation
screen.
“Setting messages that are displayed
on screen” (page 2-16)
. [Charging Messages]:
Sends a notification to a preset e-mail
address. This notification includes the
charge connector status and the charge completion.
“CARWINGSTMsettings” (page 5-12)
. [Map icons for charging stations]:
The charging station icons are displayed on
the map screen.
“Displaying charging station icons on
map” (page 2-5)
. [Long Life Mode (80% Charge)]:
The long life mode (80% charge) is always
applied for charging operation other than for
timer charge. Refer to the LEAF Owner’s
Manual.
INFO:
When ambient temperature is approximately
148F (108C) or less, 100% charge is recom-
mended since the battery deterioration effects
are small.
. [Timer/Remote - Set Climate Temp]:
Sets the temperature in the passenger
compartment for Climate Ctrl. Timer and
Remote Climate Control.
“Temperature settings” (page 2-14)
. [Other Settings]:
— [Autosave New Charging Stations]:
If charging station information you have
used is not stored in the system, the
location will be automatically registered
in the Address Book. Turn this setting off if you do not want the
charging location to be stored automati-
cally.
You can set charging stations that are
automatically registered by type. Select
from [Quick], [Trickle] or [Standard].
— [Auto-Update Stations]: While the vehicle is connecting to the
NISSAN CARWINGS Data Center, in-
formation related to charging stations
near your home will be automatically
updated.
— [Timer With Priority]: If the timer charge function and the
Climate Ctrl. Timer function are in opera-
tion at the same time due to an overlap of
the timer settings, either function can be
set to be preferentially provided with
electric power.
— [Charging Port Types to Include in Station Searches]:
When [Quick Charge] is set to OFF, the
quick charge icon will not be displayed.
“How to view charging station
information” (page 3-27)
Unique EV functions2-15
UNIQUE EV FUNCTION SETTINGS
Page 162 of 275
5-2CARWINGSTM
In addition to Event Data Recorders (EDRs)
mentioned in the LEAF Owner’s Manual, this
vehicle is equipped with electronic modules that
monitor, control and record data concerning
various vehicle systems, including the motor,
batteries, braking and electrical systems. Other
electronic modules record information concern-
ing driving conditions, including idling, braking,
acceleration, trip and other related data, in-
formation about your use of the car and its
features such as air conditioner or headlight
usage, diagnostic trouble codes, vehicle char-
ging, vehicle speed, direction and/or location.
Some of this data is stored by the vehicle for use
during vehicle servicing. Other data concerning
your vehicle’s operation and performance is
wirelessly transmitted by cellular connection
through the vehicle onboard telematics system
upon vehicle start-up or at other intervals to
NISSAN. This data may be used by NISSAN for
various purposes, including: to provide you with
CARWINGS
TMservices (refer to the CAR-
WINGSTMsection of this manual for details);
troubleshooting; evaluation of your vehicle’s
quality, functionality and performance; analysis
and research by NISSAN designed to, among
other things, optimize performance of future
electric vehicles including improvements in
future battery life; to offer you new or additional
products or services; and as otherwise may be required by law. Such data may be shared with
NISSAN’s parents, subsidiaries, affiliates, suc-
cessors or assignees; authorized NISSAN certi-
fied LEAF dealers; NISSAN’s marketing
partners; your fleet company, if your vehicle is
a fleet vehicle; your rental company, if your
vehicle is a rental vehicle; and third party service
providers such as cellular, information systems
and data management providers.
State laws allow access and use of data
recorded by vehicle devices with the consent
of the vehicle owner or pursuant to subscription
agreement. While you are not required to allow
such access and use, if you do not so agree
NISSAN may be unable under applicable law to
activate the vehicle telematics system in your
vehicle, and certain features of your vehicle
which are dependent on vehicle telematics will
not operate as intended or designed. These may
include features such as automatic charging
station map updates, remote battery state of
charge check, charging complete notice, remote
plug in reminder, remote charging on, remote
climate control on, drive route planning, driving
tips to improve range, driving history, billing
simulation, ECO ranking, ECO forest, mainte-
nance reminders, etc. Other features that may
be developed and offered by NISSAN in the
future may also not function without telematics
data transmission.CARWINGS
TMtelematics services are provided
by NISSAN pursuant to a subscription services
agreement covering your vehicle. This agree-
ment is necessary for all owners. This agree-
ment, and an explanation of its terms and
conditions, can be found at the NISSAN Own-
er’s Portal webpage. Further, the operator of the
vehicle must also touch [OK] on the Navi screen
to indicate assent each time he or she starts the
car. If you decide at any time that you do not
want your vehicle to transmit data to NISSAN,
you can deactivate the telematics account
associated with this vehicle by canceling the
subscription services agreement by visiting the
NISSAN Owner’s Portal Webpage or calling
NISSAN at 1-877-NOGASEV (1-877-664-
2738) . The service can be reactivated later
upon request if you choose. Simply visit the
same website or call the number above. Alter-
natively, you can turn off the transmission of
certain categories of data through the use of
settings found in the Navigation system under
Menu, CARWINGS
TM, Vehicle Information
Sharing with NISSAN. Note, turning off “Vehicle
Information Sharing with NISSAN” will only
disable the automatic sharing of information at
vehicle start-up. Certain categories of data may
still be transmitted if vehicle telematics features
are accessed either in the vehicle or remotely.
Your agreement to the transmission and use of
TELEMATICS OVERVIEW
Page 271 of 275
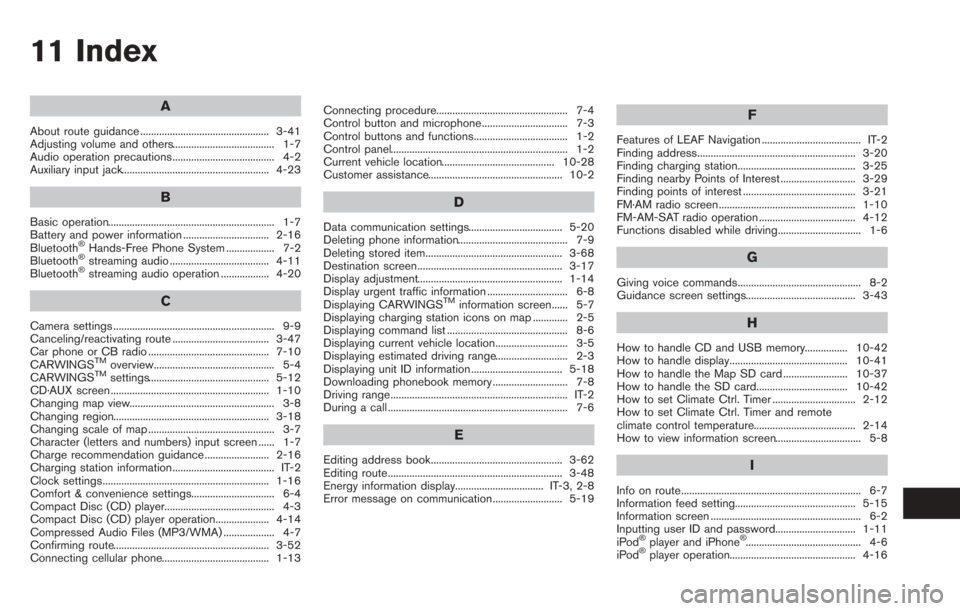
11 Index
A
About route guidance ................................................ 3-41
Adjusting volume and others...................................... 1-7
Audio operation precautions...................................... 4-2
Auxiliary input jack....................................................... 4-23
B
Basic operation.............................................................. 1-7
Battery and power information ................................ 2-16
Bluetooth
®Hands-Free Phone System .................. 7-2
Bluetooth®streaming audio ..................................... 4-11
Bluetooth®streaming audio operation .................. 4-20
C
Camera settings ............................................................ 9-9
Canceling/reactivating route .................................... 3-47
Car phone or CB radio ............................................. 7-10
CARWINGS
TMoverview............................................. 5-4
CARWINGSTMsettings............................................. 5-12
CD·AUX screen ........................................................... 1-10
Changing map view...................................................... 3-8
Changing region.......................................................... 3-18
Changing scale of map ............................................... 3-7
Character (letters and numbers) input screen ...... 1-7
Charge recommendation guidance ........................ 2-16
Charging station information...................................... IT-2
Clock settings.............................................................. 1-16
Comfort & convenience settings............................... 6-4
Compact Disc (CD) player......................................... 4-3
Compact Disc (CD) player operation.................... 4-14
Compressed Audio Files (MP3/WMA) ................... 4-7
Confirming route.......................................................... 3-52
Connecting cellular phone........................................ 1-13 Connecting procedure................................................. 7-4
Control button and microphone................................ 7-3
Control buttons and functions................................... 1-2
Control panel.................................................................. 1-2
Current vehicle location.......................................... 10-28
Customer assistance.................................................. 10-2
D
Data communication settings................................... 5-20
Deleting phone information......................................... 7-9
Deleting stored item................................................... 3-68
Destination screen...................................................... 3-17
Display adjustment...................................................... 1-14
Display urgent traffic information .............................. 6-8
Displaying CARWINGS
TMinformation screen...... 5-7
Displaying charging station icons on map ............. 2-5
Displaying command list ............................................. 8-6
Displaying current vehicle location........................... 3-5
Displaying estimated driving range........................... 2-3
Displaying unit ID information .................................. 5-18
Downloading phonebook memory ............................ 7-8
Driving range.................................................................. IT-2
During a call ................................................................... 7-6
E
Editing address book................................................. 3-62
Editing route................................................................. 3-48
Energy information display................................. IT-3, 2-8
Error message on communication.......................... 5-19
F
Features of LEAF Navigation ..................................... IT-2
Finding address........................................................... 3-20
Finding charging station............................................ 3-25
Finding nearby Points of Interest ............................ 3-29
Finding points of interest .......................................... 3-21
FM·AM radio screen................................................... 1-10
FM-AM-SAT radio operation .................................... 4-12
Functions disabled while driving............................... 1-6
G
Giving voice commands.............................................. 8-2
Guidance screen settings......................................... 3-43
H
How to handle CD and USB memory................ 10-42
How to handle display............................................ 10-41
How to handle the Map SD card ........................ 10-37
How to handle the SD card.................................. 10-42
How to set Climate Ctrl. Timer ............................... 2-12
How to set Climate Ctrl. Timer and remote
climate control temperature...................................... 2-14
How to view information screen................................ 5-8
I
Info on route................................................................... 6-7
Information feed setting............................................. 5-15
Information screen ........................................................ 6-2
Inputting user ID and password.............................. 1-11
iPod
®player and iPhone®........................................... 4-6
iPod®player operation............................................... 4-16
Page 272 of 275
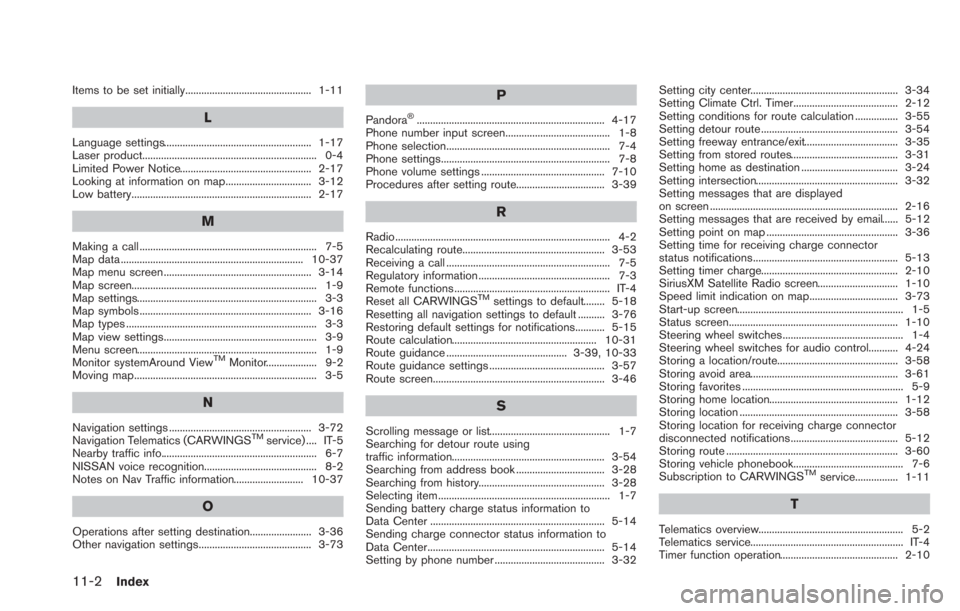
11-2Index
Items to be set initially............................................... 1-11
L
Language settings....................................................... 1-17
Laser product................................................................. 0-4
Limited Power Notice................................................. 2-17
Looking at information on map................................ 3-12
Low battery................................................................... 2-17
M
Making a call .................................................................. 7-5
Map data .................................................................... 10-37
Map menu screen ....................................................... 3-14
Map screen..................................................................... 1-9
Map settings................................................................... 3-3
Map symbols ................................................................ 3-16
Map types ....................................................................... 3-3
Map view settings......................................................... 3-9
Menu screen................................................................... 1-9
Monitor systemAround View
TMMonitor................... 9-2
Moving map.................................................................... 3-5
N
Navigation settings ..................................................... 3-72
Navigation Telematics (CARWINGSTMservice) .... IT-5
Nearby traffic info.......................................................... 6-7
NISSAN voice recognition.......................................... 8-2
Notes on Nav Traffic information.......................... 10-37
O
Operations after setting destination....................... 3-36
Other navigation settings.......................................... 3-73
P
Pandora®...................................................................... 4-17
Phone number input screen....................................... 1-8
Phone selection............................................................. 7-4
Phone settings............................................................... 7-8
Phone volume settings .............................................. 7-10
Procedures after setting route................................. 3-39
R
Radio................................................................................ 4-2
Recalculating route..................................................... 3-53
Receiving a call ............................................................. 7-5
Regulatory information ................................................. 7-3
Remote functions .......................................................... IT-4
Reset all CARWINGS
TMsettings to default........ 5-18
Resetting all navigation settings to default .......... 3-76
Restoring default settings for notifications........... 5-15
Route calculation...................................................... 10-31
Route guidance ............................................. 3-39, 10-33
Route guidance settings ........................................... 3-57
Route screen................................................................ 3-46
S
Scrolling message or list............................................. 1-7
Searching for detour route using
traffic information......................................................... 3-54
Searching from address book ................................. 3-28
Searching from history............................................... 3-28
Selecting item ................................................................ 1-7
Sending battery charge status information to
Data Center ................................................................. 5-14
Sending charge connector status information to
Data Center.................................................................. 5-14
Setting by phone number ......................................... 3-32 Setting city center....................................................... 3-34
Setting Climate Ctrl. Timer....................................... 2-12
Setting conditions for route calculation ................ 3-55
Setting detour route ................................................... 3-54
Setting freeway entrance/exit................................... 3-35
Setting from stored routes........................................ 3-31
Setting home as destination .................................... 3-24
Setting intersection..................................................... 3-32
Setting messages that are displayed
on screen ...................................................................... 2-16
Setting messages that are received by email...... 5-12
Setting point on map ................................................. 3-36
Setting time for receiving charge connector
status notifications...................................................... 5-13
Setting timer charge................................................... 2-10
SiriusXM Satellite Radio screen.............................. 1-10
Speed limit indication on map................................. 3-73
Start-up screen.............................................................. 1-5
Status screen............................................................... 1-10
Steering wheel switches............................................. 1-4
Steering wheel switches for audio control........... 4-24
Storing a location/route............................................. 3-58
Storing avoid area....................................................... 3-61
Storing favorites ............................................................ 5-9
Storing home location................................................ 1-12
Storing location ........................................................... 3-58
Storing location for receiving charge connector
disconnected notifications........................................ 5-12
Storing route ................................................................ 3-60
Storing vehicle phonebook......................................... 7-6
Subscription to CARWINGS
TMservice................ 1-11
T
Telematics overview...................................................... 5-2
Telematics service......................................................... IT-4
Timer function operation............................................ 2-10