Page 17 of 24

Wait for the tone before speaking.
Speak a command after the tone.
Speak in a clear and natural voice without pausing between words.
Look straight ahead and avoid speaking too loudly or too softly.
To go back to the previous command, say “Go back”.
To cancel a voice recognition session, say “Exit”.
To interrupt the system voice and give a command quickly, press the
button.
When speaking Phonebook names, please be aware some phones require the la\
st name
to be spoken before the first name. For example, “Michael Smith” may be spoken as
“Smith Michael”.
To increase or decrease the volume of the voice prompts, push the volume \
control
switches on the steering wheel up or down or turn the VOL/ON•OFF control knob on
the audio system while the system is responding.
If the Voice Recognition system does not recognize your voice commands, train th\
e system
using the Speaker Adaptation Mode. See your Owner’s Manual for detailed information.
Some commands are not available while the vehicle is in motion.
The “Help” command can be used to hear a list of available commands\
at any time.
Please refer to the cellular phone manufacturer’s Owner’s Manual f\
or detailed information
regarding your Bluetooth phone.
For recommended phones and detailed instructions, please visit
www.nissanusa.com/bluetooth.
CONNECTING YOUR PHONE
Before using the hands-free feature, you need to set-up or connect the s\
ystem to recognize
your compatible cellular phone(s). Five Bluetooth-enabled phones can b\
e connected. After
set-up, the system automatically connects with a connected phone when th\
e ignition is in the
acc or oN position, as long as the phone is on and in the vehicle.
CONNECTING PROCEDURE
NOTE: The vehicle must be stationary when connecting the phone.
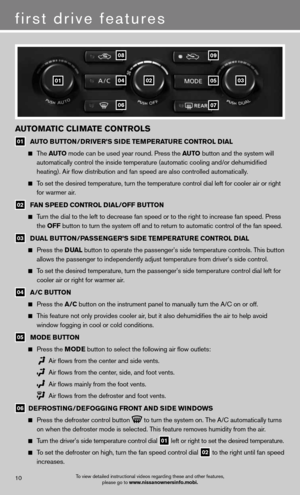
1. Press the PhoN e button
01 on the control panel
or press the
button
02 on the steering wheel.
2. Touch the “Connect Phone” key on the
touch-screen. 01
To view detailed instructional videos regarding these and other features,
please go to www.nissanownersinfo.mobi.15
Page 18 of 24

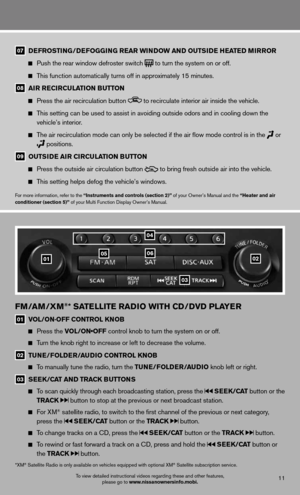
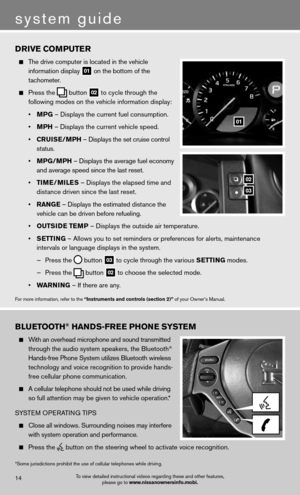
3. A popup box will appear on the screen, prompting
you to confirm that the connection is for the phone
system. Select the “Yes” key.
4. Initiate connecting from the phone.
The connecting procedure varies according to
each cellular phone model. For detailed connecting
instructions and a list of compatible phones, please
visit www.nissanusa.com/bluetooth.
When prompted for a PIN code, enter “1234”
from the handset. (The PIN code is assigned by
NISSAN and cannot be changed.)
5. When connecting is complete, the screen will return to the Phone menu dis\
play.
PHONEBOOK SETUP
Depending on your cell phone, the system may automatically download your\
cell phone’s
entire phonebook to the vehicle’s Bluetooth system.
If the phonebook does not download automatically, 40 entries can be individually downloaded.
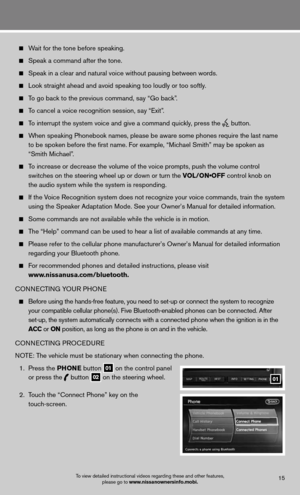
To manually download entries:
1. Press the
button and select the “Vehicle
Phonebook” key.
2. Select the “Add New” key at the top of the display.
There are different methods to input a phone
number. Select one of the following options:
• “Copy from Call History” to save a number from
the Outgoing, Incoming or Missed Calls lists.
• “Copy from the Handset” to save a number that
has been downloaded from your handset to
the vehicle.
• “Enter Number by Keypad” to input the number
and name manually.
MAKING A CALL
To make a call, follow this procedure:
1. Press the PhoN e button
01 on the control panel
or press the
button
02 on the steering wheel.
The “Phone” screen will appear on the control
panel display.
To view detailed instructional videos regarding these and other features,
please go to www.nissanownersinfo.mobi.16
system guide
Page 19 of 24

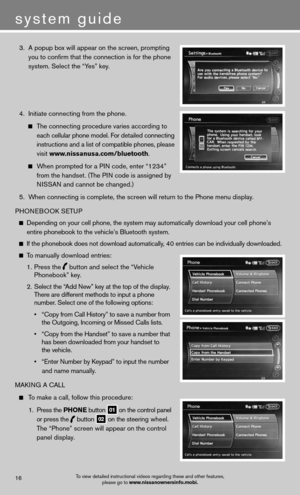
2. Select the “Handset Phonebook”, “Vehicle
Phonebook”, “Call History” or “Dial Number” key.
3. Select the desired entry from the list.
4. Select “Call” to start dialing the number.
RECEIVING/ENDING A CALL
To accept the call, press the
button on the steering
wheel or touch the “Answer” key.
To reject the call, touch the “Reject Call” key.
To hang-up, press the
button or touch the
“Hang-Up” key.
For more information, refer to the “Bluetooth® hands-Free Phone System
(section 4)” of your Multi Function Display Owner’s Manual.
To view detailed instructional videos regarding these and other features, please go to www.nissanownersinfo.mobi.17
NaviGaTioN SYSTe M
The Navigation System starts up when the ignition switch is placed in the acc or oN position.
To help ensure safe driving, some functions are grayed out or muted while driving. Park \
the
vehicle in a safe location and then operate the Navigation System.
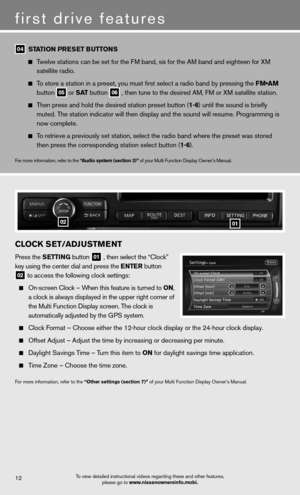
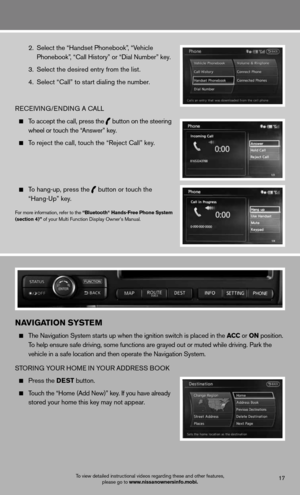
STORING YOUR HOME IN YOUR ADDRESS BOOK
Press the DeST button.
Touch the “Home (Add New)” key. If you have already
stored your home this key may not appear.
Page 20 of 24
” key, a
confirmation message is displayed. Touch the
“Yes” key.
Ensure the correct region is selected. To change
region, touch the “")
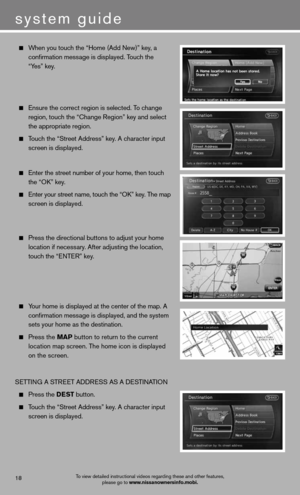
When you touch the “Home (Add New)” key, a
confirmation message is displayed. Touch the
“Yes” key.
Ensure the correct region is selected. To change
region, touch the “Change Region” key and select
the appropriate region.
Touch the “Street Address” key. A character input
screen is displayed.
Enter the street number of your home, then touch
the “OK” key.
Enter your street name, touch the “OK” key. The map
screen is displayed.
Press the directional buttons to adjust your home
location if necessary. After adjusting the location,
touch the “ENTER” key.
Your home is displayed at the center of the map. A
confirmation message is displayed, and the system
sets your home as the destination.
Press the MaP button to return to the current
location map screen. The home icon is displayed
on the screen.
SETTING A STREET ADDRESS AS A DESTINATION
Press the DeST button.
Touch the “Street Address” key. A character input
screen is displayed.
system guide
To view detailed instructional videos regarding these and other features,
please go to www.nissanownersinfo.mobi.18
Page 21 of 24
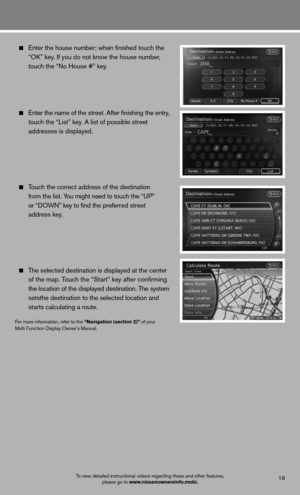
Enter the house number; when finished touch the
“OK” key. If you do not know the house number,
touch the “No House #” key.
Enter the name of the street. After finishing the entry,
touch the “List” key. A list of possible street
addresses is displayed.
Touch the correct address of the destination
from the list. You might need to touch the “UP”
or “DOWN” key to find the preferred street
address key.
The selected destination is displayed at the center
of the map. Touch the “Start” key after confirming
the location of the displayed destination. The system
setsthe destination to the selected location and
starts calculating a route.
For more information, refer to the “Navigation (section 2)” of your
Multi Function Display Owner’s Manual.
To view detailed instructional videos regarding these and other features,
please go to www.nissanownersinfo.mobi.19
Page 22 of 24
system guide
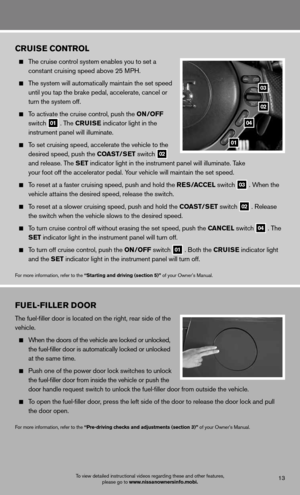
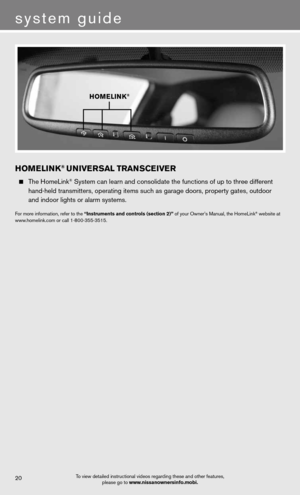
hoMeliNK® uNiver Sal TraNS ceiver
The HomeLink® System can learn and consolidate the functions of up to three different
hand-held transmitters, operating items such as garage doors, property gates, outdoor
and indoor lights or alarm systems.
For more information, refer to the “instruments and controls (section 2)” of your Owner’s Manual, the HomeLink® website at
www.homelink.com or call 1-800-355-3515.
ho MeliNK®
To view detailed instructional videos regarding these and other features,
please go to www.nissanownersinfo.mobi.20
Page 23 of 24
Page 24 of 24

To view detailed instructional videos,
go")
Nissan, the Nissan Brand Symbol, Z and
Nissan model names are Nissan trademarks.
© 2011 Nissan North America, Inc.
QR3E 0R35U0
Printing: December 2011 (06)
To view detailed instructional videos,
go to www.nissanownersinfo.mobi/2013/gtr
or snap this barcode with an appropriate barcode reader.
This Quick Reference Guide is intended to provide an overview of some of the uniq\
ue features of your new vehicle. See your
Owner’s Manual, which contains important safety warnings and information about the operation and maintenance of your vehicle,
for complete details. Nissan North America, Inc. reserves the right to make changes, at anytime, without prior notice, in prices,
colors, materials, equipment, specifications, and models and to discon\
tinue models or equipment. Due to continuous product
development and other pre- and post-production factors, actual vehicle, \
materials and specifications may vary. Some vehicles are
shown with optional equipment. See the actual vehicle for complete accur\
acy. Specifications, options and accessories may differ
in Hawaii, U.S. territories and other countries. For additional information on availability, options or accessories, see your NISSAN
dealer or contact Nissan North America, Inc.
Page:
< prev 1-8 9-16 17-24