Page 8 of 26

6
first drive features
To view detailed in\fstructional videos\f regarding these a\fnd other features\f \fplease go to www.nissanownersin\Sfo.mobi
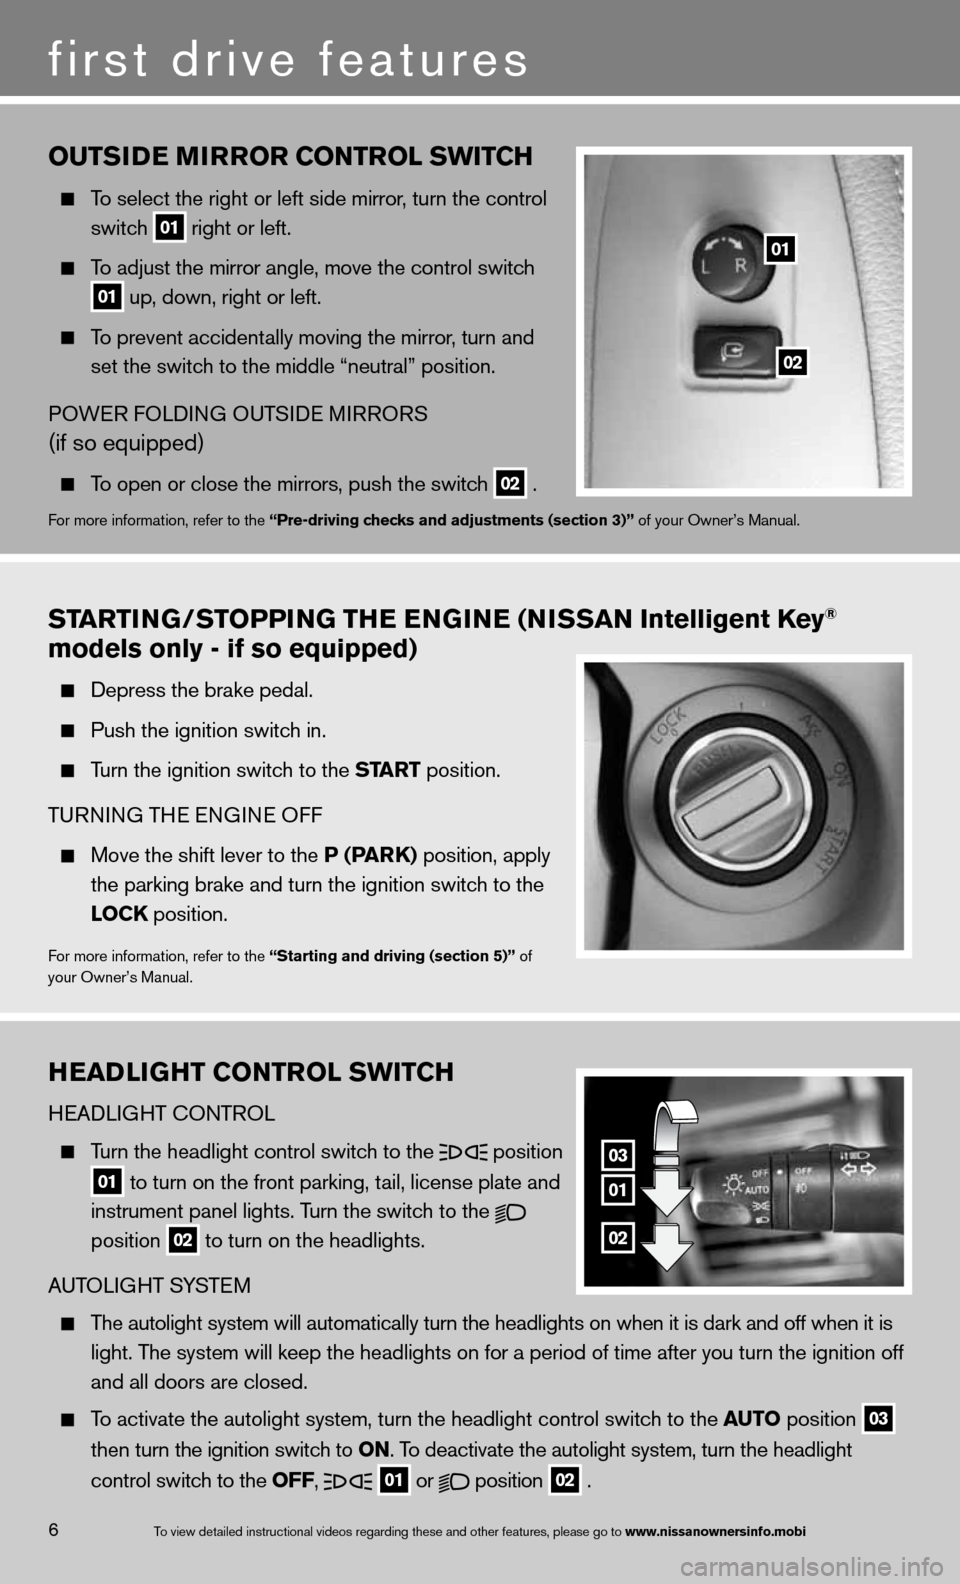
outsiDE mirror Control sWit Ch
To select the right or left side mirror , turn the control
switch
01 right or left.
To adjust the mirror angle, move the control switch
01 up, down, right or left.
To prevent accidentally moving the mirror, turn and
set the switch to the middle “neutral” position.
POWe R fOLdinG Ou TSide MiRRORS
(if so equipped)
To open or close the mirrors, push the switch
02 .f
or more information, refer to the “Pre-driving checks and adjustments (section 3)” of your Owner’s Manual.
02
01
startinG/stoPPin G thE EnG in E (nissan intelligent k ey®
models only - if so equipped)
depress the brake pedal.
Push the ignition switch in.
Turn the ignition switch to the start position.
T uRnin G THe enGine Off
Move the shift lever to the P (P ark) position, apply
the parking brake and turn the ignition switch to the
loCk position.
for more information, refer to the “starting and driving (section 5)” of
your Owner’s Manual.
h EaD liGht Control sWit Ch
H eAd LiGHT c OnTROL
Turn the headlight control switch to the
position
01 to turn on the front parking, tail, license plate and
instrument panel lights. Turn the switch to the
position
02 to turn on the headlights.
A uTOLi GHT SYSTe M
The autolight system will automatically turn the headlights on when it is\
dark and off when it is
light. The system will keep the headlights on for a period of time after you tur\
n the ignition off
and all doors are closed.
To activate the autolight system, turn the headlight control switch to the auto position
03
then turn the ignition switch to on. To deactivate the autolight system, turn the headlight
control switch to the off,
01 or
position
02 .
01
03
02
Page 9 of 26

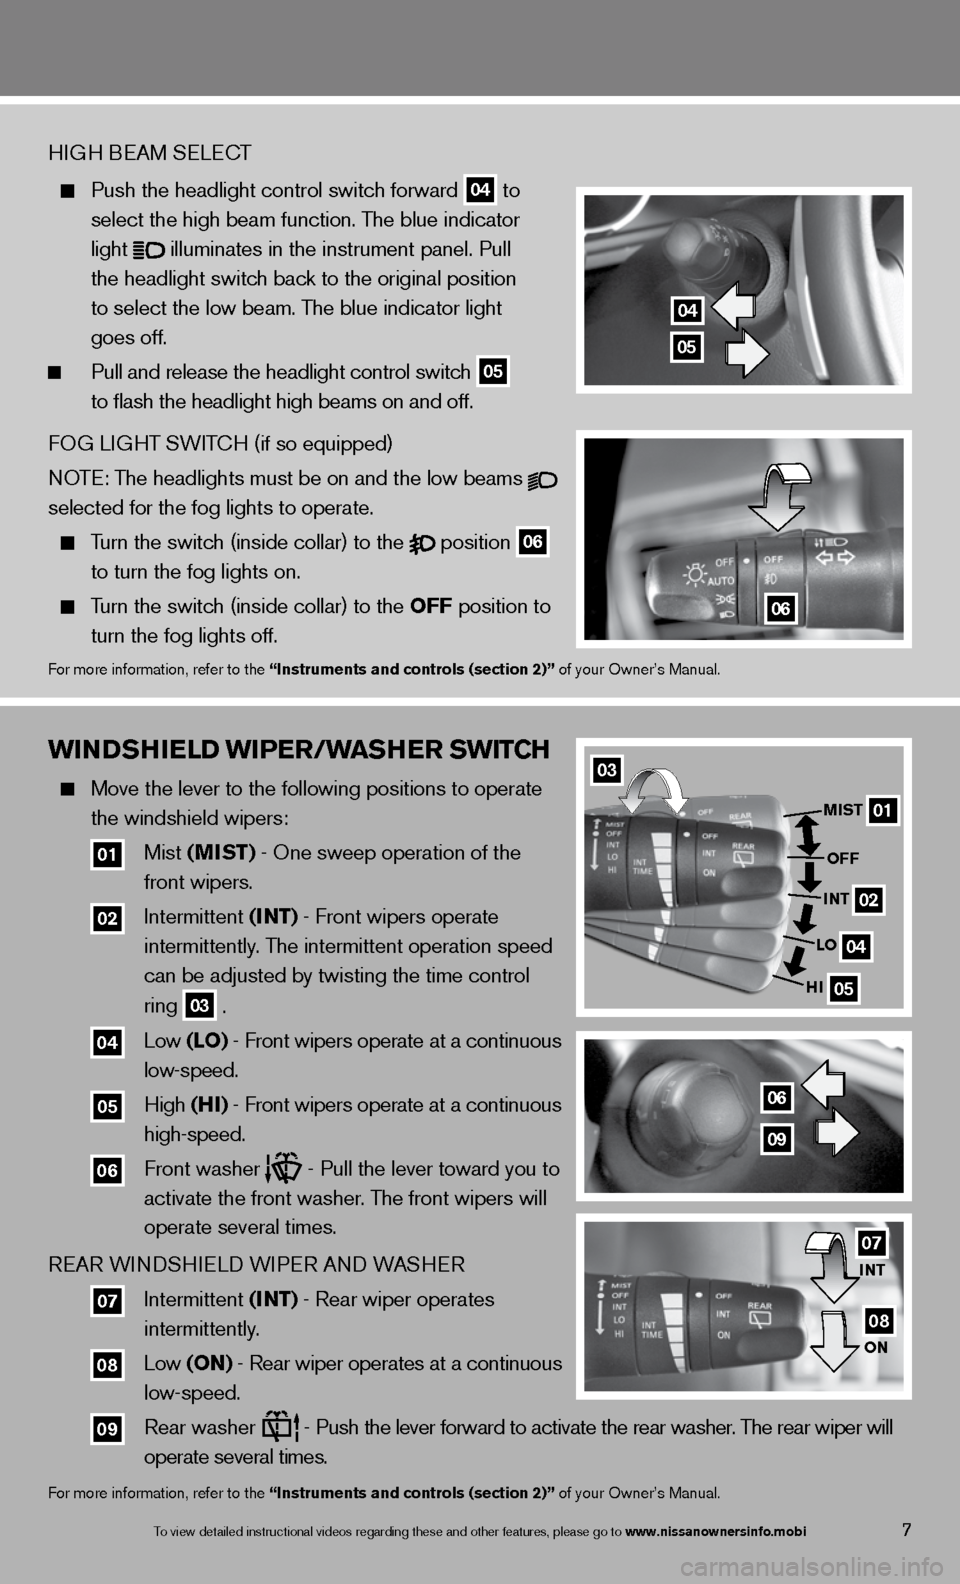
WinDshiEl D WiPEr/W ashEr sW itCh
Move the lever to the following positions to operate
the windshield wipers:
01 Mist (mist) - One sweep operation of the
front wipers.
02 intermittent (int) - front wipers operate
intermittently. The intermittent operation speed
can be adjusted by twisting the time control
ring
03 .
04 Low (lo) - front wipers operate at a continuous
low-speed.
05 High (hi) - front wipers operate at a continuous
high-speed.
06 front washer - Pull the lever toward you to
activate the front washer. The front wipers will
operate several times.
Re AR W indSHieL d W iPeR A nd WASHeR
07 intermittent (int) - Rear wiper operates
intermittently.
08 Low (on) - Rear wiper operates at a continuous
low-speed.
09 Rear washer
- Push the lever forward to activate the rear washer. The rear wiper will
operate several times.
for more information, refer to the “instruments and controls (section 2)” of your Owner’s Manual.
7
H iGH B eAM S eLec T
Push the headlight control switch forward
04 to
select the high beam function. The blue indicator
light
illuminates in the instrument panel. Pull
the headlight switch back to the original position
to select the low beam. The blue indicator light
goes off.
Pull and release the headlight control switch
05
to flash the headlight high beams on and off.
fOG Li GHT SW iTc H (if so equipped)
n OTe: The headlights must be on and the low beams
selected for the fog lights to operate.
Turn the switch (inside collar) to the
position
06
to turn the fog lights on.
Turn the switch (inside collar)
to the off position to
turn the fog lights off.
for more information, refer to the “instruments and controls (section 2)” of your Owner’s Manual.
04
05
06
03
01
02
04
05
mist
off
int
lo
hi
06
09
int
on07
08
To view detailed in\fstructional videos\f regarding these a\fnd other features\f \fplease go to www.nissanownersin\Sfo.mobi
Page 22 of 26

04 off – Press to switch between the day screen (bright) and the night screen (dark).
Press and hold the button to turn the display off. Press again to turn t\
he display on.
05 maP – Press to display the map. While following a programmed route, press multiple
times to change the type of route information.
06 Multi-function controller
a. EntE r – Press to select the highlighted item on the screen. if this button is pressed
while a map is displayed, the map menu screen is displayed.
b. Main directional buttons – Press to move across the map, highlight an\
item on the
screen or adjust a setting.
c. Additional directional buttons – Press to move across the map or high\
light an item on
the character input screen.
d. center dial
– Turn the dial to highlight an item on the screen, adjust a setting or
adjust the map scale.
07 information (info
) – Press to display the vehicle, traffic (if so equipped), weat\
her
(if so equipped) or voice recognition information.
08 DisP
lay– Press to access the display settings.
09 status – Press multiple times to display audio information with either the \
air conditioner
status, fuel economy or navigation directions.
10 s
Ettin G – Press to access the system settings.
11 BaC
k – Press to return to the previous screen. in a settings screen, this button can also
be used to apply the setting. in a character input screen, this button can also delete the
characters that have been entered.
12 voi
CE – Press to hear the current voice guidance for a programmed route.
for more information, refer to your navigation System Owner’s Manual.
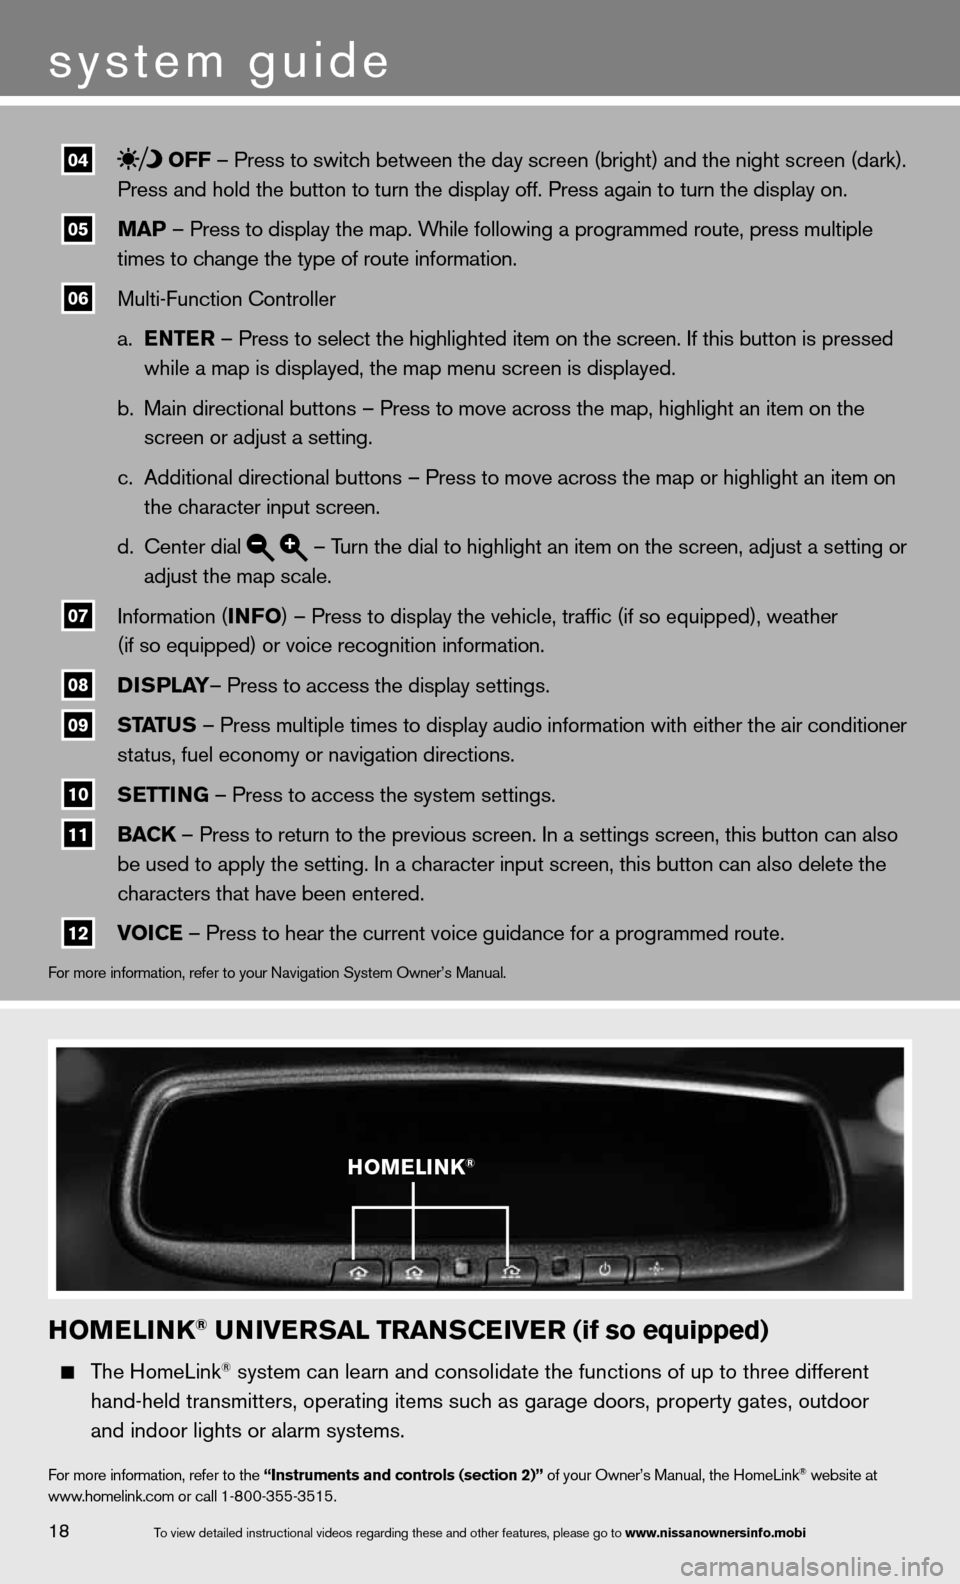
homElink® univE rsal trans CEivE r (if so equipped)
The HomeLink® system can learn and consolidate the functions of up to three different\
hand-held transmitters, operating items such as garage doors, property gates, outdoor
and indoor lights or alarm systems.
for more information, refer to the “instruments and controls (section 2)” of your Owner’s Manual, the HomeLink® website at
www.homelink.com or call 1-800-355-3515.
homElink®
18
system guide
To view detailed in\fstructional videos\f regarding these a\fnd other features\f \fplease go to www.nissanownersin\Sfo.mobi