2013 MITSUBISHI iMiEV charging
[x] Cancel search: chargingPage 187 of 258

WARNING
l If electrolyte fluid is not visible, or ap-
pears to be frozen, Do Not Attempt Jump
Starting!
A battery might rupture or explode if the
temperature is below the freezing point
or if it is not filled to the proper level.
7. Connect
one end of one jumper cable to the positive (+) terminal of the discharged bat-
tery (A), and the other end to the positive (+)
terminal of the booster battery (B).
Connect one end of the other jumper cable to
the negative (-) terminal of the booster bat-
tery, and the other end to the designated loca-
tion of the vehicle with the discharged bat-
tery at the point farthest from the battery. WARNING
l Make
sure you observe the following or-
der when connecting the cables: → →
→
l
Make sure you make connection to the
correct
designated location (as shown in
the illustration). If the connection is made
directly to the negative (-) side of the dis-
charged battery, flammable gases gener-
ated from the battery might catch fire
and explode.
l When connecting the jumper cables, do
not connect the positive (+) cable to the
negative (-) terminal. Otherwise sparks
might cause explosion of the battery. CAUTION
l
Take
care not to get the jumper cable
caught in the cooling fan or other rotat-
ing part in the bonnet room or engine com-
partment.
l Use the proper cables suitable for the bat-
tery size to prevent overheating of the ca-
bles.
l Check the jumper cables for damage and
corrosion before use.
8. Start
the engine in the vehicle which has the booster battery, let the engine idle a few mi-
nutes, then start the electric motor unit in the
vehicle with the discharged battery.
9. Check that the ready indicator illuminates.
[When the ready indicator illuminates]
Stop
the engine of another vehicle, discon-
nect the cables in the reverse order and
charge the auxiliary battery for more than 30
minutes.
After the auxiliary battery is charged, contin-
ue the process from step 16.
[When the ready indicator does not illuminate]
Both the auxiliary battery and the traction bat-
tery have gone flat at the same time.
Charge the auxiliary battery and the traction
battery by the following procedures (from
steps 10 to 14).
10. Keep connecting the jumper cable to each ve- hicle, turn the electric motor switch of your
vehicle to the “LOCK” position.
NOTE l The jumper cable needs to be connected to
the auxiliary battery when you start charging
the traction battery because the on board
charger etc. operate with a power source of
auxiliary battery.
11. Charge the traction battery by regular charg- ing. (Refer to “Regular charging” on page
1-08.)
12. When the charging indicator on the instru- ment cluster is illuminated, stop the engine
of another vehicle, disconnect the cables in
the reverse order. For emergencies
7-03 7 LHD
RHD
OHAE13E1
Page 188 of 258

NOTE
l When
the regular charge connector is connec-
ted to the charge port, the charging indicator
is blinking. When charging is started, the
charging indicator is illuminated.
l The auxiliary battery is automatically charg-
ed while charging the traction battery.
13. Charge the traction battery for more than 1 hour.
14. Disconnect the charging cable. (Refer to “Regular charging” on page 1-08.)
15. Turn the electric motor switch to the “START” position, make sure that the ready
indicator on the instrument cluster is illumi-
nated.
If the ready indicator does not illuminate, per-
form the procedure again from step 7.
If charging cannot be performed, consult a
MITSUBISHI MOTORS Authorized Service
Point.
16. Refit the battery cover. (Refer to “Auxiliary battery” on page 8-12.) WARNING
l Do
not charge the auxiliary battery using
an external battery charger while the aux-
iliary battery is mounted in the vehicle.
Doing so could cause the auxiliary bat-
tery to catch fire and explode and could
result in damage to the vehicle.
l Keep sparks, cigarettes, and flames away
from the auxiliary battery because the bat-
tery may produce an explosion.
l Use adequate ventilation when charging
or using the auxiliary battery in an en-
closed space.
l Remove all the caps before charging the
auxiliary battery.
l Electrolyte is corrosive diluted sulphuric
acid.
If electrolyte (battery acid) comes into con-
tact with your hands, eyes, clothes and
the painted surface of your vehicle, it
should be thoroughly flushed with water.
If electrolyte gets in your eyes, flush them
with water immediately and thoroughly,
and get prompt medical attention.
NOTE l If
the electric motor unit is started without
fully charging the auxiliary battery, it might
cause the anti-lock brake warning lamp to il-
luminate. Refer to “Anti-lock brake system
(ABS)” on page 5-15. Tyre repair kit
E00800901311
This
kit enables emergency repair of a small punc-
ture in the tread area of a tyre that has run over a
nail, screw, or similar object.
Storage
The tyre repair kit is stowed under the rear seat cush-
ion. The storage location of the tyre repair kit
should be remembered in case of an emergency. 1- Tyre compressor
2-
Tyre repair set
3- Tyre sealant bottle
4- Filler hose
5- Extension hose (This hose is used for removal of sealant. It
is not used in emergency puncture repair.)
6- Valve insert (spare)
7- Valve remover
8- Speed restriction sticker For emergencies
7-04
7
OHAE13E1
Page 201 of 258

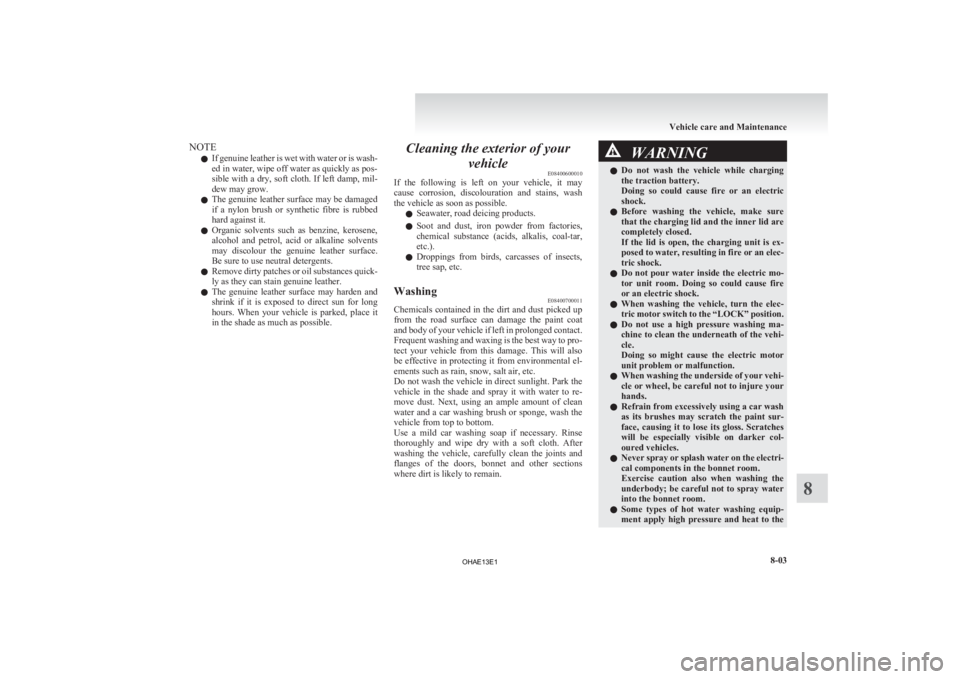
NOTE
l If
genuine leather is wet with water or is wash-
ed in water, wipe off water as quickly as pos-
sible with a dry, soft cloth. If left damp, mil-
dew may grow.
l The genuine leather surface may be damaged
if a nylon brush or synthetic fibre is rubbed
hard against it.
l Organic solvents such as benzine, kerosene,
alcohol and petrol, acid or alkaline solvents
may discolour the genuine leather surface.
Be sure to use neutral detergents.
l Remove dirty patches or oil substances quick-
ly as they can stain genuine leather.
l The genuine leather surface may harden and
shrink if it is exposed to direct sun for long
hours. When your vehicle is parked, place it
in the shade as much as possible. Cleaning the exterior of your
vehicle E08400600010
If
the following is left on your vehicle, it may
cause corrosion, discolouration and stains, wash
the vehicle as soon as possible.
l Seawater, road deicing products.
l Soot and dust, iron powder from factories,
chemical substance (acids, alkalis, coal-tar,
etc.).
l Droppings from birds, carcasses of insects,
tree sap, etc.
Washing E08400700011
Chemicals contained in the dirt and dust picked up
from
the road surface can damage the paint coat
and body of your vehicle if left in prolonged contact.
Frequent washing and waxing is the best way to pro-
tect your vehicle from this damage. This will also
be effective in protecting it from environmental el-
ements such as rain, snow, salt air, etc.
Do not wash the vehicle in direct sunlight. Park the
vehicle in the shade and spray it with water to re-
move dust. Next, using an ample amount of clean
water and a car washing brush or sponge, wash the
vehicle from top to bottom.
Use a mild car washing soap if necessary. Rinse
thoroughly and wipe dry with a soft cloth. After
washing the vehicle, carefully clean the joints and
flanges of the doors, bonnet and other sections
where dirt is likely to remain. WARNING
l Do
not wash the vehicle while charging
the traction battery.
Doing so could cause fire or an electric
shock.
l Before washing the vehicle, make sure
that the charging lid and the inner lid are
completely closed.
If the lid is open, the charging unit is ex-
posed to water, resulting in fire or an elec-
tric shock.
l Do not pour water inside the electric mo-
tor unit room. Doing so could cause fire
or an electric shock.
l When washing the vehicle, turn the elec-
tric motor switch to the “LOCK” position.
l Do not use a high pressure washing ma-
chine to clean the underneath of the vehi-
cle.
Doing so might cause the electric motor
unit problem or malfunction.
l When washing the underside of your vehi-
cle or wheel, be careful not to injure your
hands.
l Refrain from excessively using a car wash
as its brushes may scratch the paint sur-
face, causing it to lose its gloss. Scratches
will be especially visible on darker col-
oured vehicles.
l Never spray or splash water on the electri-
cal components in the bonnet room.
Exercise caution also when washing the
underbody; be careful not to spray water
into the bonnet room.
l Some types of hot water washing equip-
ment apply high pressure and heat to the Vehicle care and Maintenance
8-03 8
OHAE13E1
Page 204 of 258

Service precautions
E08401700050
Adequate
care of your vehicle at regular intervals
serves to preserve the value and appearance as long
as possible.
Maintenance items as described in this owner’s man-
ual can be performed by the owner.
We recommend you to have the periodic inspection
and maintenance performed by a MITSUBISHI
MOTORS Authorized Service Point or another spe-
cialist.
In the event a malfunction or a problem is discov-
ered, we recommend you to have it checked and re-
paired. Follow the instructions and cautions for
each of the various procedures. WARNING
l Do
not touch any components in the elec-
tric motor unit room other than the re-
serve tank. There are no components re-
quiring inspection other than the reserve
tank. Never remove or disassemble the
component which generates high voltage,
high voltage wire (orange), its connector,
EV charging cable, charge connector,
plug and an outlet. Doing so could result
in a serious injury that may risk your life.
These components are affixed with the la-
bel indicating precautions for handling.
Follow the instructions on the label. Take
your vehicle to a MITSUBISHI
MOTORS Authorized Service Point for
any necessary maintenance. High voltage components and wiring cables are lo-
cated as shown in the figure below.
1- Regular charge port
2-
Inverter
3- Traction battery
4- Heater
5- Air conditioner compressor
6- High voltage connector
7- Service plug
8- Electric motor (Electric motor unit)
9- On board charger/DC-DC converter
10- Quick charge port WARNING
l Never
touch the service plug (A) under
the front seat. Doing so could result in se-
rious injury that may risk your life, in-
cluding an electric shock. The service
plug (A) is used to shut off high voltage
from the traction battery for repair of the
vehicle at a MITSUBISHI MOTORS Au-
thorized Service Point or another special-
ist. WARNING
l When
the ready indicator is illuminated,
and the charging indicator is illuminated
or blinking, never perform maintenance
because the high voltage system is operat-
ing.
l When servicing the vehicle, make sure
that the electric motor switch is in the
“LOCK” position and the charging cable
is disconnected. Failure to do so could re-
sult in an electric shock.
l When checking or servicing the inside of
the bonnet room and coolant reserve
tank, make sure the electric motor unit is
switched off and has had a chance to cool
down. Vehicle care and Maintenance
8-06
8
OHAE13E1
Page 211 of 258

Checking auxiliary battery electrolyte
level
E08402500013Before checking the auxiliary battery electrolyte lev-
el, remove the auxiliary battery’s upper cover.
The
electrolyte level must be between the specified
limit on the outside of the auxiliary battery. Replen-
ish with distilled water as necessary.
The inside of the auxiliary battery is divided into
several compartments; remove the cap from each
compartment and fill to the upper mark. Do not top
up beyond the upper mark because spillage during
driving could cause damage.
Check the electrolyte level at least once every 4
weeks, depending on the operating conditions.
If the auxiliary battery is not used, it will discharge
by itself with time.
Check it once every four weeks and charge with
low current if necessary. During cold weather
E08402600014
The
capacity of the auxiliary battery is reduced at
low temperatures. This is an inevitable result of its
chemical and physical properties. This is why a
very cold auxiliary battery, particularly one that is
not fully charged will only deliver a fraction of the
starting current which is normally available.
We recommend you to have the auxiliary battery
checked before the start of cold weather and, if nec-
essary, have it charged or replaced.
This does not only ensure reliable starting, but an
auxiliary battery which is kept fully charged also
has a longer life.
Disconnection and connection E08402700015
To disconnect the auxiliary battery cable, stop the
electric
motor unit, first disconnect the negative (-)
terminal and then the positive (+) terminal. When
connecting the auxiliary battery, first connect the
positive (+) terminal and then the negative (-) termi-
nal.
NOTE
l Open the terminal cover (A) before discon-
necting or connecting the positive (+) termi-
nal of the auxiliary battery.
l Loosen the nut (B), and then disconnect the
auxiliary battery cable from the positive (+)
terminal. WARNING
l Keep sparks, cigarettes, and flames away
from the auxiliary battery because the
auxiliary battery could explode.
l When installing the auxiliary battery,
start connection with the positive (+) ter-
minal. If connection is started from the
negative (-) terminal, sparks will occur if
the positive (+) terminal touches any oth-
er parts, and this may cause the auxiliary
battery to explode.
l The auxiliary battery electrolyte is ex-
tremely caustic. Do not allow it to come
in contact with your eyes, skin, clothing,
or the painted surfaces of the vehicle.
Spilt electrolyte should be flushed imme-
diately with ample amounts of water.
Irritation to eyes or skin from contact
with electrolyte requires immediate medi-
cal attention.
l Ventilate when charging or using the aux-
iliary battery in an enclosed space. Vehicle care and Maintenance
8-13 8
OHAE13E1
Page 235 of 258

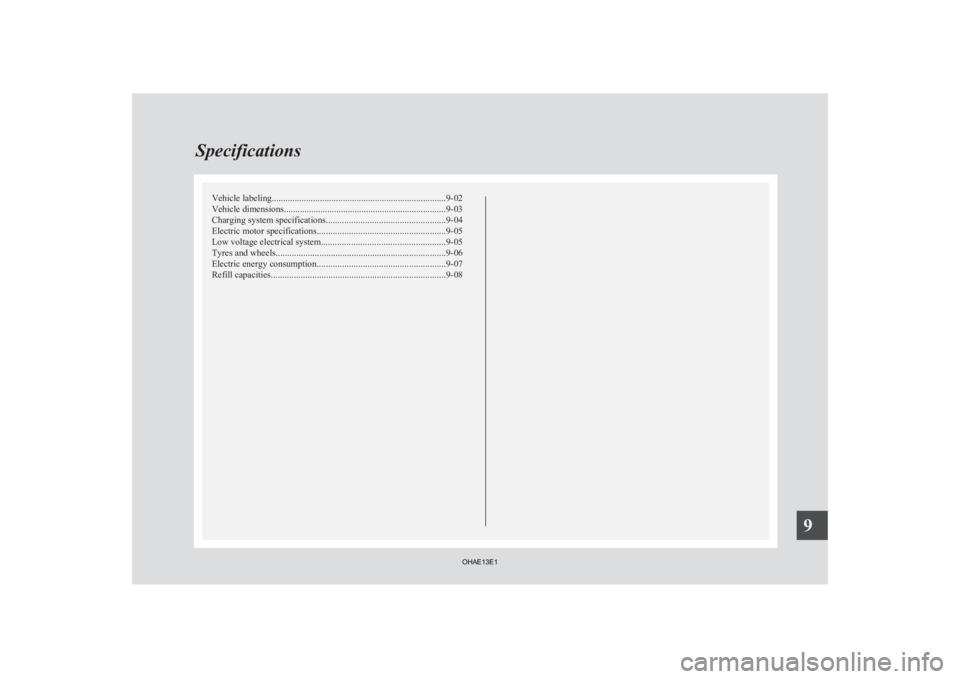
Vehicle labeling
............................................................................ 9-02
Vehicle dimensions....................................................................... 9-03
Charging system specifications .................................................... 9-04
Electric motor specifications ........................................................ 9-05
Low voltage electrical system ...................................................... 9-05
Tyres and wheels.......................................................................... 9-06
Electric energy consumption ........................................................ 9-07
Refill capacities ............................................................................ 9-08Specifications
9
OHAE13E1
Page 238 of 258

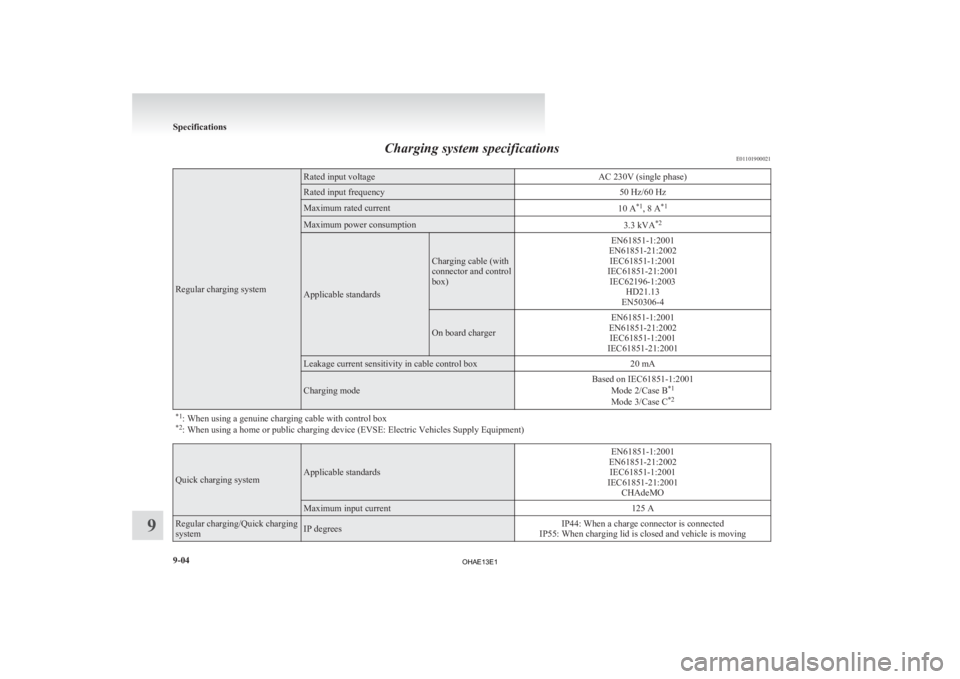
Charging system specifications
E01101900021Regular charging system Rated input voltage
AC 230V (single phase)Rated input frequency
50 Hz/60 HzMaximum rated current
10 A*1
, 8 A *1 Maximum power consumption
3.3 kVA*2 Applicable standards Charging cable (with
connector and control
box)
EN61851-1:2001
EN61851-21:2002 IEC61851-1:2001
IEC61851-21:2001 IEC62196-1:2003 HD21.13
EN50306-4 On board charger
EN61851-1:2001
EN61851-21:2002 IEC61851-1:2001
IEC61851-21:2001 Leakage current sensitivity in cable control box
20 mACharging mode
Based on IEC61851-1:2001
Mode 2/Case B *1
Mode 3/Case C *2
*1 : When using a genuine charging cable with control box
*2 : When using a home or public charging device (EVSE: Electric Vehicles Supply Equipment) Quick charging system Applicable standards
EN61851-1:2001
EN61851-21:2002 IEC61851-1:2001
IEC61851-21:2001 CHAdeMO Maximum input current
125 ARegular charging/Quick charging
system
IP degrees
IP44: When a charge connector is connected
IP55: When charging lid is closed and vehicle is moving Specifications
9-04
9
OHAE13E1
Page 241 of 258
![MITSUBISHI iMiEV 2013 Owners Manual (in English) Electric energy consumption
E01101800017Item Combined
Electric energy consumption [NEDC]
*
135 Wh/kmElectric range (Cruising range) [NEDC]
*
150 km (93 miles)
* : NEDC stands for New European Dr MITSUBISHI iMiEV 2013 Owners Manual (in English) Electric energy consumption
E01101800017Item Combined
Electric energy consumption [NEDC]
*
135 Wh/kmElectric range (Cruising range) [NEDC]
*
150 km (93 miles)
* : NEDC stands for New European Dr](/manual-img/19/34894/w960_34894-240.png)
Electric energy consumption
E01101800017Item Combined
Electric energy consumption [NEDC]
*
135 Wh/kmElectric range (Cruising range) [NEDC]
*
150 km (93 miles)
* : NEDC stands for New European Driving Cycle. The values of electric energy consumption and electric range are based on ECE R101. These values vary
depending on driving style, road and traffic conditions, ambient temperature, use of air conditioners and so forth. NOTE
l The results given do not express or imply any guarantee of the electric energy consumption of the particular vehicle.
The
vehicle itself has not been tested and there are inevitably differences between individual vehicles of the same model. In addition, this vehicle may incor-
porate particular modifications. Furthermore, the driver’s style and road and traffic conditions, as well as the extent to which the vehicle has been driven and
the standard of maintenance, will all affect its electric energy consumption.
l All mentioned values are referring to a new, driven in vehicle.
l The consumption, but mainly the driving distance depends on the condition of the traction battery.
l Parameters on traction battery are depending on temperature, climate, charging and charging history and age of the traction battery etc.
l A bigger influence as known by combustion engine are the energy consumptive consumers of the vehicle like heating, air conditioning, etc. Specifications
9-07 9
OHAE13E1