2013 MITSUBISHI iMiEV air condition
[x] Cancel search: air conditionPage 97 of 258
WARNING
l Right after the airbag inflation, several
airbag system components will be hot. Do
not touch these components. There is a
danger of being burnt.
l The airbag system is designed to work on-
ly once. Once the airbags have deployed,
they will not work again. They must
promptly be replaced, and we recom-
mend you to have the entire airbag sys-
tem inspected by a MITSUBISHI
MOTORS Authorized Service Point.
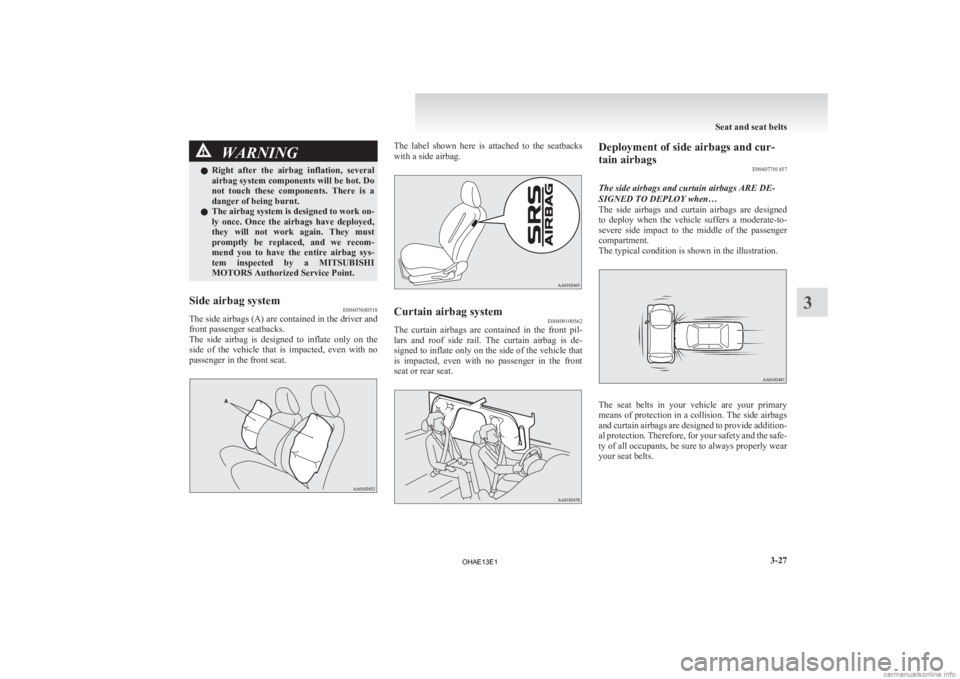
Side airbag system E00407600518
The side airbags (A) are contained in the driver and
front passenger seatbacks.
The
side airbag is designed to inflate only on the
side of the vehicle that is impacted, even with no
passenger in the front seat. The label shown here is attached to the seatbacks
with a side airbag.
Curtain airbag system
E00409100562
The curtain airbags are contained in the front pil-
lars
and roof side rail. The curtain airbag is de-
signed to inflate only on the side of the vehicle that
is impacted, even with no passenger in the front
seat or rear seat. Deployment of side airbags and cur-
tain airbags
E00407701457
The side airbags and curtain airbags ARE DE-
SIGNED TO DEPLOY when…
The
side airbags and curtain airbags are designed
to deploy when the vehicle suffers a moderate-to-
severe side impact to the middle of the passenger
compartment.
The typical condition is shown in the illustration. The seat belts in your vehicle are your primary
means
of protection in a collision. The side airbags
and curtain airbags are designed to provide addition-
al protection. Therefore, for your safety and the safe-
ty of all occupants, be sure to always properly wear
your seat belts. Seat and seat belts
3-27 3
OHAE13E1
Page 98 of 258
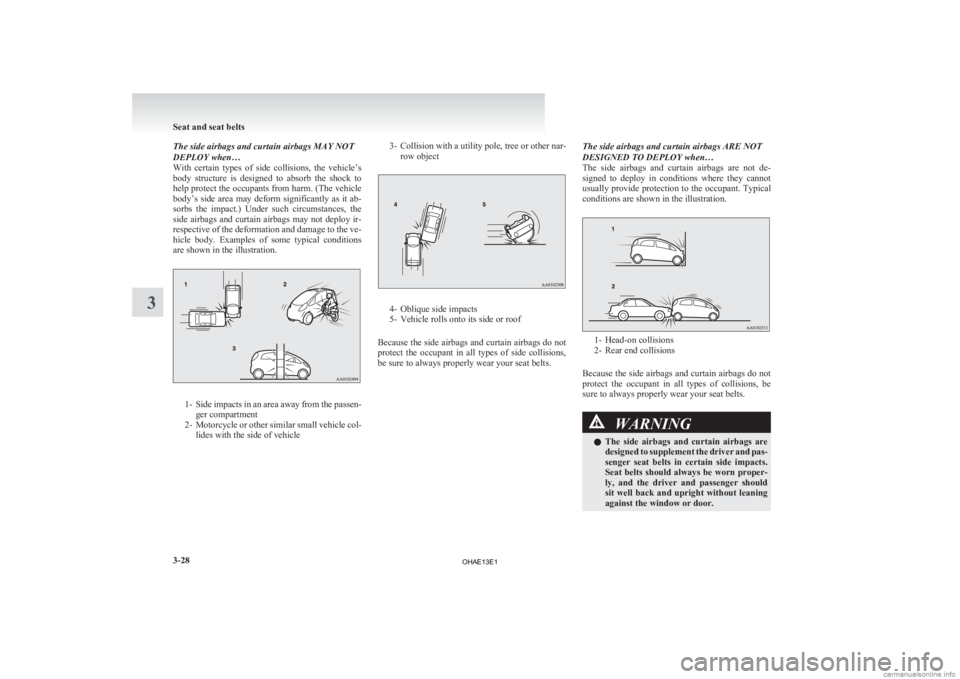
The side airbags and curtain airbags MAY NOT
DEPLOY when…
With
certain types of side collisions, the vehicle’s
body structure is designed to absorb the shock to
help protect the occupants from harm. (The vehicle
body’s side area may deform significantly as it ab-
sorbs the impact.) Under such circumstances, the
side airbags and curtain airbags may not deploy ir-
respective of the deformation and damage to the ve-
hicle body. Examples of some typical conditions
are shown in the illustration. 1- Side
impacts in an area away from the passen-
ger compartment
2- Motorcycle or other similar small vehicle col- lides with the side of vehicle 3- Collision
with a utility pole, tree or other nar-
row object 4- Oblique side impacts
5-
Vehicle rolls onto its side or roof
Because the side airbags and curtain airbags do not
protect the occupant in all types of side collisions,
be sure to always properly wear your seat belts. The side airbags and curtain airbags ARE NOT
DESIGNED TO DEPLOY when…
The
side airbags and curtain airbags are not de-
signed to deploy in conditions where they cannot
usually provide protection to the occupant. Typical
conditions are shown in the illustration. 1- Head-on collisions
2-
Rear end collisions
Because the side airbags and curtain airbags do not
protect the occupant in all types of collisions, be
sure to always properly wear your seat belts. WARNING
l The
side airbags and curtain airbags are
designed to supplement the driver and pas-
senger seat belts in certain side impacts.
Seat belts should always be worn proper-
ly, and the driver and passenger should
sit well back and upright without leaning
against the window or door. Seat and seat belts
3-28
3
OHAE13E1
Page 100 of 258
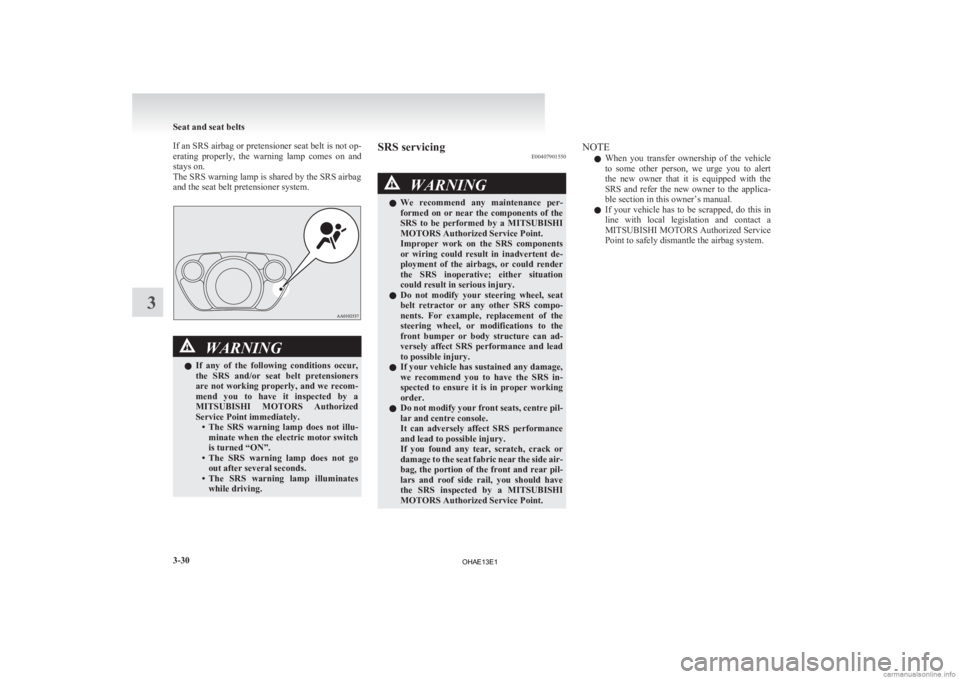
If an SRS airbag or pretensioner seat belt is not op-
erating
properly, the warning lamp comes on and
stays on.
The SRS warning lamp is shared by the SRS airbag
and the seat belt pretensioner system. WARNING
l If
any of the following conditions occur,
the SRS and/or seat belt pretensioners
are not working properly, and we recom-
mend you to have it inspected by a
MITSUBISHI MOTORS Authorized
Service Point immediately. • The SRS warning lamp does not illu-minate when the electric motor switch
is turned “ON”.
• The SRS warning lamp does not go out after several seconds.
• The SRS warning lamp illuminates while driving. SRS servicing
E00407901550 WARNING
l We
recommend any maintenance per-
formed on or near the components of the
SRS to be performed by a MITSUBISHI
MOTORS Authorized Service Point.
Improper work on the SRS components
or wiring could result in inadvertent de-
ployment of the airbags, or could render
the SRS inoperative; either situation
could result in serious injury.
l Do not modify your steering wheel, seat
belt retractor or any other SRS compo-
nents. For example, replacement of the
steering wheel, or modifications to the
front bumper or body structure can ad-
versely affect SRS performance and lead
to possible injury.
l If your vehicle has sustained any damage,
we recommend you to have the SRS in-
spected to ensure it is in proper working
order.
l Do not modify your front seats, centre pil-
lar and centre console.
It can adversely affect SRS performance
and lead to possible injury.
If you found any tear, scratch, crack or
damage to the seat fabric near the side air-
bag, the portion of the front and rear pil-
lars and roof side rail, you should have
the SRS inspected by a MITSUBISHI
MOTORS Authorized Service Point. NOTE
l When
you transfer ownership of the vehicle
to some other person, we urge you to alert
the new owner that it is equipped with the
SRS and refer the new owner to the applica-
ble section in this owner’s manual.
l If your vehicle has to be scrapped, do this in
line with local legislation and contact a
MITSUBISHI MOTORS Authorized Service
Point to safely dismantle the airbag system. Seat and seat belts
3-30
3
OHAE13E1
Page 103 of 258
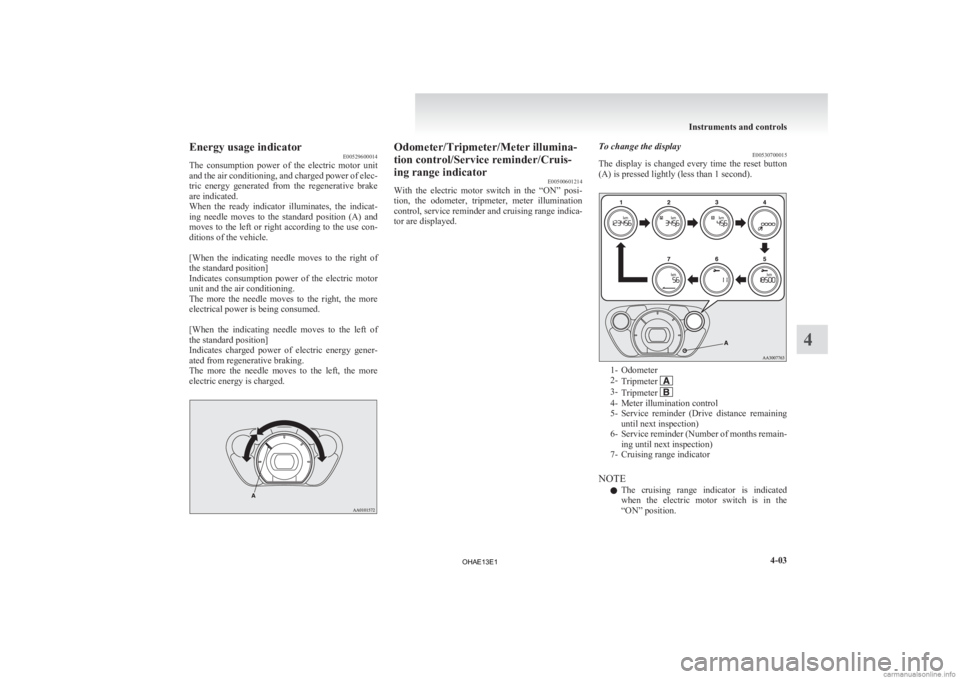
Energy usage indicator
E00529600014
The
consumption power of the electric motor unit
and the air conditioning, and charged power of elec-
tric energy generated from the regenerative brake
are indicated.
When the ready indicator illuminates, the indicat-
ing needle moves to the standard position (A) and
moves to the left or right according to the use con-
ditions of the vehicle.
[When the indicating needle moves to the right of
the standard position]
Indicates consumption power of the electric motor
unit and the air conditioning.
The more the needle moves to the right, the more
electrical power is being consumed.
[When the indicating needle moves to the left of
the standard position]
Indicates charged power of electric energy gener-
ated from regenerative braking.
The more the needle moves to the left, the more
electric energy is charged. Odometer/Tripmeter/Meter illumina-
tion control/Service reminder/Cruis-
ing range indicator
E00500601214
With
the electric motor switch in the “ON” posi-
tion, the odometer, tripmeter, meter illumination
control, service reminder and cruising range indica-
tor are displayed. To change the display
E00530700015
The
display is changed every time the reset button
(A) is pressed lightly (less than 1 second). 1- Odometer
2-
Tripmeter 3-
Tripmeter 4- Meter illumination control
5- Service
reminder (Drive distance remaining
until next inspection)
6- Service reminder (Number of months remain- ing until next inspection)
7- Cruising range indicator
NOTE l The cruising range indicator is indicated
when the electric motor switch is in the
“ON” position. Instruments and controls
4-03 4
OHAE13E1
Page 106 of 258
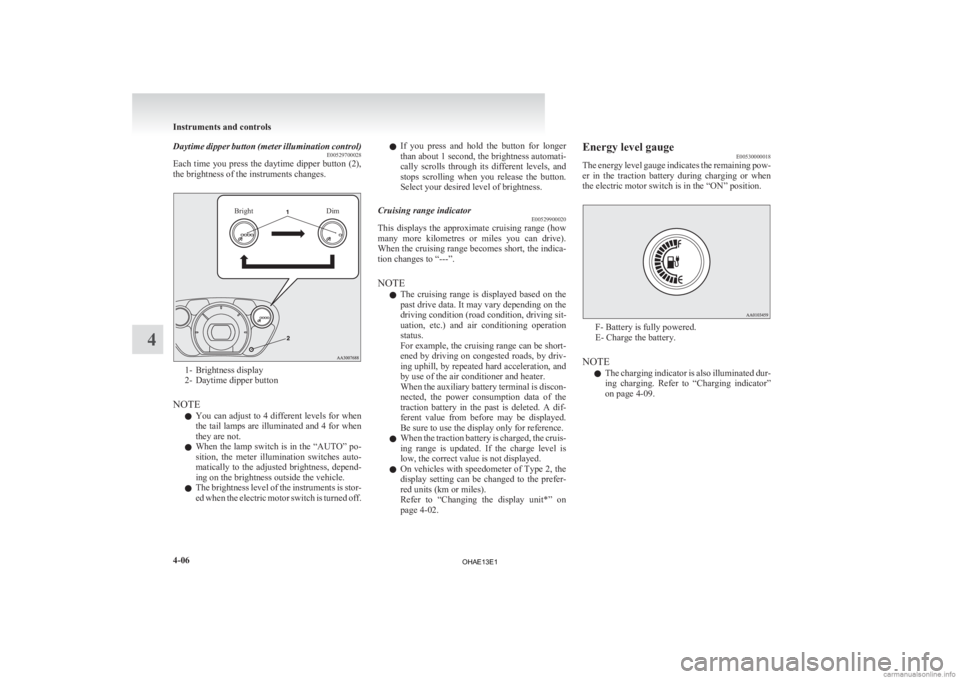
Daytime dipper button (meter illumination control)
E00529700028
Each
time you press the daytime dipper button (2),
the brightness of the instruments changes.
Bright Dim1- Brightness display
2-
Daytime dipper button
NOTE l You can adjust to 4 different levels for when
the tail lamps are illuminated and 4 for when
they are not.
l When the lamp switch is in the “AUTO” po-
sition, the meter illumination switches auto-
matically to the adjusted brightness, depend-
ing on the brightness outside the vehicle.
l The brightness level of the instruments is stor-
ed when the electric motor switch is turned off. l
If
you press and hold the button for longer
than about 1 second, the brightness automati-
cally scrolls through its different levels, and
stops scrolling when you release the button.
Select your desired level of brightness.
Cruising range indicator E00529900020
This displays the approximate cruising range (how
many
more kilometres or miles you can drive).
When the cruising range becomes short, the indica-
tion changes to “---”.
NOTE
l The cruising range is displayed based on the
past drive data. It may vary depending on the
driving condition (road condition, driving sit-
uation, etc.) and air conditioning operation
status.
For example, the cruising range can be short-
ened by driving on congested roads, by driv-
ing uphill, by repeated hard acceleration, and
by use of the air conditioner and heater.
When the auxiliary battery terminal is discon-
nected, the power consumption data of the
traction battery in the past is deleted. A dif-
ferent value from before may be displayed.
Be sure to use the display only for reference.
l When the traction battery is charged, the cruis-
ing range is updated. If the charge level is
low, the correct value is not displayed.
l On vehicles with speedometer of Type 2, the
display setting can be changed to the prefer-
red units (km or miles).
Refer to “Changing the display unit*” on
page 4-02. Energy level gauge
E00530000018
The
energy level gauge indicates the remaining pow-
er in the traction battery during charging or when
the electric motor switch is in the “ON” position. F- Battery is fully powered.
E- Charge the battery.
NOTE l The
charging indicator is also illuminated dur-
ing charging. Refer to “Charging indicator”
on page 4-09. Instruments and controls
4-06
4
OHAE13E1
Page 107 of 258
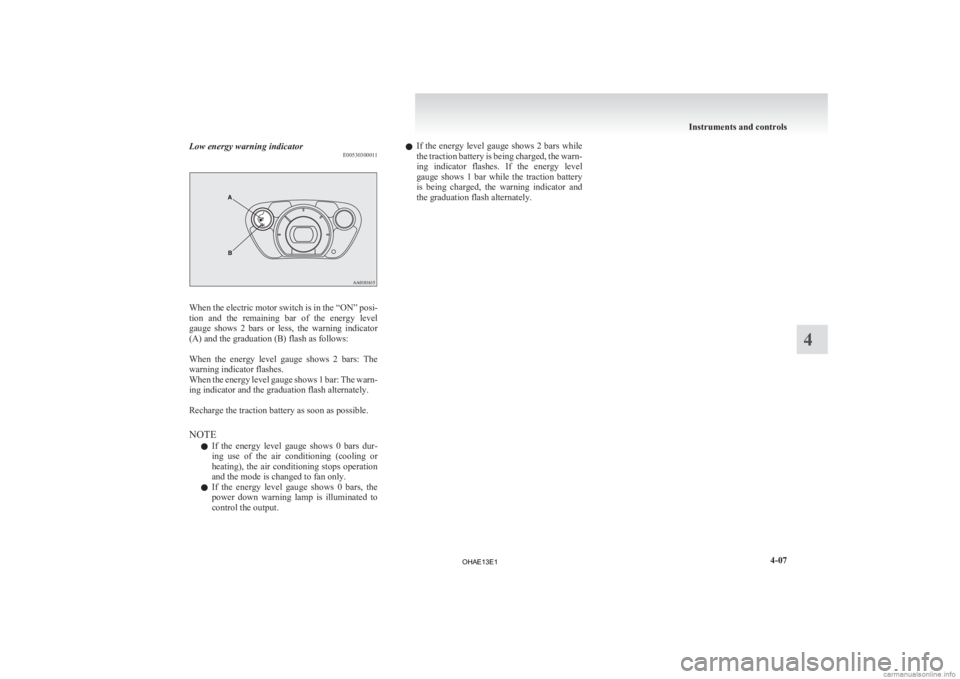
Low energy warning indicator
E00530300011When the electric motor switch is in the “ON” posi-
tion
and the remaining bar of the energy level
gauge shows 2 bars or less, the warning indicator
(A) and the graduation (B) flash as follows:
When the energy level gauge shows 2 bars: The
warning indicator flashes.
When the energy level gauge shows 1 bar: The warn-
ing indicator and the graduation flash alternately.
Recharge the traction battery as soon as possible.
NOTE
l If the energy level gauge shows 0 bars dur-
ing use of the air conditioning (cooling or
heating), the air conditioning stops operation
and the mode is changed to fan only.
l If the energy level gauge shows 0 bars, the
power down warning lamp is illuminated to
control the output. l
If
the energy level gauge shows 2 bars while
the traction battery is being charged, the warn-
ing indicator flashes. If the energy level
gauge shows 1 bar while the traction battery
is being charged, the warning indicator and
the graduation flash alternately. Instruments and controls
4-07 4
OHAE13E1
Page 111 of 258
CAUTION
l
If the lamp illuminates while
driving, immediately park your
vehicle in a safe place and we
recommend you to have it
checked. Power down warning lamp
E00530500039
If
this warning lamp illuminates, the pow-
er provided by the electric motor will be
reduced and the vehicle will only be able
to move at low speeds.
This warning lamp will illuminate;
l When the energy level in the trac-
tion battery is nearly empty.
l When temperature of the electric
motor unit or the traction battery
is too high or too low.
l When voltage of the traction bat-
tery becomes low.
If the energy level gauge shows 0 bar,
the traction battery is nearly empty and
must be charged as soon as possible. Re-
fer to “Charging” on page 1-02.
If the warning lamp illuminates when
the outside air temperature is very low,
move the vehicle to a warmer location. If the warning lamp illuminates after the
vehicle has been driven continuously up-
hill
or when the outside air temperature
is very high, stop the vehicle in a safe
place so the electric motor unit and/or
the traction battery can cool down.
When they have cooled down, the warn-
ing lamp will turn off. If the warning is
not cancelled, please contact a
MITSUBISHI MOTORS Authorized
Service Point. CAUTION
l
When
the power down warning
lamp illuminates, the vehicle
will have decreased power and
vehicle speed. The reduced
speed may be lower than other
traffic, which could increase
the chance of a collision. Be es-
pecially careful when driving.
If the vehicle cannot maintain a
safe driving speed, pull to the
side of the road in a safe place.
NOTE l Illumination
of the power down
warning lamp does not indicate a
malfunction.
l If the power down warning lamp il-
luminates while the air condition-
ing is used, the cooling or heating
may stop operating and only the
fan will operate. Combination headlamps and
dipper switch E00506002099
Headlamps
NOTE l Do
not leave the lamps on for a long time
while the ready indicator is not illuminated.
A run-down auxiliary battery could result.
l When it rains, or when the vehicle has been
washed, the inside of the lens sometimes be-
comes foggy, but this does not indicate a func-
tional problem.
When the lamp is switched on, the heat will
remove the fog. However, if water gathers in-
side the lamp, we recommend you to have it
checked.
Rotate the switch to turn on the lamps. Instruments and controls
4-11 4
OHAE13E1
Page 122 of 258
Economical driving
E00600101092
For
economical driving, there are some technical re-
quirements that have to be met. In order to achieve
longer life of the vehicle and the most economical
operation, we recommend you to have the vehicle
checked at regular intervals in accordance with the
service standards.
Starting and acceleration
Avoid driving with the accelerator pedal is pushed
way down, such as for unnecessarily sudden starts,
acceleration and deceleration. Smoothly depress
the accelerator pedal.
Observe the speed limit and keep the speed as con-
stant as possible while driving.
Idling
Parking for a long period with the ready indicator
illuminated will shorten the cruising range.
Speed
At higher vehicle speed, more traction battery is con-
sumed. Avoid driving at full speed. Even a slight re-
lease of the accelerator pedal will save a significant
amount of traction battery.
Tyre inflation pressure
Check the tyre inflation pressures at regular inter-
vals. Low tyre inflation pressure increases road re-
sistance. In addition, low tyre pressures adversely
affect tyre wear and driving stability.
Cargo loads
Do not drive with unnecessary articles in the lug-
gage compartment. Air conditioning
Too
much cooling/heating can affect the cruising
range, so maintain an appropriate temperature to ex-
tend the cruising range. Driving, alcohol and drugs
E00600200070
Driving
after drinking alcohol is one of the most fre-
quent causes of accidents.
Your driving ability can be seriously impaired even
with blood alcohol levels far below the legal mini-
mum. If you have been drinking, don’t drive. Ride
with a designated non-drinking driver, call a cab or
a friend, or use public transportation. Drinking cof-
fee or taking a cold shower will not make you sober.
Similarly, prescription and nonprescription drugs af-
fect your alertness, perception and reaction time.
Consult with your doctor or pharmacist before driv-
ing while under the influence of any of these medi-
cations. WARNING
l NEVER DRINK AND DRIVE.
Your
perceptions are less accurate, your
reflexes are slower and your judgment is
impaired. Starting and driving
5-02
5
OHAE13E1