2013 MERCEDES-BENZ SLS-CLASS clock
[x] Cancel search: clockPage 72 of 286
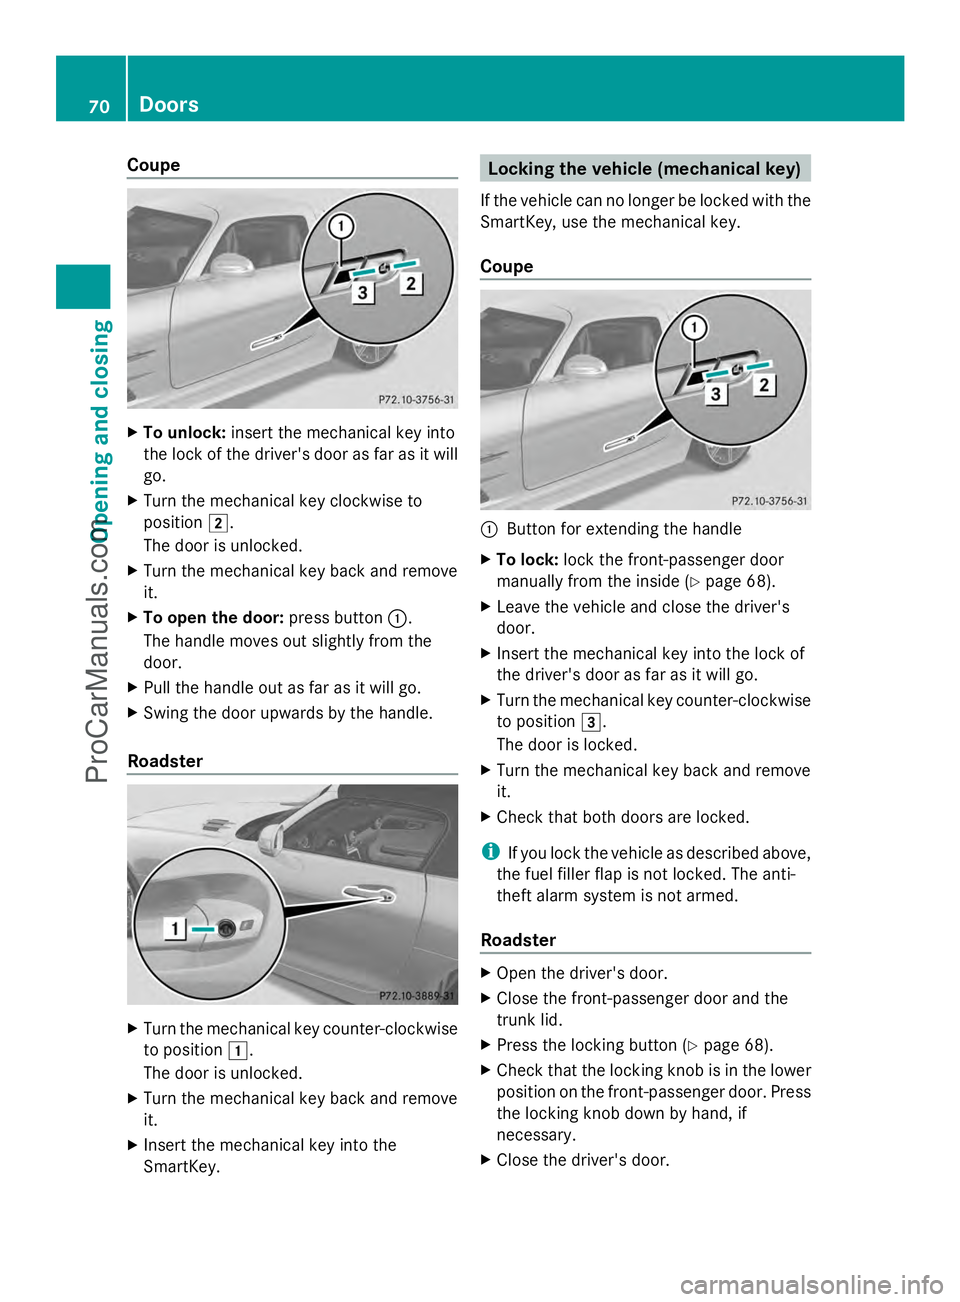
Coupe
X
To unlock: insert the mechanical key into
the lock of the driver's door as far as it will
go.
X Turn the mechanical key clockwise to
position 2.
The door is unlocked.
X Turn the mechanical key back and remove
it.
X To open the door: press button:.
The handle moves out slightly from the
door.
X Pull the handle out as far as it will go.
X Swing the door upwards by the handle.
Roadster X
Turn the mechanical key counter-clockwise
to position 1.
The door is unlocked.
X Turn the mechanical key back and remove
it.
X Insert the mechanical key into the
SmartKey. Locking the vehicle (mechanical key)
If the vehicle can no longer be locked with the
SmartKey, use the mechanical key.
Coupe :
Button for extending the handle
X To lock: lock the front-passenger door
manually from the inside ( Ypage 68).
X Leave the vehicle and close the driver's
door.
X Insert the mechanical key into the lock of
the driver's door as far as it will go.
X Turn the mechanical key counter-clockwise
to position 3.
The door is locked.
X Turn the mechanical key back and remove
it.
X Check that both doors are locked.
i If you lock the vehicle as described above,
the fuel filler flap is not locked. The anti-
theft alarm system is not armed.
Roadster X
Open the driver's door.
X Close the front-passenger door and the
trunk lid.
X Press the locking button (Y page 68).
X Check that the locking knob is in the lower
position on the front-passenger door. Press
the locking knob down by hand, if
necessary.
X Close the driver's door. 70
DoorsOpening and closing
ProCarManuals.com
Page 73 of 286
X
Take the mechanical key out of the
SmartKey (Y page 63).
X Insert the mechanical key into the lock of
the driver's door as far as it will go. :
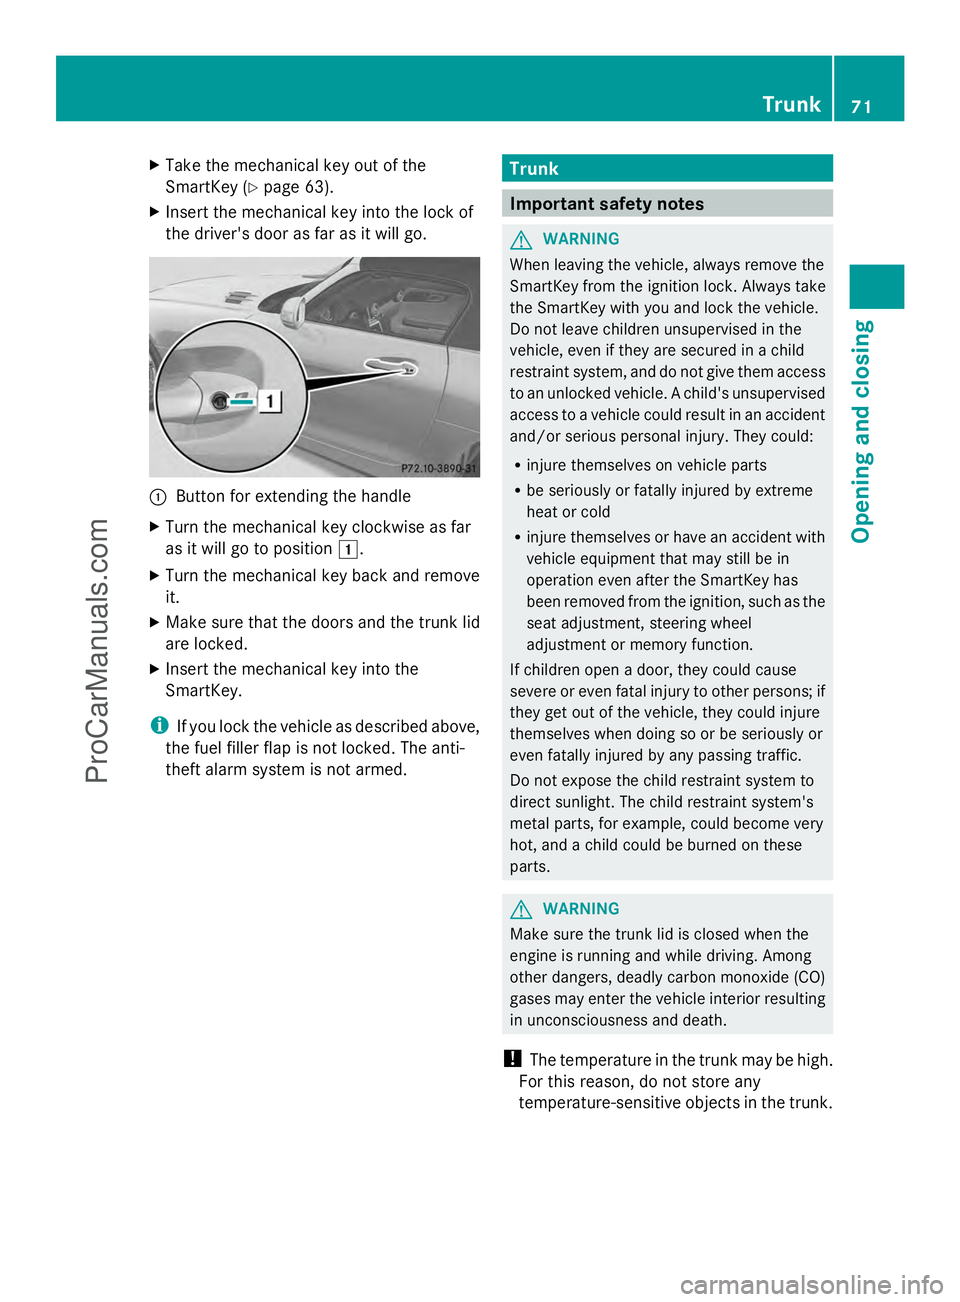
Button for extending the handle
X Turn the mechanical key clockwise as far
as it will go to position 1.
X Turn the mechanical key back and remove
it.
X Make sure that the doors and the trunk lid
are locked.
X Insert the mechanical key into the
SmartKey.
i If you lock the vehicle as described above,
the fuel filler flap is not locked. The anti-
theft alarm system is not armed. Trunk
Important safety notes
G
WARNING
When leaving the vehicle, always remove the
SmartKey from the ignition lock. Always take
the SmartKey with you and lock the vehicle.
Do not leave children unsupervised in the
vehicle, even if they are secured in a child
restraint system, and do not give them access
to an unlocked vehicle. A child's unsupervised
access to a vehicle could result in an accident
and/or serious personal injury. They could:
R injure themselves on vehicle parts
R be seriously or fatally injured by extreme
heat or cold
R injure themselves or have an accident with
vehicle equipment that may still be in
operation even after the SmartKey has
been removed from the ignition, such as the
seat adjustment, steering wheel
adjustment or memory function.
If children open a door, they could cause
severe or even fatal injury to other persons; if
they get out of the vehicle, they could injure
themselves when doing so or be seriously or
even fatally injured by any passing traffic.
Do not expose the child restraint system to
direct sunlight. The child restraint system's
metal parts, for example, could become very
hot, and a child could be burned on these
parts. G
WARNING
Make sure the trunk lid is closed when the
engine is running and while driving. Among
other dangers, deadly carbon monoxide (CO)
gases may enter the vehicle interior resulting
in unconsciousness and death.
! The temperature in the trunk may be high.
For this reason, do not store any
temperature-sensitive objects in the trunk. Trunk
71Opening and closing Z
ProCarManuals.com
Page 75 of 286
X
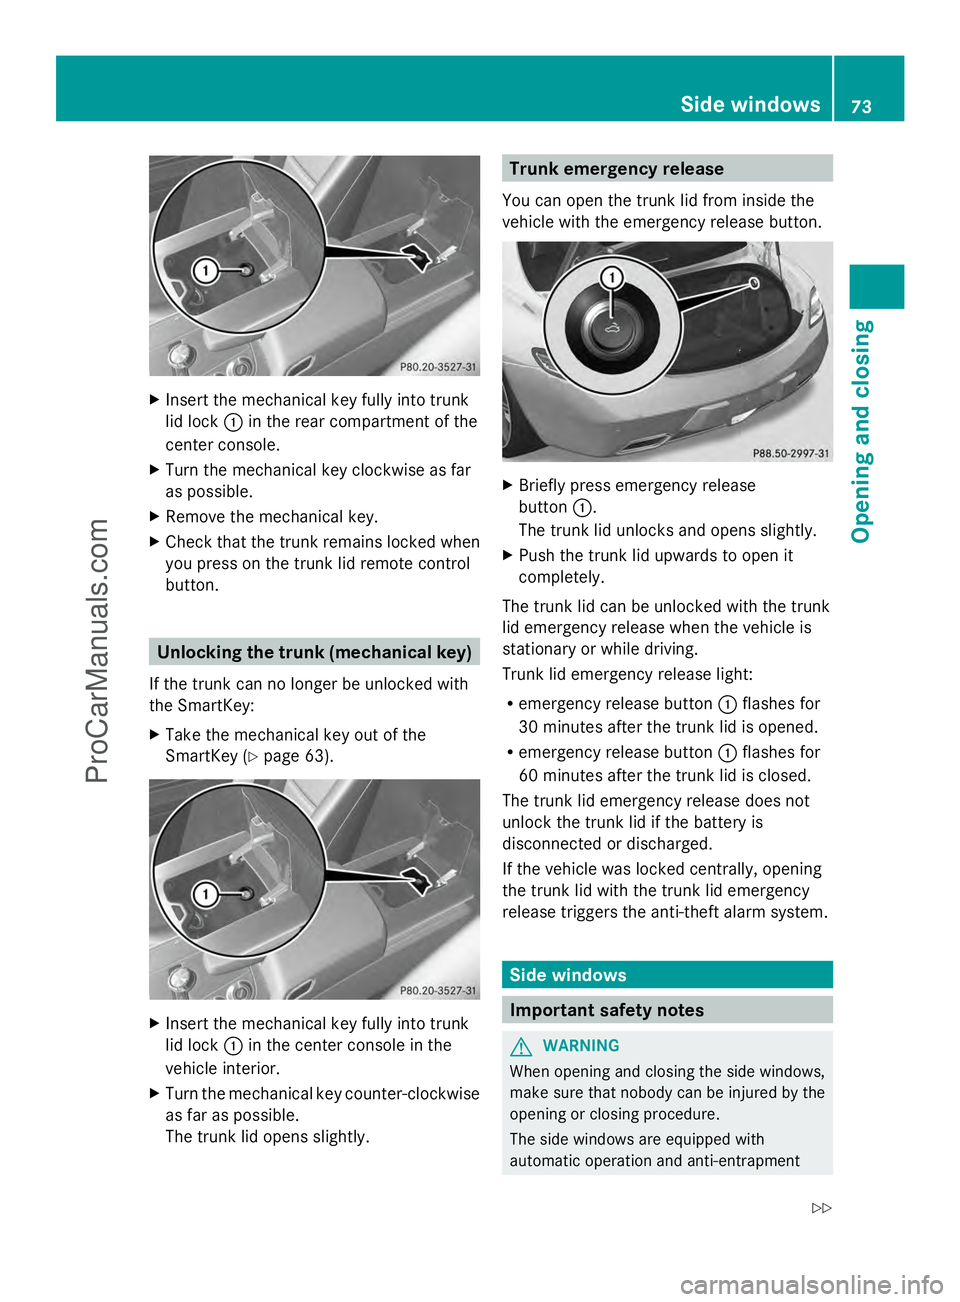
Insert the mechanical key fully into trunk
lid lock :in the rear compartment of the
center console.
X Turn the mechanical key clockwise as far
as possible.
X Remove the mechanical key.
X Check that the trunk remains locked when
you press on the trunk lid remote control
button. Unlocking the trunk (mechanical key)
If the trunk can no longer be unlocked with
the SmartKey:
X Take the mechanical key out of the
SmartKey (Y page 63). X
Insert the mechanical key fully into trunk
lid lock :in the center console in the
vehicle interior.
X Turn the mechanical key counter-clockwise
as far as possible.
The trunk lid opens slightly. Trunk emergency release
You can open the trunk lid from inside the
vehicle with the emergency release button. X
Briefly press emergency release
button :.
The trunk lid unlocks and opens slightly.
X Push the trunk lid upwards to open it
completely.
The trunk lid can be unlocked with the trunk
lid emergency release when the vehicle is
stationary or while driving.
Trunk lid emergency release light:
R emergency release button :flashes for
30 minutes after the trunk lid is opened.
R emergency release button :flashes for
60 minutes after the trunk lid is closed.
The trunk lid emergency release does not
unlock the trunk lid if the battery is
disconnected or discharged.
If the vehicle was locked centrally, opening
the trunk lid with the trunk lid emergency
release triggers the anti-theft alarm system. Side windows
Important safety notes
G
WARNING
When opening and closing the side windows,
make sure that nobody can be injured by the
opening or closing procedure.
The side windows are equipped with
automatic operation and anti-entrapment Side windows
73Opening and closing
Z
ProCarManuals.com
Page 107 of 286

Condensation may drip from the underside of
the vehicle when it is in cooling mode.
Activating/deactivating X
To activate: press the¿button.
The indicator lamp in the ¿button lights
up.
X To deactivate: press the¿button.
The indicator lamp in the ¿button goes
out. The cooling with air dehumidification
function has a delayed switch-off feature.
Problems with the "cooling with air
dehumidification" function When you press the
¿button, the
indicator lamp in the button flashes three
times or remains off. You can no longer switch
on the cooling with air dehumidification
function.
X Visit a qualified specialist workshop. Setting climate control to automatic
G
WARNING
If you switch off the cooling function, the
vehicle will not be cooled when weather
conditions are warm. The windows can fog up
more quickly. Window fogging may impair
visibility and endanger you and others.
In automatic mode, the set temperature is
controlled automatically. The system
automatically regulates the temperature of
the dispensed air, the airflow and the air
distribution.
Automatic mode will achieve optimal
operation if cooling with air dehumidification
is also activated. If necessary, cooling with air
dehumidification can be deactivated. X
Select key position 2with the Start/Stop
button.
X Set the desired temperature.
X To activate: press theÃbutton.
The indicator lamp in the Ãbutton lights
up. Automatic air distribution and airflow
are activated.
X To select manually: press theÃ
button.
The indicator lamp in the Ãbutton goes
out. Automatic air distribution and airflow
are deactivated. Setting the temperature
Different temperatures can be set for the
driver's and front-passenger sides.
X Select key position 2with the Start/Stop
button.
X To increase/reduce: turn control:and
D clockwise or counter-clockwise
(Y page 103).
Only change the temperature setting in
small increments. Start at 72 ‡ (22 †). Setting the air distribution
¯ Directs the airflow through the
defroster vents
P Directs the airflow through the center
and side air vents
O Directs the airflow through the
footwell air vents
S Directs the airflow through the center
and side air vents as well as the
footwell air vents
_ Directs the airflow to the entire vehicle
interior
b Directs the airflow through the center
and side air vents, as well as the
defroster vents
a Directs the airflow through the
footwell and defroster vents Operating the climate control systems
105Climate control Z
ProCarManuals.com
Page 108 of 286

X
Select key position 2with the Start/Stop
button.
X Press the _button repeatedly until the
desired symbol appears in the display.
The indicator lamp in the Ãbutton goes
out. Automatic control is deactivated and
the air distribution is controlled according
to the selected setting. Setting the airflow
X Select key position 2with the Start/Stop
button.
X To increase/reduce: press theKor
I button. Switching the mono function on/off
The MONO function is only available in
vehicles for Canada.
You can use the MONO function to adopt the
temperature and air distribution settings on
the driver's side for the front-passenger side.
X Press the ºbutton.
The indicator lamp in the ºbutton lights
up or goes out. Defrosting the windshield
i You should only select the defrosting
function until the windshield is clear again.
X Select SmartKey position 2with the Start/
Stop button.
X To activate: press the¬button.
The indicator lamp in the ¬button lights
up.
The system automatically switches to the
following functions:
R high airflow
R high temperature
R air distribution to the windshield and
front side windows
R air-recirculation mode off X
To deactivate: press the¬button.
The indicator lamp in the ¬button goes
out. The previously selected settings are
restored. Air-recirculation mode remains
deactivated.
or
X Press the Ãbutton.
The indicator lamp in the ¬button goes
out. Airflow and air distribution are set to
automatic mode.
or
X Turn controls :orD clockwise or
counter-clockwise ( Ypage 103).
or
X Press the KorI button. Switching maximum cooling on/off
The MAX COOL function is only available in
vehicles for the USA.
MAX COOL is only operational when the
engine is running.
When you activate MAX COOL, climate
control switches to the following functions:
R maximum cooling
R maximum airflow
R air-recirculation mode on
X To activate: press theÙbutton.
The indicator lamp in the button lights up.
X To deactivate: press theÙbutton
again.
The indicator lamp in the button goes out.
The previously selected settings come into
effect again.
i To deactivate MAX COOL press the ^,
Ã, or ¬button. 106
Operating the climate control systemsClimate control
ProCarManuals.com
Page 123 of 286
Drive
program Characteristic
Driving mode
RS
RACE
START Optimal vehicle
acceleration from a
standstill
X
Turn drive program selector switch :until
the desired drive program is shown in the
multifunction display.
i RScannot be selected during normal
driving. For further information on RACE
START, see (Y page 121). Steering wheel paddle shifters
In transmission position D, you can use the
steering wheel paddle shifters to restrict or
derestrict the transmission shift range. One
of the automatic drive programs, C,Sor S+,
must be selected in order to do so.
In manual drive program M, you need to
change gear yourself using the steering wheel
paddle shifters. At low engine speeds, the
transmission shifts down automatically.
i GT model: in manual drive program M,
the transmission shift and response times
are significantly shorter with sportier and
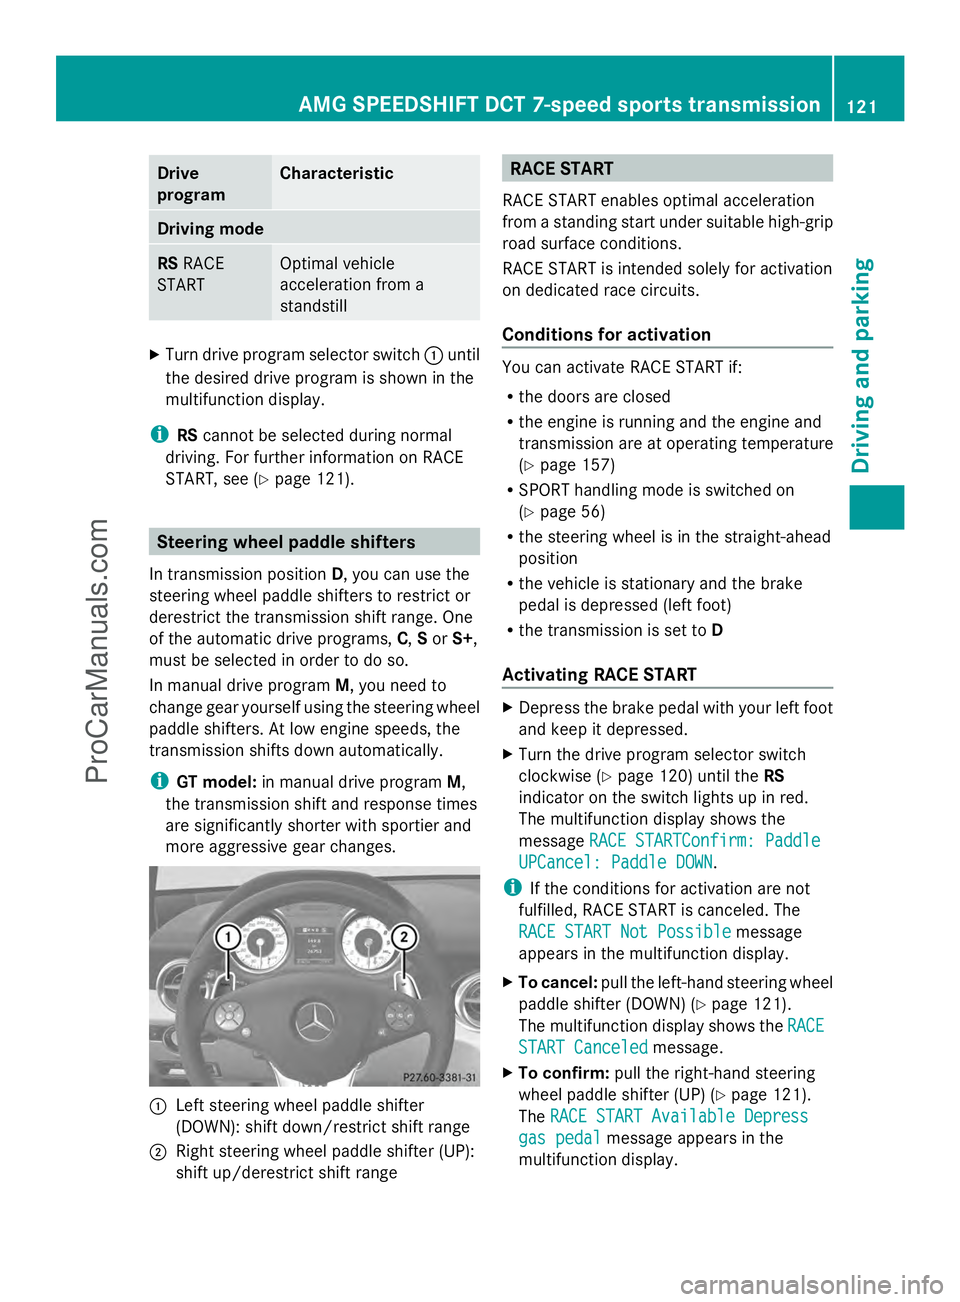
more aggressive gear changes. :
Left steering wheel paddle shifter
(DOWN): shift down/restrict shift range
; Right steering wheel paddle shifter (UP):
shift up/derestrict shift range RACE START
RACE START enables optimal acceleration
from a standing start under suitable high-grip
road surface conditions.
RACE START is intended solely for activation
on dedicated race circuits.
Conditions for activation You can activate RACE START if:
R
the doors are closed
R the engine is running and the engine and
transmission are at operating temperature
(Y page 157)
R SPORT handling mode is switched on
(Y page 56)
R the steering wheel is in the straight-ahead
position
R the vehicle is stationary and the brake
pedal is depressed (left foot)
R the transmission is set to D
Activating RACE START X
Depress the brake pedal with your left foot
and keep it depressed.
X Turn the drive program selector switch
clockwise (Y page 120) until the RS
indicator on the switch lights up in red.
The multifunction display shows the
message RACE STARTConfirm: Paddle RACE STARTConfirm: Paddle
UPCancel: Paddle DOWN
UPCancel: Paddle DOWN.
i If the conditions for activation are not
fulfilled, RACE START is canceled. The
RACE START Not Possible RACE START Not Possible message
appears in the multifunction display.
X To cancel: pull the left-hand steering wheel
paddle shifter (DOWN) (Y page 121).
The multifunction display shows the RACE
RACE
START Canceled
START Canceled message.
X To confirm: pull the right-hand steering
wheel paddle shifter (UP) ( Ypage 121).
The RACE START Available Depress
RACE START Available Depress
gas pedal
gas pedal message appears in the
multifunction display. AMG SPEEDSHIFT DCT 7-speed sports transmission
121Driving and parking Z
ProCarManuals.com
Page 128 of 286
X
Turn the fuel filler cap counter-clockwise
and remove it.
X Insert the fuel filler cap into the holder
bracket on the inside of filler flap ?.
X Completely insert the fuel pump nozzle into
the filler neck and refuel.
X Only fill the tank until the pump nozzle
switches off.
! Overfilling the fuel tank could damage the
fuel system.
Closing X
Replace the fuel filler cap and turn it
clockwise. The fuel filler cap audibly
engages.
X Close the fuel filler flap. 126
RefuelingDriving and parking
ProCarManuals.com
Page 198 of 286
Useful information
i This Operator's Manual describes all
models and all standard and optional
equipment of your vehicle available at the
time of publication of the Operator's
Manual. Country-specific differences are
possible. Please note that your vehicle may
not be equipped with all features
described. This also applies to safety-
related systems and functions.
i Please read the information on qualified
specialist workshops (Y page 22).Stowage areas
Stowage space
Important safety notes G
WARNING
If you do not correctly store objects in the
vehicle interior, they can slip or be flung
around, thus striking vehicle occupants.
There is a risk of injury, especially when
braking or abruptly changing directions.
R Always store objects so that they cannot be
flung around in these or in similar
situations.
R Always make sure that objects do not
protrude from stowage compartments,
parcel nets or stowage nets.
R Close lockable stowage compartments
while driving.
R Stow and secure objects that are heavy,
hard, pointy, sharp-edged, fragile or too
large in the trunk. Glove box X
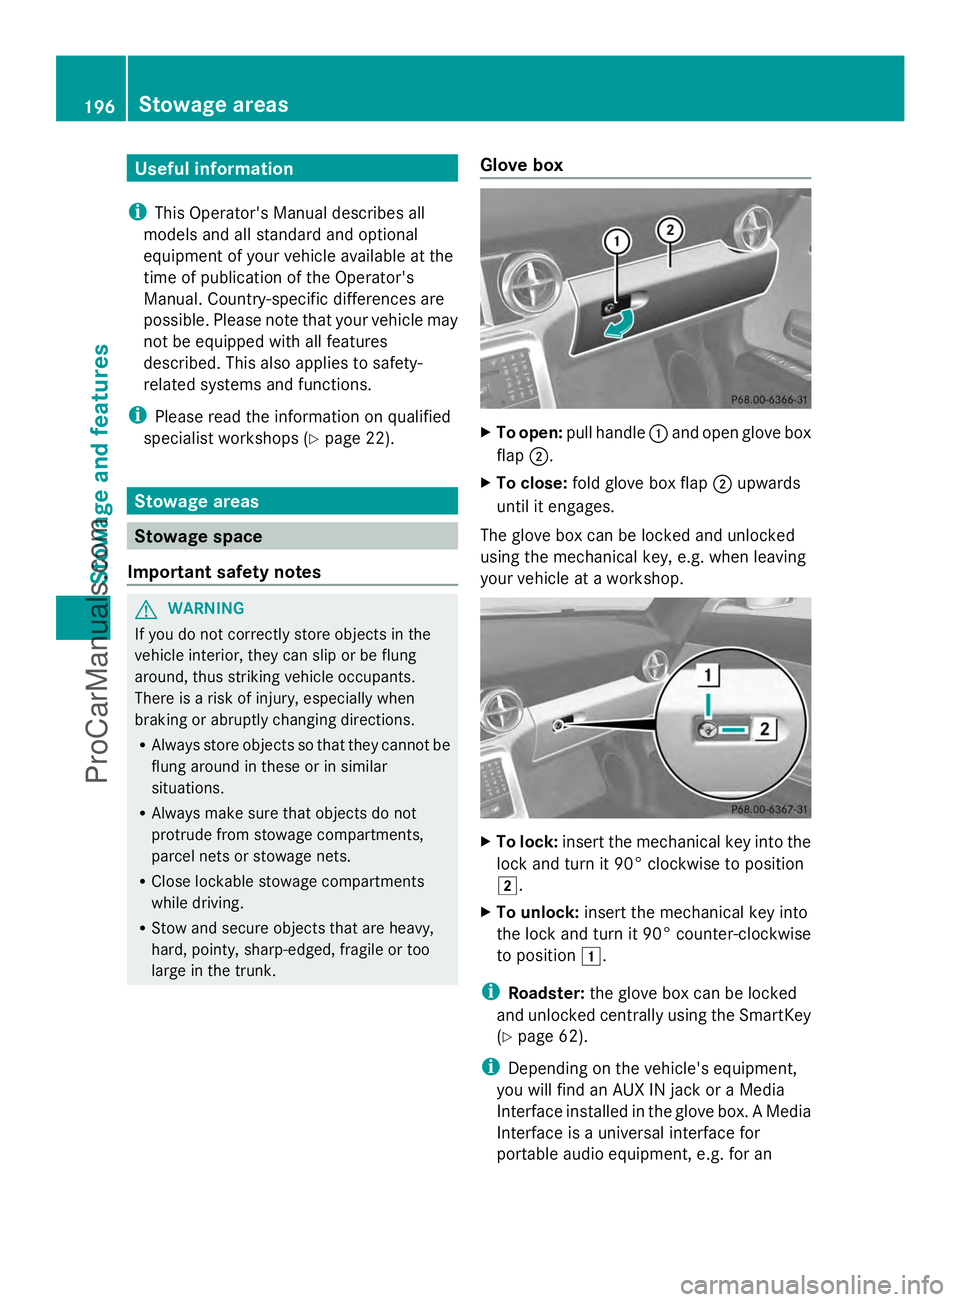
To open: pull handle :and open glove box
flap ;.
X To close: fold glove box flap ;upwards
until it engages.
The glove box can be locked and unlocked
using the mechanical key, e.g. when leaving
your vehicle at a workshop. X
To lock: insert the mechanical key into the
lock and turn it 90° clockwise to position
2.
X To unlock: insert the mechanical key into
the lock and turn it 90° counter-clockwise
to position 1.
i Roadster: the glove box can be locked
and unlocked centrally using the SmartKey
(Y page 62).
i Depending on the vehicle's equipment,
you will find an AUX IN jack or a Media
Interface installed in the glove box. A Media
Interface is a universal interface for
portable audio equipment, e.g. for an 196
Stowage areasStowage and features
ProCarManuals.com