2013 MERCEDES-BENZ SL-CLASS ROADSTER service
[x] Cancel search: servicePage 403 of 572

X
Select Yes or No and press W to confirm.
The setting is accepted.
Yes deletes
the POIs after importing to the
server.
No does not delete the POIs on the server.
X To exit the menu: select Back by turning
cVd the COMAND controller and press
W to confirm.
i Routes and destinations are
automatically deleted on the server after
seven days.
Conditions of use You can review the terms of use for the
COMAND Mercedes-Benz Apps and
Google™.
X
Select Terms and conditions in the
options menu
by sliding ZVÆ the COMAND
controller and press W to confirm
(Y page 397).
X Select COMAND or Google and press W to
confirm.
The respective start page appears.
X Select Continue to view further content.
Resetting settings The reset function resets all COMAND
settings to the factory settings.
X
Select the ® icon
in the main function bar
by sliding ZV and turning cVd the
COMAND controller and press W to
confirm.
The carousel view appears.
X Bring the COMAND panel to the front by
turning cVd the COMAND controller and
press W to confirm.
X Select Options by sliding VÆ and turning
cVd the COMAND controller and press
W to confirm. X
Select Reset and press W to confirm.
A prompt appears asking whether you
really wish to reset.
X Select Yes or No and press W to confirm.
If you select Yes, the settings are reset.
If you
select No, the process will be aborted.
i Resetting your
personal data in COMAND
(reset function) does not reset the settings
for the online functions (Y page 294).
Similarly, resetting the settings of the
online functions has no influence on the
reset function. Other services
Mercedes-Benz Mobile Website The COMAND functions include the
Mercedes-Benz Mobile Website as a
predefined favorite.
X
Select the ® icon
in the main function bar
by sliding ZV and turning cVd the Online and Internet functions
401
COMAND Z
Page 404 of 572
COMAND controller and press
W to
confirm.
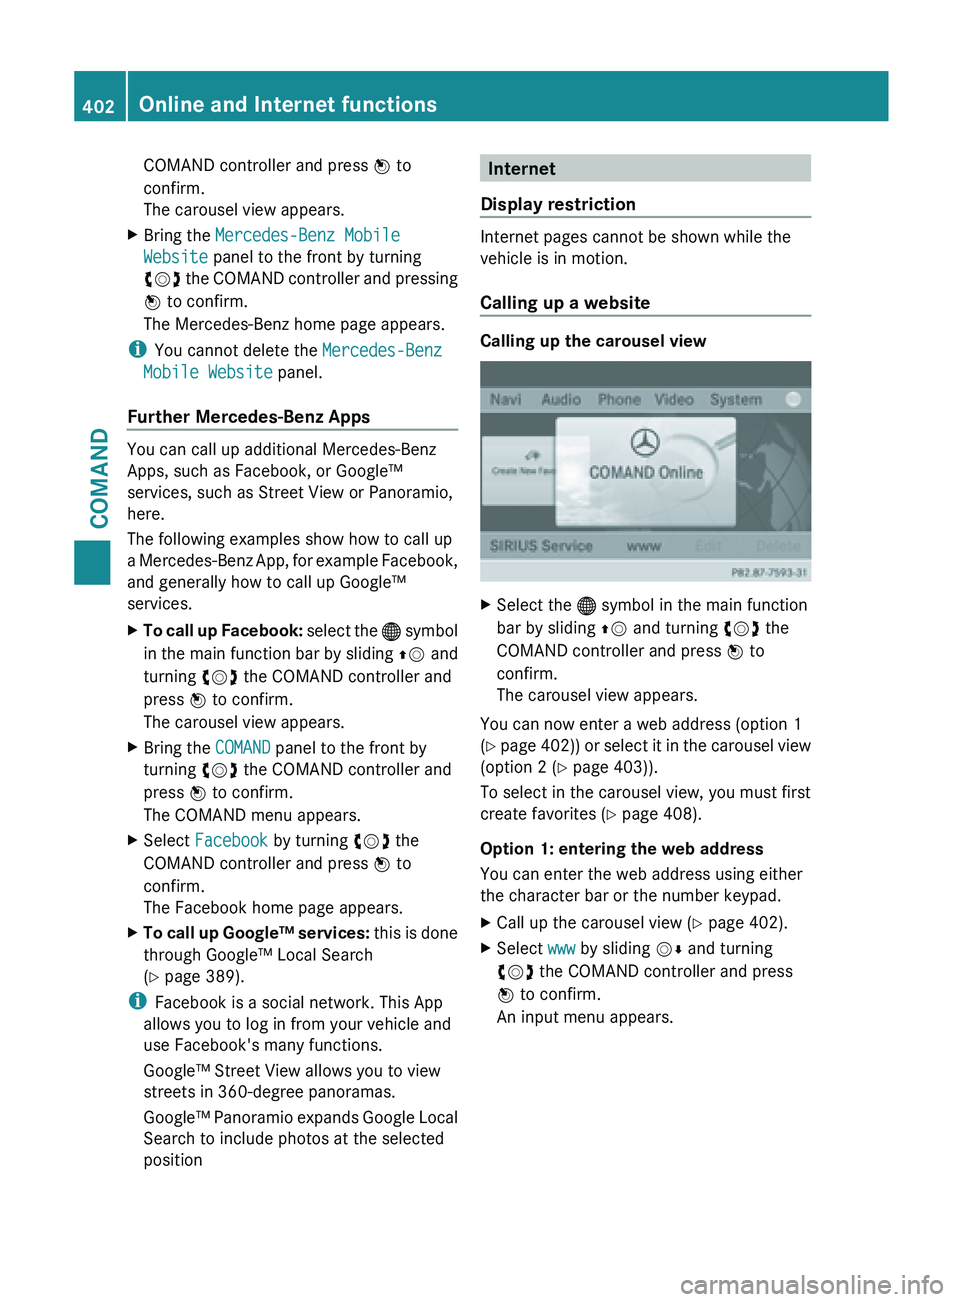
The carousel view appears.
X Bring the Mercedes-Benz Mobile
Website panel to the front by turning
cVd the
COMAND controller and pressing
W to confirm.
The Mercedes-Benz home page appears.
i You cannot delete the Mercedes-Benz
Mobile Website panel.
Further Mercedes-Benz Apps You can call up additional Mercedes-Benz
Apps, such as Facebook, or Google™
services, such as Street View or Panoramio,
here.
The following examples show how to call up
a
Mercedes-Benz
App, for example Facebook,
and generally how to call up Google™
services.
X To call up Facebook: select
the ® symbol
in the main function bar by sliding ZV and
turning cVd the COMAND controller and
press W to confirm.
The carousel view appears.
X Bring the COMAND panel to the front by
turning cVd the COMAND controller and
press W to confirm.
The COMAND menu appears.
X Select Facebook by turning cVd the
COMAND controller and press W to
confirm.
The Facebook home page appears.
X To call up Google™ services: this
is done
through Google™ Local Search
(Y page 389).
i Facebook is a social network. This App
allows you to log in from your vehicle and
use Facebook's many functions.
Google™ Street View allows you to view
streets in 360-degree panoramas.
Google™ Panoramio
expands Google Local
Search to include photos at the selected
position Internet
Display restriction Internet pages cannot be shown while the
vehicle is in motion.
Calling up a website
Calling up the carousel view
X
Select the ® symbol in the main function
bar by sliding ZV and turning cVd the
COMAND controller and press W to
confirm.
The carousel view appears.
You can now enter a web address (option 1
(Y page
402)) or select it in the carousel view
(option 2 (Y page 403)).
To select in the carousel view, you must first
create favorites (Y page 408).
Option 1: entering the web address
You can enter the web address using either
the character bar or the number keypad.
X Call up the carousel view ( Y page 402).
X Select www by sliding VÆ and turning
cVd the COMAND controller and press
W to confirm.
An input menu appears. 402
Online and Internet functions
COMAND
Page 418 of 572
X
Select Info in the radio display by sliding
VÆ and turning cVd the COMAND
controller and press W to confirm.
Information on the currently selected
station is displayed. Content is dependent
on the station.
X To return to the radio display: confirm
Info by pressing W.
X Slide ZV the COMAND controller up. Satellite radio
Important notes i
The satellite
radio mode described below
requires optionally available satellite radio
equipment and registration with a satellite
radio provider.
i Note that the categories and channels
shown in the illustrations depend on the
program content offered by the provider.
The program content may vary. The
illustrations and descriptions in these
operating instructions may therefore differ
from the channels and categories offered
by the provider.
Satellite radio mode may be temporarily
unavailable or interrupted for a variety of
reasons. These reasons include
environmental or topographical conditions
as well as other issues beyond the control
of Mercedes-Benz USA, LLC. This means
operation may not be possible in certain
areas.
These include:
R tunnels
R parking garages
R locations inside or next to buildings
R locations in the vicinity of other
structures
i SIRIUS XM Radio offers more than 130
radio stations in digital quality, for example
100% commercial-free music, sports, news
and entertainment. SIRIUS XM Radio employs a fleet of high-
performance
satellites
to broadcast around
the clock throughout the USA and Canada.
The satellite radio program is available for
a monthly fee. Details are available from
the SIRIUS XM Service Center and at
http://www.sirius.com (USA) or
http://www.siriuscanada.com
(Canada).
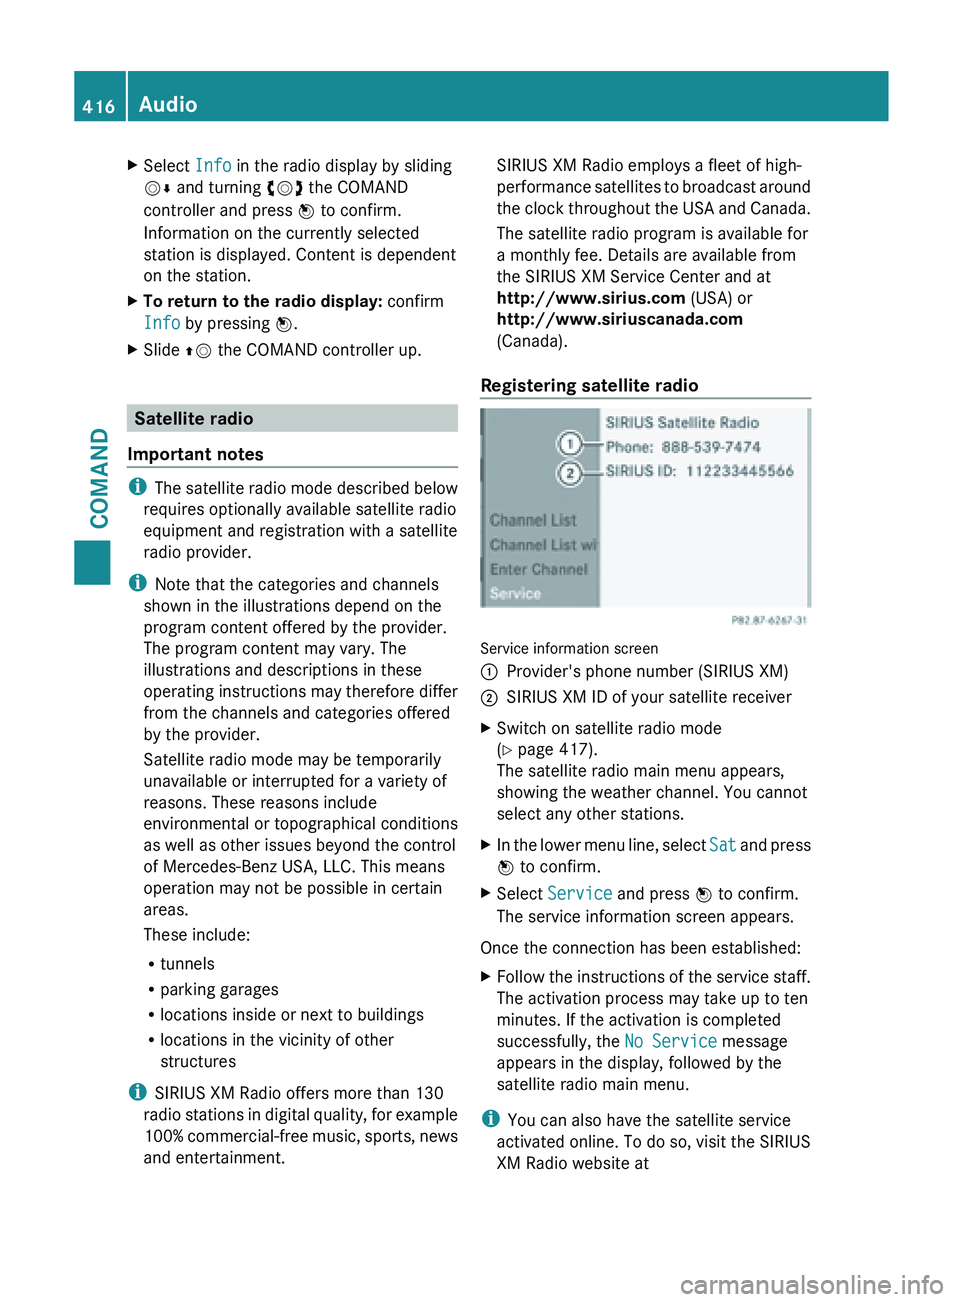
Registering satellite radio Service information screen
:
Provider's phone number (SIRIUS XM)
; SIRIUS XM ID of your satellite receiver
X Switch on satellite radio mode
(Y page 417).
The satellite radio main menu appears,
showing the weather channel. You cannot
select any other stations.
X In the lower menu line, select Sat and
press
W to confirm.
X Select Service and press W to confirm.
The service information screen appears.
Once the connection has been established:
X Follow the instructions of the service staff.
The activation process may take up to ten
minutes. If the activation is completed
successfully, the No Service message
appears in the display, followed by the
satellite radio main menu.
i You can also have the satellite service
activated online. To do so, visit the SIRIUS
XM Radio website at 416
Audio
COMAND
Page 419 of 572

http://www.sirius.com (USA) or
http://www.siriuscanada.com
(Canada).
i If registration is not included when
purchasing the system, your credit card
details will be required to activate your
account.
If the
satellite receiver is not installed or is
not installed correctly, the Device
Unavailable message will appear.
Switching on satellite radio mode Notes
For example, to select a channel or scroll in
the lists, you can also use the
=;
9: buttons on the multifunction
steering wheel ( Y page 211).
Important information on registering the
satellite radio (Y
page 416).
Option 1
X Press the $ function button.
The No Service message appears after
switching on or if no signal is being
received. Once COMAND receives the
signal, the satellite radio display appears.
The station last selected is played.
i Repeatedly pressing this function button
switches through the wavebands in this
order: FM, AM, WB and subsequently
switches on
the satellite radio. Pressing the
button again takes you back to FM radio
mode. Option 2 Satellite radio main menu
:
Satellite radio main display
; Channel name
= Preset
? Selected category/channel number
A Channel information (in brief)
B Sound settings
C Category list
D Channel information (in detail)
E Channel preset list
F Satellite radio menu
Channel information A can be viewed in
detail ( Y page 420).
X Select Audio in the main function bar by
sliding ZV and
turning cVd the COMAND
controller and press W to confirm.
If satellite radio mode was the last mode
selected, it will now be active.
If another audio mode is switched on, you
can now switch to satellite radio mode in
the audio menu.
X Select Audio by sliding ZV the COMAND
controller and press W to confirm.
The audio menu appears.
X Select Sat and press W to confirm. Audio
417
COMAND Z
Page 420 of 572
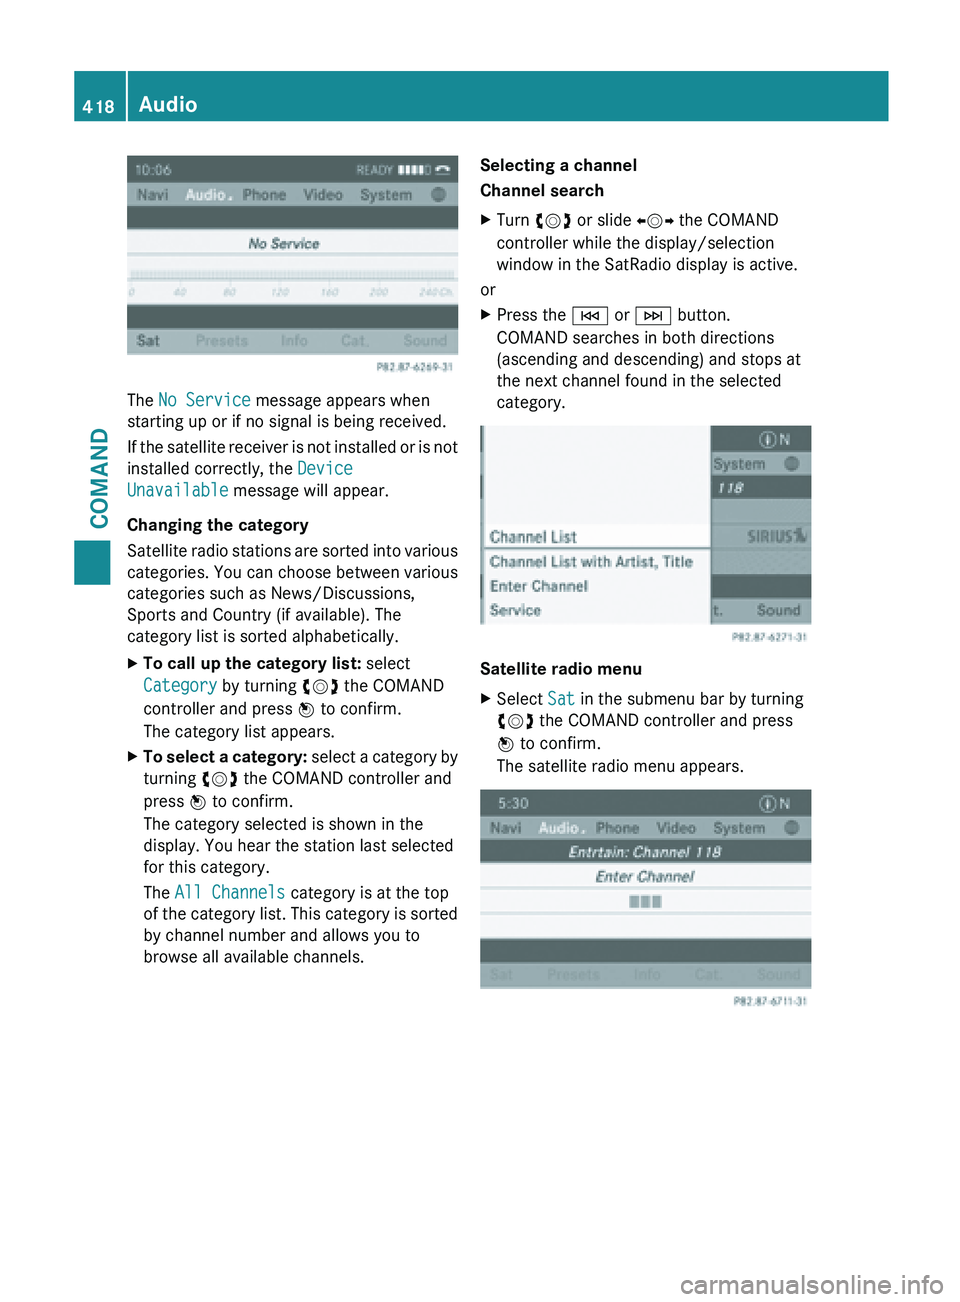
The No Service message appears when
starting up or if no signal is being received.
If
the
satellite receiver is not installed or is not
installed correctly, the Device
Unavailable message will appear.
Changing the category
Satellite radio stations are sorted into various
categories. You can choose between various
categories such as News/Discussions,
Sports and Country (if available). The
category list is sorted alphabetically.
X To call up the category list: select
Category by turning cVd the COMAND
controller and press W to confirm.
The category list appears.
X To select a category: select
a category by
turning cVd the COMAND controller and
press W to confirm.
The category selected is shown in the
display. You hear the station last selected
for this category.
The All Channels category is at the top
of the category list. This category is sorted
by channel number and allows you to
browse all available channels. Selecting a channel
Channel search
X
Turn cVd or slide XVY the COMAND
controller while the display/selection
window in the SatRadio display is active.
or
X Press the E or F button.
COMAND searches in both directions
(ascending and descending) and stops at
the next channel found in the selected
category. Satellite radio menu
X
Select Sat in the submenu bar by turning
cVd the COMAND controller and press
W to confirm.
The satellite radio menu appears. 418
Audio
COMAND
Page 422 of 572

X
Select a preset by turning cVd the
COMAND controller and press and hold
W until you hear a tone.
or
X Press and hold a number button, e.g.
n, until you hear a tone.
The channel is stored under the preset.
Storing channels automatically
This function automatically stores channels
with adequate reception in the preset
memory. Channels stored manually in the
preset memory will be overwritten.
X Option 1: press W the COMAND controller
when the display/selection window is
active.
X Select Autostore in
the presets by turning
cVd the COMAND controller and press
W to confirm.
X Option 2: select Presets in the submenu
bar by sliding VÆ and turning cVd the
COMAND controller and press W to
confirm.
X Select Autostore and
press W to confirm.
In both cases, COMAND searches for
channels that can be received. You will see
a message to this effect. The available
channels are automatically stored in the
preset positions.
X To cancel storing: select Cancel and
press W to confirm.
Selecting a channel from the preset list
X To call up the preset list: select
Presets by turning cVd the COMAND
controller and press W to confirm.
The channel preset list appears.
X To set a channel: select a preset by
turning cVd the COMAND controller and
press W to confirm.
or
X Press a number key, such as n.Displaying information
X
Select Info in the submenu bar by turning
cVd
the COMAND controller and press
W to confirm.
Information on the currently received
program is displayed.
If available, you will see:
R the full channel name
R the artist
of the track that is currently being
played
R the track that is currently being played
X To return to the radio display: confirm
Info by pressing W.
X Slide ZV the COMAND controller up.
Displaying service information :
Provider's phone number (SIRIUS XM) or
Call Service Provider
; SIRIUS ID of your satellite receiver
The provider's customer service center is
available by
phone at any time to answer any
general questions or questions on the
versions available. 420
Audio
COMAND
Page 423 of 572
X
Select Sat Radio in the submenu bar by
turning cVd the COMAND controller and
press W to confirm.
X Select Service and press W to confirm.
The provider's details appear.
X To return to the SatRadio main display:
slide XVY the COMAND controller.
Channel list updates
When receiving
a new channel list, the display
shows the Updating Channels...
message.
The station last selected is switched to mute
until the update has been completed.
Satellite radio mode is not available during
this process.
Once the update has been completed, the
satellite radio main menu appears. The
station last selected is played.
Sound settings
Information on sound settings ( Y page 278).Audio CD/DVD and MP3 mode
Important safety notes G
WARNING
COMAND is classified as a Class 1 laser
product. Never open the housing. There is a
risk of
damage to the eyes due to exposure to
invisible laser radiation if you open the casing,
or if the casing is faulty or damaged.
COMAND does not contain any parts that can
be serviced by the user. For safety reasons,
all maintenance work must be carried out by
qualified aftersales technicians. G
WARNING
Only when the vehicle is stationary should
you:
R insert a data carrier
R eject a disc There is a risk of being distracted from the
road and traffic conditions if you insert or
eject a disc while the vehicle is in motion.
Inserting/ejecting CDs/DVDs Notes
If the CD/DVD has a printed side, this must
face upwards when the CD/DVD is inserted.
If
neither
side is printed, the side to be played
should face downwards. The system may not
be able to play CDs/DVDs with copy
protection.
i If a medium contains other files in
addition to music files, the loading time
before the first track starts to play may be
longer.
Inserting a disc into the single DVD drive
X Press the 8 eject button.
If there is a disc already inserted, it will be
ejected.
X Take the disc out of the slot.
X Insert a disc into the slot.
If the disc is correctly inserted and is a
suitable disc,
it is drawn in by the drive and
played.
Ejecting a disc from the single DVD drive
X Press the 8 eject button.
X Take the disc out of the slot.
If you
do not take the disc out of the slot, it
is drawn in again automatically after a short
while and reloaded.
Inserting discs into the DVD changer
The DVD changer has a fixed magazine with
six trays.
X To insert a CD/DVD into the magazine
tray: press the V load/eject button.
A menu shows the current load status of
the magazine trays. The last tray selected
is identified by a red digit. Audio
421
COMAND Z
Page 455 of 572
Basic settings
Adjusting the brightness, contrast or
color X
In DVD video or video AUX mode, press
W the COMAND controller and show the
menu.
X Select DVD-Video by sliding VÆ and
turning cVd the COMAND controller and
press W to confirm.
A menu appears.
X Select Brightness, Contrast or
Color
by
turning cVd the COMAND controller and
press W to confirm.
Changing the picture format X
Press
W the COMAND controller to show
the menu.
X Select DVD-Video by sliding VÆ and
cVd turning the COMAND controller and
press W to confirm.
A menu appears.
X Select 16:9 Optimized, 4:3 or
Widescreen and press W to confirm.
The dot in front of the entry indicates the
currently selected format.
X Select a setting by turning cVd the
COMAND controller and press W to
confirm. Video DVD mode
Safety notes G
WARNING
COMAND is classified as a Class 1 laser
product. Never open the housing. There is a
risk of
damage to the eyes due to exposure to
invisible laser radiation if you open the casing,
or if the casing is faulty or damaged.
COMAND does not contain any parts that can
be serviced by the user. For safety reasons, all maintenance work must be carried out by
qualified aftersales technicians.
G
WARNING
Only when the vehicle is stationary should
you:
R load a disc
R eject a disc
There is a risk of being distracted from the
road and
traffic conditions if this is done while
the vehicle is in motion.
Notes on discs !
Do not
affix stickers or labels to the discs.
They could peel off and damage COMAND.
Stickers can cause the disc to bend, which
can result in read errors and disc
recognition problems.
! COMAND is designed to play discs that
comply with the EN 60908 standard.
Therefore, you can only use discs with a
maximum thickness of 1.3 mm.
If you insert thicker discs, e.g. those that
contain data on both sides (DVD on one
side and audio data on the other), they
cannot be ejected and can damage the
device.
Only use round discs with a diameter of
12 cm. Do not use discs with a diameter of
8 cm, even with an adapter.
Playback problems may occur when playing
copied discs. There are a large variety of
discs, DVD authoring software, writing
software and writers available. This variety
means that there is no guarantee that the
system will be able to play discs that you have
copied yourself.
DVD playback conditions If
video DVDs do not conform to the NTSC or
PAL TV standards, they may create picture,
sound or other problems during playback. Video
453
COMAND Z