2013 MERCEDES-BENZ GLA SUV towing
[x] Cancel search: towingPage 347 of 401
Position number
Bidentifies the charged battery of the other vehicle or an equivalent jump-
starting device.
X Press together cover :of positive clamp ;and slide it back.
X Connect positive terminal ;on your vehicle to positive terminal =of donor battery B
using the jump lead. beginning with your own battery.
X Start the engine of the donor vehicle and run it at idling speed.
X Connect negative terminal ?of donor battery Bto earth point Aof your vehicle using the
jump lead, connecting the jump lead to donor battery Bfirst.
X Start the engine.
X Before disconnecting the jump leads, let the engines run for several minutes.
X First, remove the jump leads from earth point Aand negative terminal ?, then from pos-
itive clamp ;and positive terminal =. Begin each time at the contacts on your own vehicle
first.
X Close cover :of positive clamp ;after removing the jump leads.
X Have the battery checked at a qualified specialist workshop.
i Jump-starting is not considered to be a normal operating condition.
i Jump-starting cables and further information regarding jump starting can be obtained at
any qualified specialist workshop. Towing and tow-starting
Important safety notes
G
WARNING
Safety relevant functions are restricted or no
longer available if:
R the engine is not running
R the brake system or power steering is mal-
functioning
R there is a malfunction in the voltage supply
or the vehicle's electrical system
When your vehicle is towed away or towed
started, you may require considerably more
effort to steer and brake. There is a risk of an
accident.
In such cases use a rigid towing bar. Before
being towed away or tow started, make sure
the steering moves freely. G
WARNING
If the weight of the vehicle to be towed or tow- started is greater than the permissible gross
weight of your vehicle:
R the towing eye could detach itself
R the vehicle/trailer combination could over-
turn.
There is a risk of an accident.
When towing or tow-starting another vehicle,
its weight should not be greater than the per-
missible gross weight of your vehicle.
Information on your vehicle's gross vehicle
weight rating can be found on the vehicle
identification plate (Y page 384).344
Towing and tow-startingBreakdown assistance
Page 348 of 401
!
When COLLISION PREVENTION ASSIST
PLUS, DISTRONIC PLUS or the HOLD func- tion is activated, the vehicle brakes auto-
matically in certain situations. To avoid
damage to the vehicle, deactivate these
systems in the following or similar situa-
tions:
R when towing away
R in a car wash
! Only secure the tow cable or tow bar to
the towing eyes or, if available, to the trailer
tow hitch. You could otherwise damage the
vehicle.
! Observe the following points when towing
with a tow rope:
R Secure the tow rope on the same side on
both vehicles.
R Make sure that the tow rope is not longer
than legally permitted. Mark the tow rope
in the middle, e.g. with a white cloth
(30 x 30 cm). This will make other road
users aware that a vehicle is being
towed.
R Only secure the tow cable to the towing
eyes or, if available, to the trailer tow
hitch.
R Observe the brake lamps of the towing
vehicle while driving. Always maintain a
distance a distance so that the tow rope
does not sag.
R Do not use steel cables or chains to tow
your vehicle. You could otherwise dam-
age the vehicle.
! Do not use the towing eyes for recovery
purposes as this could damage the vehicle.
If in doubt, recover the vehicle with a crane.
! Pull away smoothly when towing away or
tow-starting a vehicle. If the tractive power
is too high, the vehicles could be damaged.
! You may tow the vehicle for a maximum of
50km. A towing speed of 50 km/h must not be exceeded. For towing distances over 50 km, the front
axle or the entire vehicle must be raised
and transported.
! If you tow or tow-start another vehicle, its
weight must not exceed the maximum per- missible gross vehicle weight of your vehi-
cle.
! Vehicles with automatic transmission
must not be tow-started. The transmission
may otherwise be damaged.
Observe the legal requirements for the rele-
vant countries when towing and tow-starting.
It is better to have the vehicle transported
than to have it towed.
Vehicles with automatic transmission:
when towing a vehicle, the transmission must be in position N.
The battery must be connected and charged.
Otherwise, you:
R cannot turn the key in the ignition lock to
position 2
R cannot shift the transmission to position N
on vehicles with automatic transmis-
sion
i Deactivate the automatic locking feature
before the vehicle is towed (Y page 249).
You could otherwise be locked out when
pushing or towing the vehicle.
Deactivate tow-away protection
(Y page 81) before the vehicle is towed. Towing and tow-starting
345Breakdown assistance Z
Page 349 of 401
Fitting/removing the towing eye
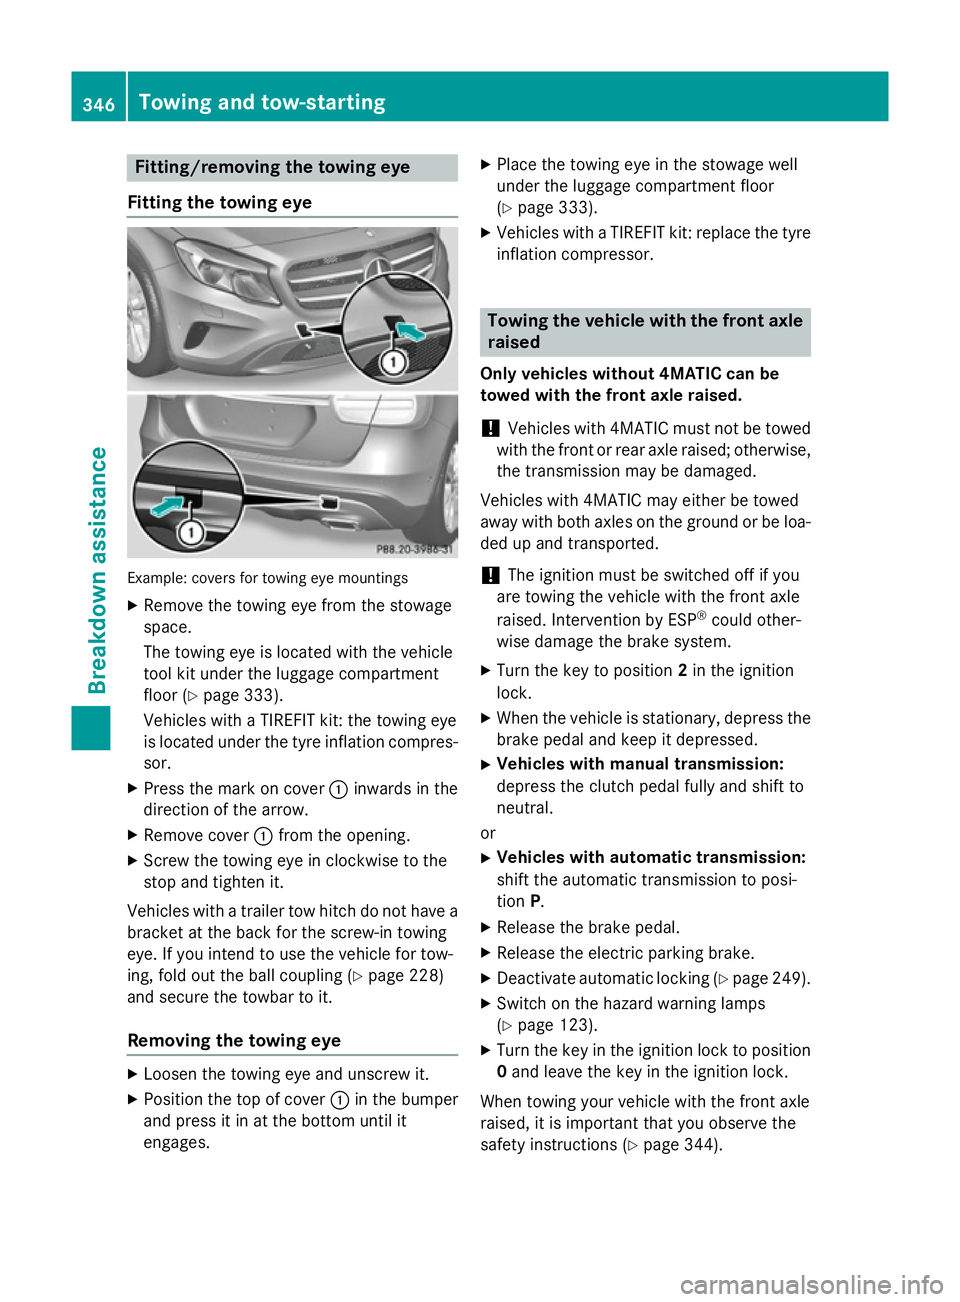
Fitting the towing eye Example: covers for towing eye mountings
X Remove the towing eye from the stowage
space.
The towing eye is located with the vehicle
tool kit under the luggage compartment
floor (Y page 333).
Vehicles with a TIREFIT kit: the towing eye
is located under the tyre inflation compres-
sor.
X Press the mark on cover :inwards in the
direction of the arrow.
X Remove cover :from the opening.
X Screw the towing eye in clockwise to the
stop and tighten it.
Vehicles with a trailer tow hitch do not have a bracket at the back for the screw-in towing
eye. If you intend to use the vehicle for tow-
ing, fold out the ball coupling (Y page 228)
and secure the towbar to it.
Removing the towing eye X
Loosen the towing eye and unscrew it.
X Position the top of cover :in the bumper
and press it in at the bottom until it
engages. X
Place the towing eye in the stowage well
under the luggage compartment floor
(Y page 333).
X Vehicles with a TIREFIT kit: replace the tyre
inflation compressor. Towing the vehicle with the front axle
raised
Only vehicles without 4MATIC can be
towed with the front axle raised.
! Vehicles with 4MATIC must not be towed
with the front or rear axle raised; otherwise, the transmission may be damaged.
Vehicles with 4MATIC may either be towed
away with both axles on the ground or be loa-
ded up and transported.
! The ignition must be switched off if you
are towing the vehicle with the front axle
raised. Intervention by ESP ®
could other-
wise damage the brake system.
X Turn the key to position 2in the ignition
lock.
X When the vehicle is stationary, depress the
brake pedal and keep it depressed.
X Vehicles with manual transmission:
depress the clutch pedal fully and shift to
neutral.
or
X Vehicles with automatic transmission:
shift the automatic transmission to posi-
tion P.
X Release the brake pedal.
X Release the electric parking brake.
X Deactivate automatic locking (Y page 249).
X Switch on the hazard warning lamps
(Y page 123).
X Turn the key in the ignition lock to position
0 and leave the key in the ignition lock.
When towing your vehicle with the front axle
raised, it is important that you observe the
safety instructions (Y page 344).346
Towing and tow-startingBreakdown assistance
Page 350 of 401
Towing the vehicle with both axles on
the ground
i In order to signal a change of direction
when towing with the hazard warning lamps switched on, use the combination switch as
usual. In this case, only the turn signals for
the desired direction flash. When you reset
the combination switch, the hazard warn-
ing lamps start flashing again.
Vehicles with automatic transmission: the
automatic transmission automatically shifts
to position Pwhen you open the driver's or
front-passenger door or when you remove the
key from the ignition lock. In order to ensure that the automatic transmission stays in posi- tion Nwhen towing the vehicle, you must
observe the following points:
X Make sure that the vehicle is stationary.
X Turn the key to position 2in the ignition
lock.
X Depress and hold the brake pedal.
X Shift the automatic transmission to posi-
tion N.
Vehicles with manual transmission: X Turn the key to position 2in the ignition
lock.
X Depress and hold the brake pedal.
X Depress the clutch pedal fully and shift to
neutral.
Vehicles with manual or automatic trans- mission:
X Leave the key in position 2in the ignition
lock.
X Release the brake pedal.
X Release the electric parking brake.
X Switch on the hazard warning lamps
(Y page 123).
It is important that you observe the safety
instructions when towing away your vehicle
(Y page 344). Transporting the vehicle
! You may only secure the vehicle by the
wheels, not by parts of the vehicle such as
axle or steering components. Otherwise,
the vehicle could be damaged.
X Vehicles with manual transmission:
depress the clutch pedal fully and shift to
neutral.
X Vehicles with automatic transmission:
turn the key to position 2in the ignition
lock.
X Move the transmission to position N.
As soon as the vehicle is loaded: X Prevent the vehicle from rolling away by
applying the electric parking brake.
X Vehicles with manual transmission:
depress the clutch pedal fully and engage
first or reverse gear.
X Vehicles with automatic transmission:
shift the transmission to position P.
X Turn the key to position 0in the ignition
lock and remove it.
X Secure the vehicle.
The towing eyes or trailer tow hitch can be
used to pull the vehicle onto a trailer or trans-
porter if you wish to transport it. Notes for 4MATIC vehicles
! Vehicles with 4MATIC must not be towed
with the front or rear axle raised; otherwise, the transmission may be damaged.
Vehicles with 4MATIC may only be either
towed away with both axles on the ground or be loaded up and transported.
If the vehicle has transmission damage or
damage to the front or rear axle, have it trans-
ported on a transporter or trailer.
In the event of damage to the electrical
system
If the battery is defective, the automatic
transmission will be locked in position P. To
shift the automatic transmission to position Towing and tow-starting
347Breakdown assistance Z
Page 351 of 401
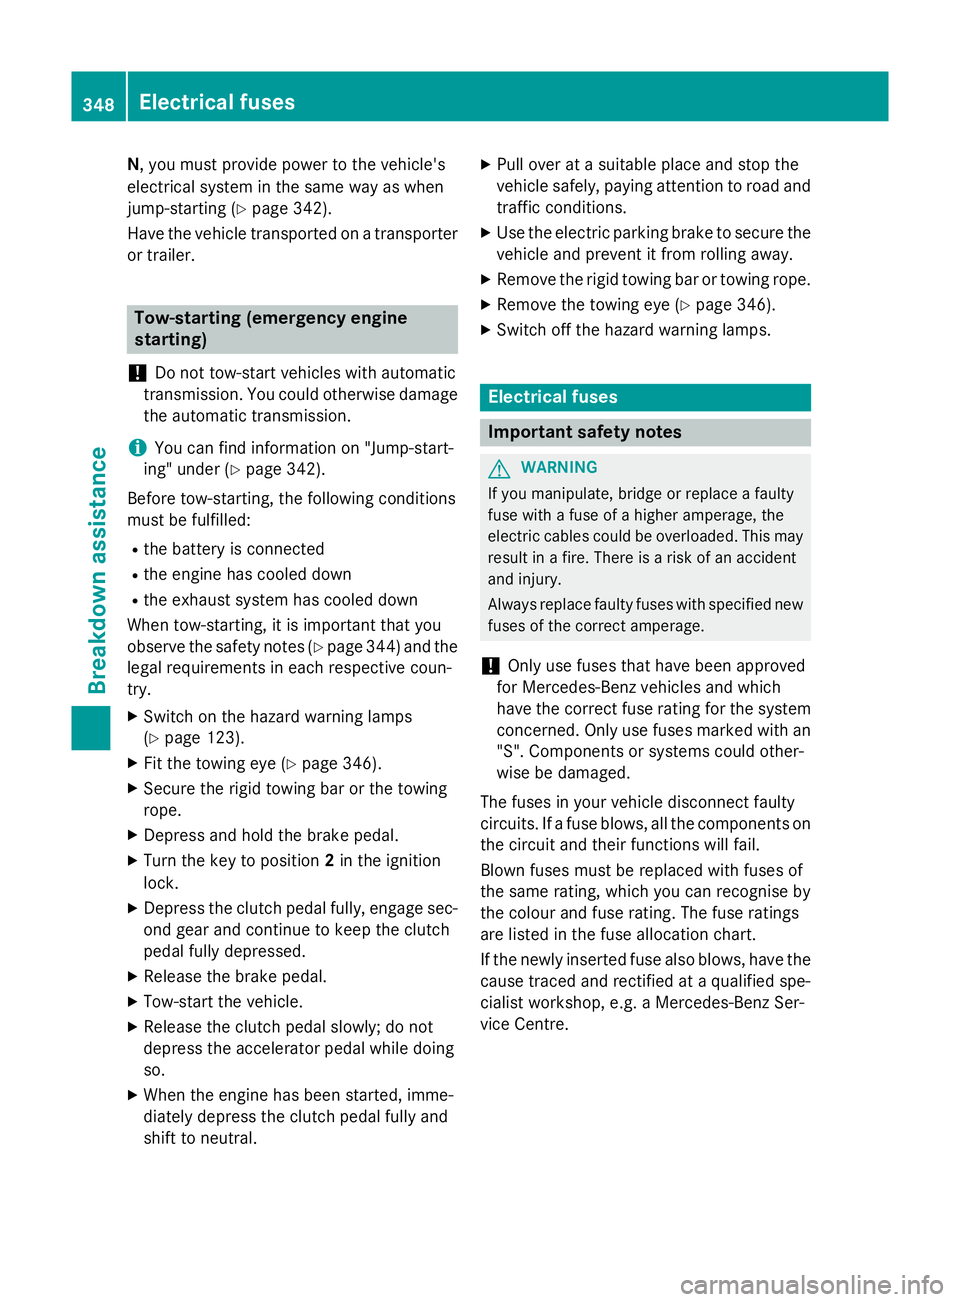
N, you must provide power to the vehicle's
electrical system in the same way as when
jump-starting (Y page 342).
Have the vehicle transported on a transporter or trailer. Tow-starting (emergency engine
starting)
! Do not tow-start vehicles with automatic
transmission. You could otherwise damage the automatic transmission.
i You can find information on "Jump-start-
ing" under (Y page 342).
Before tow-starting, the following conditions
must be fulfilled:
R the battery is connected
R the engine has cooled down
R the exhaust system has cooled down
When tow-starting, it is important that you
observe the safety notes (Y page 344) and the
legal requirements in each respective coun-
try.
X Switch on the hazard warning lamps
(Y page 123).
X Fit the towing eye (Y page 346).
X Secure the rigid towing bar or the towing
rope.
X Depress and hold the brake pedal.
X Turn the key to position 2in the ignition
lock.
X Depress the clutch pedal fully, engage sec-
ond gear and continue to keep the clutch
pedal fully depressed.
X Release the brake pedal.
X Tow-start the vehicle.
X Release the clutch pedal slowly; do not
depress the accelerator pedal while doing
so.
X When the engine has been started, imme-
diately depress the clutch pedal fully and
shift to neutral. X
Pull over at a suitable place and stop the
vehicle safely, paying attention to road and
traffic conditions.
X Use the electric parking brake to secure the
vehicle and prevent it from rolling away.
X Remove the rigid towing bar or towing rope.
X Remove the towing eye (Y page 346).
X Switch off the hazard warning lamps. Electrical fuses
Important safety notes
G
WARNING
If you manipulate, bridge or replace a faulty
fuse with a fuse of a higher amperage, the
electric cables could be overloaded. This may result in a fire. There is a risk of an accident
and injury.
Always replace faulty fuses with specified new fuses of the correct amperage.
! Only use fuses that have been approved
for Mercedes-Benz vehicles and which
have the correct fuse rating for the system concerned. Only use fuses marked with an
"S". Components or systems could other-
wise be damaged.
The fuses in your vehicle disconnect faulty
circuits. If a fuse blows, all the components on the circuit and their functions will fail.
Blown fuses must be replaced with fuses of
the same rating, which you can recognise by
the colour and fuse rating. The fuse ratings
are listed in the fuse allocation chart.
If the newly inserted fuse also blows, have the
cause traced and rectified at a qualified spe-
cialist workshop, e.g. a Mercedes-Benz Ser-
vice Centre. 348
Electrical fusesBreakdown assistance
Page 360 of 401
pressure can be checked using the on-board
computer.
If possible, only correct tyre pressures when
the tyres are cold.
The tyres are cold:
R if the vehicle has been parked with the tyres
out of direct sunlight for at least three
hours and
R if the vehicle has not been driven further
than 1.6 km
Depending on the ambient temperature, the
speed at which you are driving and the load on the tyres, the tyre temperature and thus the
tyre pressure changes by approximately
10 kPa (0.1 bar/1.5 psi) per 10 †. Take this
into account when checking the pressure of
warm tyres. Only correct the tyre pressure if it
is too low for the current operating condi-
tions.
Driving with tyre pressure that is too high or
too low can:
R shorten the service life of the tyres
R cause increased tyre damage
R have a negative effect on handling charac-
teristics and thus driving safety (e.g. aqua-
planing)
i The tyre pressure values given for low
loads are minimum values which offer you
good ride comfort characteristics.
However, you can also use the values given for higher loads. These are permissible andwill not adversely affect the running of the
vehicle. Tyre pressure loss warning system
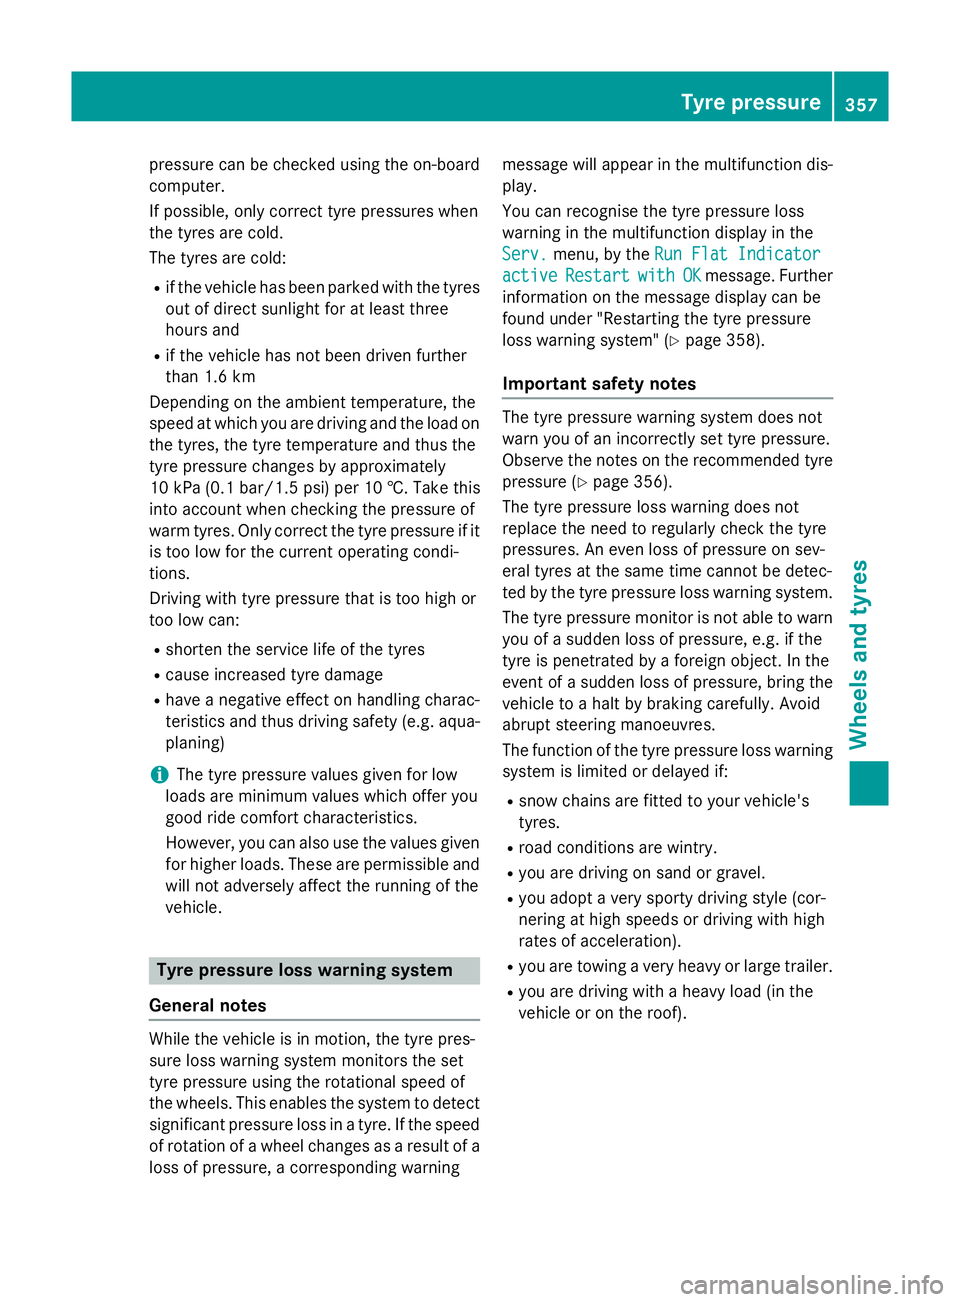
General notes While the vehicle is in motion, the tyre pres-
sure loss warning system monitors the set
tyre pressure using the rotational speed of
the wheels. This enables the system to detect
significant pressure loss in a tyre. If the speed of rotation of a wheel changes as a result of aloss of pressure, a corresponding warning message will appear in the multifunction dis-
play.
You can recognise the tyre pressure loss
warning in the multifunction display in the
Serv.
Serv. menu, by the Run Flat Indicator Run Flat Indicator
active
active Restart
Restart with
withOK
OKmessage. Further
information on the message display can be
found under "Restarting the tyre pressure
loss warning system" (Y page 358).
Important safety notes The tyre pressure warning system does not
warn you of an incorrectly set tyre pressure.
Observe the notes on the recommended tyre
pressure (Y page 356).
The tyre pressure loss warning does not
replace the need to regularly check the tyre
pressures. An even loss of pressure on sev-
eral tyres at the same time cannot be detec-
ted by the tyre pressure loss warning system. The tyre pressure monitor is not able to warn
you of a sudden loss of pressure, e.g. if the
tyre is penetrated by a foreign object. In the
event of a sudden loss of pressure, bring the
vehicle to a halt by braking carefully. Avoid
abrupt steering manoeuvres.
The function of the tyre pressure loss warning system is limited or delayed if:
R snow chains are fitted to your vehicle's
tyres.
R road conditions are wintry.
R you are driving on sand or gravel.
R you adopt a very sporty driving style (cor-
nering at high speeds or driving with high
rates of acceleration).
R you are towing a very heavy or large trailer.
R you are driving with a heavy load (in the
vehicle or on the roof). Tyre pressure
357Wheels and tyres Z
Page 391 of 401
obtained from any qualified specialist
workshop.
Usually you will find information about the
fuel grade on the pump. If you cannot find the label on the petrol pump, ask the filling sta-
tion staff.
Information on refuelling (Y page 175).
Low outside temperatures
In winter months, diesel fuel with an improved cold flow quality is available. In Europe, the
EN 590 standard defines various climate-
dependent temperature categories. Malfunc-
tions can be avoided by refuelling with diesel
fuel that corresponds to the climatic specifi-
cations outlined in EN 590. At unusually low
outside temperatures, it is possible that the
flow characteristics of the diesel fuel could be insufficient. Accordingly, diesel fuel from
warmer areas may not be suitable for opera-
tion in colder climatic conditions.
i Further information on country-specific
fuel properties and fuel types with low-tem-
perature resistance can be obtained from
oil companies, e.g. at filling stations.
Fuel consumption information H
Environmental note
CO 2(carbon dioxide) is the gas which scien-
tists believe to be principally responsible for
global warming (the greenhouse effect). Your
vehicle's CO 2emissions are directly related to
fuel consumption and therefore depend on:
R efficient use of the fuel by the engine
R driving style
R other non-technical factors, such as envi-
ronmental influences, road conditions or
traffic flow
You can minimise your vehicle's CO 2emis-
sions by driving carefully and having it serv-
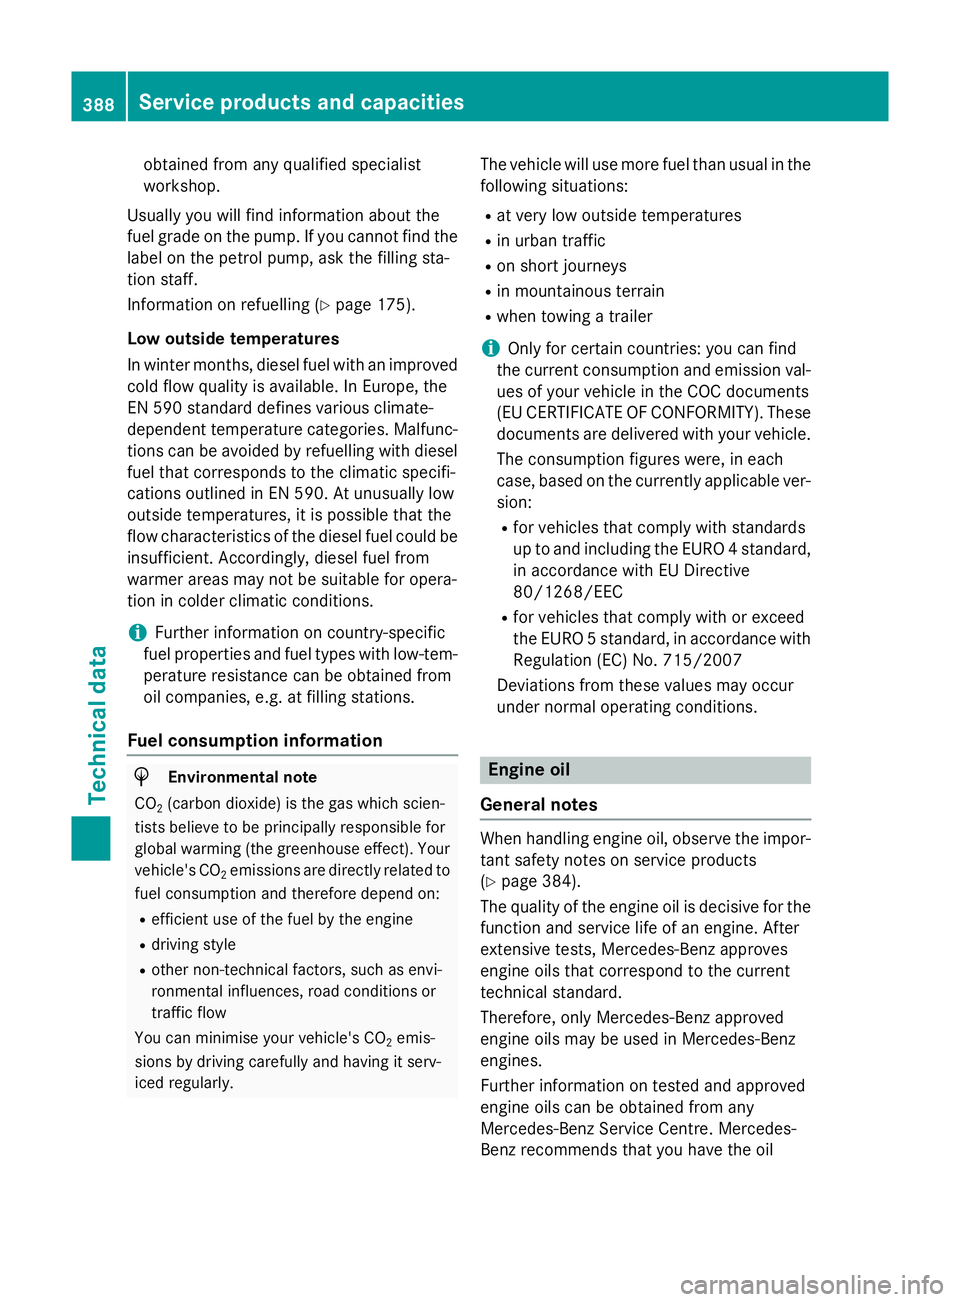
iced regularly. The vehicle will use more fuel than usual in the
following situations:
R at very low outside temperatures
R in urban traffic
R on short journeys
R in mountainous terrain
R when towing a trailer
i Only for certain countries: you can find
the current consumption and emission val-
ues of your vehicle in the COC documents
(EU CERTIFICATE OF CONFORMITY). These documents are delivered with your vehicle.
The consumption figures were, in each
case, based on the currently applicable ver- sion:
R for vehicles that comply with standards
up to and including the EURO 4 standard, in accordance with EU Directive
80/1268/EEC
R for vehicles that comply with or exceed
the EURO 5 standard, in accordance with
Regulation (EC) No. 715/2007
Deviations from these values may occur
under normal operating conditions. Engine oil
General notes When handling engine oil, observe the impor-
tant safety notes on service products
(Y page 384).
The quality of the engine oil is decisive for the
function and service life of an engine. After
extensive tests, Mercedes-Benz approves
engine oils that correspond to the current
technical standard.
Therefore, only Mercedes-Benz approved
engine oils may be used in Mercedes-Benz
engines.
Further information on tested and approved
engine oils can be obtained from any
Mercedes-Benz Service Centre. Mercedes-
Benz recommends that you have the oil 388
Service products and capacitiesTechnical data
Page 399 of 401
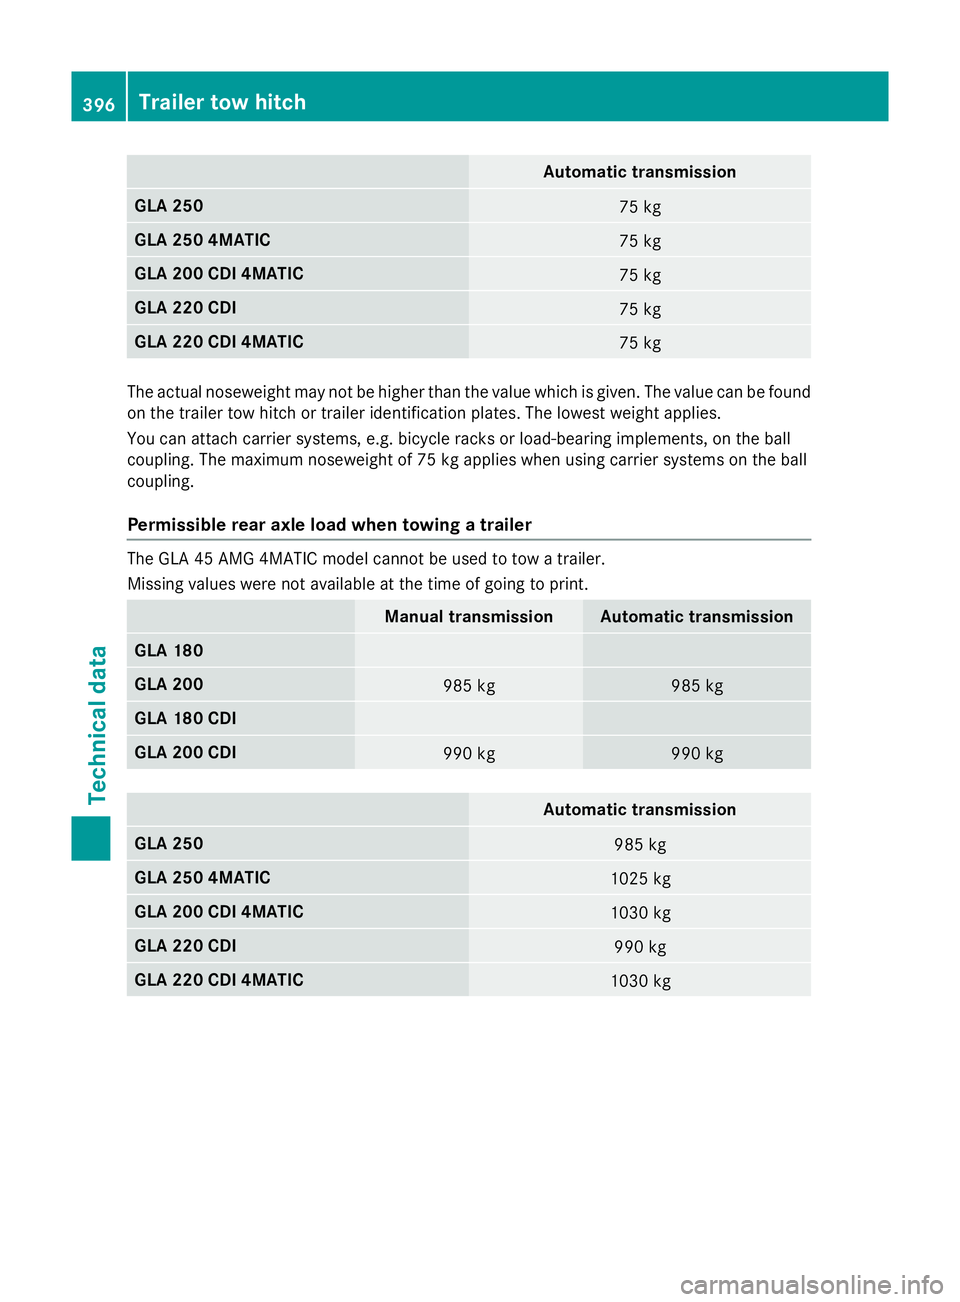
Automatic transmission
GLA 250
75 kg
GLA 250 4MATIC
75 kg
GLA 200 CDI 4MATIC
75 kg
GLA 220 CDI
75 kg
GLA 220 CDI 4MATIC
75 kg
The actual noseweight may not be higher than the value which is given. The value can be found
on the trailer tow hitch or trailer identification plates. The lowest weight applies.
You can attach carrier systems, e.g. bicycle racks or load-bearing implements, on the ball
coupling. The maximum noseweight of 75 kg applies when using carrier systems on the ball
coupling.
Permissible rear axle load when towing a trailer The GLA 45 AMG 4MATIC model cannot be used to tow a trailer.
Missing values were not available at the time of going to print. Manual transmission Automatic transmission
GLA 180
GLA 200
985 kg 985 kg
GLA 180 CDI
GLA 200 CDI
990 kg 990 kg
Automatic transmission
GLA 250
985 kg
GLA 250 4MATIC
1025 kg
GLA 200 CDI 4MATIC
1030 kg
GLA 220 CDI
990 kg
GLA 220 CDI 4MATIC
1030 kg396
Trailer tow hitchTechnical data