2013 MERCEDES-BENZ CLA-CLASS reset
[x] Cancel search: resetPage 198 of 352
Rif you have adopted a sporty driving style
with high cornering speeds or high rates of
acceleration
R if you are predominantly driving slower
than 80 km/h or faster than 180 km/h
R if you are currently using COMAND Online
or making a telephone call with COMAND
Online
R if the time has been set incorrectly
R in active driving situations, such as when
you change lanes or change your speed
Warning and display messages in the
multifunction displayXActivate ATTENTION ASSIST using the on-
board computer ( Y page 218).
The À symbol appears in the assistance
display ( Y page 217).
If ATTENTION ASSIST is active, it will not
warn you until at least 20 minutes after
your journey has begun. You then hear an
intermittent warning tone twice and the
Attention Assist: Take a break!
message appears in the multifunction dis-
play.XIf necessary, take a break.XPress the a button to confirm the mes-
sage.
On long journeys, take regular breaks in good
time to allow yourself to rest properly. If you
do not take a break, you will be warned again
after 15 minutes at the earliest. This will only
happen if ATTENTION ASSIST still detects
typical indicators of fatigue or increasing lap-
ses in concentration.
ATTENTION ASSIST is reset and starts
assessing your tiredness again when you con-
tinue your journey if:
R you switch off the engine
R you take off your seat belt and open the
driver's door, e.g. for a change of drivers or
to take a break
Speed Limit Assist
General notes
Speed Limit Assist shows you detected speed
limits in the multifunction display. Data from
the navigation system is also used for this
purpose. If a traffic sign indicating a speed
limit or the end of a speed limit is detected,
it is shown in the multifunction display. If
Speed Limit Assist does not detect any traffic
signs, the speed limit from the digital road
map is taken and shown in the display.
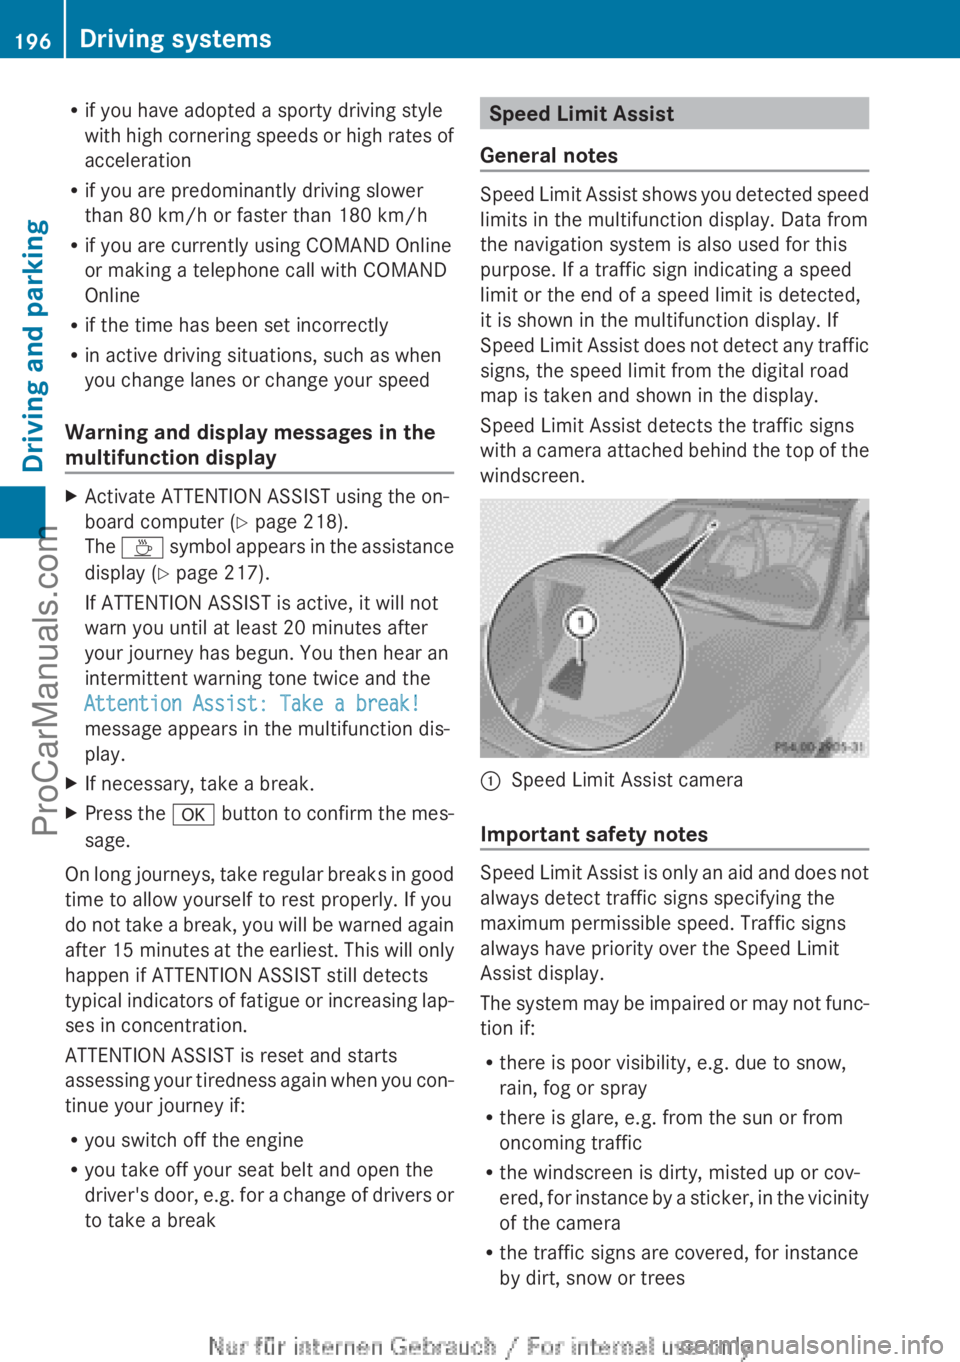
Speed Limit Assist detects the traffic signs
with a camera attached behind the top of the
windscreen.
:Speed Limit Assist camera
Important safety notes
Speed Limit Assist is only an aid and does not
always detect traffic signs specifying the
maximum permissible speed. Traffic signs
always have priority over the Speed Limit
Assist display.
The system may be impaired or may not func-
tion if:
R there is poor visibility, e.g. due to snow,
rain, fog or spray
R there is glare, e.g. from the sun or from
oncoming traffic
R the windscreen is dirty, misted up or cov-
ered, for instance by a sticker, in the vicinity
of the camera
R the traffic signs are covered, for instance
by dirt, snow or trees
196Driving systemsDriving and parking
ProCarManuals.com
Page 213 of 352
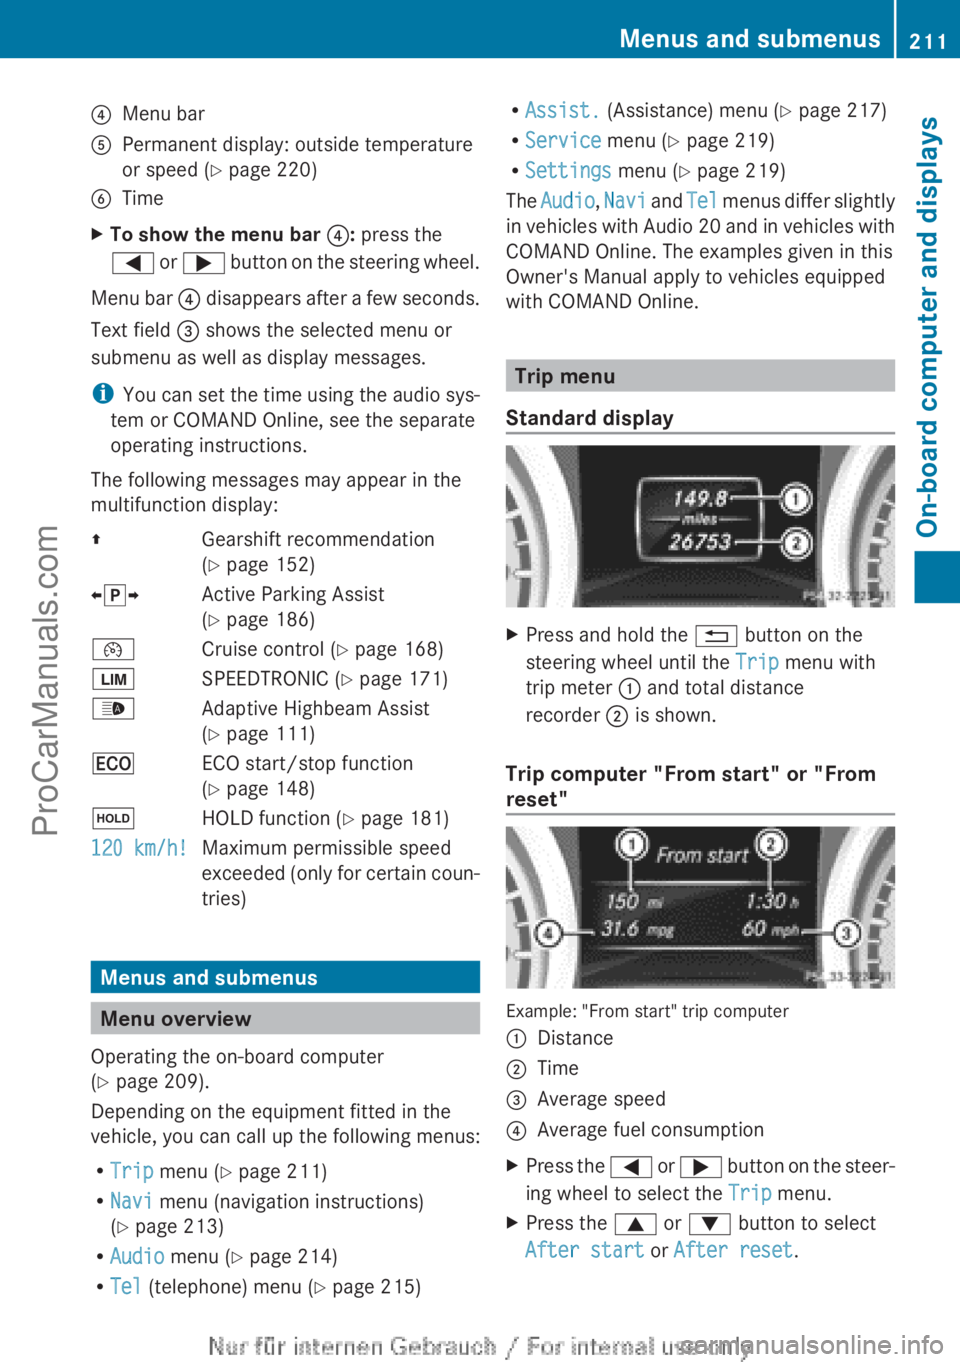
?Menu barAPermanent display: outside temperature
or speed ( Y page 220)BTimeXTo show the menu bar ?: press the
= or ; button on the steering wheel.
Menu bar ? disappears after a few seconds.
Text field = shows the selected menu or
submenu as well as display messages.
i You can set the time using the audio sys-
tem or COMAND Online, see the separate
operating instructions.
The following messages may appear in the
multifunction display:
ZGearshift recommendation
( Y page 152)Xj YActive Parking Assist
( Y page 186)¯Cruise control ( Y page 168)ÈSPEEDTRONIC ( Y page 171)_Adaptive Highbeam Assist
( Y page 111)¤ECO start/stop function
( Y page 148)ëHOLD function ( Y page 181)120 km/h!Maximum permissible speed
exceeded (only for certain coun-
tries)
Menus and submenus
Menu overview
Operating the on-board computer
( Y page 209).
Depending on the equipment fitted in the
vehicle, you can call up the following menus:
R Trip menu ( Y page 211)
R Navi menu (navigation instructions)
( Y page 213)
R Audio menu ( Y page 214)
R Tel (telephone) menu ( Y page 215)
R
Assist. (Assistance) menu ( Y page 217)
R Service menu (Y page 219)
R Settings menu (Y page 219)
The Audio , Navi and Tel menus differ slightly
in vehicles with Audio 20 and in vehicles with
COMAND Online. The examples given in this
Owner's Manual apply to vehicles equipped
with COMAND Online.
Trip menu
Standard display
XPress and hold the % button on the
steering wheel until the Trip menu with
trip meter : and total distance
recorder ; is shown.
Trip computer "From start" or "From
reset"
Example: "From start" trip computer
:Distance;Time=Average speed?Average fuel consumptionXPress the = or ; button on the steer-
ing wheel to select the Trip menu.XPress the 9 or : button to select
After start or After reset .Menus and submenus211On-board computer and displaysZProCarManuals.com
Page 214 of 352
The values in the From start submenu are
calculated from the start of a journey, whilst
the values in the From reset submenu are
calculated from the last time the submenu
was reset ( Y page 212).
The From start trip computer is automati-
cally reset when:
R the ignition has been switched off for more
than four hours.
R 999 hours have been exceeded.
R 9,999 kilometres have been exceeded.
If the value exceeds 9,999 hours or
99,999 kilometres, the From reset trip com-
puter is automatically reset.
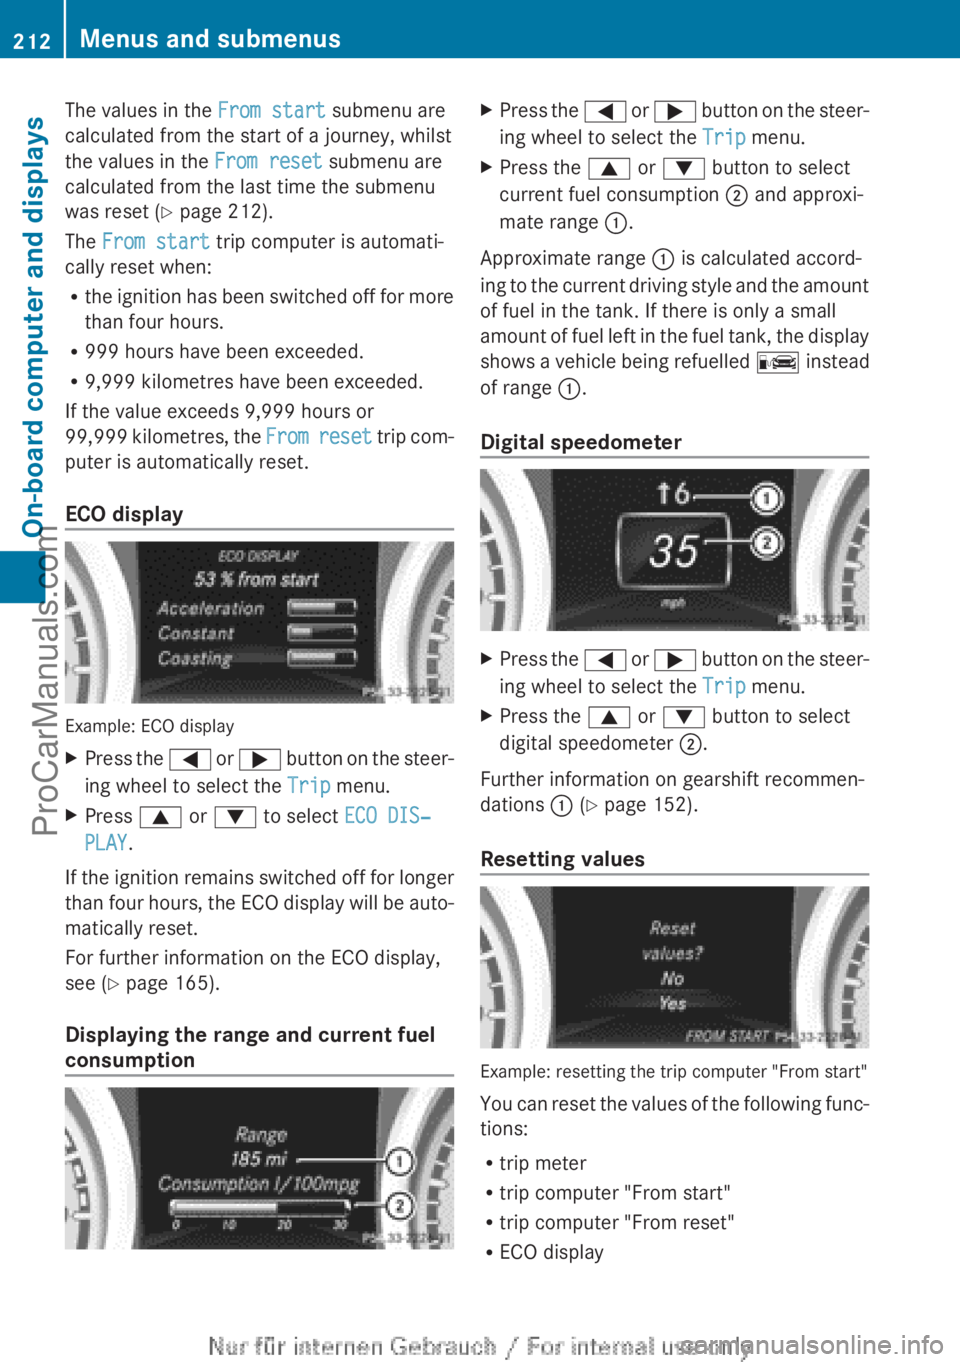
ECO display
Example: ECO display
XPress the = or ; button on the steer-
ing wheel to select the Trip menu.XPress 9 or : to select ECO DIS‐
PLAY .
If the ignition remains switched off for longer
than four hours, the ECO display will be auto-
matically reset.
For further information on the ECO display,
see ( Y page 165).
Displaying the range and current fuel
consumption
XPress the = or ; button on the steer-
ing wheel to select the Trip menu.XPress the 9 or : button to select
current fuel consumption ; and approxi-
mate range :.
Approximate range : is calculated accord-
ing to the current driving style and the amount
of fuel in the tank. If there is only a small
amount of fuel left in the fuel tank, the display
shows a vehicle being refuelled C instead
of range :.
Digital speedometer
XPress the = or ; button on the steer-
ing wheel to select the Trip menu.XPress the 9 or : button to select
digital speedometer ;.
Further information on gearshift recommen-
dations : (Y page 152).
Resetting values
Example: resetting the trip computer "From start"
You can reset the values of the following func-
tions:
R trip meter
R trip computer "From start"
R trip computer "From reset"
R ECO display
212Menus and submenusOn-board computer and displays
ProCarManuals.com
Page 215 of 352
XPress the = or ; button on the steer-
ing wheel to select the Trip menu.XPress the 9 or : button to select the
function that you wish to reset.XPress the a button.XPress the : button to select Yes and
press a to confirm.
i
If you reset the values in the ECO display,
the values in the "From start" trip computer
are also reset. If you reset the values in the
"From start" trip computer, the values in
the ECO display are also reset.
Navigation menu
Displaying navigation instructions
XSwitch on Audio 20 with Becker ®
MAP
PILOT or COMAND Online (see the sepa-
rate operating instructions).XPress the = or ; button on the steer-
ing wheel to select the Navi menu.
In the Navi menu, the multifunction display
shows navigation instructions. For more
information, see the separate operating
instructions.
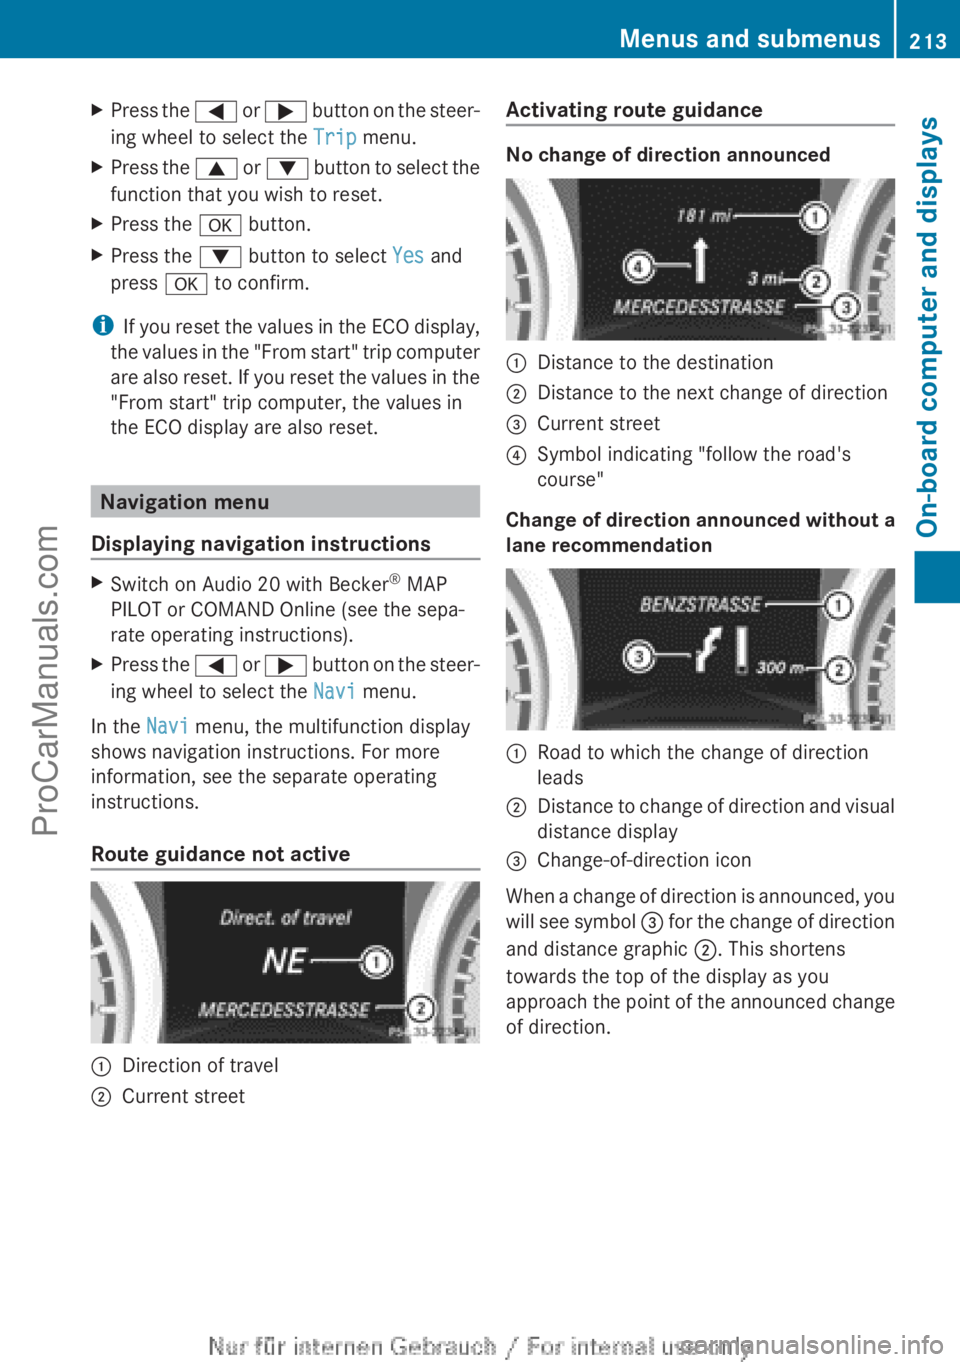
Route guidance not active
:Direction of travel;Current streetActivating route guidance
No change of direction announced
:Distance to the destination;Distance to the next change of direction=Current street?Symbol indicating "follow the road's
course"
Change of direction announced without a
lane recommendation
:Road to which the change of direction
leads;Distance to change of direction and visual
distance display=Change-of-direction icon
When a change of direction is announced, you
will see symbol = for the change of direction
and distance graphic ;. This shortens
towards the top of the display as you
approach the point of the announced change
of direction.
Menus and submenus213On-board computer and displaysZProCarManuals.com
Page 227 of 352
Convenience
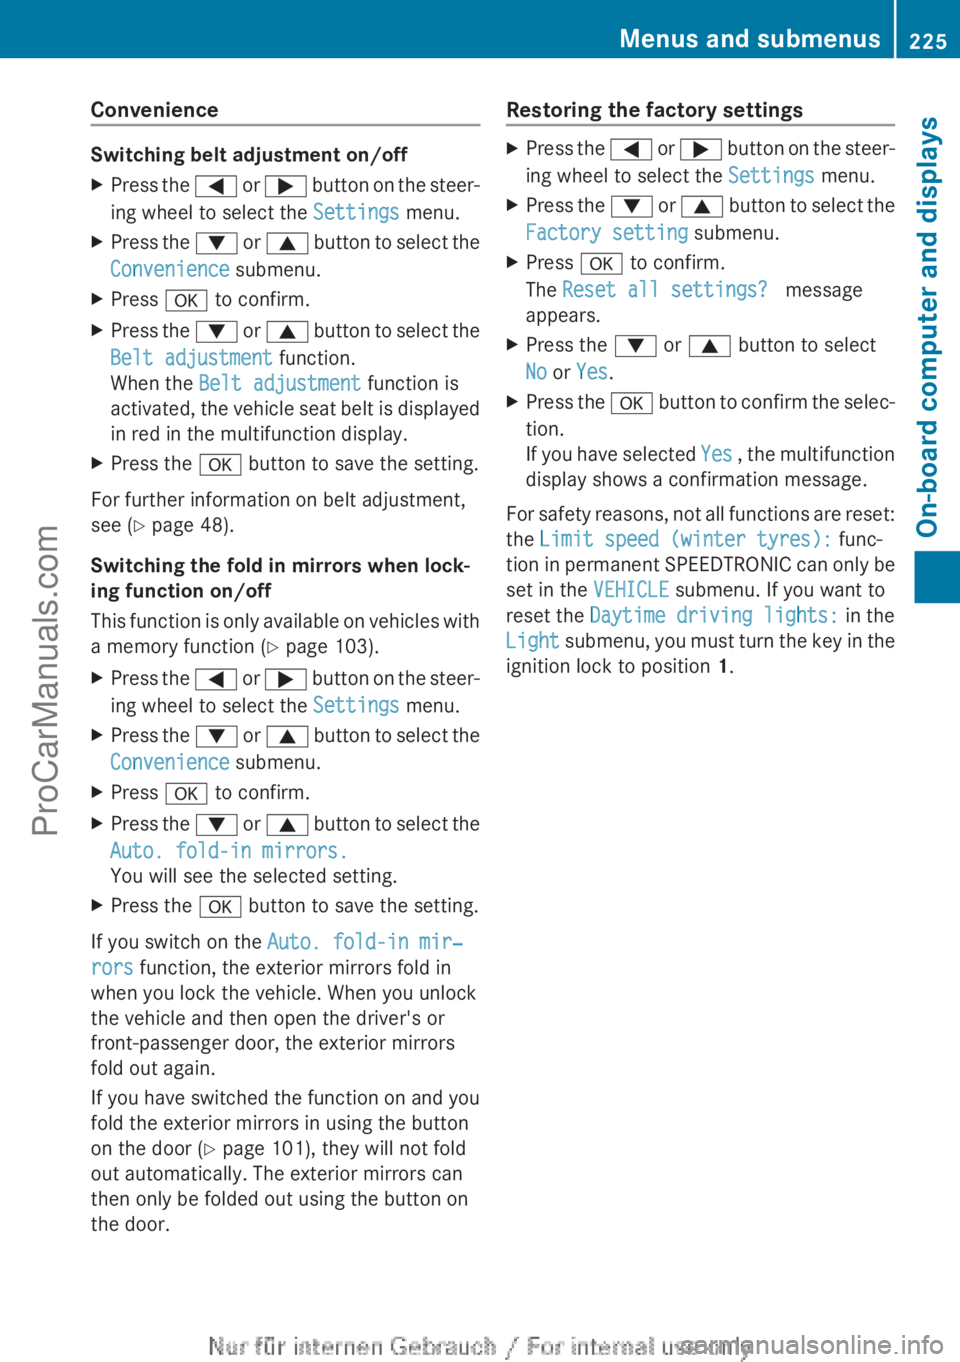
Switching belt adjustment on/off
XPress the = or ; button on the steer-
ing wheel to select the Settings menu.XPress the : or 9 button to select the
Convenience submenu.XPress a to confirm.XPress the : or 9 button to select the
Belt adjustment function.
When the Belt adjustment function is
activated, the vehicle seat belt is displayed
in red in the multifunction display.XPress the a button to save the setting.
For further information on belt adjustment,
see ( Y page 48).
Switching the fold in mirrors when lock-
ing function on/off
This function is only available on vehicles with
a memory function ( Y page 103).
XPress the = or ; button on the steer-
ing wheel to select the Settings menu.XPress the : or 9 button to select the
Convenience submenu.XPress a to confirm.XPress the : or 9 button to select the
Auto. fold-in mirrors.
You will see the selected setting.XPress the a button to save the setting.
If you switch on the Auto. fold-in mir‐
rors function, the exterior mirrors fold in
when you lock the vehicle. When you unlock
the vehicle and then open the driver's or
front-passenger door, the exterior mirrors
fold out again.
If you have switched the function on and you
fold the exterior mirrors in using the button
on the door ( Y page 101), they will not fold
out automatically. The exterior mirrors can
then only be folded out using the button on
the door.
Restoring the factory settingsXPress the = or ; button on the steer-
ing wheel to select the Settings menu.XPress the : or 9 button to select the
Factory setting submenu.XPress a to confirm.
The Reset all settings? message
appears.XPress the : or 9 button to select
No or Yes .XPress the a button to confirm the selec-
tion.
If you have selected Yes , the multifunction
display shows a confirmation message.
For safety reasons, not all functions are reset:
the Limit speed (winter tyres): func-
tion in permanent SPEEDTRONIC can only be
set in the VEHICLE submenu. If you want to
reset the Daytime driving lights: in the
Light submenu, you must turn the key in the
ignition lock to position 1.
Menus and submenus225On-board computer and displaysZProCarManuals.com
Page 284 of 352
Useful information
i This Owner's Manual describes all mod-
els, series and optional equipment for your
vehicle that were available at the time of
going to press. National variations are pos-
sible. Note that your vehicle may not be
equipped with all of the functions descri-
bed. This is also the case for systems and
functions relevant to safety.
i Read the information on qualified special-
ist workshops: ( Y page 24).
Engine compartment
Bonnet
Important safety notes
GWARNING
An unlocked bonnet may open while driving
and block your view. There is a risk of an acci-
dent.
Never unlock the bonnet while driving.
GWARNING
When being opened and closed, the bonnet
may suddenly fall into the closed position.
There is a risk of injury to persons in the range
of movement of the bonnet.
Open and close the bonnet only when nobody
is in the range of movement.
GWARNING
Certain components in the engine compart-
ment could be very hot, e.g. the engine, the
radiator and parts of the exhaust system.
There is a risk of injury when accessing the
engine compartment.
As far as possible, allow the engine to cool
down and only touch the following compo-
nents.
GWARNING
If you open the bonnet while the engine is
overheating or while there is a fire in the
engine compartment, you could come into
contact with hot gases or other leaking
service products. There is a danger of injury.
Allow an overheating engine to cool down
before opening the bonnet. If there is a fire in
the engine compartment, leave the bonnet
closed and notify the fire brigade.GWARNING
There are parts in the engine compartment
that move. Certain components may continue
to run even if the ignition is switched off or
may suddenly start again, e.g. the radiator
fan. There is a danger of injury.
If you need to access the engine compart-
ment:
R switch off the ignition
R never enter the danger area of moving com-
ponents, e.g. the rotation area of the fan
R keep items of clothing away from moving
parts
GWARNING
The ignition system and the fuel injection sys-
tem operate with a high voltage. If you touch
the live components, you could receive an
electric shock. There is a danger of injury.
Never touch components of the ignition sys-
tem or the fuel injection system when the
ignition is switched on.
Active bonnet (pedestrian protection)
Operating principle
! Once triggered, an active bonnet must be
reset at a qualified specialist workshop,
e.g. a Mercedes-Benz Service Centre. The
active bonnet function will then be availa-
ble again. The additional pedestrian pro-
tection provided by the active bonnet will
then be restored.
The active bonnet is only available in certain
countries.
The active bonnet can reduce the risk of injury
to pedestrians in certain accident situations.
282Engine compartmentMaintenance and care
ProCarManuals.com
Page 285 of 352
Raising the active bonnet increases the clear-
ance to hard components, such as the engine.
If the active bonnet has been triggered, it is
raised at the rear in the area around the hinge
by approximately 60 mm.
For the drive to the workshop, reset the trig-
gered active bonnet yourself. If the active
bonnet has been triggered, pedestrian pro-
tection may be limited.
ResettingGWARNING
Certain components in the engine compart-
ment could be very hot, e.g. the engine, the
radiator and parts of the exhaust system.
There is a risk of injury when accessing the
engine compartment.
As far as possible, allow the engine to cool
down and only touch the following compo-
nents.
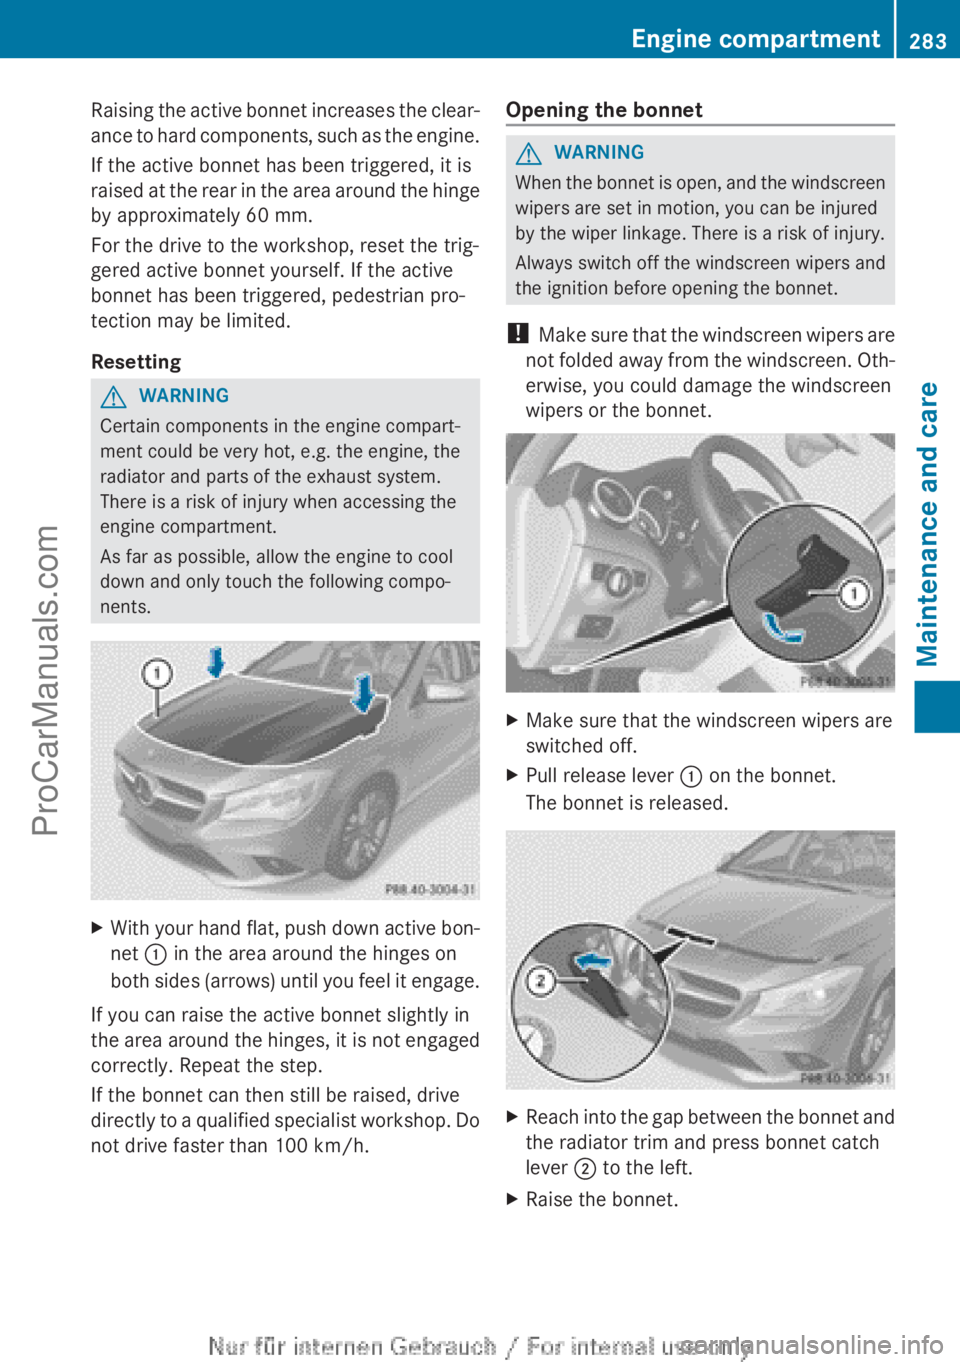
XWith your hand flat, push down active bon-
net : in the area around the hinges on
both sides (arrows) until you feel it engage.
If you can raise the active bonnet slightly in
the area around the hinges, it is not engaged
correctly. Repeat the step.
If the bonnet can then still be raised, drive
directly to a qualified specialist workshop. Do
not drive faster than 100 km/h.
Opening the bonnetGWARNING
When the bonnet is open, and the windscreen
wipers are set in motion, you can be injured
by the wiper linkage. There is a risk of injury.
Always switch off the windscreen wipers and
the ignition before opening the bonnet.
! Make sure that the windscreen wipers are
not folded away from the windscreen. Oth-
erwise, you could damage the windscreen
wipers or the bonnet.
XMake sure that the windscreen wipers are
switched off.XPull release lever : on the bonnet.
The bonnet is released.XReach into the gap between the bonnet and
the radiator trim and press bonnet catch
lever ; to the left.XRaise the bonnet.Engine compartment283Maintenance and careZProCarManuals.com
Page 289 of 352

Information on the type of service and service
intervals (see separate Service Booklet).
You can obtain further information from any
Mercedes-Benz Service Centre.
i The ASSYST PLUS service interval display
does not show any information on the
engine oil level. Observe the notes on the
engine oil level ( Y page 284).
The multifunction display shows a service
message for a few seconds, e.g.:
R Service A in .. days
R Service A due
R Service A overdue by .. days
Depending on the operating conditions of the
vehicle, the remaining time or distance until
the next service due date is displayed.
The letter indicates which service is due. A
stands for a minor service and B for a major
service. A number or another letter may be
displayed after the letter. This figure indicates
any necessary additional maintenance work
to be performed.
If you notify a qualified specialist workshop of
this display, you will receive a statement on
the associated costs.
The ASSYST PLUS service interval display
does not take into account any periods of
time during which the battery is disconnec-
ted.
Maintaining the time-dependent service
schedule:XNote down the service due date displayed
in the multifunction display before discon-
necting the battery.
or
XAfter reconnecting the battery, subtract
the battery disconnection periods from the
service date shown on the display.
Hiding a service message
XPress % or a .Displaying service messagesXSwitch the ignition on.XUsing = or ; , select the Service
menu.XPress 9 or : to select the ASSYST
PLUS submenu and press a to confirm.
The service due date appears in the multi-
function display.
Information about Service
Resetting the ASSYST PLUS service inter-
val display
! If the ASSYST PLUS service interval dis-
play has been inadvertently reset, this set-
ting can be corrected at a qualified special-
ist workshop.
Have service work carried out as described
in the Service Booklet. This may otherwise
lead to increased wear and damage to the
major assemblies or the vehicle.
A qualified specialist workshop, e.g. a
Mercedes-Benz Service Centre, will reset the
ASSYST PLUS service interval display after
the service work has been carried out. You
can also obtain further information on main-
tenance work, for example.
Special service requirements
The prescribed service interval is based on
normal operation of the vehicle. Service work
will need to be performed more often if the
vehicle is operated under arduous conditions
or increased loads, for example:
R regular city driving with frequent intermedi-
ate stops
R if the vehicle is primarily used to travel
short distances
R for frequent operation in mountainous ter-
rain or on poor road surfaces
R if the engine is often left idling for long peri-
ods
In these or similar operating conditions, have
the air filter, engine oil and oil filter, for exam-
ple, changed more frequently. The tyres must
Service287Maintenance and careZProCarManuals.com