2013 MERCEDES-BENZ CLA-CLASS oil pressure
[x] Cancel search: oil pressurePage 6 of 352

1, 2, 3 ...
12 V socket see Socket
A
ABS (Anti-lock Braking System) Display message ............................ 227
Function/notes ................................ 64
Important safety notes ....................64
Warning lamp ................................. 256
Activating/deactivating air-recir-
culation mode .................................... 134
Activating/deactivating cooling
with air dehumidification ................. 128
Active light function ......................... 110
Active Park Assist Display message ............................ 245
Active Parking Assist
Cancelling ...................................... 190
Detecting parking spaces ..............187
Exiting a parking space ..................189
Function/notes ............................. 186
Important safety notes ..................186
Parking .......................................... 188
Towing a trailer .............................. 191
ADAPTIVE BRAKE ................................. 70
Adaptive Brake Assist Display message ............................ 234
Function/notes ................................ 66
Adaptive brake lamps ......................... 68
Adaptive Highbeam Assist Display message ............................ 240
Function/notes ............................. 111
Switching on/off ........................... 112
Adaptive Main-beam Assist
Switching on/off (on-board com-
puter) ............................................. 221
Additional speedometer ................... 220
Additives (engine oil) ........................ 341
Adjusting the headlamp range ......... 108
Airbags Front airbag (driver, front
passenger) ....................................... 44
Important safety guidelines .............42
Kneebag ........................................... 44
Sidebag ............................................ 44
Triggering ......................................... 41
Windowbag ...................................... 45
Air-conditioning system
see Climate control
Air filter (white display message) .... 242
Air pressure see Tyre pressure
Air vents
Important safety notes ..................141
Rear ............................................... 142
Setting ........................................... 141
Setting the centre air vents ...........141
Setting the side air vents ...............142
Alarm system
see ATA (Anti-Theft Alarm system)
Ambient lighting
Setting the brightness (on-board
computer) ...................................... 222
Anti-glare film .................................... 280
Anti-lock braking system see ABS (Anti-lock Braking System)
Anti-Theft Alarm system
see ATA (Anti-Theft Alarm system)
Aquaplaning ....................................... 167
Ashtray ............................................... 276
Assistance display (on-board com-
puter) .................................................. 217
Assistance menu (on-board com-
puter) .................................................. 217
ASSYST PLUS Displaying a service message ........287
Hiding a service message ..............287
Notes ............................................. 286
Resetting the service interval dis-
play ................................................ 287
Service message ............................ 286
Special service requirements ......... 287
ATA (Anti-Theft Alarm system)
Activating/deactivating ...................71
Function ........................................... 71
Interior motion sensor .....................72
Switching off the alarm ....................71
Tow-away protection ........................ 71
ATTENTION ASSIST
Activating/deactivating .................218
Display message ............................ 242
Function/notes ............................. 1954IndexProCarManuals.com
Page 287 of 352

XSlowly slide oil dipstick : into the guide
tube to the stop, and take it out again.
If the level is between MIN mark = and
MAX mark ;, the oil level is correct.XIf the oil level has dropped to MIN mark
= or below, top up with 1.0 litre of engine
oil.
Adding engine oil
GWARNING
If engine oil comes into contact with hot com-
ponents in the engine compartment, it may
ignite. There is a risk of fire and injury.
Make sure that engine oil does not spill out
over the filler neck. Allow the engine to cool
down and thoroughly clean the components
that have come into contact with engine oil
before you start the engine.
HEnvironmental note
When topping up the oil, take care not to spill
any. If oil enters the soil or waterways, it is
harmful to the environment.
! Only use engine oils and oil filters that
have been approved for vehicles with a
service system. You can obtain a list of the
engine oils and oil filters tested and
approved in accordance with the
Mercedes-Benz Specifications for Service
Products at any Mercedes-Benz Service
Centre.
Damage to the engine or exhaust system is
caused by the following:
R using engine oils and oil filters that have
not been specifically approved for the
service system
R changing the engine oil and oil filter after
missing the change interval required by
the service system
R using engine oil additives
! Do not add too much oil. Topping up with
too much engine oil can result in damage
to the engine or to the catalytic converter.
Have excess engine oil siphoned off.
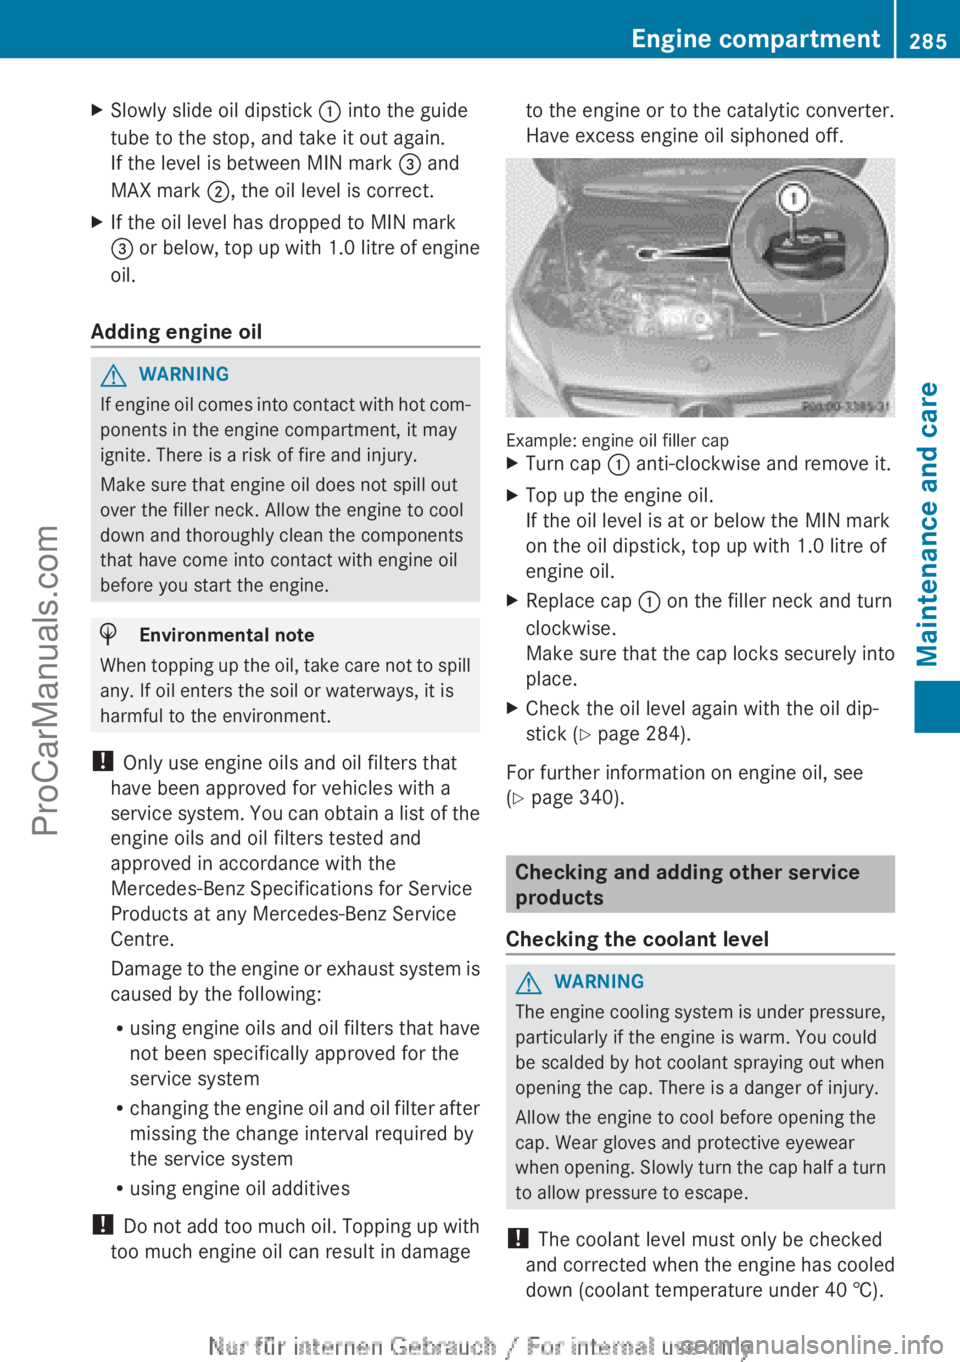
Example: engine oil filler cap
XTurn cap : anti-clockwise and remove it.XTop up the engine oil.
If the oil level is at or below the MIN mark
on the oil dipstick, top up with 1.0 litre of
engine oil.XReplace cap : on the filler neck and turn
clockwise.
Make sure that the cap locks securely into
place.XCheck the oil level again with the oil dip-
stick ( Y page 284).
For further information on engine oil, see
( Y page 340).
Checking and adding other service
products
Checking the coolant level
GWARNING
The engine cooling system is under pressure,
particularly if the engine is warm. You could
be scalded by hot coolant spraying out when
opening the cap. There is a danger of injury.
Allow the engine to cool before opening the
cap. Wear gloves and protective eyewear
when opening. Slowly turn the cap half a turn
to allow pressure to escape.
! The coolant level must only be checked
and corrected when the engine has cooled
down (coolant temperature under 40 †).
Engine compartment285Maintenance and careZProCarManuals.com
Page 294 of 352

XMake sure that the vehicle is stationary and
that the key is in position 2 in the ignition
lock.XTo open the cover of the reversing cam-
era: with the audio system/COMAND
Online activated, press the W button.XSelect System by turning cVd the audio
system/COMAND controller and press W
to confirm.XSelect Rear view camera and press W to
confirm.XSelect Open camera cover and confirm
with W.
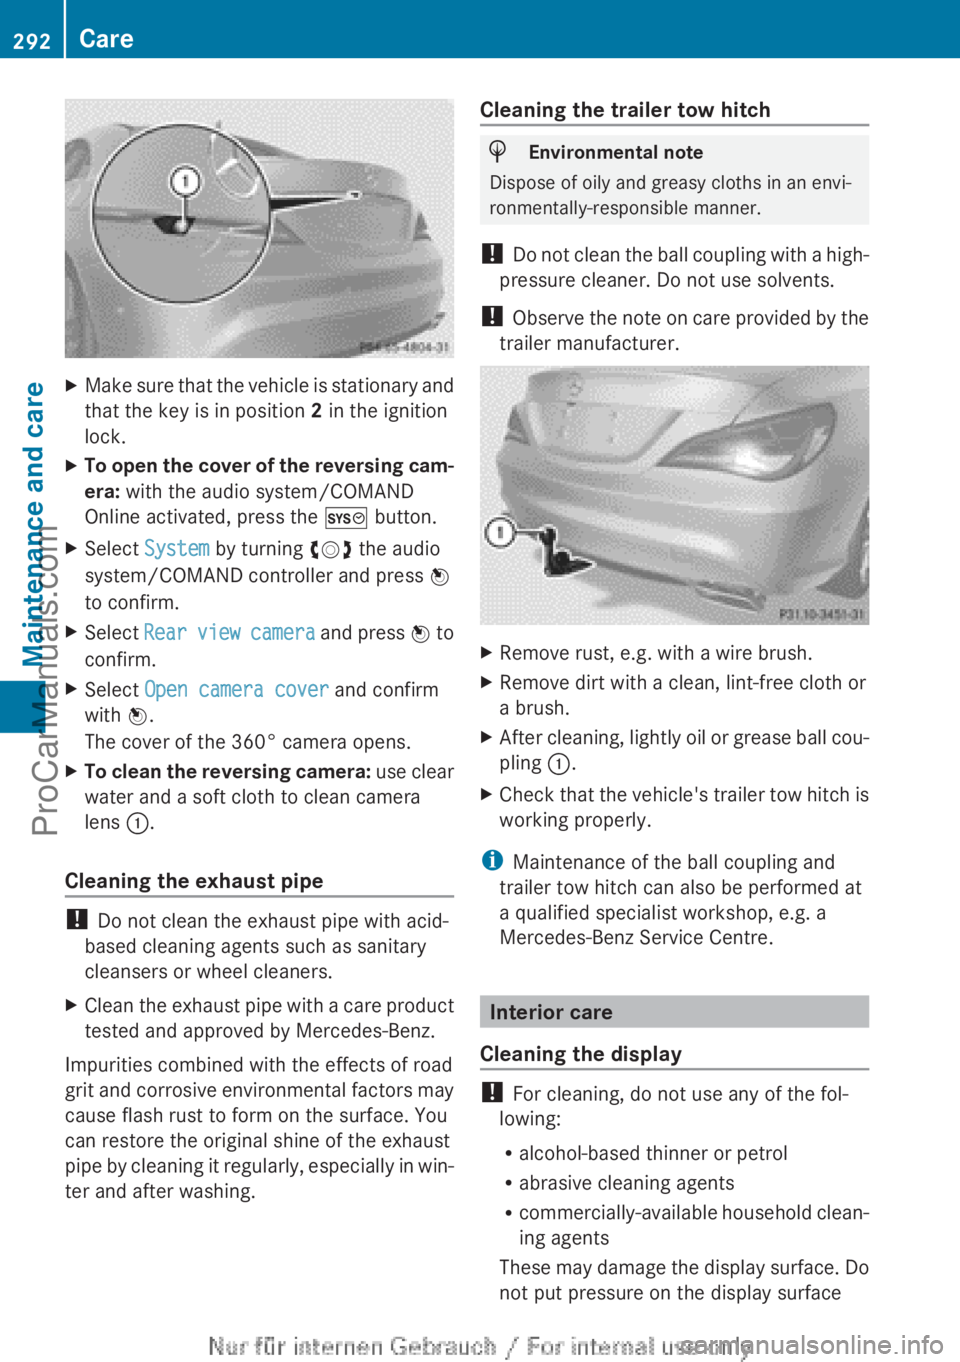
The cover of the 360° camera opens.XTo clean the reversing camera: use clear
water and a soft cloth to clean camera
lens :.
Cleaning the exhaust pipe
!
Do not clean the exhaust pipe with acid-
based cleaning agents such as sanitary
cleansers or wheel cleaners.
XClean the exhaust pipe with a care product
tested and approved by Mercedes-Benz.
Impurities combined with the effects of road
grit and corrosive environmental factors may
cause flash rust to form on the surface. You
can restore the original shine of the exhaust
pipe by cleaning it regularly, especially in win-
ter and after washing.
Cleaning the trailer tow hitchHEnvironmental note
Dispose of oily and greasy cloths in an envi-
ronmentally-responsible manner.
! Do not clean the ball coupling with a high-
pressure cleaner. Do not use solvents.
! Observe the note on care provided by the
trailer manufacturer.
XRemove rust, e.g. with a wire brush.XRemove dirt with a clean, lint-free cloth or
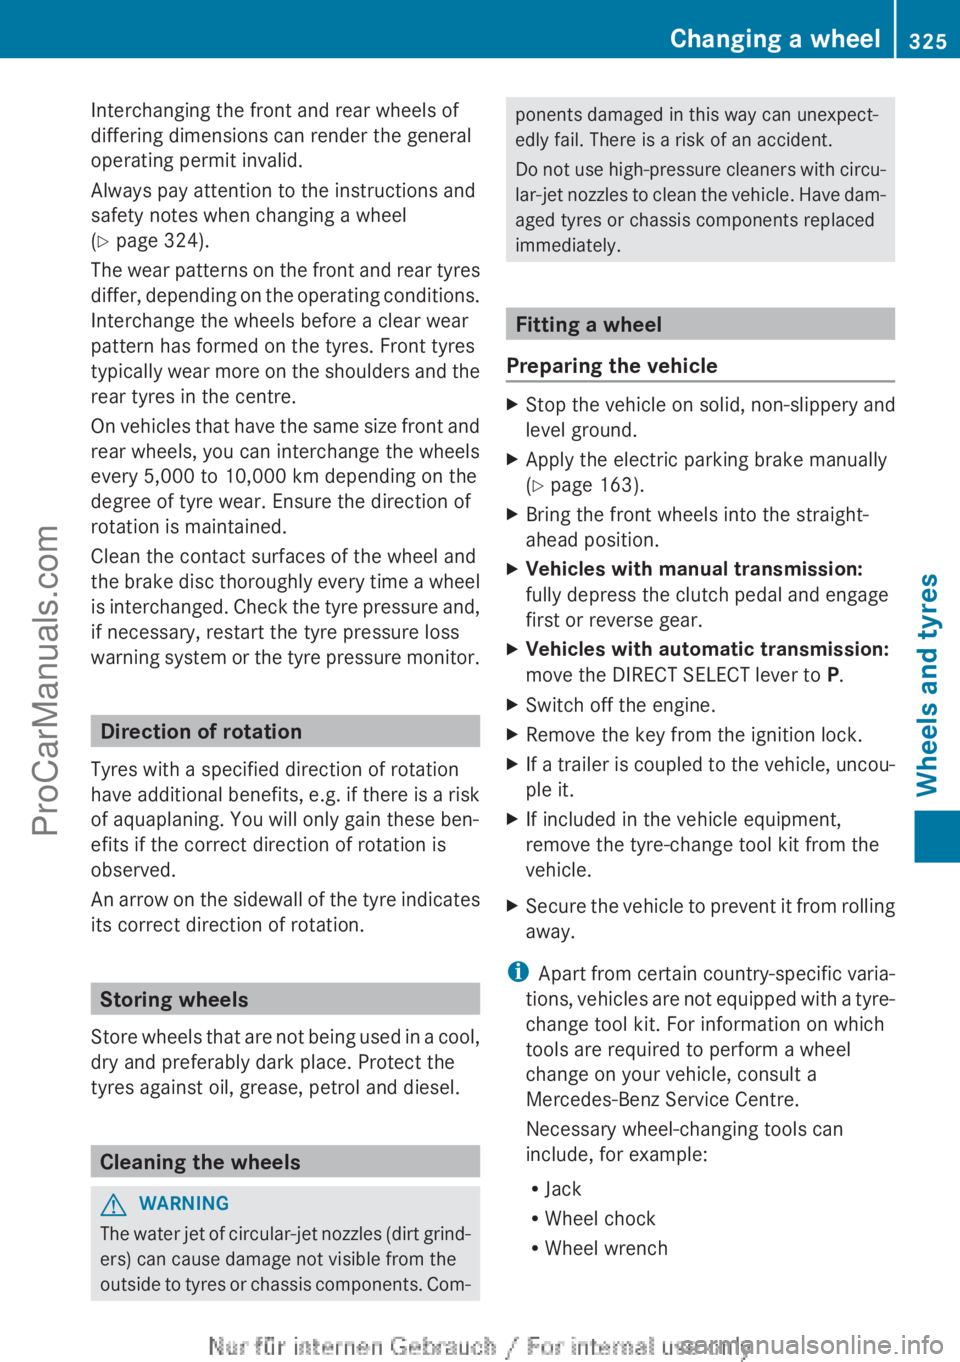
a brush.XAfter cleaning, lightly oil or grease ball cou-
pling :.XCheck that the vehicle's trailer tow hitch is
working properly.
i Maintenance of the ball coupling and
trailer tow hitch can also be performed at
a qualified specialist workshop, e.g. a
Mercedes-Benz Service Centre.
Interior care
Cleaning the display
! For cleaning, do not use any of the fol-
lowing:
R alcohol-based thinner or petrol
R abrasive cleaning agents
R commercially-available household clean-
ing agents
These may damage the display surface. Do
not put pressure on the display surface
292CareMaintenance and care
ProCarManuals.com
Page 327 of 352

Interchanging the front and rear wheels of
differing dimensions can render the general
operating permit invalid.
Always pay attention to the instructions and
safety notes when changing a wheel
( Y page 324).
The wear patterns on the front and rear tyres
differ, depending on the operating conditions.
Interchange the wheels before a clear wear
pattern has formed on the tyres. Front tyres
typically wear more on the shoulders and the
rear tyres in the centre.
On vehicles that have the same size front and
rear wheels, you can interchange the wheels
every 5,000 to 10,000 km depending on the
degree of tyre wear. Ensure the direction of
rotation is maintained.
Clean the contact surfaces of the wheel and
the brake disc thoroughly every time a wheel
is interchanged. Check the tyre pressure and,
if necessary, restart the tyre pressure loss
warning system or the tyre pressure monitor.
Direction of rotation
Tyres with a specified direction of rotation
have additional benefits, e.g. if there is a risk
of aquaplaning. You will only gain these ben-
efits if the correct direction of rotation is
observed.
An arrow on the sidewall of the tyre indicates
its correct direction of rotation.
Storing wheels
Store wheels that are not being used in a cool,
dry and preferably dark place. Protect the
tyres against oil, grease, petrol and diesel.
Cleaning the wheels
GWARNING
The water jet of circular-jet nozzles (dirt grind-
ers) can cause damage not visible from the
outside to tyres or chassis components. Com-
ponents damaged in this way can unexpect-
edly fail. There is a risk of an accident.
Do not use high-pressure cleaners with circu-
lar-jet nozzles to clean the vehicle. Have dam-
aged tyres or chassis components replaced
immediately.
Fitting a wheel
Preparing the vehicle
XStop the vehicle on solid, non-slippery and
level ground.XApply the electric parking brake manually
( Y page 163).XBring the front wheels into the straight-
ahead position.XVehicles with manual transmission:
fully depress the clutch pedal and engage
first or reverse gear.XVehicles with automatic transmission:
move the DIRECT SELECT lever to P.XSwitch off the engine.XRemove the key from the ignition lock.XIf a trailer is coupled to the vehicle, uncou-
ple it.XIf included in the vehicle equipment,
remove the tyre-change tool kit from the
vehicle.XSecure the vehicle to prevent it from rolling
away.
i Apart from certain country-specific varia-
tions, vehicles are not equipped with a tyre-
change tool kit. For information on which
tools are required to perform a wheel
change on your vehicle, consult a
Mercedes-Benz Service Centre.
Necessary wheel-changing tools can
include, for example:
R Jack
R Wheel chock
R Wheel wrench
Changing a wheel325Wheels and tyresZProCarManuals.com