2013 MERCEDES-BENZ CLA-CLASS ad blue
[x] Cancel search: ad bluePage 111 of 352
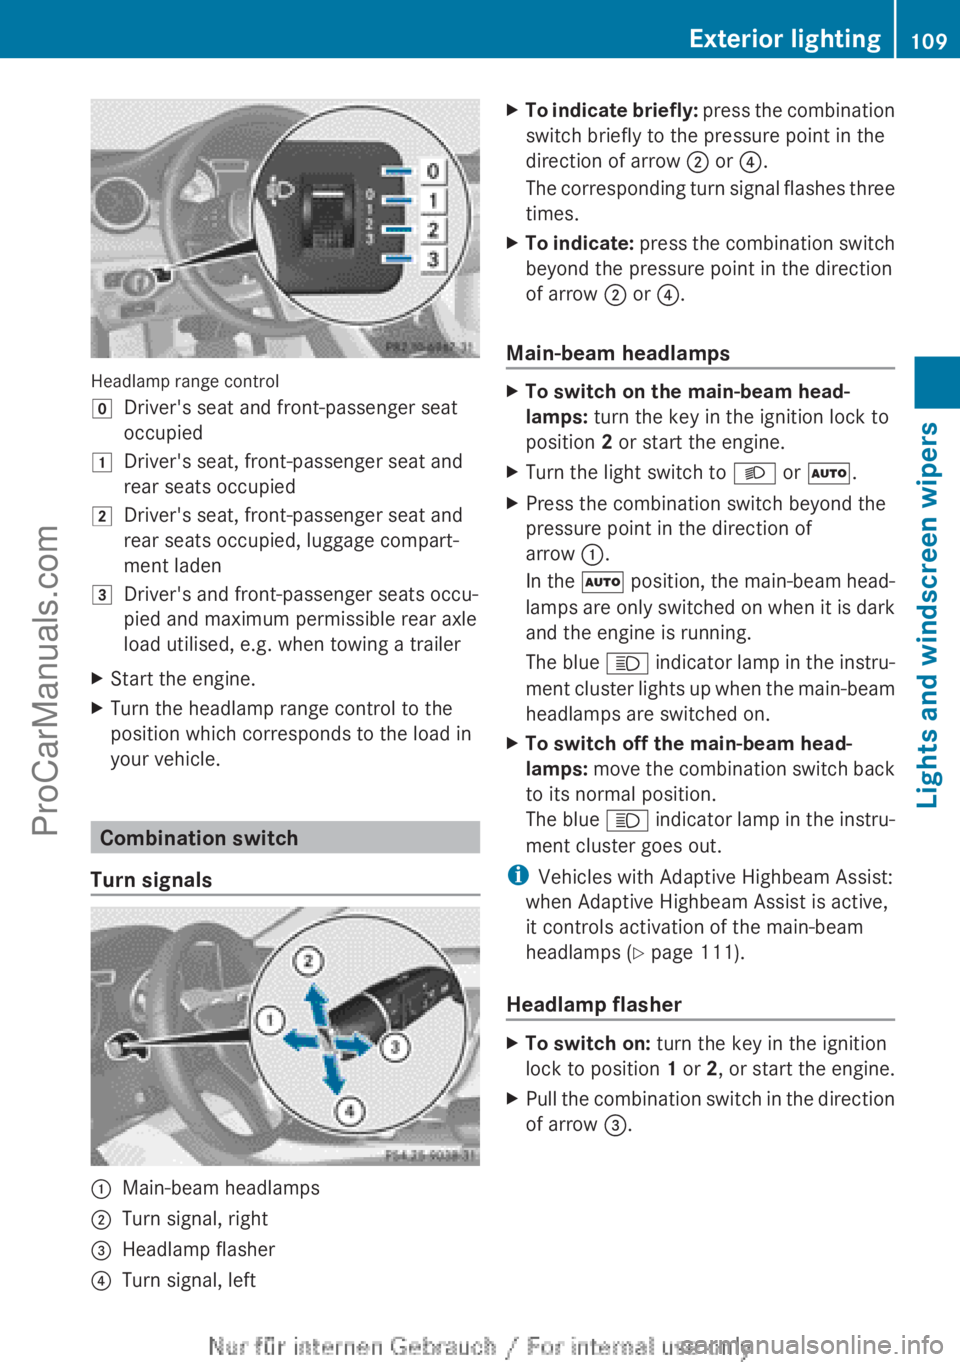
Headlamp range control
gDriver's seat and front-passenger seat
occupied1Driver's seat, front-passenger seat and
rear seats occupied2Driver's seat, front-passenger seat and
rear seats occupied, luggage compart-
ment laden3Driver's and front-passenger seats occu-
pied and maximum permissible rear axle
load utilised, e.g. when towing a trailerXStart the engine.XTurn the headlamp range control to the
position which corresponds to the load in
your vehicle.
Combination switch
Turn signals
:Main-beam headlamps;Turn signal, right=Headlamp flasher?Turn signal, leftXTo indicate briefly: press the combination
switch briefly to the pressure point in the
direction of arrow ; or ?.
The corresponding turn signal flashes three
times.XTo indicate: press the combination switch
beyond the pressure point in the direction
of arrow ; or ?.
Main-beam headlamps
XTo switch on the main-beam head-
lamps: turn the key in the ignition lock to
position 2 or start the engine.XTurn the light switch to L or à .XPress the combination switch beyond the
pressure point in the direction of
arrow :.
In the à position, the main-beam head-
lamps are only switched on when it is dark
and the engine is running.
The blue K indicator lamp in the instru-
ment cluster lights up when the main-beam
headlamps are switched on.XTo switch off the main-beam head-
lamps: move the combination switch back
to its normal position.
The blue K indicator lamp in the instru-
ment cluster goes out.
i Vehicles with Adaptive Highbeam Assist:
when Adaptive Highbeam Assist is active,
it controls activation of the main-beam
headlamps ( Y page 111).
Headlamp flasher
XTo switch on: turn the key in the ignition
lock to position 1 or 2, or start the engine.XPull the combination switch in the direction
of arrow =.Exterior lighting109Lights and windscreen wipersZProCarManuals.com
Page 139 of 352
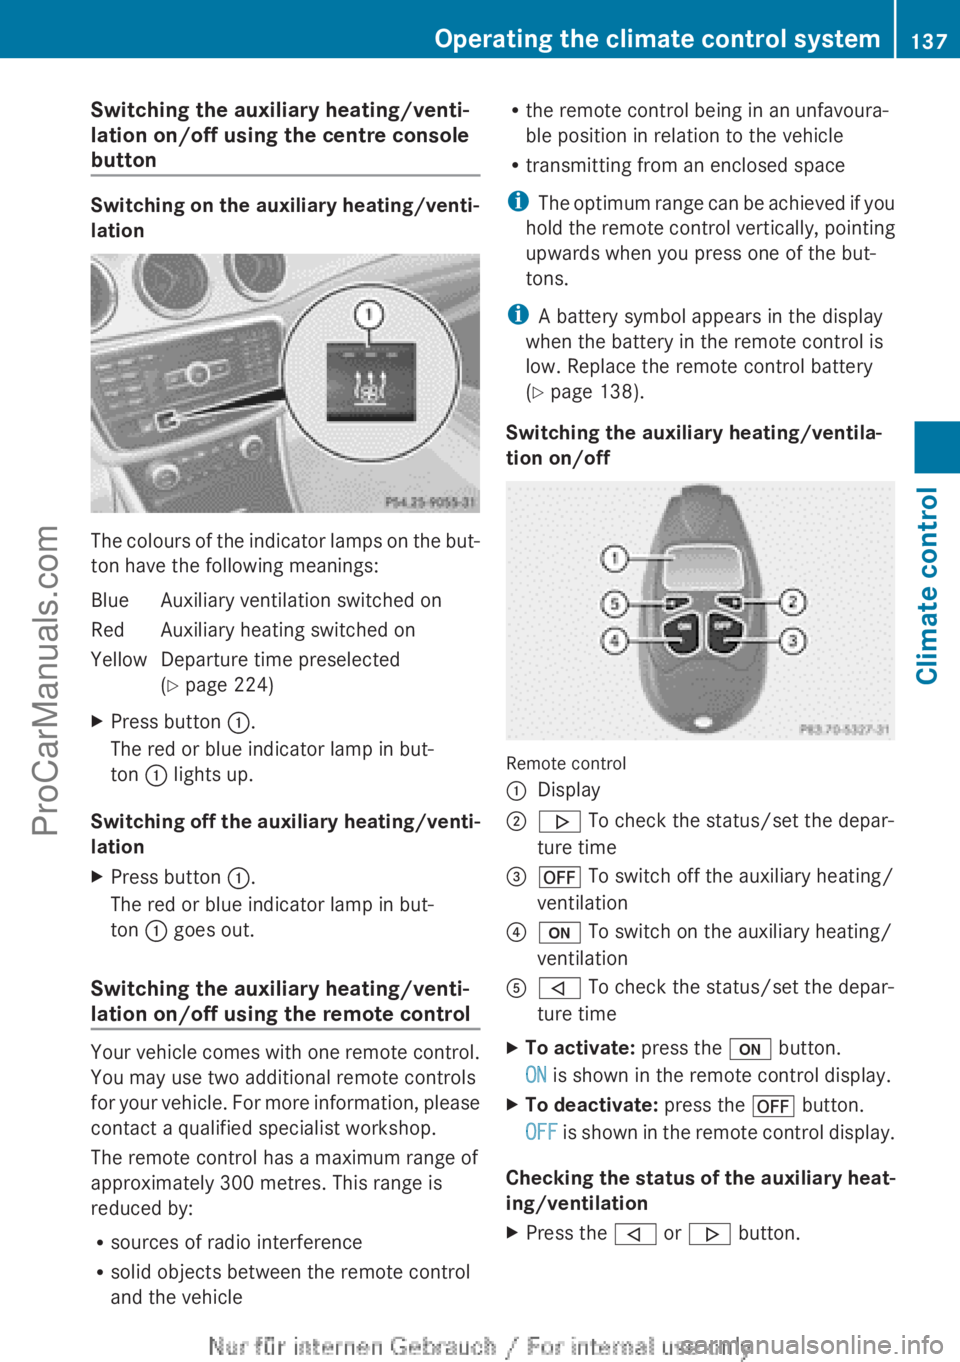
Switching the auxiliary heating/venti-
lation on/off using the centre console
button
Switching on the auxiliary heating/venti-
lation
The colours of the indicator lamps on the but-
ton have the following meanings:
BlueAuxiliary ventilation switched onRedAuxiliary heating switched onYellowDeparture time preselected
( Y page 224)XPress button :.
The red or blue indicator lamp in but-
ton : lights up.
Switching off the auxiliary heating/venti-
lation
XPress button :.
The red or blue indicator lamp in but-
ton : goes out.
Switching the auxiliary heating/venti-
lation on/off using the remote control
Your vehicle comes with one remote control.
You may use two additional remote controls
for your vehicle. For more information, please
contact a qualified specialist workshop.
The remote control has a maximum range of
approximately 300 metres. This range is
reduced by:
R sources of radio interference
R solid objects between the remote control
and the vehicle
R the remote control being in an unfavoura-
ble position in relation to the vehicle
R transmitting from an enclosed space
i The optimum range can be achieved if you
hold the remote control vertically, pointing
upwards when you press one of the but-
tons.
i A battery symbol appears in the display
when the battery in the remote control is
low. Replace the remote control battery
( Y page 138).
Switching the auxiliary heating/ventila-
tion on/off
Remote control
:Display;. To check the status/set the depar-
ture time=^ To switch off the auxiliary heating/
ventilation?u To switch on the auxiliary heating/
ventilationA, To check the status/set the depar-
ture timeXTo activate: press the u button.
ON is shown in the remote control display.XTo deactivate: press the ^ button.
OFF is shown in the remote control display.
Checking the status of the auxiliary heat-
ing/ventilation
XPress the , or . button.Operating the climate control system137Climate controlZProCarManuals.com
Page 218 of 352
XSwitch on your mobile phone and audio
system or COMAND Online, see the sepa-
rate operating instructions.XPlace a mobile phone in the mobile phone
bracket ( Y page 278), or establish a Blue-
tooth ®
connection with the audio system
or COMAND Online (see the separate oper-
ating instructions).XPress the = or ; button on the steer-
ing wheel to select the Tel menu.
You will see one of the following display mes-
sages in the multifunction display:
R Please enter PIN: the mobile phone has
been placed in the mobile phone bracket
and the PIN has not been entered.
When you enter your PIN via the mobile
phone, LINGUATRONIC, the audio system
or COMAND Online, the mobile phone
searches for a network.
R Telephone ready or the name of the net-
work provider: the mobile phone has found
a network and is ready to receive.
R Telephone No service : there is no net-
work available or the mobile phone is
searching for a network.
i You can obtain further information about
suitable mobile phones and connecting
mobile phones via Bluetooth ®
:
R from any Mercedes Benz Service Centre
R on the Internet at: http://
www.mercedes-benz.com/connect
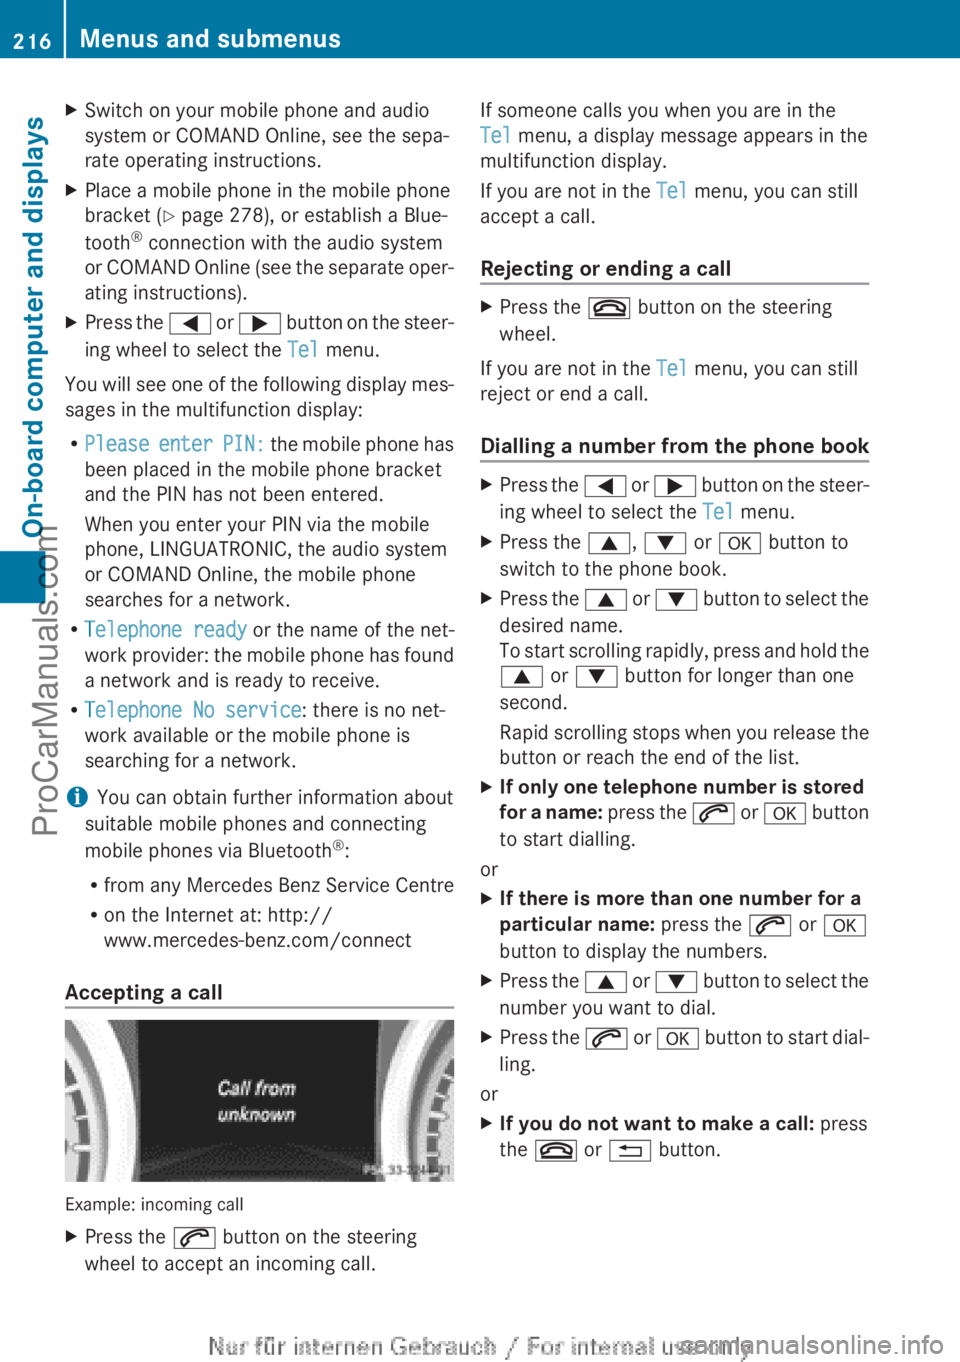
Accepting a call
Example: incoming call
XPress the 6 button on the steering
wheel to accept an incoming call.If someone calls you when you are in the
Tel menu, a display message appears in the
multifunction display.
If you are not in the Tel menu, you can still
accept a call.
Rejecting or ending a callXPress the ~ button on the steering
wheel.
If you are not in the Tel menu, you can still
reject or end a call.
Dialling a number from the phone book
XPress the = or ; button on the steer-
ing wheel to select the Tel menu.XPress the 9, : or a button to
switch to the phone book.XPress the 9 or : button to select the
desired name.
To start scrolling rapidly, press and hold the
9 or : button for longer than one
second.
Rapid scrolling stops when you release the
button or reach the end of the list.XIf only one telephone number is stored
for a name: press the 6 or a button
to start dialling.
or
XIf there is more than one number for a
particular name: press the 6 or a
button to display the numbers.XPress the 9 or : button to select the
number you want to dial.XPress the 6 or a button to start dial-
ling.
or
XIf you do not want to make a call: press
the ~ or % button.216Menus and submenusOn-board computer and displays
ProCarManuals.com
Page 280 of 352
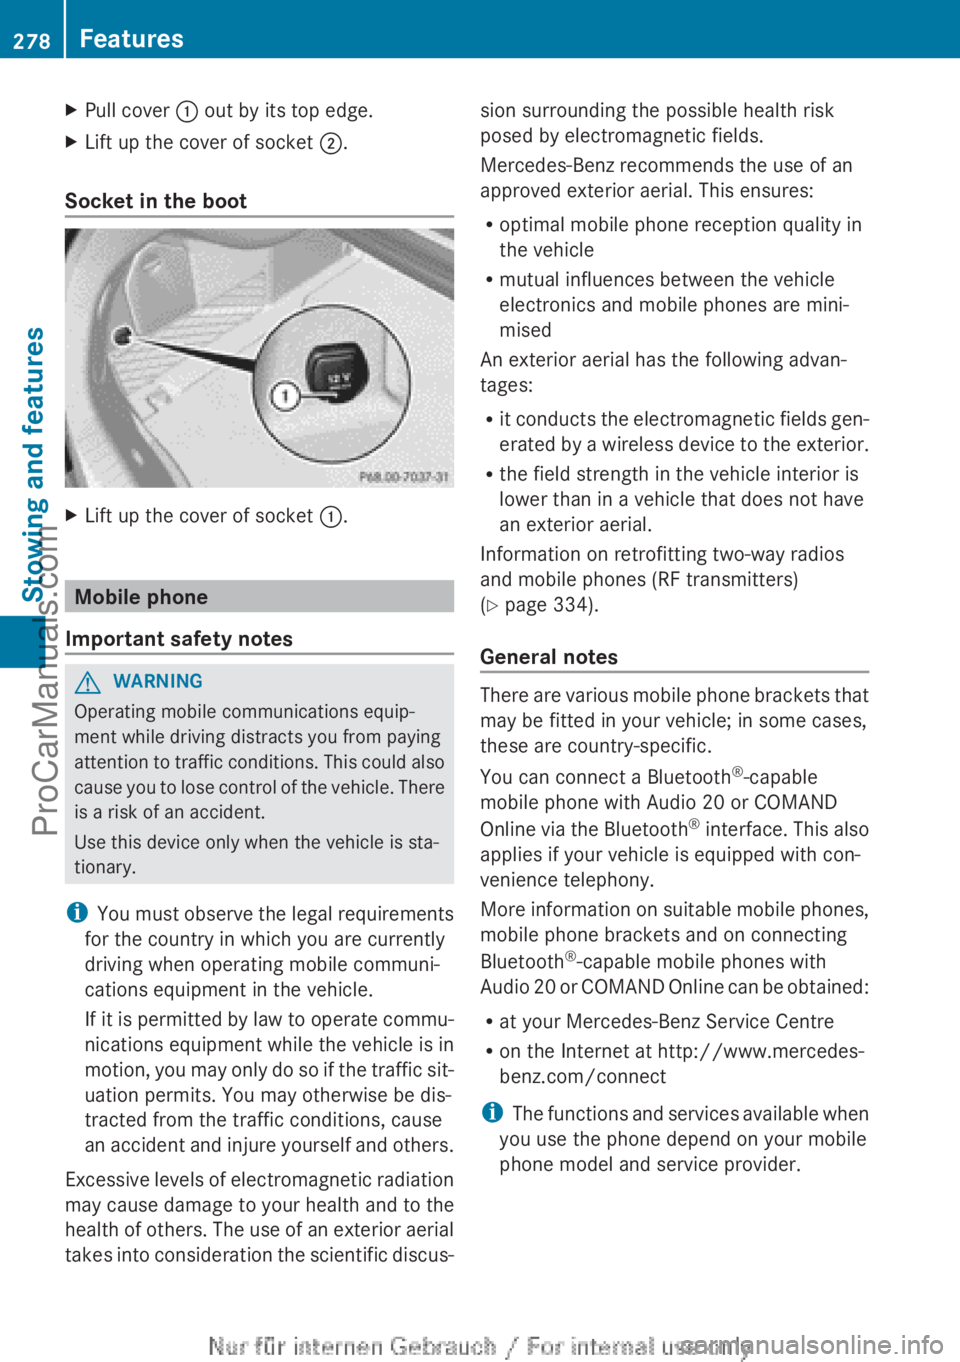
XPull cover : out by its top edge.XLift up the cover of socket ;.
Socket in the boot
XLift up the cover of socket :.
Mobile phone
Important safety notes
GWARNING
Operating mobile communications equip-
ment while driving distracts you from paying
attention to traffic conditions. This could also
cause you to lose control of the vehicle. There
is a risk of an accident.
Use this device only when the vehicle is sta-
tionary.
i You must observe the legal requirements
for the country in which you are currently
driving when operating mobile communi-
cations equipment in the vehicle.
If it is permitted by law to operate commu-
nications equipment while the vehicle is in
motion, you may only do so if the traffic sit-
uation permits. You may otherwise be dis-
tracted from the traffic conditions, cause
an accident and injure yourself and others.
Excessive levels of electromagnetic radiation
may cause damage to your health and to the
health of others. The use of an exterior aerial
takes into consideration the scientific discus-
sion surrounding the possible health risk
posed by electromagnetic fields.
Mercedes-Benz recommends the use of an
approved exterior aerial. This ensures:
R optimal mobile phone reception quality in
the vehicle
R mutual influences between the vehicle
electronics and mobile phones are mini-
mised
An exterior aerial has the following advan-
tages:
R it conducts the electromagnetic fields gen-
erated by a wireless device to the exterior.
R the field strength in the vehicle interior is
lower than in a vehicle that does not have
an exterior aerial.
Information on retrofitting two-way radios
and mobile phones (RF transmitters)
( Y page 334).
General notes
There are various mobile phone brackets that
may be fitted in your vehicle; in some cases,
these are country-specific.
You can connect a Bluetooth ®
-capable
mobile phone with Audio 20 or COMAND
Online via the Bluetooth ®
interface. This also
applies if your vehicle is equipped with con-
venience telephony.
More information on suitable mobile phones,
mobile phone brackets and on connecting
Bluetooth ®
-capable mobile phones with
Audio 20 or COMAND Online can be obtained:
R at your Mercedes-Benz Service Centre
R on the Internet at http://www.mercedes-
benz.com/connect
i The functions and services available when
you use the phone depend on your mobile
phone model and service provider.
278FeaturesStowing and features
ProCarManuals.com
Page 281 of 352
Using a mobile phone
If the mobile phone is inserted in the mobile
phone bracket, you can speak to the person
you are calling using the hands-free system.
XOpen the telephone compartment
( Y page 270).XPlace the mobile phone bracket into the
pre-installed fitting (see the separate
installation instructions for the mobile
phone fitting).XInsert the mobile phone into the mobile
phone bracket (see the separate installa-
tion instructions for the mobile phone fit-
ting).
i On some mobile phone brackets, first you
have to connect the phone to the mobile
phone bracket via Bluetooth ®
(see the sep-
arate operating instructions for the mobile
phone bracket).
If this is the case, the mobile phone does
not have to be inserted into the bracket for
you to be able to use the telephone func-
tions. However, the charging function and
aerial function are not available.
Operating the mobile phone
You can operate the telephone using the
6 and ~ buttons on the multifunction
steering wheel. You can operate other mobile
phone functions via the on-board computer
( Y page 215).
When you remove the key from the ignition
lock, the mobile phone stays switched on.
However, you can no longer use the hands-
free system.
If you have an active call and would like to
take the key out of the ignition lock, first
remove the mobile phone from the bracket.
i If you use a mobile phone bracket which
is connected to your mobile via Blue-
tooth ®
and you wish to continue a call on
your mobile phone:
You should switch the call to "Private
mode" before you remove the key from the
ignition lock. Otherwise, it will take up to
20 seconds for the mobile phone to dis-
connect from the system. Only then can
you continue the call on your mobile phone.
Notes on the necessary steps for setting
"Private mode" can be found in the sepa-
rate operating instructions of the mobile
phone.
i Not all mobile phones support "Private
mode".
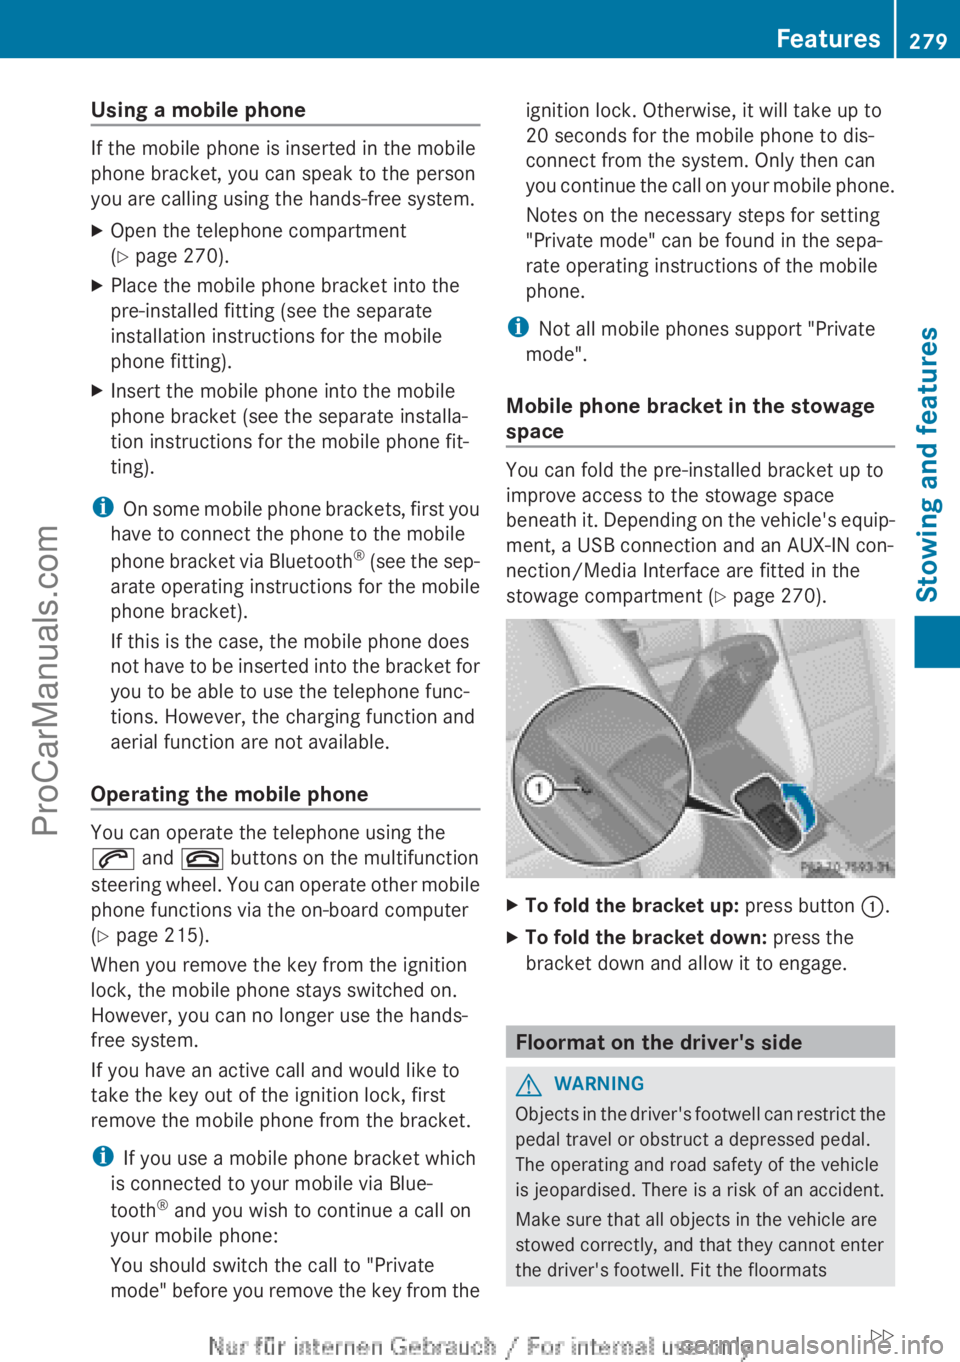
Mobile phone bracket in the stowage
space
You can fold the pre-installed bracket up to
improve access to the stowage space
beneath it. Depending on the vehicle's equip-
ment, a USB connection and an AUX-IN con-
nection/Media Interface are fitted in the
stowage compartment ( Y page 270).
XTo fold the bracket up: press button :.XTo fold the bracket down: press the
bracket down and allow it to engage.
Floormat on the driver's side
GWARNING
Objects in the driver's footwell can restrict the
pedal travel or obstruct a depressed pedal.
The operating and road safety of the vehicle
is jeopardised. There is a risk of an accident.
Make sure that all objects in the vehicle are
stowed correctly, and that they cannot enter
the driver's footwell. Fit the floormats
Features279Stowing and featuresZProCarManuals.com