Page 166 of 410
166
4. MY MEMORY
CT200h_Navi_OM76113E_(EE)
13.12.06 15:16
3Select the desired item.
4Select “OK”.
CHANGING THE NAME
1Select “Name”.
2Enter the desired name and select
“OK”.
1Select “Delete”.
2Select the route trace to be deleted
and select “delete”.
3Select “Yes” when the confirmation
screen appears.
No.Function
Select to edit route trace names.
(P.166)
Select to display registered route
traces on the map screen.
When set to on, the indicator will
illuminate.
Select to confirm the start point
on the map screen.
Select to confirm the end point on
the map screen.
DELETING ROUTE TRACES
Page 167 of 410
167
4. MY MEMORY
CT200h_Navi_OM76113E_(EE)
13.12.06 15:16
3
NAVIGATION SYSTEM
1Press the lid.
2Open the cover and connect a USB
memory.
Turn on the power of the USB memory
if it is not turned on.
3Display the “My memory” screen.
(P.150)
4Select “Backup to USB”.
BACKUP TO A USB
MEMORY
Memory points registered in the nav-
igation system can be copied to a
USB memory.
A password must first be set in order
to back up data. (P.168)
Exporting memory point data is for
your back-up use only and distribu-
tion or usage in other system is
strictly prohibited.
Page 168 of 410

168
4. MY MEMORY
CT200h_Navi_OM76113E_(EE)
13.12.06 15:16
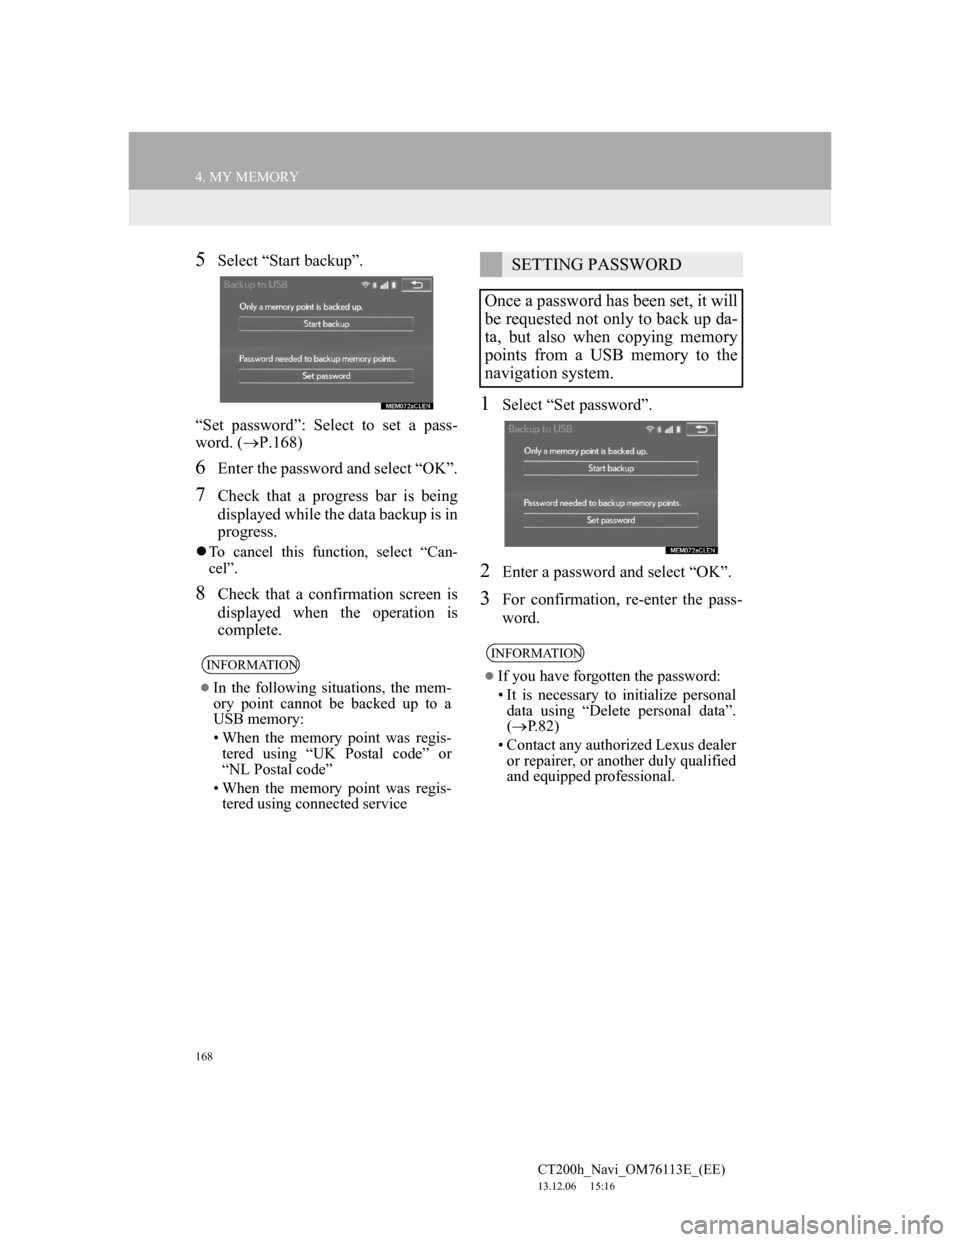
5Select “Start backup”.
“Set password”: Select to set a pass-
word. (P.168)
6Enter the password and select “OK”.
7Check that a progress bar is being
displayed while the data backup is in
progress.
To cancel this function, select “Can-
cel”.
8Check that a confirmation screen is
displayed when the operation is
complete.
1Select “Set password”.
2Enter a password and select “OK”.
3For confirmation, re-enter the pass-
word.
INFORMATION
In the following situations, the mem-
ory point cannot be backed up to a
USB memory:
• When the memory point was regis-
tered using “UK Postal code” or
“NL Postal code”
• When the memory point was regis-
tered using connected service
SETTING PASSWORD
Once a password has been set, it will
be requested not only to back up da-
ta, but also when copying memory
points from a USB memory to the
navigation system.
INFORMATION
If you have forgotten the password:
• It is necessary to initialize personal
data using “Delete personal data”.
(P.82)
• Contact any authorized Lexus dealer
or repairer, or another duly qualified
and equipped professional.
Page 169 of 410

169
4. MY MEMORY
CT200h_Navi_OM76113E_(EE)
13.12.06 15:16
3
NAVIGATION SYSTEM
1Display the “My memory” screen.
(P.150)
2Select “Copy from USB”.
If a password has already been set,
enter the password. For instructions on
setting a password: P.168
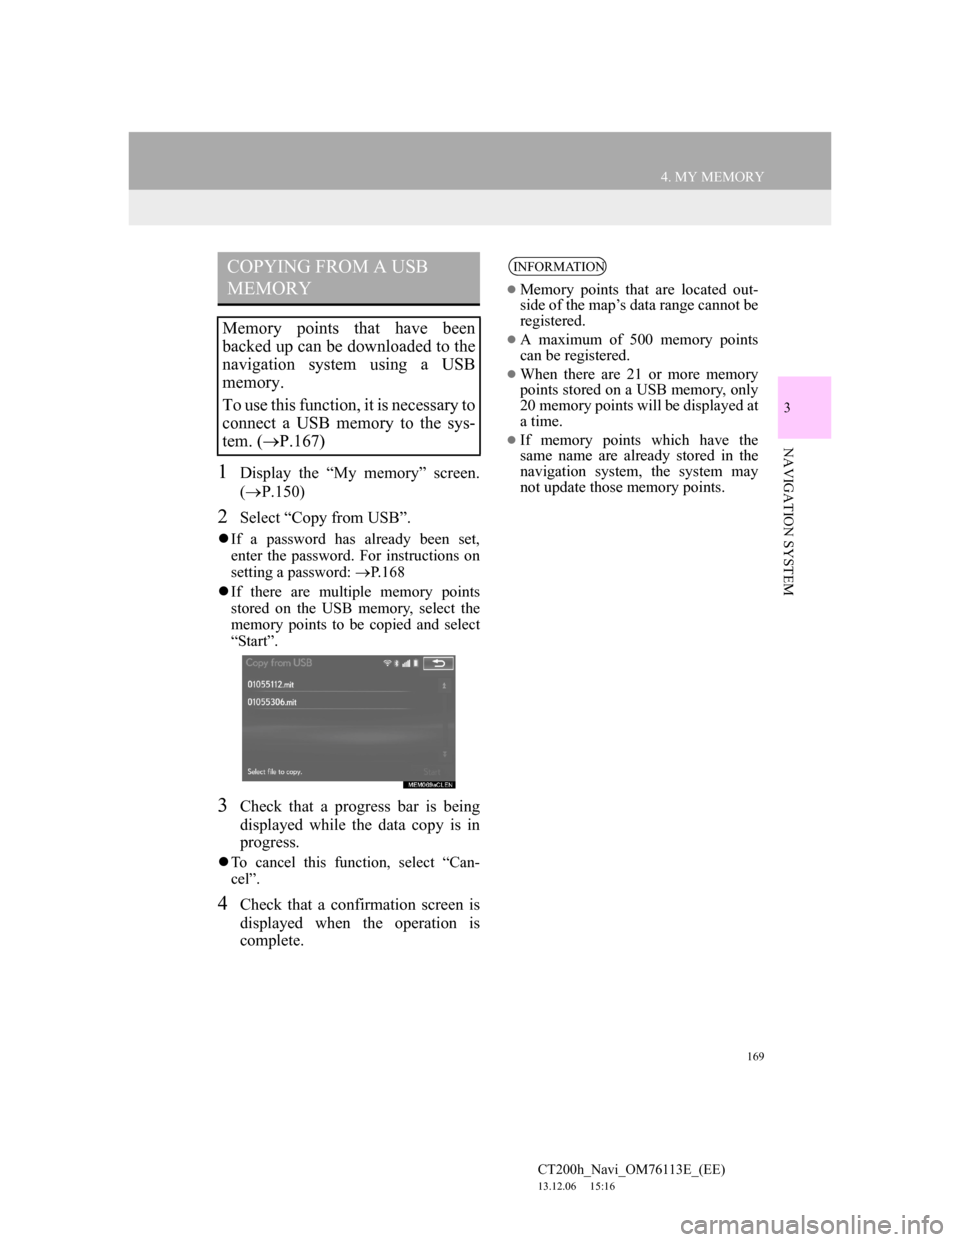
If there are multiple memory points
stored on the USB memory, select the
memory points to be copied and select
“Start”.
3Check that a progress bar is being
displayed while the data copy is in
progress.
To cancel this function, select “Can-
cel”.
4Check that a confirmation screen is
displayed when the operation is
complete.
COPYING FROM A USB
MEMORY
Memory points that have been
backed up can be downloaded to the
navigation system using a USB
memory.
To use this function, it is necessary to
connect a USB memory to the sys-
tem. (P.167)
INFORMATION
Memory points that are located out-
side of the map’s data range cannot be
registered.
A maximum of 500 memory points
can be registered.
When there are 21 or more memory
points stored on a USB memory, only
20 memory points will be displayed at
a time.
If memory points which have the
same name are already stored in the
navigation system, the system may
not update those memory points.
Page 171 of 410
171
5. SETUP
CT200h_Navi_OM76113E_(EE)
13.12.06 15:16
3
NAVIGATION SYSTEM
NAVIGATION SETTINGS
SCREEN
No.FunctionPage
Detailed connected ser-
vice settings can be
changed.
395
Select to set the average
vehicle speed.172
Select to set displayed
POI icon categories.172
Select to set display of
3D landmarks on/off.
Select to set speed limit
information on/off.
Select to set the automat-
ic zooming function on/
off. (When the vehicle
approaches a guidance
point)
Select to set display of
cautionary messages on/
off. (e.g., When the route
includes traffic restric-
tions or seasonally re-
stricted roads.)
Select to set display of
pop-up messages on/off.
Select to adjust the cur-
rent position mark manu-
ally. Miscalculation of
the distance caused by
tyre replacement can also
be adjusted.
173
Coverage areas and legal
information can be dis-
played.
187
Select to reset all setup
items.
No.FunctionPage
Page 172 of 410

172
5. SETUP
CT200h_Navi_OM76113E_(EE)
13.12.06 15:16
1Display the “Navigation settings”
screen. (P.170)
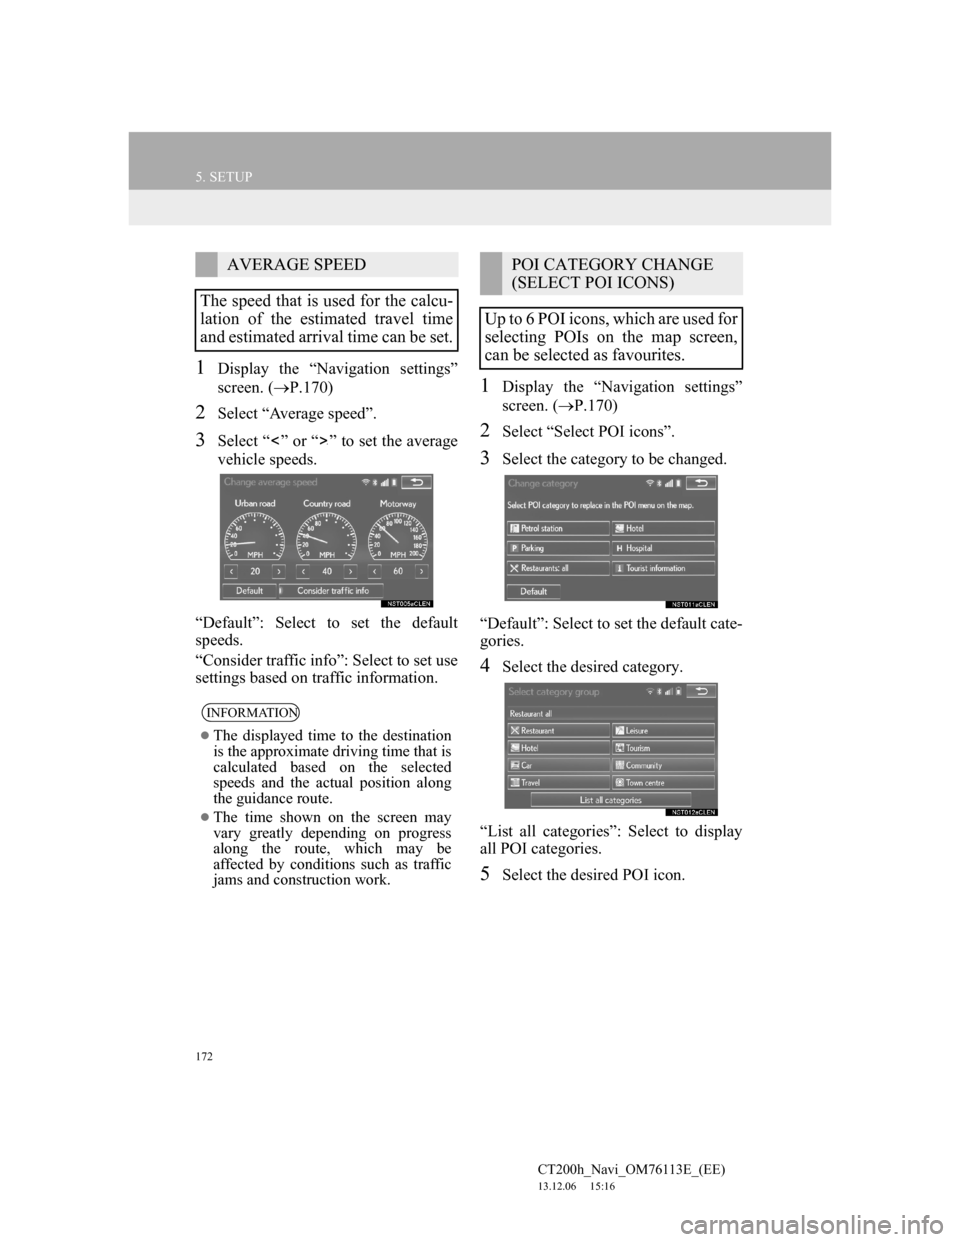
2Select “Average speed”.
3Select “ ” or “ ” to set the average
vehicle speeds.
“Default”: Select to set the default
speeds.
“Consider traffic info”: Select to set use
settings based on traffic information.
1Display the “Navigation settings”
screen. (P.170)
2Select “Select POI icons”.
3Select the category to be changed.
“Default”: Select to set the default cate-
gories.
4Select the desired category.
“List all categories”: Select to display
all POI categories.
5Select the desired POI icon.
AVERAGE SPEED
The speed that is used for the calcu-
lation of the estimated travel time
and estimated arrival time can be set.
INFORMATION
The displayed time to the destination
is the approximate driving time that is
calculated based on the selected
speeds and the actual position along
the guidance route.
The time shown on the screen may
vary greatly depending on progress
along the route, which may be
affected by conditions such as traffic
jams and construction work.
POI CATEGORY CHANGE
(SELECT POI ICONS)
Up to 6 POI icons, which are used for
selecting POIs on the map screen,
can be selected as favourites.
Page 173 of 410
173
5. SETUP
CT200h_Navi_OM76113E_(EE)
13.12.06 15:16
3
NAVIGATION SYSTEM
1Display the “Navigation settings”
screen. (P.170)
2Select “Calibration”.
3Select the desired item.
POSITION/DIRECTION CALI-
BRATION
1Select “Position / Direction”.
2Scroll the map to the desired point
(P.103) and select “OK”.
3Select an arrow to adjust the direc-
tion of the current position mark and
select “OK”.
CURRENT POSITION/TYRE
CHANGE CALIBRATION
The current position mark can be ad-
justed manually. Miscalculation of
the distance caused by tyre replace-
ment can also be adjusted.
For additional information on the
accuracy of a current position:
P.184
When driving, the current position
mark will be automatically corrected
by GPS signals. If GPS reception is
poor due to location, the current po-
sition mark can be adjusted manual-
ly.
Page 174 of 410
174
5. SETUP
CT200h_Navi_OM76113E_(EE)
13.12.06 15:16
TYRE CHANGE CALIBRATION
1Select “Tyre change”.
The message appears and the quick dis-
tance calibration is automatically
started.
The tyre change calibration function
will be used when replacing the
tyres. This function will adjust mis-
calculation caused by the circumfer-
ence difference between the old and
new tyres.
INFORMATION
If this procedure is not performed
when the tyres are replaced, the cur-
rent position mark may be incorrectly
displayed.