Page 56 of 655
Rear Center Lap/Shoulder Belt Retractor
Lockout — Four-Door Models Only
This feature is designed to lock the retractor whenever
the 60% rear seatback is not fully latched. This prevents
someone from wearing the rear center lap/shoulder belt
when the rear seatback is not fully latched.
NOTE:
• If the rear center lap/shoulder belt cannot be pulled
out, check that the rear seatback is fully latched.
• If the rear seatback is properly latched and the rear
center lap/shoulder belt still cannot be pulled out, the
Automatic-Locking Retractor (ALR) system may be
activated. To reset this feature you must let all of the
belt webbing return into the retractor. You will not be
able to pull out more webbing until all of the webbing
has been returned back into the retractor. WARNING!The rear center lap/shoulder belt is equipped with a
lock-out feature to ensure that the rear seatback is in
the fully upright and locked position when occupied.
If the rear seatback is not fully upright and locked
and the rear center lap/shoulder belt can be pulled
out of the retractor, the vehicle should immediately
be taken to your authorized dealer for service. Failure
to follow this warning could result in serious or fatal
injury.54 THINGS TO KNOW BEFORE STARTING YOUR VEHICLE
Page 73 of 655

• Turn on the interior lights, which remain on as long as
the battery has power or until the ignition key is
removed.
• Unlock the doors automatically.
In order to reset the Enhanced Accident Response System
functions after an event, the ignition switch must be
changed from IGN ON to IGN OFF.
If A Deployment Occurs
The Advanced Front Air Bags are designed to deflate
immediately after deployment.
NOTE: Front and/or side air bags will not deploy in all
collisions. This does not mean something is wrong with
the air bag system. If you do have a collision which deploys the air bags, any
or all of the following may occur:
• The nylon air bag material may sometimes cause
abrasions and/or skin reddening to the driver and
front passenger as the air bags deploy and unfold. The
abrasions are similar to friction rope burns or those
you might get sliding along a carpet or gymnasium
floor. They are not caused by contact with chemicals.
They are not permanent and normally heal quickly.
However, if you haven’t healed significantly within a
few days, or if you have any blistering, see your doctor
immediately.
2 THINGS TO KNOW BEFORE STARTING YOUR VEHICLE 71
Page 105 of 655
Periodic Safety Checks You Should Make Outside
The Vehicle
Tires
Examine tires for excessive tread wear and uneven wear
patterns. Check for stones, nails, glass, or other objects
lodged in the tread or sidewall. Inspect the tread for cuts
and cracks. Inspect sidewalls for cuts, cracks and bulges.
Check the wheel nuts for tightness. Check the tires
(including spare) for proper cold inflation pressure.
Lights
Have someone observe the operation of brake lights and
exterior lights while you work the controls. Check turn
signal and high beam indicator lights on the instrument
panel. Door Latches
Check for positive closing, latching, and locking.
Fluid Leaks
Check area under vehicle after overnight parking for fuel,
engine coolant, oil, or other fluid leaks. Also, if gasoline
fumes are detected or if fuel, power steering fluid, or
brake fluid leaks are suspected, the cause should be
located and corrected immediately.
2THINGS TO KNOW BEFORE STARTING YOUR VEHICLE 103
Page 174 of 655
Cargo Lamp
The courtesy and dome lights will turn on when the front
doors are opened, by rotating the control for the dimmer
switch on the multifunction lever fully upward, or if
equipped, when the UNLOCK button is pressed on the
Remote Keyless Entry (RKE) transmitter.
The sports bar reading lights (available on four-door
models) can be turned on by pressing the switches,
located on either side of the lens. Press a switch a second
time to turn the light off.
The rear cargo light may be turned on by pressing the
lens. Press the lens a second time to turn the light off. Sports Bar Reading Light172 UNDERSTANDING THE FEATURES OF YOUR VEHICLE
Page 212 of 655
Front Panel(s) Installation With Rear Hard Top
Removed
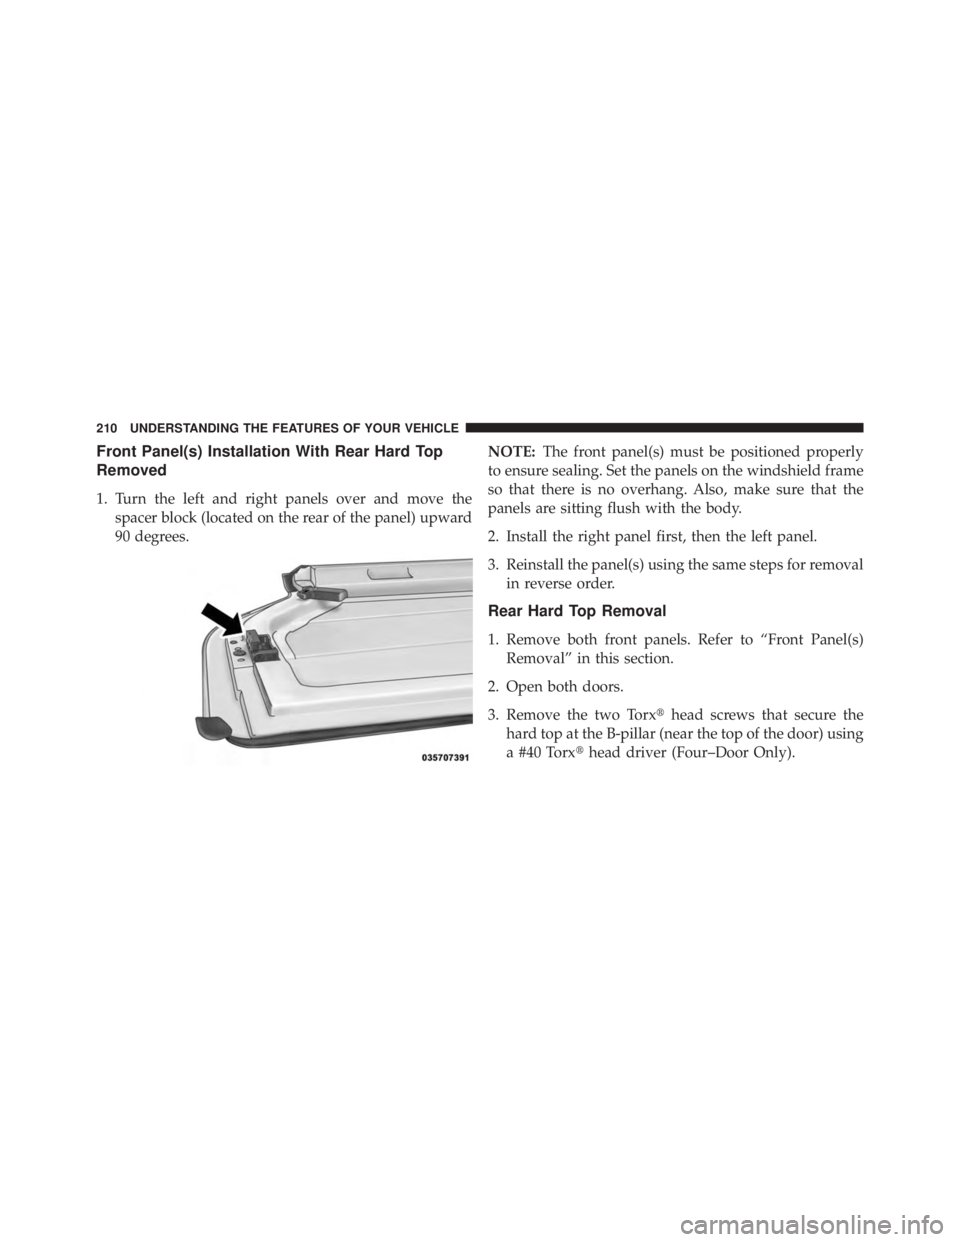
1. Turn the left and right panels over and move the
spacer block (located on the rear of the panel) upward
90 degrees. NOTE: The front panel(s) must be positioned properly
to ensure sealing. Set the panels on the windshield frame
so that there is no overhang. Also, make sure that the
panels are sitting flush with the body.
2. Install the right panel first, then the left panel.
3. Reinstall the panel(s) using the same steps for removal
in reverse order.
Rear Hard Top Removal
1. Remove both front panels. Refer to “Front Panel(s)
Removal” in this section.
2. Open both doors.
3. Remove the two Torx � head screws that secure the
hard top at the B-pillar (near the top of the door) using
a #40 Torx � head driver (Four–Door Only).210 UNDERSTANDING THE FEATURES OF YOUR VEHICLE
Page 274 of 655
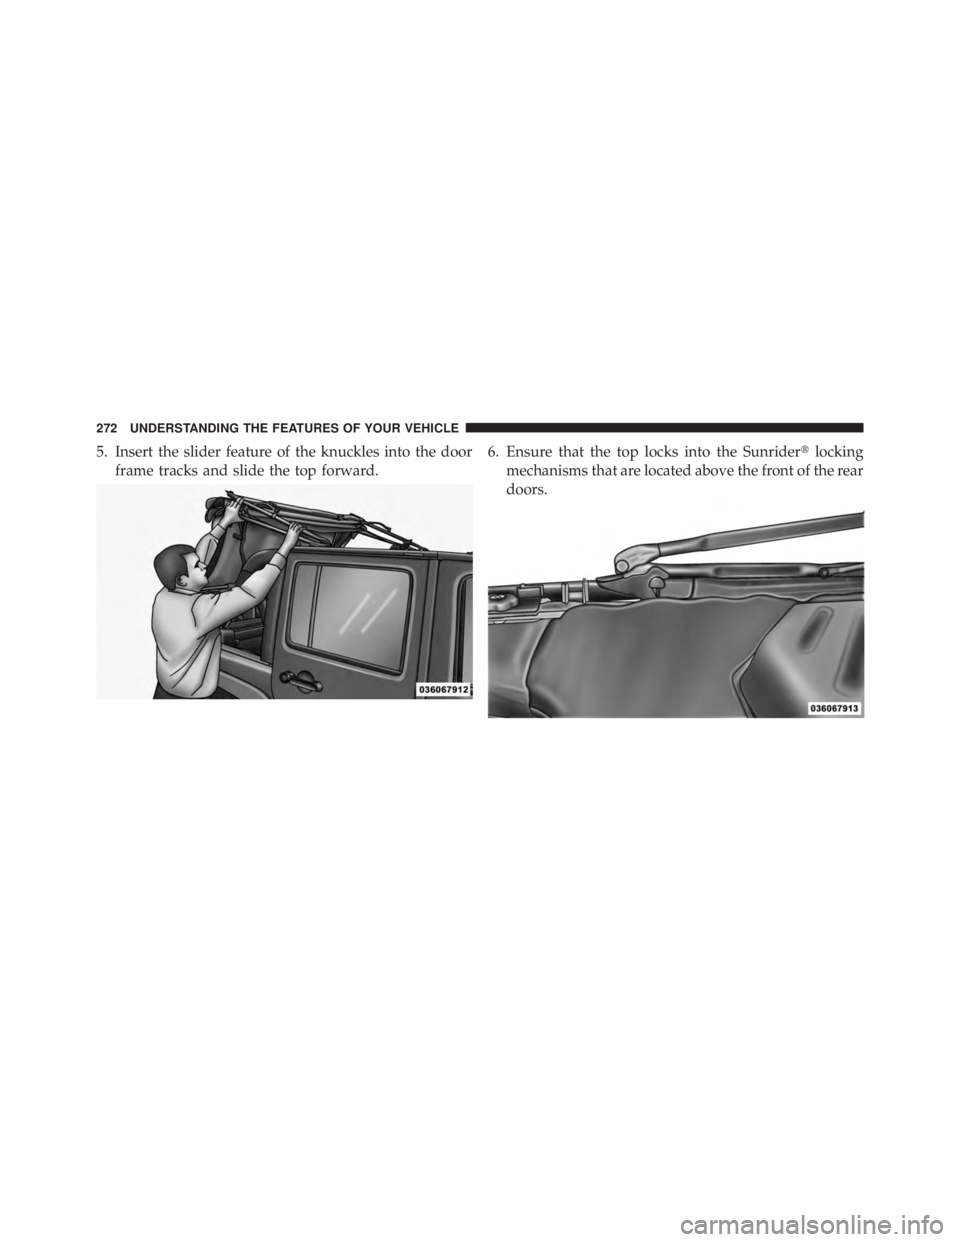
5. Insert the slider feature of the knuckles into the door
frame tracks and slide the top forward. 6. Ensure that the top locks into the Sunrider � locking
mechanisms that are located above the front of the rear
doors.272 UNDERSTANDING THE FEATURES OF YOUR VEHICLE
Page 333 of 655

System Status
Displays SYSTEM OK if there are no active Warning
Messages stored. Pressing and releasing the DOWN
button when SYSTEM OK is displayed will do nothing.
Displays SYSTEM WARNINGS PRESENT if there are
active Warning Messages stored. Pressing and releasing
the DOWN button when SYSTEM WARNINGS PRES-
ENT is displayed will display each stored warning for
each button press. Press and Release the MENU button to
return to the Main Menu.
Personal Settings (Customer-Programmable
Features)
Personal Settings allows the driver to set and recall
features when the vehicle speed is at 0 mph (0 km/h)
(manual transmission) or when the shift lever is in PARK
(auto transmission).
Press and release the MENU button until Personal Set-
tings displays in the EVIC. Use the DOWN button to display one of the following
choices:
Language
When in this display you may select one of five lan-
guages for all display nomenclature, including the trip
functions and the navigation system (if equipped). Press
the SELECT button while in this display to select English,
Espanol or Francais. Then, as you continue, the informa-
tion will display in the selected language.
Auto Lock Doors
When this feature is selected, all doors will lock automati-
cally when the vehicle reaches a speed of 15 mph (24 km/h).
The auto door lock feature can be enabled or disabled, to
make your selection, press and release the SELECT button
until a check-mark appears next to the feature showing the
system has been activated or the check-mark is removed
showing the system has been deactivated. 4 UNDERSTANDING YOUR INSTRUMENT PANEL 331
Page 334 of 655

Auto Unlk On Exit
When ON is selected, all doors will unlock when the
vehicle is stopped and the transmission is in the PARK or
NEUTRAL position and the driver’s door is opened. To
make your selection, press and release the SELECT
button until “On” or “Off” appears.
RKE Unlock
When Driver Door 1st Press is selected, only the driver’s
door will unlock on the first press of the Remote Keyless
Entry (RKE) transmitter UNLOCK button. When Driver
Door 1st Press is selected, you must press the RKE
transmitter UNLOCK button twice to unlock the passen-
ger’s doors. When All Doors 1st Press is selected, all of
the doors will unlock on the first press of the RKE
transmitter UNLOCK button. To make your selection,
press and release the SELECT button until “Driver Door
1st Press” or “All Doors 1st Press” appears. Sound Horn With Lock
When on is selected, a short horn sound will occur when
the RKE transmitter LOCK button is pressed. This feature
may be selected with or without the Flash Lamp with
Lock feature. To make your selection, press and release
the SELECT button until “On” or “Off” appears.
Flash Lamp with Lock
When on is selected, the front and rear turn signals will
flash when the doors are locked or unlocked with the
RKE transmitter. This feature may be selected with or
without the Sound Horn with Lock feature selected. To
make your selection, press and release the SELECT
button until “On” or “Off” appears.
Headlamp Off Delay
When this feature is selected, the driver can choose to
have the headlights remain on for 0, 30, 60, or 90 seconds332 UNDERSTANDING YOUR INSTRUMENT PANEL