Page 49 of 116
Following Your Route
•Your route is marked with a magenta line on the map. If you depart from the original
route, your route is recalculated. A speed limit icon could appear as you travel on
major roadways.
Adding A Via Point
• To add a stop between the current location and the end destination (Via Point) you must be navigating a route.
•
Touch the “back arrow icon” multiple times to return to the Main Navigation menu.
• Touch the “Where To?” soft-key, then search for the additional stop. Then select the Via Point you wish to add from the given search results.
• Touch the “Go” soft-key, then touch the “Add to Current Route” soft-key.
Taking A Detour
• To take a detour you must be navigating a route.
•
Touch the “back arrow icon” soft-key multiple times to return to the Main Navigation
menu.
• Touch the “Detour” soft-key.
NOTE:
If the route you are currently taking is the only reasonable option, the device might
not calculate a detour.
ELECTRONICS
47
Page 50 of 116

Acquiring Satellites
• The GPS Satellite strength bars indicate the strength of your satellite reception.
• Acquiring satellite signals can take a few minutes. When at least one of the barsis green, your device has acquired satellite signals.
•
You may experience delays receiving satellite signals when in areas with an ob-
structed view to the sky, such as garages, tunnels, or large cities with tall buildings.
SiriusXM SATELLITE RADIO/TRAVEL LINK
• SiriusXM Travel Link requires a subscription, sold separately after the 1 year trial subscription included with your vehicle purchase.
• SiriusXM Travel Link is only available in the United States.
• The following describes features that are available when in SiriusXM Satellite Radio mode.
• To access SiriusXM Satellite Radio, press the “RADIO/MEDIA” or “RADIO” and then touch the “SAT” soft-key tab.
Info
• Touch the “i” soft-key to view detailed information about the current Sirius XM Satellite channel.
SiriusXM Parental Controls
• SiriusXM offers the option to permanently block selected channels. Call 1-888-539-7474 and request the Family Package.
• Uconnect
®430/430N and 730N: Press the “MENU” hard-key while in SiriusXM
Satellite Radio Mode, then touch the “Channel Lock” to enable and/or disable
desired channels. The SEEK and SCAN function will then only display channels
without Channel lock.
Search/Browse
• Touch the “magnifying glass” soft-key to search/browse the SiriusXM channel listing by Favorites and Categories such as Song, Artist and Channel Name.
The Search/Browse also allows you manage your Favorites.
ELECTRONICS
48
Page 51 of 116

• You can save 50 favorite songs and 50 favorite artists.
•
Touch the “add favorite” soft-key to add
either the song or the artist of the cur")
SiriusXM Satellite Radio Favorites (SAT Favorites)
• You can save 50 favorite songs and 50 favorite artists.
•
Touch the “add favorite” soft-key to add
either the song or the artist of the cur-
rently playing program to the SAT Favor-
ites list. The favorite star will appear in
the upper right corner, below the SAT
soft-key.
•You will see a favorite star indicator in
the upper right side of the screen below
the SAT soft-key and a pop up will alert
you that a favorite song or artist is cur-
rently playing on one of the SiriusXM
satellite radio channels.
NOTE:
Refer to your Uconnect®730N or 430/
430N User's Manual for more information.
Display SAT Favorites List
• Touch the “Search/Browse” soft-key and select “Favorites” from the SAT
Browse screen.
• Touch the desired favorites soft-key to switch the SAT tuner to the corre-
sponding channel.
• You may use the “LIST” soft-key to toggle between:
• Favorite Songs.
• Favorite Artists.
• Currently playing favorites.
ELECTRONICS
49
Page 52 of 116
.
Press the REPLAY button to listen to
the stor")
Replay
• While you are in SAT mode, you canreplay 44 minutes of the current
SiriusXM channel (when the channel is
changed, this audio buffer is erased).
Press the REPLAY button to listen to
the stored audio.
• You can touch the on-screen controls to pause and rewind audio playback,
touch the SCAN button to preview
each of the tracks stored in the buffer,
or select a track from the list.
• The time displayed below the bar indicates how much time is present between the current buffer play position and the live broadcast.
Replay Option Option Description
Play/Pause Touch to Pause content playback. Touch Pause/Play again to resume playback.
Rewind/RW Rewinds the channel content in steps of five seconds. Touch and hold to rewind continuously, then release to begin playing content at that
point.
Fast Forward/FW Forwards the content, and works similarly to Rewind/RW. However, Fast Forward/FW can only be used when content has been previously
rewound.
Replay Time Displays the amount of time in the upper center of the screen by which your content lags the Live channel.
Live Resumes playback of Live content at any time while replaying rewound content.
ELECTRONICS
50
Page 53 of 116
SiriusXM Travel Link (Uconnect® 730N & Uconnect® 430N Only)
NOTE:
• SiriusXM Travel Link requires a subscription, sold separately after the 1 year trialsubscription included with your vehicle purchase.
• SiriusXM Travel Link is only available in the United States.
• SiriusXM Travel Link brings a wealth of useful information into your vehicle and right to your fingertips.
• To access Travel Link, press the MENU hard-key, then the Travel Link soft-key.
1 – Favorites View and store your favorite location, theater and sport
teams for quick access.
2 – Forecast View detailed weather conditions, forecasts and
ski/snowboarding conditions at resorts.
3 – Ski Info View ski and snowboarding conditions at ski resorts.
4 – Fuel Prices View detailed price information for fuel stations.
5 – Movies View information on movies that are playing at theaters.
6 – Sports View sports scores and upcoming events for all major
sports.
ELECTRONICS
51
Page 54 of 116

STEERING WHEEL AUDIO CONTROLS
•The steering wheel audio controls are
located on the rear surface of the steer-
ing wheel.
Right Switch
•Press the switch up or down to increase
or decrease the volume.
• Press the button in the center to change modes AM/FM/CD/SAT.
Left Switch
• Press the switch up or down to search for the next listenable station or select the
next or previous CD track.
• Press the button in the center to select the next preset station (radio) or to change CDs if equipped with a CD Changer.
iPod®/USB/MP3 CONTROL
• There are many ways to play music from iPod®/MP3 players or USB devices
through your vehicle's sound system.
• The remote USB port, located within the front storage area, allows you to plug an iPod
®into the vehicle's sound system.
• Non-Touch-Screen Radios: To hear audio from devices connected to the USB port, press the “AUX” button on the radio faceplate.
• Touch-Screen Radios: To hear audio from devices connected to the USB port, press the “MEDIA” hard-key, then touch the “AUX” or “iPod
®” soft-key.
• When connected to this feature: •
The iPod®can be controlled using the
radio buttons to Play, Browse, and List
the iPod
®or external devices contents.
• The iPod®battery charges when
plugged into the USB port (if sup-
ported by the specific audio device).
• Compatible iPod
®devices may also
be controllable using voice commands. Refer to the Owner's Manual on the DVD
for details.
ELECTRONICS
52
Page 55 of 116

NOTE:
The USB port supports certain Mini, Classic, Nano, Touch, and iPhone®devices.
The
USB port also supports playing music from compatible external USB Mass Storage
Class memory devices. For supported audio file formats, refer to the USB Port section in
the Owner's Manual on the DVD. Refer to www.UconnectPhone.com website for a list of
tested iPod
®s. Some iPod®software versions may not fully support the USB port
features. Please visit Apple’s website for iPod®software updates.
WARNING!
Do not plug in or remove the iPod®or external device while driving. Failure to
follow this warning could result in a collision.
Uconnect® Phone
• To determine if your vehicle is equipped with Uconnect®Phone, press the
“Uconnect®Phone” buttonlocated on the radio faceplate. If your vehicle has
this feature, you will hear a voice prompt. If not, you will see a message on the
radio “Uconnect phone not available”.
•
The Uconnect®Phone is a voice-activated, hands-free, in-vehicle communications
system with Voice Command Capability (see Voice Command section).
NOTE:
To access the tutorial, press the “Uconnect®Phone” button. After the BEEP,
say “tutorial.” Press any hard-key/button or touch the display (Touch-Screen radio) to
cancel the “tutorial”.
• The Uconnect
®Phone allows you to dial a phone number with your mobile phone
using simple voice commands.
• Refer to your vehicle Owner's Manual on the DVD for further details.
NOTE:
The Uconnect
®Phone requires a mobile phone equipped with the Bluetooth®
Hands-Free Profile, Version 1.0 or higher. For Uconnect®Customer Support: U.S.
residents - visit www.UconnectPhone.com or call 1–877–855–8400. Canadian
Residents - call, 1-800-465–2001 (English) or 1-800-387-9983 (French). This site
will provide specific instructions based on the type of mobile phone being paired.
ELECTRONICS
53
Page 56 of 116

Phone Pairing
NOTE:
• Pairing is a one-time initial setup before using the phone.
• Prior to starting the pairing procedure ensure all additional phones within thevehicle have their Bluetooth
®disabled.
•
The Uconnect®Phone requires a mobile phone equipped with the Bluetooth®
Hands-Free Profile, Version 1.0 or higher. For Uconnect®customer support: U.S.
residents - visit www.UconnectPhone.com or call 1–877–855–8400. Canadian
Residents - call 1-800-465–2001 (English) or 1-800-387-9983 (French). This site
will provide specific instructions based on the type of mobile phone being paired.
• Press the “Phone”button to begin.
• Wait for the “ready” prompt and BEEP.
• After the BEEP, say ”setup” or “Uconnect device setup”.
• After the BEEP, say “device pairing”.
• After the BEEP, say “pair a device”.
• Follow the audible prompts.
•
You will be asked to say a four-digit
Personal Identification Number (PIN),
which you will later need to enter into
your mobile phone. You can say any
four-digit PIN. You will not need to re-
member this PIN after the initial pairing
process.
• You will then be prompted to give the phone pairing a name (each phone paired should have a unique name).
•
Next you will be asked to give this new pairing a priority of 1 thru 7 (up to seven phones
may be paired); 1 is the highest and 7 is the lowest priority. The system will only connect
to the highest priority phone that exists within the proximity of the vehicle.
• You will then need to start the pairing procedure on your cell phone. Follow the Bluetooth®instructions in your cell phone Owner's Manual to complete the phone
pairing setup.
ELECTRONICS
54
 1
1 2
2 3
3 4
4 5
5 6
6 7
7 8
8 9
9 10
10 11
11 12
12 13
13 14
14 15
15 16
16 17
17 18
18 19
19 20
20 21
21 22
22 23
23 24
24 25
25 26
26 27
27 28
28 29
29 30
30 31
31 32
32 33
33 34
34 35
35 36
36 37
37 38
38 39
39 40
40 41
41 42
42 43
43 44
44 45
45 46
46 47
47 48
48 49
49 50
50 51
51 52
52 53
53 54
54 55
55 56
56 57
57 58
58 59
59 60
60 61
61 62
62 63
63 64
64 65
65 66
66 67
67 68
68 69
69 70
70 71
71 72
72 73
73 74
74 75
75 76
76 77
77 78
78 79
79 80
80 81
81 82
82 83
83 84
84 85
85 86
86 87
87 88
88 89
89 90
90 91
91 92
92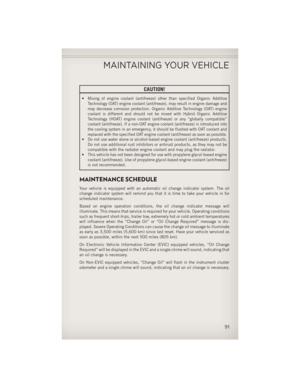 93
93 94
94 95
95 96
96 97
97 98
98 99
99 100
100 101
101 102
102 103
103 104
104 105
105 106
106 107
107 108
108 109
109 110
110 111
111 112
112 113
113 114
114 115
115

NOTE:
• SiriusXM Travel Link requires a subscription, sold separately after the 1 year trialsubscription included with your vehicle purc")