Page 305 of 541

Note:If the bulb is accidentally touched, it should be cleaned with
rubbing alcohol before being used.
Headlamp:
A. Front parking lamp/turn signal
bulb
B. Low/High beam headlamp bulb
C. Sidemarker bulb
Low/High beam bulbs:
1. Make sure the headlamp switch is
in the off position, then open the
hood.
2. Reach in behind the headlamp
assembly to access the bulbs and
connectors.
3. Remove service cap.
4. Remove bulb from the headlamp
assembly by turning it
counterclockwise, then pull it
straight out.
Front parking lamp/turn
signal/sidemarker bulbs:
1. Make sure headlamp switch is in
the off position, then open the hood.
2. Reach in behind the headlamp
assembly to access the bulb sockets
and connectors.
3. Rotate the bulb socket
counterclockwise and remove from
the lamp assembly.
4. Carefully pull the bulb out of the socket and push in the new bulb.
Install the new bulbs in reverse order from the steps above.
ABC
Maintenance305
2013 Taurus
Owners Guide gf, 1st Printing
USA(fus)
Page 306 of 541
Replacing HID headlamp bulbs (if equipped)
The headlamps on your vehicle use a “high intensity discharge” source.
These lamps operate at a high voltage. When the bulb is burned out, the
bulb and starter capsule assembly must be replaced by your authorized
dealer.
Replacing stop/tail/turn and sidemarker lamp bulbs
Your vehicle is equipped with a tail lamp assembly containing integral
multiple light emitting diodes (LED) for the stop/tail/turn and sidemarker
functions. If replacement is required, see your authorized dealer.
Replacing backup lamp bulbs
1. Make sure the headlamp switch is in the off position.
2. Remove the deck lid trim panel press pins
and carefully pull the panel away to expose
the backside of the backup lamp assembly.
3. Remove bulb socket by rotating it
counterclockwise, then pull it out of
the lamp assembly.
306Maintenance
2013 Taurus
Owners Guide gf, 1st Printing
USA(fus)
Page 342 of 541

Note:Passengers should not remain in the vehicle when the vehicle is
being jacked.
1. Park on a level surface, set the parking brake and activate the hazard
flashers.
2. Place the gearshift lever in P (Park) and turn the engine off.
3. Lift the trunk cargo cover, and remove
the wing nut that secures the spare tire
by turning it counterclockwise.
4. Lift and remove the spare tire from
the trunk.
5. Remove the second wing nut that
secures the jack retention bracket by
turning it counterclockwise, remove the
jack kit from the vehicle.
6. Remove the jack and the wrench from
the felt bag. Fold down the wrench
socket to use to loosen the lug nuts and
to operate the jack.
Vehicle jacking
1. Block the diagonally opposite
wheel.
2. If your vehicle has wheel covers,
remove them with the lug wrench tip
and loosen each wheel lug nut
one-half turn counterclockwise. Do
not remove them until the wheel is raised off the ground.
3. The vehicle jacking points are shown here, and are depicted on the
yellow warning label on the jack.
342Wheels and Tires
2013 Taurus
Owners Guide gf, 1st Printing
USA(fus)
Page 343 of 541
Jack at the specified locations to avoid damage to the vehicle.
4. Small arrow-shaped marks on the sills show the location of the jacking
points.
5. Remove the lug nuts with the lug wrench.
6. Replace the flat tire with the spare tire, making sure the valve stem is
facing outward. Reinstall the lug nuts until the wheel is snug against the
hub. Do not fully tighten the lug nuts until the wheel has been lowered.
7. Lower the wheel by turning the jack handle counterclockwise.
8. Remove the jack and fully tighten the lug
nuts in the order shown. Refer toWheel lug
nut torque specificationslater in this
chapter for the proper lug nut torque
specification.
9. Put the flat tire, jack and lug wrench
away. Make sure the jack is fastened so it
does not rattle when you drive. Unblock the
wheels.
Wheels and Tires343
2013 Taurus
Owners Guide gf, 1st Printing
USA(fus)
Page 348 of 541

First Stage: Reinflating the Tire with Sealing Compound and Air
WARNING:Do not stand directly over the temporary mobility kit
while inflating the tire. If you notice any unusual bulges or
deformations in the tire’s sidewall during inflation, stop and call
roadside assistance.
WARNING:If the tire doesn’t inflate to the recommended tire
pressure within 15 minutes, stop and call roadside assistance.
Preparation
Park the vehicle in a safe, level and secure area, away from moving
traffic. Turn the hazard lights on. Apply the parking brake and turn the
engine off. Inspect the flat tire for visible damage.
Sealant compound contains latex. To avoid any allergic reactions, use the
non-latex gloves located in the accessory box on the underside of the
temporary mobility kit housing.
Do not remove any foreign object that has pierced the tire. If a puncture
is located in the tire sidewall, stop and call roadside assistance.
1. Remove the valve cap from the tire valve.
2. Unwrap the clear tube from the compressor housing.
3. Remove the tube cap and fasten the metal connector of the tube to
the tire valve, turning clockwise. Make sure the connection is tightly
fastened.
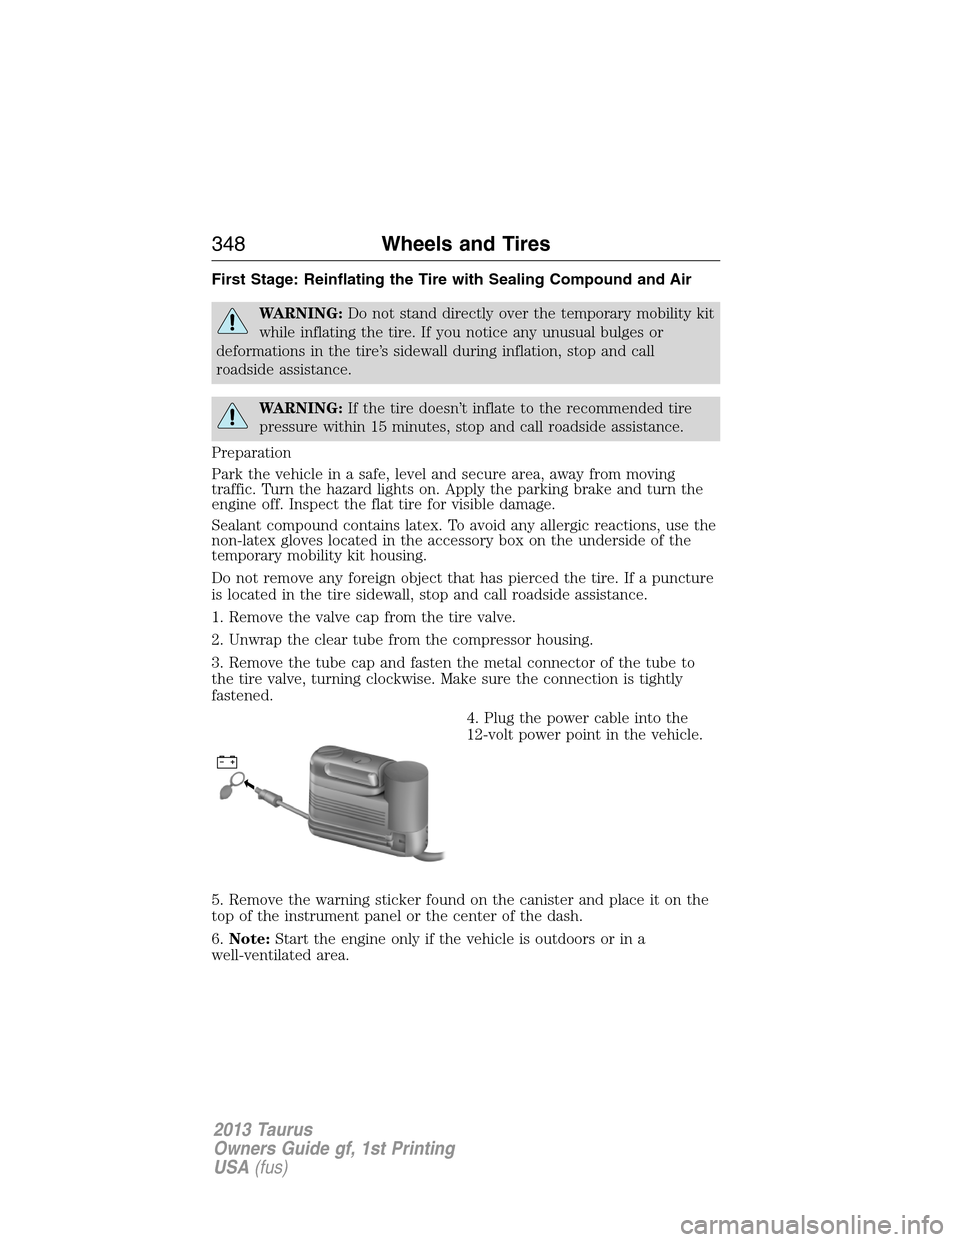
4. Plug the power cable into the
12-volt power point in the vehicle.
5. Remove the warning sticker found on the canister and place it on the
top of the instrument panel or the center of the dash.
6.Note:Start the engine only if the vehicle is outdoors or in a
well-ventilated area.
348Wheels and Tires
2013 Taurus
Owners Guide gf, 1st Printing
USA(fus)
Page 349 of 541

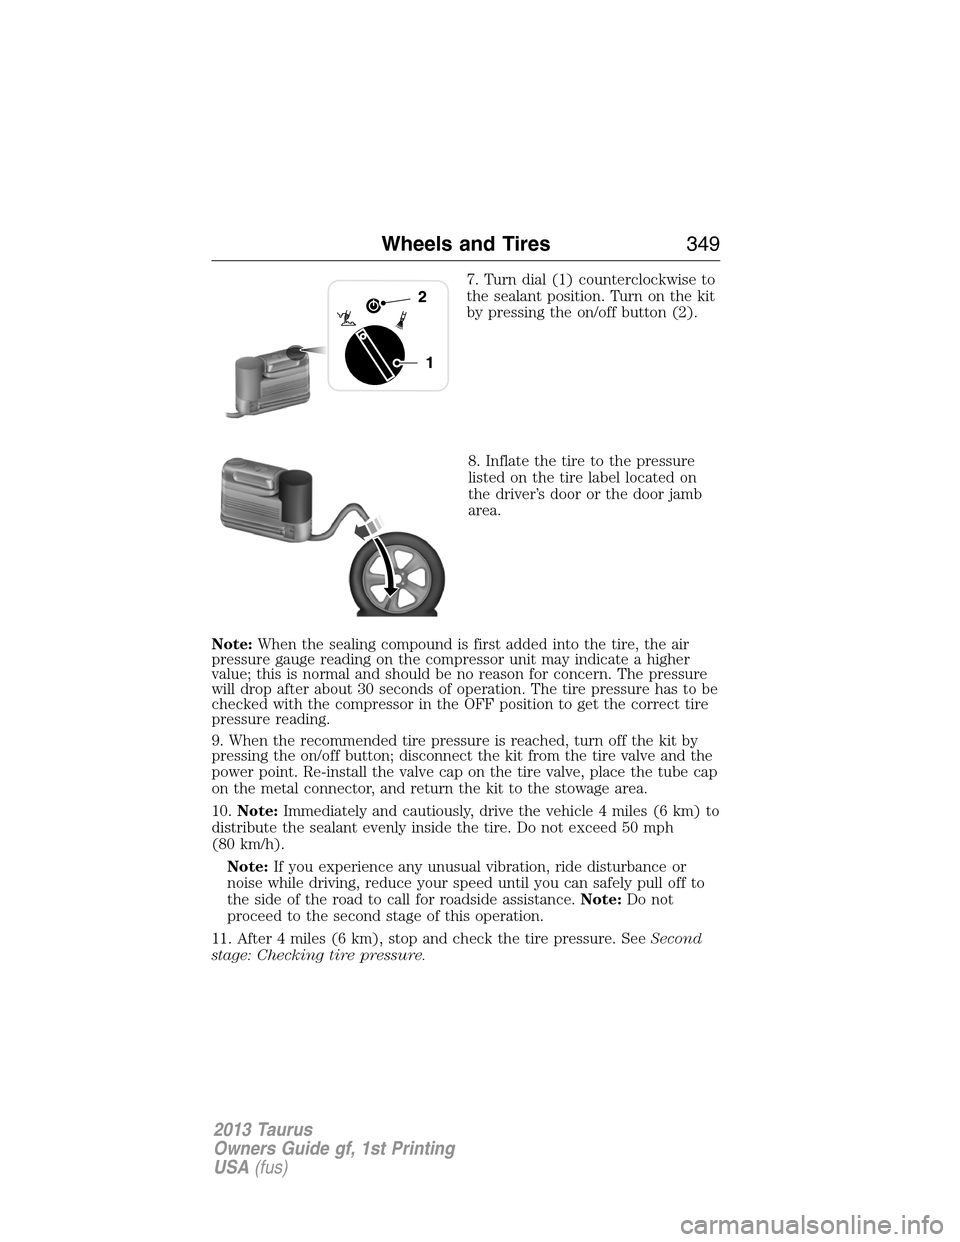
7. Turn dial (1) counterclockwise to
the sealant position. Turn on the kit
by pressing the on/off button (2).
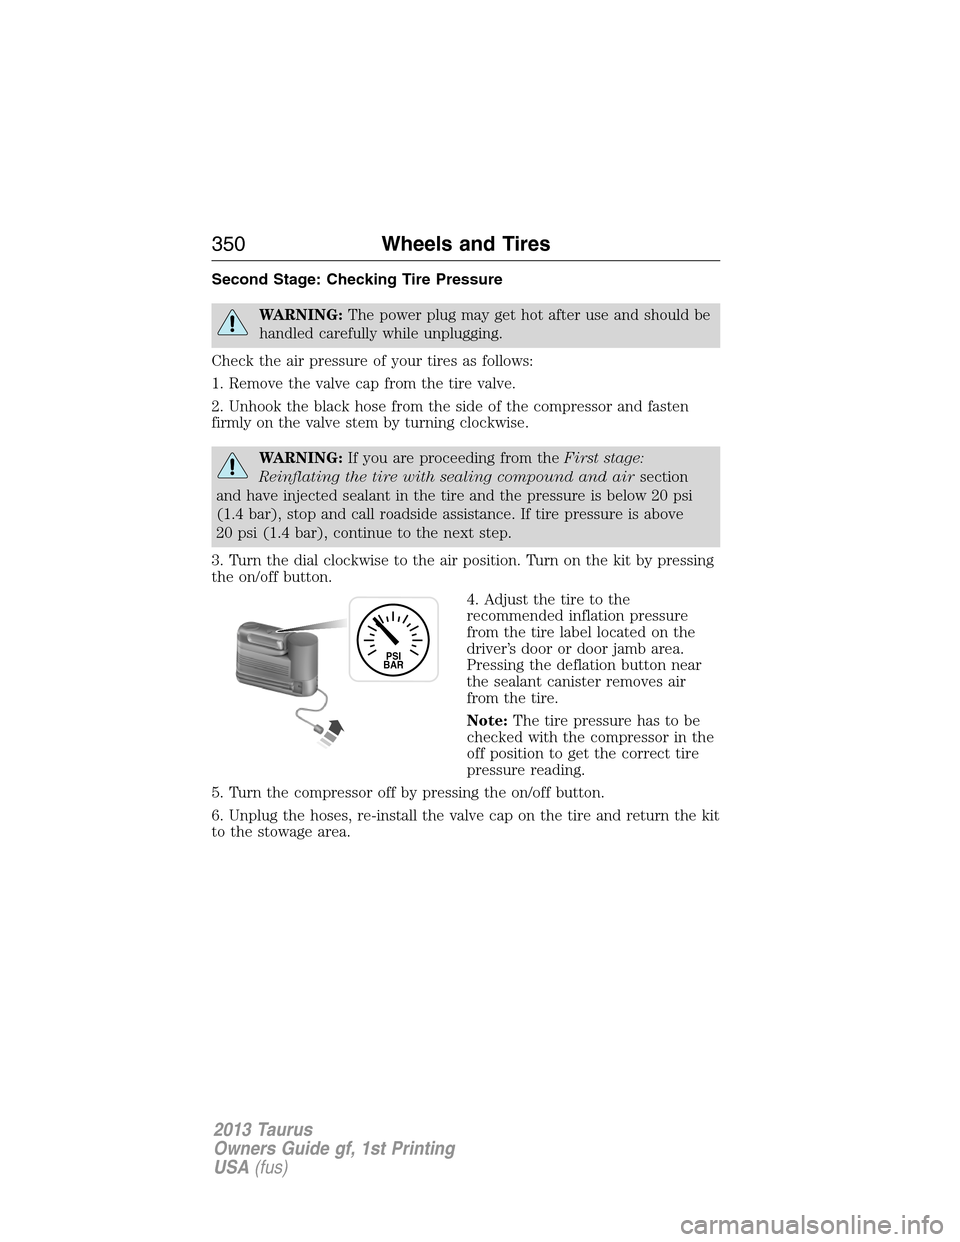
8. Inflate the tire to the pressure
listed on the tire label located on
the driver’s door or the door jamb
area.
Note:When the sealing compound is first added into the tire, the air
pressure gauge reading on the compressor unit may indicate a higher
value; this is normal and should be no reason for concern. The pressure
will drop after about 30 seconds of operation. The tire pressure has to be
checked with the compressor in the OFF position to get the correct tire
pressure reading.
9. When the recommended tire pressure is reached, turn off the kit by
pressing the on/off button; disconnect the kit from the tire valve and the
power point. Re-install the valve cap on the tire valve, place the tube cap
on the metal connector, and return the kit to the stowage area.
10.Note:Immediately and cautiously, drive the vehicle 4 miles (6 km) to
distribute the sealant evenly inside the tire. Do not exceed 50 mph
(80 km/h).
Note:If you experience any unusual vibration, ride disturbance or
noise while driving, reduce your speed until you can safely pull off to
the side of the road to call for roadside assistance.Note:Do not
proceed to the second stage of this operation.
11. After 4 miles (6 km), stop and check the tire pressure. SeeSecond
stage: Checking tire pressure.
Wheels and Tires349
2013 Taurus
Owners Guide gf, 1st Printing
USA(fus)
Page 350 of 541

Second Stage: Checking Tire Pressure
WARNING:The power plug may get hot after use and should be
handled carefully while unplugging.
Check the air pressure of your tires as follows:
1. Remove the valve cap from the tire valve.
2. Unhook the black hose from the side of the compressor and fasten
firmly on the valve stem by turning clockwise.
WARNING:If you are proceeding from theFirst stage:
Reinflating the tire with sealing compound and airsection
and have injected sealant in the tire and the pressure is below 20 psi
(1.4 bar), stop and call roadside assistance. If tire pressure is above
20 psi (1.4 bar), continue to the next step.
3. Turn the dial clockwise to the air position. Turn on the kit by pressing
the on/off button.
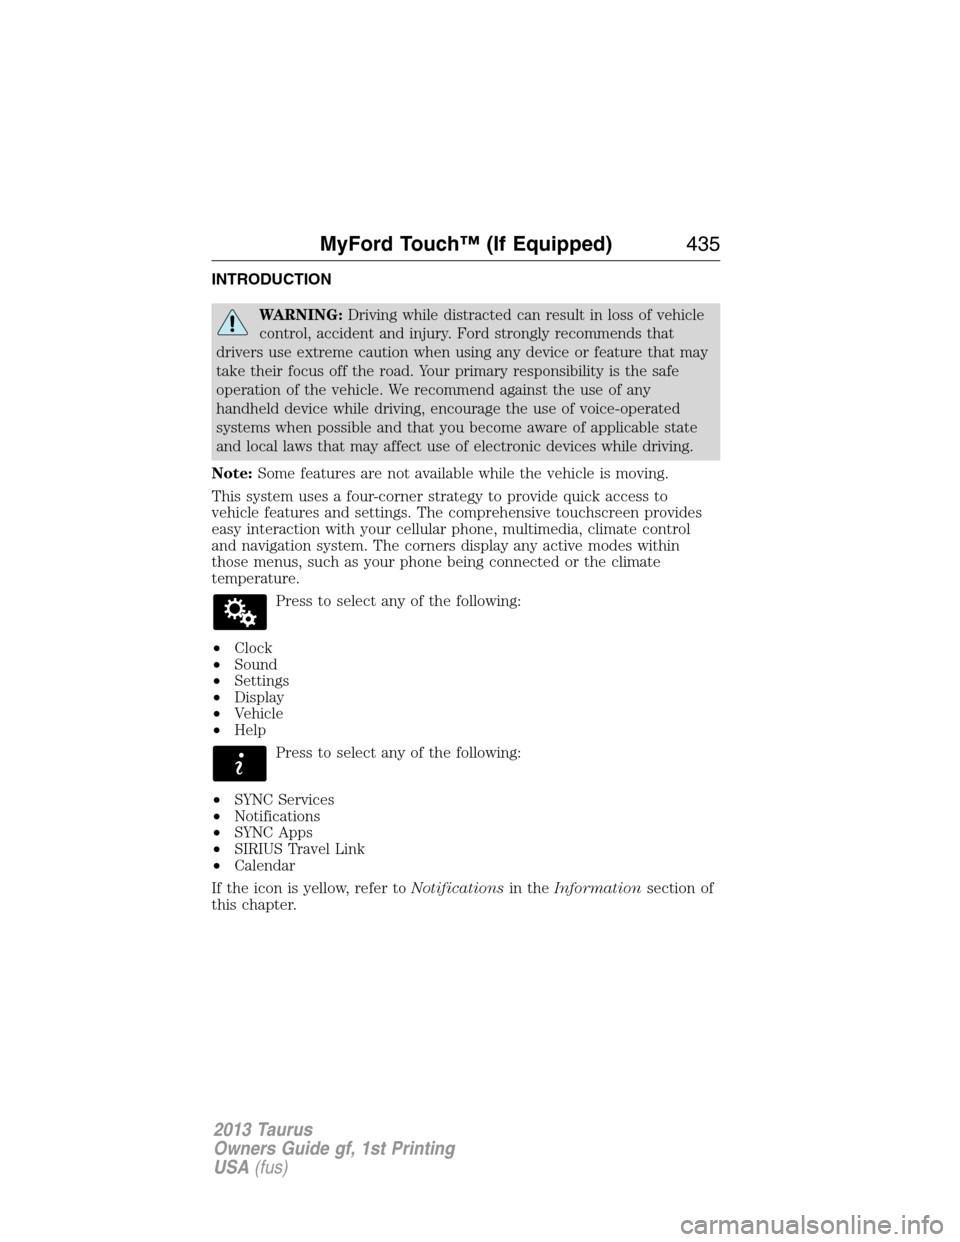
4. Adjust the tire to the
recommended inflation pressure
from the tire label located on the
driver’s door or door jamb area.
Pressing the deflation button near
the sealant canister removes air
from the tire.
Note:The tire pressure has to be
checked with the compressor in the
off position to get the correct tire
pressure reading.
5. Turn the compressor off by pressing the on/off button.
6. Unplug the hoses, re-install the valve cap on the tire and return the kit
to the stowage area.
PSI
BAR
350Wheels and Tires
2013 Taurus
Owners Guide gf, 1st Printing
USA(fus)
Page 435 of 541

INTRODUCTION
WARNING:Driving while distracted can result in loss of vehicle
control, accident and injury. Ford strongly recommends that
drivers use extreme caution when using any device or feature that may
take their focus off the road. Your primary responsibility is the safe
operation of the vehicle. We recommend against the use of any
handheld device while driving, encourage the use of voice-operated
systems when possible and that you become aware of applicable state
and local laws that may affect use of electronic devices while driving.
Note:Some features are not available while the vehicle is moving.
This system uses a four-corner strategy to provide quick access to
vehicle features and settings. The comprehensive touchscreen provides
easy interaction with your cellular phone, multimedia, climate control
and navigation system. The corners display any active modes within
those menus, such as your phone being connected or the climate
temperature.
Press to select any of the following:
•Clock
•Sound
•Settings
•Display
•Vehicle
•Help
Press to select any of the following:
•SYNC Services
•Notifications
•SYNC Apps
•SIRIUS Travel Link
•Calendar
If the icon is yellow, refer toNotificationsin theInformationsection of
this chapter.
MyFord Touch™ (If Equipped)435
2013 Taurus
Owners Guide gf, 1st Printing
USA(fus)