Page 82 of 497
LIGHTING CONTROL
Rotate the control clockwise to the
first position to turn on the parking
lamps.
Rotate the control clockwise to the
second position to turn on the
headlamps.
Rotate the control to the vertical
position to turn the headlamps off.
High Beams
•Push the lever toward the
instrument panel to activate.
•Pull the lever toward you to
deactivate.
Headlamp Flasher
Pull the lever toward you slightly
and release it to flash the
headlamps.
120
120
82Lighting
2013 Expedition(exd)
Owners Guide gf, 1st Printing
USA(fus)
Page 84 of 497
DAYTIME RUNNING LAMPS (IF EQUIPPED)
WARNING:Always remember to switch your headlamps on in
low light situations or during inclement weather. The system does
not activate the tail lamps and may not provide adequate lighting
during these conditions. Failure to activate your headlamps under these
conditions may result in a collision.
The system turns the headlamps on with a reduced intensity output
(halogen headlamps) or turns the front turn lamps on (HID headlamps)
in daylight conditions.
To switch the system on, ignition must be in the on position, then switch
the lighting control to the off, autolamp, or parking lamp position.
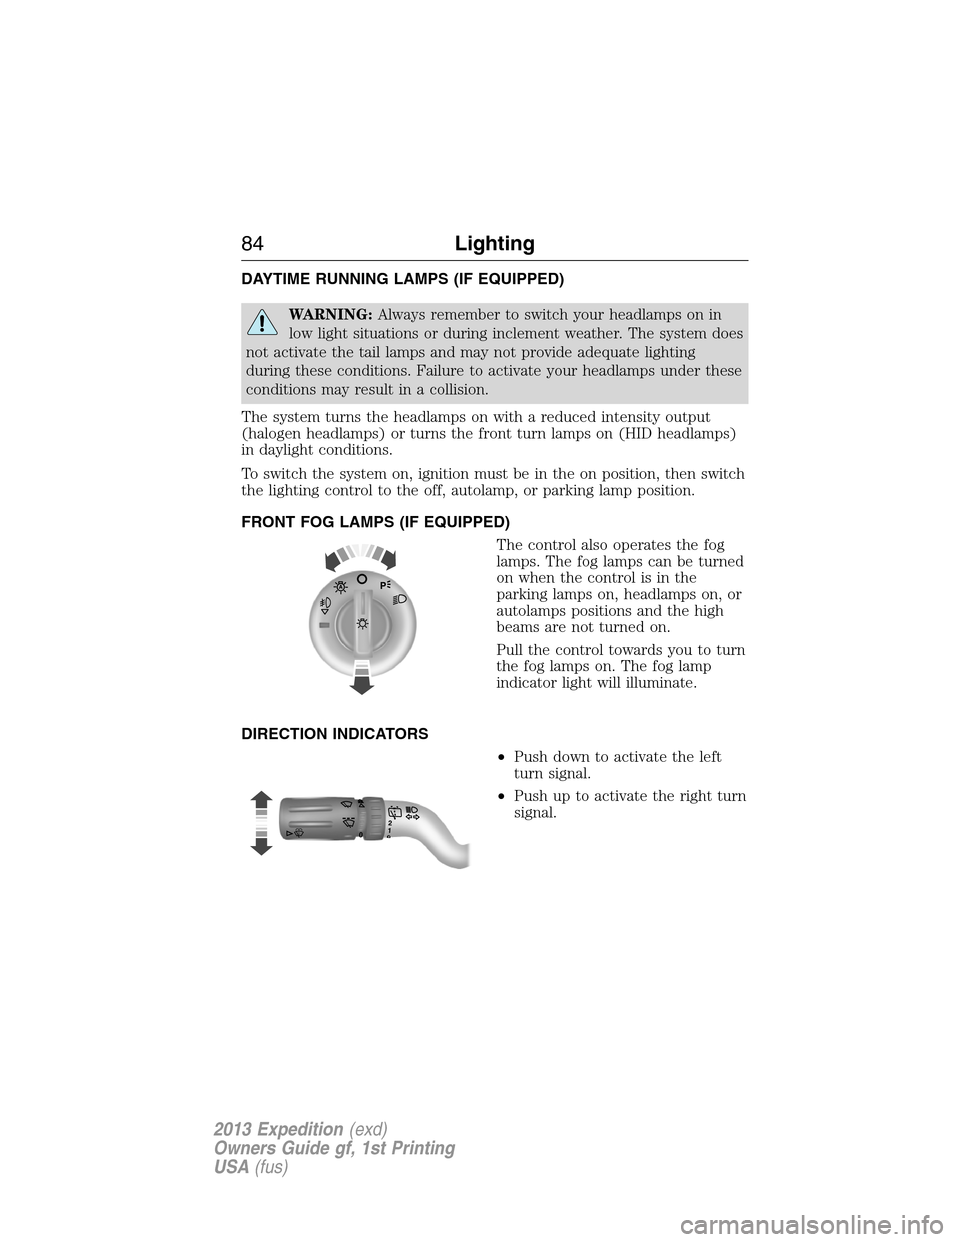
FRONT FOG LAMPS (IF EQUIPPED)
The control also operates the fog
lamps. The fog lamps can be turned
on when the control is in the
parking lamps on, headlamps on, or
autolamps positions and the high
beams are not turned on.
Pull the control towards you to turn
the fog lamps on. The fog lamp
indicator light will illuminate.
DIRECTION INDICATORS
•Push down to activate the left
turn signal.
•Push up to activate the right turn
signal.
120
84Lighting
2013 Expedition(exd)
Owners Guide gf, 1st Printing
USA(fus)
Page 89 of 497

Fold-Away Exterior Mirrors
Push the mirror toward the door window glass. Make sure that you fully
engage the mirror in its support when returning it to its original position.
Power-Folding Mirrors (If Equipped)
Note:Activating the mirrors 10 or more times within one minute, or
repeated folding and unfolding of the mirrors while holding the control
down during full travel, may disable the system to protect motors from
overheating. Wait approximately three minutes with the vehicle running,
and up to 10 minutes with the vehicle off, for the system to reset and for
function to return to normal.
Pull the control back to fold the
mirrors in or out.
A mirror may also be manually folded by pulling it toward the door
window glass. This may cause the mirror to appear loose and it will need
to be re-synchronized. Pull and hold the control to fold the mirrors in
until movement stops. A click will be heard indicating re-synchronization.
If the click is not heard, use the control to fold the mirrors all the way
out, then in again. Once the click is heard the mirrors will operate
normally until they are again manually folded.
Memory Mirrors (If Equipped)
You can save and recall the mirror positions through the memory
function. SeeMemory functionin theSeatschapter.
Auto-Dimming Feature (If Equipped)
The driver’s side exterior mirror will automatically dim when the interior
auto-dimming mirror is activated.
Signal Indicator Mirrors (If Equipped)
The rear-facing portion of the appropriate mirror housing will blink when
the turn signal is activated.
Windows and Mirrors89
2013 Expedition(exd)
Owners Guide gf, 1st Printing
USA(fus)
Page 92 of 497
REAR QUARTER WINDOWS (IF EQUIPPED)
WARNING:Do not leave children unattended in the vehicle and
do not let children play with the power rear quarter windows.
They may seriously injure themselves.
WARNING:When closing the power rear quarter windows, you
should verify that it is free of obstructions and ensure that
children and/or pets are not in the proximity of the window opening.
Press and hold theVENTcontrol to
open the windows.
Pull and hold theVENTcontrol to
close the windows.
Note:Vehicles without a moonroof
will only have theVENTbutton.
SUN VISORS
Rotate the visor toward the side
window and extend it rearward for
extra sunlight coverage.
Illuminated Visor Vanity Mirror
Lift the cover to switch on the
lamp.
SLIDE TILTVENT
92Windows and Mirrors
2013 Expedition(exd)
Owners Guide gf, 1st Printing
USA(fus)
Page 93 of 497
MOONROOF (IF EQUIPPED)
WARNING:Do not let children play with the moonroof or leave
children unattended in the vehicle. They may seriously hurt
themselves.
WARNING:When closing the moonroof, you should verify that it
is free of obstructions and ensure that children and/or pets are
not in the proximity of the moonroof opening.
The sliding shade can be manually opened or closed when the moonroof
is closed. Pull the shade toward the front of the vehicle to close it.
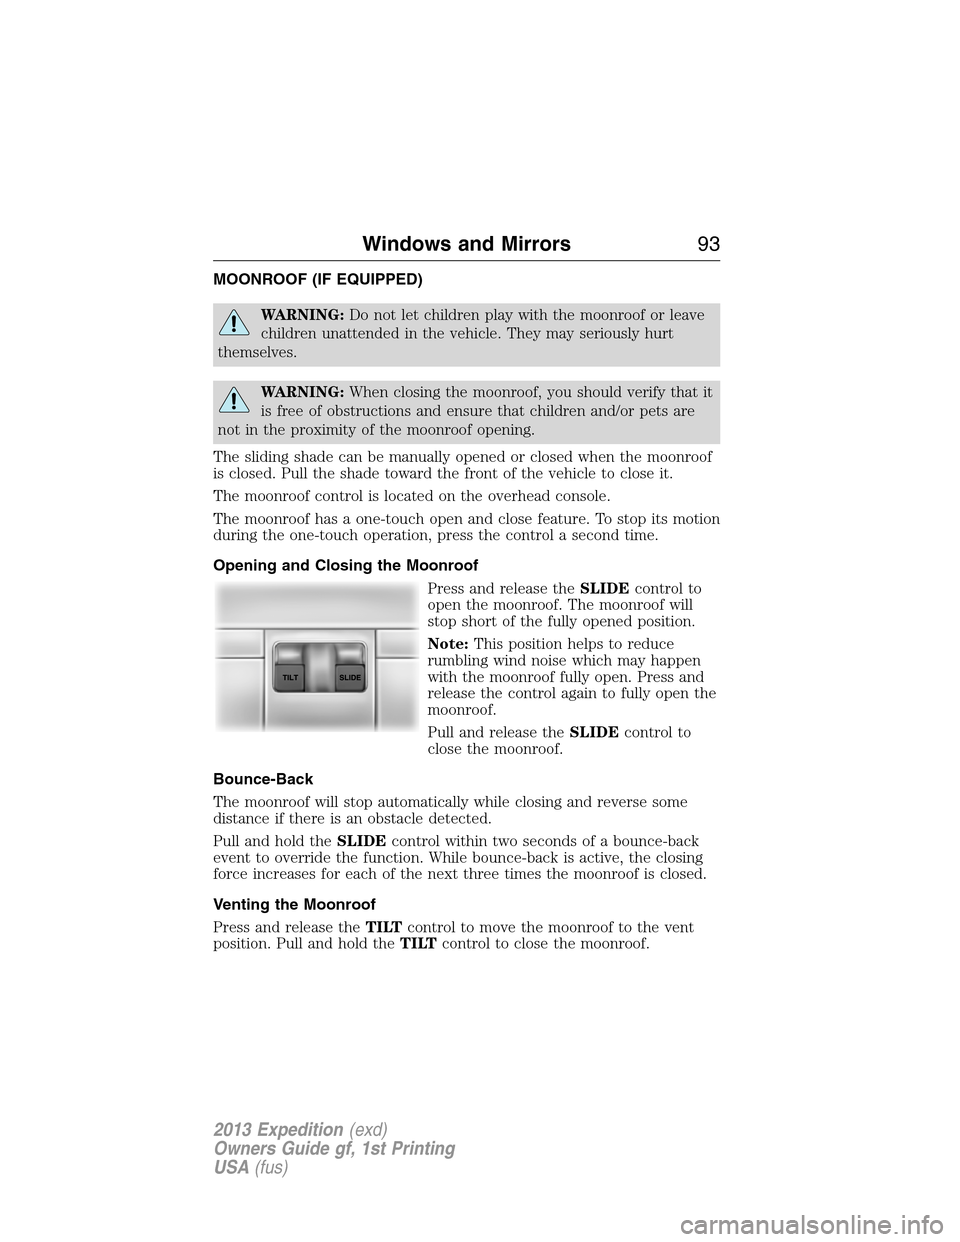
The moonroof control is located on the overhead console.
The moonroof has a one-touch open and close feature. To stop its motion
during the one-touch operation, press the control a second time.
Opening and Closing the Moonroof
Press and release theSLIDEcontrol to
open the moonroof. The moonroof will
stop short of the fully opened position.
Note:This position helps to reduce
rumbling wind noise which may happen
with the moonroof fully open. Press and
release the control again to fully open the
moonroof.
Pull and release theSLIDEcontrol to
close the moonroof.
Bounce-Back
The moonroof will stop automatically while closing and reverse some
distance if there is an obstacle detected.
Pull and hold theSLIDEcontrol within two seconds of a bounce-back
event to override the function. While bounce-back is active, the closing
force increases for each of the next three times the moonroof is closed.
Venting the Moonroof
Press and release theTILTcontrol to move the moonroof to the vent
position. Pull and hold theTILTcontrol to close the moonroof.
Windows and Mirrors93
2013 Expedition(exd)
Owners Guide gf, 1st Printing
USA(fus)
Page 99 of 497
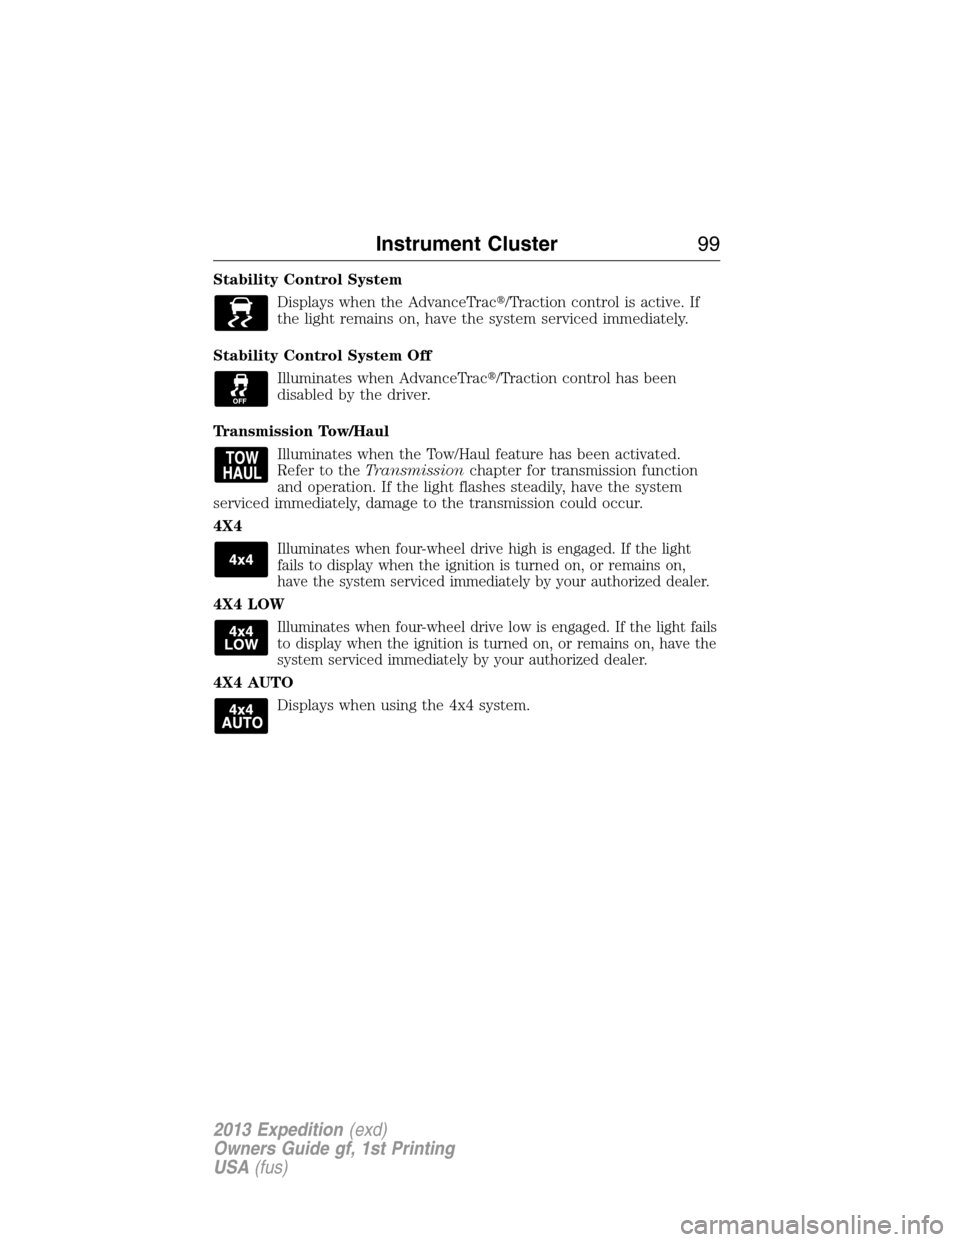
Stability Control System
Displays when the AdvanceTrac�/Traction control is active. If
the light remains on, have the system serviced immediately.
Stability Control System Off
Illuminates when AdvanceTrac�/Traction control has been
disabled by the driver.
Transmission Tow/Haul
Illuminates when the Tow/Haul feature has been activated.
Refer to theTransmissionchapter for transmission function
and operation. If the light flashes steadily, have the system
serviced immediately, damage to the transmission could occur.
4X4
Illuminates when four-wheel drive high is engaged. If the light
fails to display when the ignition is turned on, or remains on,
have the system serviced immediately by your authorized dealer.
4X4 LOW
Illuminates when four-wheel drive low is engaged. If the light fails
to display when the ignition is turned on, or remains on, have the
system serviced immediately by your authorized dealer.
4X4 AUTO
Displays when using the 4x4 system.
Instrument Cluster99
2013 Expedition(exd)
Owners Guide gf, 1st Printing
USA(fus)
Page 109 of 497
To reset the oil monitoring system to 100% after each oil change,
perform the following:
1. Press and release the SETUP button to display “OIL LIFE XXX%
HOLD RESET = NEW”.
2. Press and hold the RESET button for two seconds and release to reset
the oil life to 100%.
Note:To change oil life 100% value (if equipped with this feature) to
another value, proceed to Step 3.
3. Once “OIL LIFE SET TO XXX%” is displayed, release and press the
RESET button to change the Oil Life Start Value. Each release and press
will reduce the value by 10%.
•UNITS: Displays the current units in English or Metric.
•AUTOLAMP (SEC): This feature keeps your headlights on for up to
three minutes after the ignition is switched off.
•AUTOLOCK: This feature automatically locks all vehicle doors when
the vehicle is shifted into any gear, putting the vehicle in motion.
•AUTOUNLOCK: This feature automatically unlocks all vehicle doors
when the driver’s door is opened within 10 minutes of the ignition
being turned off.
•RUNNING BOARDS (if equipped): This feature automatically deploys
the side running boards for easy entry/exit from the vehicle or for
cleaning.
Auto: The running boards will automatically deploy when a door is
opened and automatically retract when the door is closed
Out: The running boards will remain deployed regardless of the doors
being open/closed. This setting can be used when washing the vehicle,
or accessing the roof rack. The running boards will stow and enter
AUTO mode when the vehicle speed exceeds 5 mph (8 km/h).
Off: The running boards will remain in regardless of the doors being
open/closed.
•POWER LIFTGATE (if equipped): This feature allows users to
open/close the rear liftgate at the touch of a button. If disabled, the
outside release handle and the rear cargo area control button are off.
The instrument panel button will continue to function the liftgate in
power mode.
•EASY ENTRY / EXIT (if equipped): This feature automatically moves
the driver’s seat rearward for easy exit/entry from the vehicle.
Information Displays109
2013 Expedition(exd)
Owners Guide gf, 1st Printing
USA(fus)
Page 116 of 497
GENERAL AUDIO INFORMATION
Radio Frequencies and Reception Factors
AM and FM frequencies are established by the Federal Communications
Commission (FCC) and the Canadian Radio and Telecommunications
Commission (CRTC). Those frequencies are:
AM: 530, 540–1700, 1710 kHz
FM: 87.9–107.7, 107.9 MHz
Radio reception factors
Distance/StrengthThe further you travel from an FM station,
the weaker the signal and the weaker the
reception.
TerrainHills, mountains, tall buildings, bridges,
tunnels, freeway overpasses, parking garages,
dense tree foliage and thunderstorms can
interfere with your reception.
Station OverloadWhen you pass a ground-based broadcast
repeating tower, a stronger signal may
overtake a weaker one and result in the audio
system muting.
CD/CD Player Information
Note:CD units are designed to play commercially pressed 4.75 inch (12
centimeter) audio compact discs only. Due to technical incompatibility,
certain recordable and re-recordable compact discs may not function
correctly when used in Ford CD players.
Note:CDs with homemade paper (adhesive) labels should not be inserted
into the CD player as the label may peel and cause the CD to become
jammed. It is recommended that homemade CDs be identified with
permanent felt tip marker rather than adhesive labels. Ballpoint pens may
damage CDs. Please contact your authorized dealer for further information.
Note:Do not use any irregularly shaped discs or discs with a scratch
protection film attached.
Always handle discs by their edges only. Clean the disc with an approved
CD cleaner only, wiping from the center of the disc toward the edge. Do
not clean in a circular motion.
Do not expose discs to direct sunlight or heat sources for extended
periods of time.
11 6Audio System
2013 Expedition(exd)
Owners Guide gf, 1st Printing
USA(fus)