Page 41 of 84

iPod®/USB/MP3 CONTROL
• The USB port located within the glove
box, allows you to plug an iPod® or
USB device into the vehicle's sound
system.
• To hear audio from devices connected
to this port from a non-touch-screen
radio, press the MEDIA button on the
radio faceplate.
• When connected to this feature:
• The iPod® or USB device audio can
be played on the vehicle’s sound
system.
• The iPod® can be controlled using the radio buttons to Play, Browse, and List
the iPod® or external devices contents. Refer to the BLUE&ME™ Manual on
the DVD for details.
• The iPod® battery charges when plugged into the USB port (if supported by the
specific audio device).
• Compatible iPod® devices may also be controllable using voice commands.
Refer to the BLUE&ME™ Manual on the DVD for details.
NOTE:
The USB port supports certain Mini, Classic, Nano, Touch, and iPhone® devices.
The USB port also supports playing music from compatible external USB Mass
Storage Class memory devices. For supported audio file formats, refer to the USB
Port section on the Owner's Manual on the DVD. Some iPod® software versions
may not fully support the USB port features. Please visit Apple’s website for iPod®
software updates.
WARNING!
Do not plug in or remove the iPod® or external device while driving. Failure to
follow this warning could result in a collision.
ELECTRONICS
39
Page 42 of 84

• The EVIC features a driver interactive
display that is located in the instru-
ment cluster. Pressing the controls on
the right side of the Instrument C")
ELECTRONIC VEHICLE INFORMATION
CENTER (EVIC)
• The EVIC features a driver interactive
display that is located in the instru-
ment cluster. Pressing the controls on
the right side of the Instrument Cluster
allows the driver to select vehicle in-
formation and Personal Settings. For
additional information, refer to Pro-
grammable Features in this guide.
• Press the SET button to enter the
menu mode.
• Press the plus or minus buttons to
scroll through the menu settings.
• Once the menu setting is shown in the EVIC display press the SET button to ac-
cess the setting and use the plus or minus buttons to change the current setting.
Press the SET button a second time to save the setting and return to menu
screen.
PROGRAMMABLE FEATURES
Electronic Vehicle Information Center (EVIC)
• The EVIC can be used to program the following Personal Settings. Press and re-
lease the SET button until menu is displayed, then press the plus or minus but-
tons to scroll through the settings.
• Once the menu setting is shown in the EVIC display press the SET button to ac-
cess the setting and use the plus or minus buttons to change the current setting.
The menu includes the following functions:
• Dimmer • Language
• Speed Beep • Buzzer Volume
• Trip B Data • Button Volume
• Set Time • Belt Buzzer
• Set Date • Hill Start Assist
•See Radio (Repeat Audio Information)• GSI Shift
• Speed Display • Daytime Running Lamps
• Autoclose • Exit Menu
• Units • Tire Pressure
• Key
ELECTRONICS
40
Page 43 of 84

TRIP BUTTON
• The Trip button is located on the end
of the wiper lever to the right of the
steering column. The trip button can
be used to display and reset the fol-
lowing functions:
• Range
• Distance Travelled
• Average Consumption
• Instant Consumption
• Average Speed
• Travel Time
• Short press (less than one second) to
display different functions.
• Long press (more than one second) to reset and start a new trip.
New Trip
• A new trip can be reset or restarted by:
• “Manual” resetting by the user, by pressing the Trip button;
• “Automatically” resetting, when the “Trip distance” reaches 9999.9 miles or
when the “Travel time” reaches 99.59 (99 hours and 59 minutes);
• After disconnecting/reconnecting the battery.
Trip A
• Shows the total distance traveled for Trip A since the last reset.
Trip B
• Shows the total distance traveled for Trip B since the last reset.
Start Of Trip Procedure
• With the ignition key on, press and hold the TRIP button for over one second to
reset Trip A or Trip B.
Exit Trip
• The Trip function is over when all the values have been displayed or holding the
SET button for longer than one second.
• Briefly press the SET button to go back to the menu screen or press and hold the
SET (approximately one second) to go back to the main screen without storing
settings.
ELECTRONICS
41
Page 44 of 84
POWER OUTLET
• For added convenience there is a
standard 12 Volt (13 Amp) power out-
let located in the floor console.
NOTE:
• Do not exceed the maximum power of
160 Watts (13 Amps) at 12 Volts. If
the 160 Watt (13 Amp) power rating is
exceeded, the fuse protecting the sys-
tem will need to be replaced.
• Power outlets are designed for acces-
sory plugs only. Do not insert any
other object in the power outlet as this will damage the outlet and blow the fuse.
Improper use of the power outlet can cause damage not covered by your new
vehicle warranty.
ELECTRONICS
42
Page 45 of 84
TRAILER TOWING
• Trailer towing with this vehicle is not recommended.
RECREATIONAL TOWING (BEHIND MOTORHOME,
ETC.)
Towing This Vehicle Behind Another Vehicle
Towing ConditionWheels OFF theGroundManual Transmission
Flat Tow NONE Transmission in NEUTRAL
Dolly TowFront OK
Rear NO
On Trailer ALL OK
NOTE:
• Vehicles equipped with manual transmissions may be recreationally towed (flat
towed) at any legal highway speed, for any distance, if the manual transmission is
in NEUTRAL.
• This vehicle may be towed on a flatbed or vehicle trailer provided all four wheels
are OFF the ground.
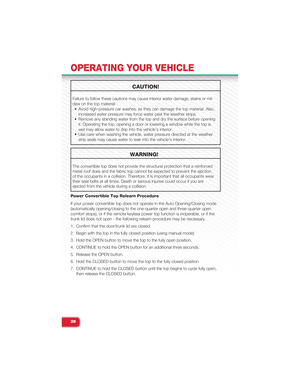
CAUTION!
Towing this vehicle in violation of the above requirements can cause severe trans-
mission damage. Damage from improper towing is not covered under the New
Vehicle Limited Warranty.
UTILITY
43
Page 46 of 84

24-HOUR ROADSIDE ASSISTANCE
• If your Abarth requires jump start assistance, out of gas/fuel delivery, tire service,
lockout service or towing due to a defect covered under the Basic Limited War-
ranty, dial toll-free 1-888-242-6342. See your Warranty booklet for further details.
• Provide your name, vehicle identification number and license plate number.
• Provide your location, including telephone number, from which you are calling.
• Briefly describe the nature of the problem and answer a few simple questions.
• You will be given the name of the service provider and an estimated time of ar-
rival. If you feel you are in an “unsafe situation”, please let us know. With your
consent, we will contact local police or safety authorities.
INSTRUMENT CLUSTER WARNING LIGHTS
- Generic Warning Light
• The Generic Warning Light will illuminate if any of the following conditions occur:
Oil Change Request, Engine Oil Pressure Sensor Failure, After Run Cooling
Pump, External Light Failure, Fuel Cut-Off Intervention, Fuel Cut-Off Not Available,
Parking Sensor Failure.
- Power Steering System Warning
• If the “POWER STEERING SYSTEM OVER TEMP” message and icon are dis-
played in the Electronic Vehicle Information Center (EVIC) display, it indicates that
extreme steering maneuvers have occurred, which caused an over temperature
condition in the power steering system. You will lose power steering assistance
momentarily until the over temperature condition no longer exists. Once driving
conditions are safe, pull over and let the vehicle idle. After approximately five min-
utes, the system will cool and return to normal operation.
- Engine Temperature Warning Light
• This light warns of an overheated engine condition.
• If the light turns on or flashes continuously while driving, safely pull over and stop
the vehicle. If the A/C system is on, turn it off. Also, shift the transmission into
NEUTRAL and idle the vehicle. If the temperature reading does not return to nor-
mal, turn the engine off immediately.
• We recommend that you do not operate the vehicle or engine damage will occur.
Have the vehicle serviced immediately.
WARNING!
A hot engine cooling system is dangerous. You or others could be badly burned
by steam or boiling coolant. You may want to call an authorized studio for service
if your vehicle overheats.
WHAT TO DO IN EMERGENCIES
44
Page 47 of 84
 Light
•This light informs you of a problem with the Electronic Throttle Control (ETC) system.
• If a problem is detected, the light will come on while the engin")
- Electronic Throttle Control (ETC) Light
•This light informs you of a problem with the Electronic Throttle Control (ETC) system.
• If a problem is detected, the light will come on while the engine is running. Cycle
the ignition when the vehicle has completely stopped; the light should turn off.
• If the light remains lit with the engine running, your vehicle will usually be drivable;
however, see an authorized service center immediately. If the light is flashing
when the engine is running, immediate service is required and you may experi-
ence reduced performance, an elevated/rough idle or engine stall and your ve-
hicle may require towing.
- Electronic Stability Control (ESC) OFF Indicator Light
• This light indicates the ESC system has been turned off by the driver.
- Electronic Stability Control (ESC) Activation / Malfunction
Indicator Light
• The “ESC Activation/Malfunction Indicator Light” in the instrument cluster will
come on for four seconds when the ignition switch is turned to the ON/RUN posi-
tion. If the “ESC Activation/Malfunction Indicator Light” comes on continuously
with the engine running, a malfunction has been detected in the ESC system.
If this light remains on, see your authorized studio as soon as possible to have
the problem diagnosed and corrected.
NOTE:
• The “ESC Off Indicator Light” and the “ESC Activation/Malfunction Indicator
Light” come on momentarily each time the ignition switch is turned to ON/RUN.
• Each time the ignition is turned to ON/RUN, the ESC system will be ON even if it
was turned off previously.
• ESC Activation/Malfunction Light can blink during a ESC or TC intervention.
TTC (Tire Transfer Control)
• The TTC system uses the brakes to prevent unwanted wheelspin during corner-
ing, to maximize acceleration and minimize understeering during aggressive driv-
ing. This feature is active in all modes. While TTC is active, the “ESC” lamp in the
instrument cluster may flash.
WHAT TO DO IN EMERGENCIES
45
Page 48 of 84
 Light
• Each tire should be checked monthly when it is cold and inflated to the tire pres-
sure recommended by the vehicle manufacturer. This can be found on")
- Tire Pressure Monitoring System (TPMS) Light
• Each tire should be checked monthly when it is cold and inflated to the tire pres-
sure recommended by the vehicle manufacturer. This can be found on the ve-
hicle placard or tire inflation pressure label on the driver's door. (If your vehicle
has tires of a different size than the size indicated on the vehicle placard or tire
inflation pressure label, you should determine the proper tire inflation pressure for
those tires.)
• As an added safety feature, your vehicle has been equipped with a Tire Pressure
Monitoring System (TPMS) that illuminates a low tire pressure telltale when one or
more of your tires is significantly under-inflated. Accordingly, when the low tire
pressure telltale illuminates, you should stop and check your tires as soon as
possible, and inflate them to the proper pressure. Driving on a significantly under-
inflated tire causes the tire to overheat and can lead to tire failure. Under-inflation
also reduces fuel efficiency and tire tread life, and may affect the vehicle’s han-
dling and stopping ability.
•IF THE LIGHT STARTS FLASHING INDICATING A LOW TIRE PRES-
SURE, ADJUST THE AIR PRESSURE IN THE LOW TIRE TO THE AIR
PRESSURE SHOWN ON THE VEHICLE PLACARD OR TIRE INFLATION
PRESSURE LABEL LOCATED ON THE DRIVER'S DOOR. NOTE: AFTER
INFLATION, THE VEHICLE MAY NEED TO BE DRIVEN FOR 20 MIN-
UTES BEFORE THE FLASHING LIGHT WILL TURN OFF.
• Please note that the TPMS is not a substitute for proper tire maintenance, and it
is the driver’s responsibility to maintain correct tire pressure, even if under-
inflation has not reached the level to trigger illumination of the TPMS low tire pres-
sure telltale.
• Your vehicle has also been equipped with a TPMS malfunction indicator to indi-
cate when the system is not operating properly. The TPMS malfunction indicator
is combined with the low tire pressure telltale. When the system detects a mal-
function, the telltale will flash for approximately one minute and then remain con-
tinuously illuminated. This sequence will continue each time the vehicle is re-
started as long as the malfunction exists.
• When the malfunction indicator is illuminated, the system may not be able to de-
tect or signal low tire pressure as intended. TPMS malfunctions may occur for a
variety of reasons, including the installation of replacement or alternate tires or
wheels on the vehicle that prevent the TPMS from functioning properly. Always
check the TPMS malfunction telltale after replacing one or more tires or wheels
on your vehicle, to ensure that the replacement or alternate tires and wheels al-
low the TPMS to continue to function properly.
WHAT TO DO IN EMERGENCIES
46


 power out-
let located in the floor console.
NOTE:
• Do not exceed the maximum power of
160 Watts (13 Amps) at 12 Volts. I")

Towing This Vehicle Behind Another Vehicle
Towing ConditionWheels OFF theGroundManu")