Page 498 of 683
TIRE SAFETY INFORMATION
Tire MarkingsNOTE:
•P (Passenger) - Metric tire sizing is based on U.S.
design standards. P-Metric tires have the letter “P”
molded into the sidewall preceding the size designa-
tion. Example: P215/65R15 95H.
•European-Metric tire sizing is based on European
design standards. Tires designed to this standard have
the tire size molded into the sidewall beginning with
the section width. The letter�P�is absent from this tire
size designation. Example: 215/65R15 96H.
•LT (Light Truck) - Metric tire sizing is based on U.S.
design standards. The size designation for LT-Metric
tires is the same as for P-Metric tires except for the
letters “LT” that are molded into the sidewall preced-
ing the size designation. Example: LT235/85R16.
1 — U.S. DOT Safety Standards
Code (TIN)4 — Maximum Load
2 — Size Designation5 — Maximum Pressure
3 — Service Description6 — Treadwear, Traction and
Temperature Grades 496 STARTING AND OPERATING
Page 500 of 683
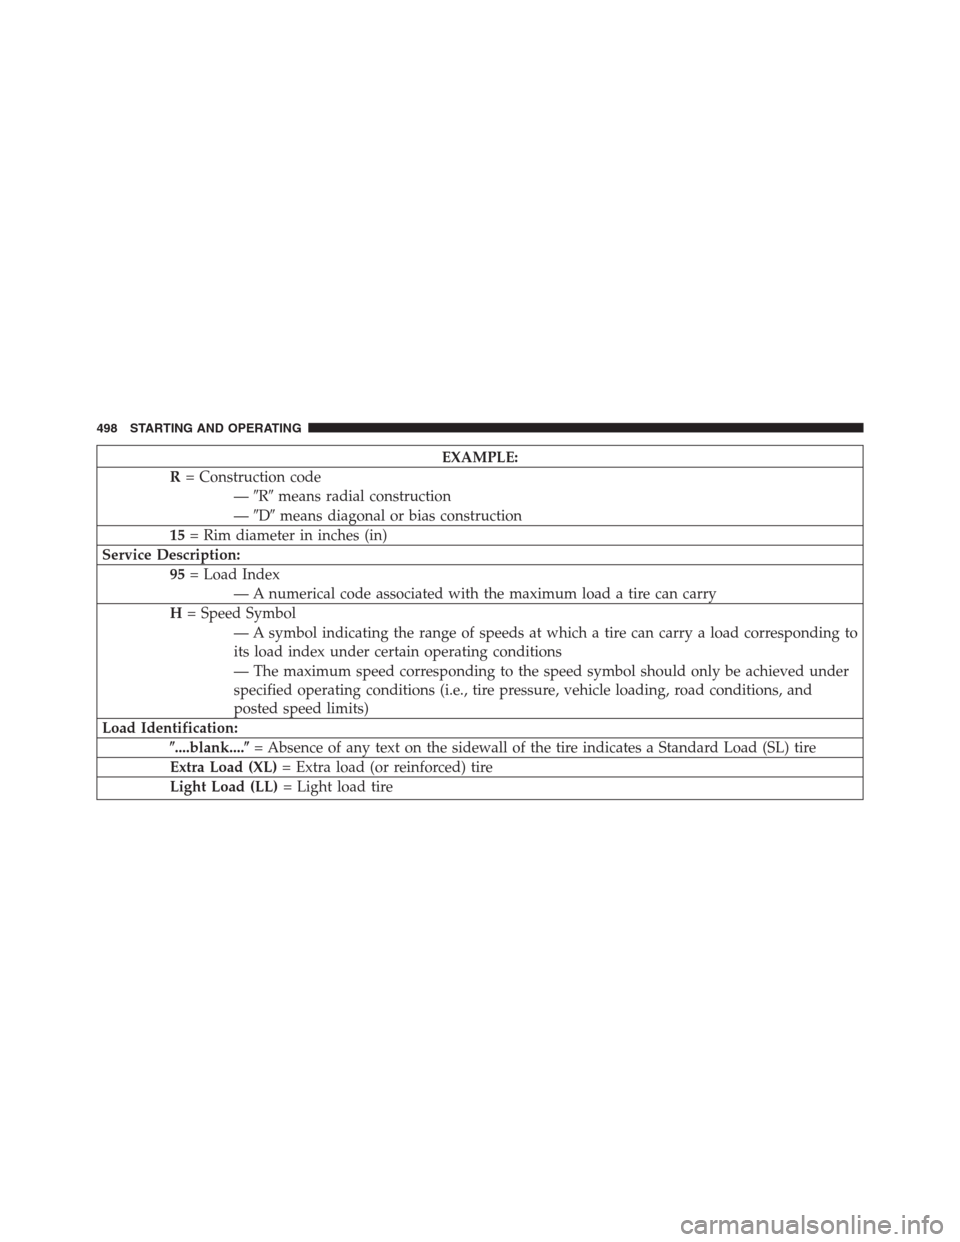
EXAMPLE:
R= Construction code
—�R�means radial construction
—�D�means diagonal or bias construction
15= Rim diameter in inches (in)
Service Description:
95= Load Index
— A numerical code associated with the maximum load a tire can carry
H= Speed Symbol
— A symbol indicating the range of speeds at which a tire can carry a load corresponding to
its load index under certain operating conditions
— The maximum speed corresponding to the speed symbol should only be achieved under
specified operating conditions (i.e., tire pressure, vehicle loading, road conditions, and
posted speed limits)
Load Identification:
�....blank....�= Absence of any text on the sidewall of the tire indicates a Standard Load (SL) tire
Extra Load (XL)= Extra load (or reinforced) tire
Light Load (LL)= Light load tire
498 STARTING AND OPERATING
Page 570 of 683
4. Stand the tire/cover assembly upright and remove the
wheel spacer by squeezing the winch retaining tabs
together. Push the retainer through the spare tire to
release it from the wheel.Preparations For Jacking
1. Park the vehicle on a firm, level surface. Avoid ice or
slippery areas.
WARNING!
Do not attempt to change a tire on the side of the
vehicle close to moving traffic, pull far enough off
the road to avoid being hit when operating the jack
or changing the wheel.
2. Turn on the Hazard Warning flasher.
3. Set the parking brake.
4. Place the shift lever into PARK.
5. Turn OFF the ignition.
Removing Wheel Spacer
568 WHAT TO DO IN EMERGENCIES
Page 573 of 683
CAUTION!
Do not attempt to raise the vehicle by jacking on
locations other than those indicated.Rear jack locations are between a pair of down-facing
tabs on the sill flange of the vehicle side body.
Jack Locations
Rear Jacking Locations
6
WHAT TO DO IN EMERGENCIES 571
Page 578 of 683

3. Turn the compact spare tire so that the valve stem is
down, and place the tire into the spare tire/cover
assembly. Slide the wheel spacer through the center of
the wheel and spare tire/cover assembly, so that the
two retainer tabs snap out and engage the spare tire
cover on the opposite side.
CAUTION!
The compact spare tire/cover assembly must be used
when the compact spare tire is stored. Failure to use
this cover could drastically reduce the life of the
compact spare tire.
WARNING!
Verify that both retainer tabs of the wheel spacer have
been properly extended through the center of the
wheel and spare tire/cover assembly. Failure to prop-
erly engage both retainer tabs could result in loss of
the spare tire and cover assembly, which will cause
vehicle damage and may cause loss of vehicle control.
4. Using the winch T-handle, rotate the drive nut to the
right until the compact spare tire/cover assembly is
drawn into place against the underside of the vehicle.
5. Continue to rotate the nut to the right until you hear
the winch mechanism click three times. It cannot be
overtightened. Check under the vehicle to ensure the
compact spare tire/cover assembly is positioned cor-
rectly against the underside of the vehicle.
576 WHAT TO DO IN EMERGENCIES
Page 608 of 683
4. Disengage the two retaining tabs that secure the filter
cover to the HVAC housing, and remove the cover.
5. Remove the A/C air filter by pulling it straight out of
the housing.6.Install the A/C air filter with the arrow on the filter
pointing toward the floor. When installing the filter
cover, make sure the retaining tabs fully engage the
cover.
CAUTION!
The A/C air filter is identified with an arrow to
indicate airflow direction through the filter. Failure
to properly install the filter will result in the need to
replace it more often.
7. Rotate the glove compartment door back into position.
A/C Air Filter Replacement
606 MAINTAINING YOUR VEHICLE
Page 618 of 683

Use only manufacturer’s recommended brake fluid. Re-
fer to “Fluids, Lubricants, and Genuine Parts” in “Main-
taining Your Vehicle” for further information.
WARNING!
•Use only manufacturer’s recommended brake fluid.
Refer to “Fluids, Lubricants, and Genuine Parts” in
“Maintaining Your Vehicle” for further information.
Using the wrong type of brake fluid can severely
damage your brake system and/or impair its perfor-
mance. The proper type of brake fluid for your vehicle
is also identified on the original factory installed
hydraulic master cylinder reservoir.
•To avoid contamination from foreign matter or
moisture, use only new brake fluid or fluid that has
been in a tightly closed container. Keep the master
cylinder reservoir cap secured at all times. Brake
(Continued)
WARNING!(Continued)
fluid in a open container absorbs moisture from the
air resulting in a lower boiling point. This may
cause it to boil unexpectedly during hard or pro-
longed braking, resulting in sudden brake failure.
This could result in a collision.
•Overfilling the brake fluid reservoir can result in
spilling brake fluid on hot engine parts, causing
the brake fluid to catch fire. Brake fluid can also
damage painted and vinyl surfaces, care should be
taken to avoid its contact with these surfaces.
•Do not allow petroleum based fluid to contaminate
the brake fluid. Brake seal components could be
damaged, causing partial or complete brake failure.
This could result in a collision.
616 MAINTAINING YOUR VEHICLE
Page 624 of 683

Stain Repel Fabric Cleaning Procedure – If Equipped
Stain Repel seats may be cleaned in the following manner:
•Remove as much of the stain as possible by blotting
with a clean, dry towel.
•Blot any remaining stain with a clean, damp towel.
•For tough stains, apply MOPAR® Total Clean, or a
mild soap solution to a clean, damp cloth and remove
stain. Use a fresh, damp towel to remove soap residue.
•For grease stains, apply MOPAR® Multi-Purpose
Cleaner to a clean, damp cloth and remove stain. Use
a fresh, damp towel to remove soap residue.
•Do not use any harsh solvents or any other form of
protectants on Stain Repel products.
Interior Care
Instrument Panel Surfaces
The instrument panel cover has a low glare surface,
which minimizes reflections in the windshield. Do not
use protectants or other products which may cause
undesirable reflections. Use soap and warm water to
restore the low glare surface.
Cleaning Interior Trim
Interior trim should be cleaned starting with a damp
cloth, a damp cloth with MOPAR® Total Clean or equiva-
lent, then MOPAR® Spot & Stain Remover or equivalent
if absolutely necessary. Do not use harsh cleaners or
Armor All®. Use MOPAR® Total Clean or equivalent to
clean vinyl upholstery
622 MAINTAINING YOUR VEHICLE
 - Metric tire sizing is based on U.S.
design standards. P-Metric tires have the letter “P”
molded into the sidewall preceding the size d")