Page 258 of 683
Rear Console Halo Lighting
The rear overhead console has recessed halo lighting
around the perimeter of the console base. This feature
provides additional lighting options while traveling and
is controlled by the headlight switch. Refer to “Lights/
Halo Lights — If Equipped” in “Understanding the
Features Of Your Vehicle” for further information.
GARAGE DOOR OPENER — IF EQUIPPED
HomeLink® replaces up to three hand-held transmitters
that operate devices such as garage door openers, motor-
ized gates, lighting or home security systems. The
HomeLink® unit is powered by your vehicles 12 Volt
battery.
Overhead Compartment Features
1 — DVD* 5 — Storage
2 — Rear HVAC 6 — DVD*
3 — Interior Lights 7 — Interior Lights
4 — Storage 8 — Halo Lighting
* If equipped, otherwise storage. 256 UNDERSTANDING THE FEATURES OF YOUR VEHICLE
Page 271 of 683
Sunroof Fully Closed
Press the switch forward and release to ensure that the
sunroof is fully closed.
ELECTRICAL POWER OUTLETS — IF EQUIPPED
Two 12 Volt (13 Amp) power outlets are located on the
lower instrument panel, below the open storage bin. The
driver-side power outlet is controlled by the ignition
switch and the passenger-side power outlet is connected
directly to the battery. The driver-side power outlet will
also operate a conventional cigar lighter unit (if equipped
with an optional Smoker’s Package).
NOTE:To ensure proper operation a MOPAR® cigar
knob and element must be used.
Instrument Panel Outlets
3
UNDERSTANDING THE FEATURES OF YOUR VEHICLE 269
Page 272 of 683

CAUTION!
•Do not exceed the maximum power of 160 Watts
(13 Amps) at 12 Volts. If the 160 Watt (13 Amp)
power rating is exceeded the fuse protecting the
system will need to be replaced.
•Power outlets are designed for accessory plugs
only. Do not insert any other object in the power
outlets as this will damage the outlet and blow the
fuse. Improper use of the power outlet can cause
damage not covered by your New Vehicle Limited
Warranty.
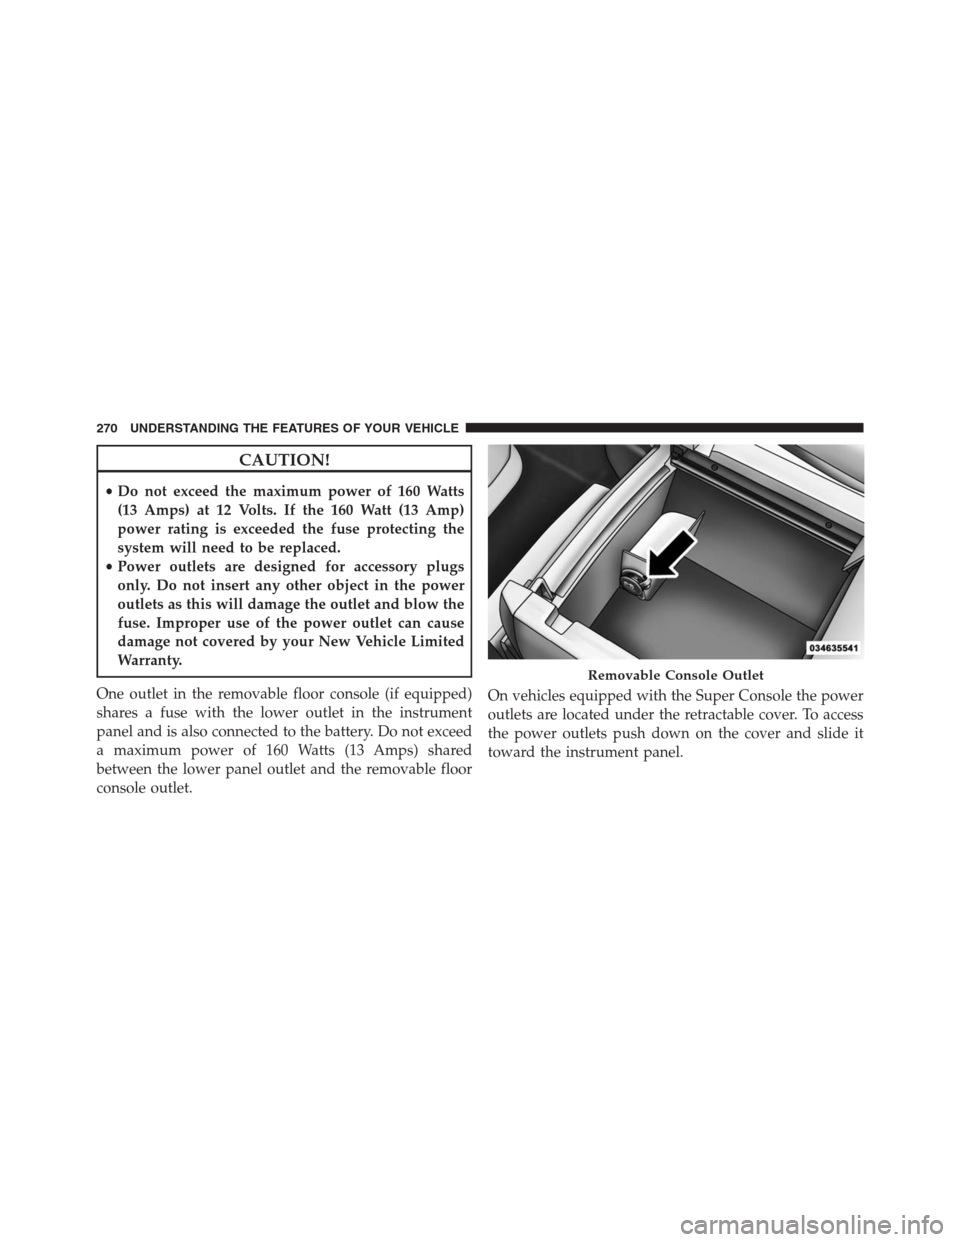
One outlet in the removable floor console (if equipped)
shares a fuse with the lower outlet in the instrument
panel and is also connected to the battery. Do not exceed
a maximum power of 160 Watts (13 Amps) shared
between the lower panel outlet and the removable floor
console outlet.On vehicles equipped with the Super Console the power
outlets are located under the retractable cover. To access
the power outlets push down on the cover and slide it
toward the instrument panel.
Removable Console Outlet
270 UNDERSTANDING THE FEATURES OF YOUR VEHICLE
Page 274 of 683
WARNING!
To avoid serious injury or death:
•Only devices designed for use in this type of outlet
should be inserted into any 12 Volt outlet.
•Do not touch with wet hands.
•Close the lid when not in use and while driving the
vehicle.
•If this outlet is mishandled, it may cause an electric
shock and failure.
CAUTION!
•Many accessories that can be plugged in draw power
from the vehicle’s battery, even when not in use (i.e.,
cellular phones, etc.). Eventually, if plugged in long
enough, the vehicle’s battery will discharge suffi-
ciently to degrade battery life and/or prevent the
engine from starting.
(Continued)
Power Outlet Fuses
1 — M7 Fuse 20 A Yellow Power Outlet Center Seat (Opt) or with
Console Rear
2 — M6 Fuse 20 A Yellow Cigar Lighter Instrument Panel or with
Console Front
3 — M36 Fuse 20 A Yellow Power Outlet Instrument Panel or
with Console Center 272 UNDERSTANDING THE FEATURES OF YOUR VEHICLE
Page 275 of 683
CAUTION!(Continued)
•Accessories that draw higher power (i.e., coolers,
vacuum cleaners, lights, etc.), will degrade the
battery even more quickly. Only use these intermit-
tently and with greater caution.
•After the use of high power draw accessories, or
long periods of the vehicle not being started (with
accessories still plugged in), the vehicle must be
driven a sufficient length of time to allow the
alternator to recharge the vehicle’s battery.
•Power outlets are designed for accessory plugs
only. Do not hang any type of accessory or acces-
sory bracket from the plug. Improper use of the
power outlet can cause damage.
POWER INVERTER — IF EQUIPPED
A 110 Volt, 150 Watt inverter outlet (if equipped) converts
DC current to AC current, and is located on the left rear
trim panel immediately behind the second row left
passenger seat.
Power Inverter Outlet
3
UNDERSTANDING THE FEATURES OF YOUR VEHICLE 273
Page 289 of 683
•Large console center storage will store headphones for
the available rear DVD entertainment system or other
items
•12 Volt DC power outlet provides continuous power
inside the console for cell phones or other electronics.
•Rear occupant accessible
•Multiple adjustments
•Removable from vehicle for additional floor space.
The top and center console sections slide forward and
rearward to provide added user comfort. A one-piece cup
holder insert for both cavities can easily be removed for
cleaning. The cupholders will also accommodate large
size cups and 20 oz (.6 L) bottles.Position 1 shows the console closed with four cupholders
and a convenient storage tray.
Console Position 1
3
UNDERSTANDING THE FEATURES OF YOUR VEHICLE 287
Page 466 of 683

ENGINE BLOCK HEATER — IF EQUIPPED
The engine block heater warms the engine, and permits
quicker starts in cold weather. Connect the cord to a
standard 110-115 Volt AC electrical outlet with a
grounded, three-wire extension cord.
The engine block heater must be plugged in at least one
hour to have an adequate warming effect on the engine.
The engine block heater cord is routed under the hood on
the driver’s side of the vehicle. It has a removable cap
that is located on the driver side of the Integrated Power
Module.
WARNING!
Remember to disconnect the engine block heater
cord before driving. Damage to the 110-115 Volt
electrical cord could cause electrocution.
AUTOMATIC TRANSMISSION
CAUTION!
Damage to the transmission may occur if the follow-
ing precautions are not observed:
•Shift into PARK only after the vehicle has come to
a complete stop.
•Shift into or out of REVERSE only after the vehicle
has come to a complete stop and the engine is at
idle speed.
•Do not shift between PARK, REVERSE, NEU-
TRAL, or DRIVE when the engine is above idle
speed.
•Before shifting into any gear, make sure your foot
is firmly pressing the brake pedal.
NOTE:You must press and hold the brake pedal while
shifting out of PARK.
464 STARTING AND OPERATING
Page 581 of 683

WARNING!
To avoid the risk of forcing the vehicle off the jack,
do not tighten the wheel nuts fully until the vehicle
has been lowered. Failure to follow this warning may
result in personal injury.
3. Lower the vehicle to the ground by turning the jack
handle counterclockwise.
4.
Finish tightening the lug nuts. Push down on the
wrench while at the end of the handle for increased
leverage. Tighten the lug nuts in a star pattern until each
nut has been tightened twice. The correct tightness of
each lug nut is 100 ft/lbs (135 N·m). If in doubt about
the correct tightness, have them checked with a torque
wrench by your authorized dealer or service station.
5. After 25 miles (40 km) check the lug nut torque with a
torque wrench to ensure that all lug nuts are properly
seated against the wheel.
JUMP-STARTING
If your vehicle has a discharged battery it can be jump-
started using a set of jumper cables and a battery in
another vehicle or by using a portable battery booster
pack. Jump-starting can be dangerous if done improperly
so please follow the procedures in this section carefully.
NOTE:When using a portable battery booster pack
follow the manufacturer ’s operating instructions and
precautions.
CAUTION!
Do not use a portable battery booster pack or any
other booster source with a system voltage greater
than 12 Volts or damage to the battery, starter motor,
alternator or electrical system may occur.
6
WHAT TO DO IN EMERGENCIES 579