2013 CHEVROLET MALIBU change time
[x] Cancel search: change timePage 196 of 436
Black plate (36,1)Chevrolet Malibu Owner Manual - 2013 - CRC - 6/6/12
7-36 Infotainment System
$/i(Mute/End Call):Press to
end a call, reject a call, or cancel an
operation.
Infotainment System Controls
To navigate the menu system using
the infotainment controls, see
Overview (Radio with CD and
Touchscreen) on page 7‑5 or
Overview (Radio with CD) on
page 7‑2.
v/>(Phone/Mute): Press to
enter the Phone main menu.
Voice Recognition
The voice recognition system uses
commands to control the system
and dial phone numbers.
Noise: The system may not
recognize voice commands if there
is too much background noise.
When to Speak: A tone sounds to
indicate that the system is ready for
a voice command. Wait for the tone
and then speak.
How to Speak: Speak clearly in a
calm and natural voice.
Audio System
When using the Bluetooth system,
sound comes through the vehicle's
front audio system speakers and
overrides the audio system. Use the
VOL/
Oknob during a call to
change the volume level. The
adjusted volume level remains in
memory for later calls. The system
maintains a minimum volume level.
Other Information
The Bluetooth® word mark and
logos are owned by the Bluetooth®
SIG, Inc. and any use of such marks
by General Motors is under license.
Other trademarks and trade names
are those of their respective owners.
See Radio Frequency Statement on
page 13‑21 for information
regarding Part 15 of the Federal
Communications Commission (FCC)
rules and Industry Canada
Standards RSS-GEN/210/220/310.
Bluetooth (Infotainment
Controls)
To navigate the menu system using
the infotainment controls, see
Overview (Radio with CD and
Touchscreen) on page 7‑5 or
Overview (Radio with CD) on
page 7‑2.
Pairing
A Bluetooth-enabled cell phone
must be paired to the Bluetooth
system and then connected to the
vehicle before it can be used. See
your cell phone manufacturer's user
guide for Bluetooth functions before
pairing the cell phone. If a Bluetooth
phone is not connected, calls will be
made using OnStar Hands-Free
Calling, if available. See OnStar
Overview on page 14‑1.
Pairing Information
.A Bluetooth phone with MP3
capability cannot be paired to
the vehicle as a phone and an
MP3 player at the same time.
Page 197 of 436
Black plate (37,1)Chevrolet Malibu Owner Manual - 2013 - CRC - 6/6/12
Infotainment System 7-37
.Up to five cell phones can be
paired to the Bluetooth system.
.The pairing process is disabled
when the vehicle is moving.
.Pairing only needs to be
completed once, unless the
pairing information on the cell
phone changes or the cell phone
is deleted from the system.
.Only one paired cell phone can
be connected to the Bluetooth
system at a time.
.If multiple paired cell phones are
within range of the system, the
system connects to the first
available paired cell phone in the
order that they were first paired
to the system. To connect to a
different paired phone, see
“Connecting to a Different
Phone”later in this section.
Pairing a Phone
1. Press the CONFIG button.
2. Select Phone Settings or Bluetooth Settings. 3. Select Bluetooth.
4. Select Pair Device (Phone).
A four-digit Personal
Identification Number (PIN)
appears on the display. The PIN
is used in Step 6.
5. Start the pairing process on the cell phone to be paired to the
vehicle. See the cell phone
manufacturer's user guide for
information on this process.
6. Locate the device named “Your
Vehicle” in the list on the cell
phone. Follow the instructions
on the cell phone to enter the
PIN provided in Step 4. After the
PIN is successfully entered, the
system prompts you to provide a
name for the paired cell phone.
This name will be used to
indicate which phones are
paired and connected to the
vehicle. The system responds
with “
successfully paired” after the
pairing process is complete. 7. Repeat Steps 1−6 to pair
additional phones.
Listing All Paired and Connected
Phones
1. Press the CONFIG button.
2. Select Phone Settings or Bluetooth Settings.
3. Select Bluetooth.
4. Select Device List.
Deleting a Paired Phone
1. Press the CONFIG button.
2. Select Phone Settings or Bluetooth Settings.
3. Select Bluetooth.
4. Select Device List.
5. Select the phone to delete and follow the on screen prompts.
Page 200 of 436
Black plate (40,1)Chevrolet Malibu Owner Manual - 2013 - CRC - 6/6/12
7-40 Infotainment System
Dual Tone Multi-Frequency
(DTMF) Tones
The in-vehicle Bluetooth system can
send numbers during a call. This is
used when calling a menu-driven
phone system.
1. Turn or press the TUNE/MENUknob and select Enter Number.
2. Enter the character sequence.
Bluetooth (Voice
Recognition)
Using Voice Recognition
To use voice recognition, press theb/gbutton on the steering wheel.
Use the commands below for the
various voice features. For
additional information, say "Help"
while you are in a voice
recognition menu.
Pairing
A Bluetooth-enabled cell phone
must be paired to the Bluetooth
system and then connected to the
vehicle before it can be used. See
your cell phone manufacturer's user
guide for Bluetooth functions before
pairing the cell phone. If a Bluetooth
phone is not connected, calls will be
made using OnStar Hands-Free
Calling, if available. See OnStar
Overview on page 14‑1.
Pairing Information
.A Bluetooth phone with MP3
capability cannot be paired to
the vehicle as a phone and an
MP3 player at the same time.
.Up to five cell phones can be
paired to the Bluetooth system.
.The pairing process is disabled
when the vehicle is moving.
.Pairing only needs to be
completed once, unless the
pairing information on the cell
phone changes or the cell phone
is deleted from the system.
.Only one paired cell phone can
be connected to the Bluetooth
system at a time.
.If multiple paired cell phones are
within range of the system, the
system connects to the first
available paired cell phone in the
order that they were first paired
to the system. To connect to a
different paired phone, see
“Connecting to a Different
Phone” later in this section.
Pairing a Phone
1. Press
b/g. The system
responds “Ready,”followed by
a tone.
2. Say “Bluetooth.” This command
can be skipped.
Page 201 of 436
Black plate (41,1)Chevrolet Malibu Owner Manual - 2013 - CRC - 6/6/12
Infotainment System 7-41
3. Say“Pair.”The system responds
with instructions and a four-digit
Personal Identification Number
(PIN). The PIN is used in Step 5.
4. Start the pairing process on the cell phone that you want to pair.
For help with this process, see
your cell phone manufacturer's
user guide.
5. Locate the device named “Your
Vehicle” in the list on the cell
phone. Follow the instructions
on the cell phone to enter the
PIN provided in Step 3. After the
PIN is successfully entered, the
system prompts you to provide a
name for the paired cell phone.
This name will be used to
indicate which phones are
paired and connected to the
vehicle. The system responds
with “
successfully paired” after the
pairing process is complete.
6. Repeat Steps 1−5 to pair additional phones. Listing All Paired and Connected
Phones
The system can list all cell phones
paired to it. If a paired cell phone is
also connected to the vehicle, the
system responds with
“is connected”
after that phone name.
1. Press
b/g. The system
responds “Ready,”followed by
a tone.
2. Say “Bluetooth.”
3. Say “List.”
Deleting a Paired Phone
If the phone name you want to
delete is unknown, see “Listing All
Paired and Connected Phones.”
1. Press
b/g. The system
responds “Ready,”followed by
a tone.
2. Say “Bluetooth.”
3. Say “Delete.” The system asks
for which phone to delete.
4. Say the name of the phone you want to delete. Connecting to a Different Phone
To connect to a different cell phone,
the Bluetooth system looks for the
next available cell phone in the
order in which all the available cell
phones were paired. Depending on
which cell phone you want to
connect to, you may have to use
this command several times.
1. Press
b/g. The system
responds “Ready,”followed by
a tone.
2. Say “Bluetooth.”
3. Say “Change phone.”
.If another cell phone is
found, the response will be
“
connected.”
.If another cell phone is not
found, the original phone
remains connected.
Page 210 of 436
Black plate (4,1)Chevrolet Malibu Owner Manual - 2013 - CRC - 6/6/12
8-4 Climate Controls
.Select a temperature setting that
is higher in hot weather and
lower in cold weather.
.Turn off the air conditioning
when it is not needed.
.Only use defrost to clear the
windows.
Automatic Operation
The system automatically controls
the fan speed, air delivery, air
conditioning, and recirculation in
order to heat or cool the vehicle to
the desired temperature.
When the indicator light is on, the
system is in full automatic operation.
If the air delivery mode or fan
setting is manually adjusted, the
auto indicator turns off and displays
will show the selected settings. To place the system in
automatic mode:
1. Press AUTO.
2. Set the temperature. Allow the
system time to stabilize. Then
adjust the temperature as
needed for best comfort.
To improve fuel efficiency and to
cool the vehicle faster, recirculation
may be automatically selected in
warm weather.
The recirculation light will not come
on. Press
hto select
recirculation; press it again to select
outside air.
Manual Operation
Driver and Passenger
Temperature Control: The
temperature can be adjusted
separately for the driver and
passenger.
Turn the knob clockwise or
counterclockwise to increase or
decrease the driver or passenger
temperature setting. SYNC:
Press to link all climate
zone settings to the driver settings.
The SYNC indicator light will turn
off. When the passenger settings
are adjusted, the SYNC indicator
light is on.
Fan Control: Turn the knob
clockwise or counterclockwise to
increase or decrease the fan speed.
Press AUTO to return to automatic
operation.
Air Delivery Modes: Press
Y,\,
[, or-to change the direction of
the airflow. An indicator light comes
on in the selected mode button.
Changing the mode cancels the
automatic operation and the system
goes into manual mode. Press
AUTO to return to automatic
operation.
Y(Vent): Air is directed to the
instrument panel outlets.
\(Bi-Level): Air is directed to the
instrument panel outlets and the
floor outlets.
Page 245 of 436
Black plate (29,1)Chevrolet Malibu Owner Manual - 2013 - CRC - 6/6/12
Driving and Operating 9-29
If driving safely on a wet road and it
becomes necessary to slam on the
brakes and continue braking to
avoid a sudden obstacle, a
computer senses that the wheels
are slowing down. If one of the
wheels is about to stop rolling, the
computer will separately work the
brakes at each wheel.
ABS can change the brake pressure
to each wheel, as required, faster
than any driver could. This can help
the driver steer around the obstacle
while braking hard.
As the brakes are applied, the
computer keeps receiving updates
on wheel speed and controls
braking pressure accordingly.
Remember: ABS does not change
the time needed to get a foot up to
the brake pedal or always decrease
stopping distance. If you get too
close to the vehicle in front of you,
there will not be enough time to
apply the brakes if that vehiclesuddenly slows or stops. Always
leave enough room up ahead to
stop, even with ABS.
Using ABS
Do not pump the brakes. Just hold
the brake pedal down firmly and let
ABS work. You might hear the ABS
pump or motor operating and feel
the brake pedal pulsate, but this is
normal.
Braking in Emergencies
ABS allows the driver to steer and
brake at the same time. In many
emergencies, steering can help
more than even the very best
braking.
Parking Brake
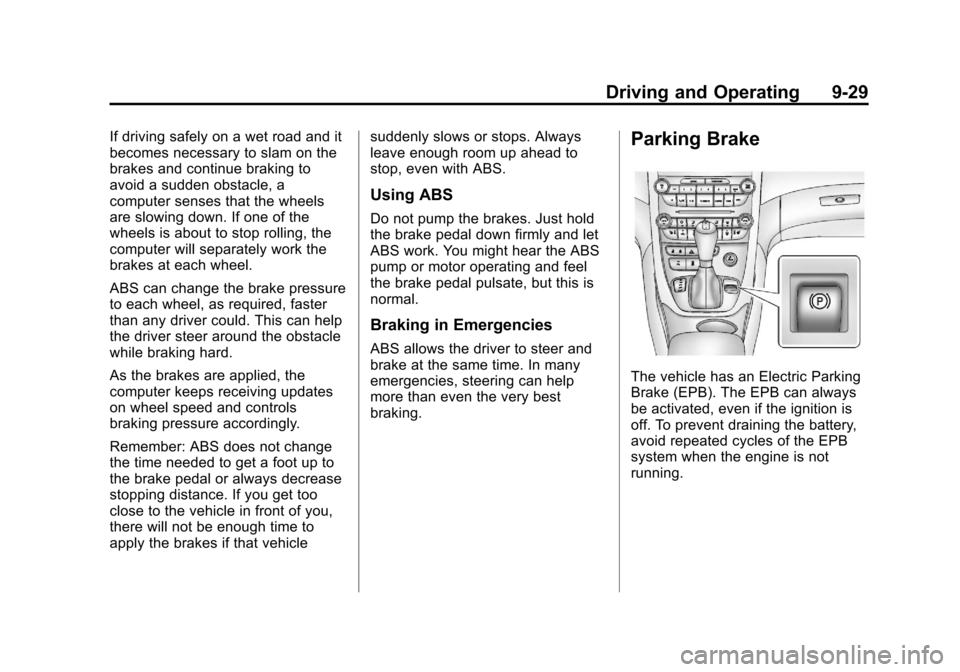
The vehicle has an Electric Parking
Brake (EPB). The EPB can always
be activated, even if the ignition is
off. To prevent draining the battery,
avoid repeated cycles of the EPB
system when the engine is not
running.
Page 259 of 436
Black plate (43,1)Chevrolet Malibu Owner Manual - 2013 - CRC - 6/6/12
Driving and Operating 9-43
Lane Departure
Warning (LDW)
The vehicle may have an LDW
system. Read this entire section
before using the system.
{WARNING
The LDW system is an aid to help
the vehicle stay in the driving
lane. It does not steer the vehicle.
The LDW system may not:
.Provide enough time to avoid
a crash.
.Detect lane markings under
bad weather conditions or if
the windshield is dirty.
.Detect lane markings and will
not detect road edges.
.Warn that the vehicle is
crossing a lane marking if the
system does not detect the
lane marking.(Continued)
WARNING (CONTINUED)
If LDW only detects lane
markings on one side of the road,
it will only warn you when
departing the lane on the side
where it has detected a lane
marker. Even with LDW, always
keep your attention on the road
and maintain proper vehicle
position within the lane, or vehicle
damage, injury, or death could
occur. Always keep the
windshield clean and do not use
LDW in bad weather conditions.
When the vehicle crosses a
detected lane marking, the LDW
indicator will flash and three beeps
will sound. LDW will not warn if the
turn signal is on or if a sharp
maneuver is made.
How the System Works
The LDW camera sensor is on the
windshield ahead of the rearview
mirror.
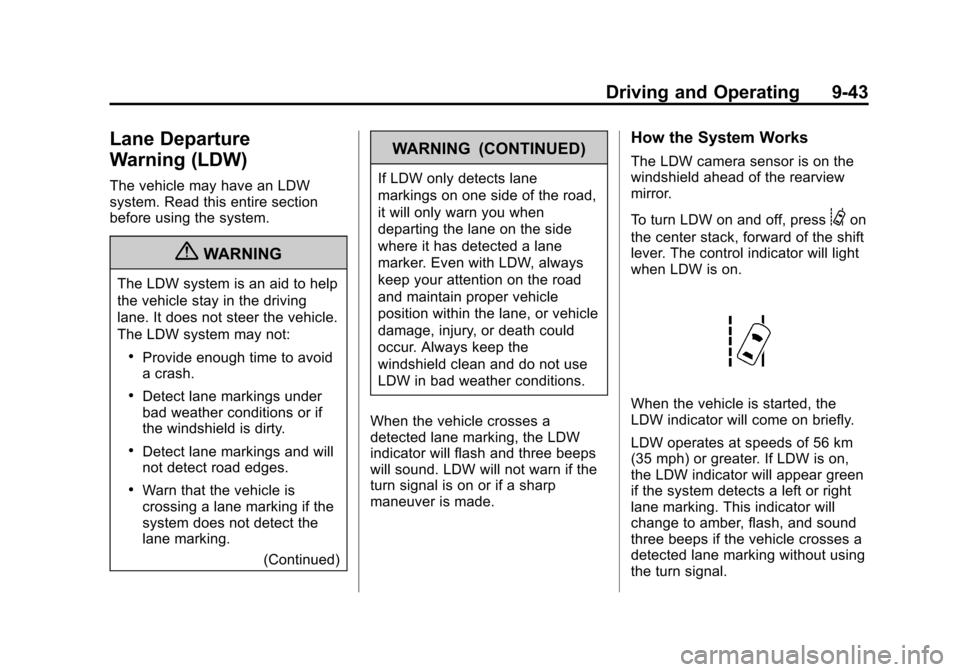
To turn LDW on and off, press
@on
the center stack, forward of the shift
lever. The control indicator will light
when LDW is on.
When the vehicle is started, the
LDW indicator will come on briefly.
LDW operates at speeds of 56 km
(35 mph) or greater. If LDW is on,
the LDW indicator will appear green
if the system detects a left or right
lane marking. This indicator will
change to amber, flash, and sound
three beeps if the vehicle crosses a
detected lane marking without using
the turn signal.
Page 277 of 436
Black plate (11,1)Chevrolet Malibu Owner Manual - 2013 - CRC - 6/6/12
Vehicle Care 10-11
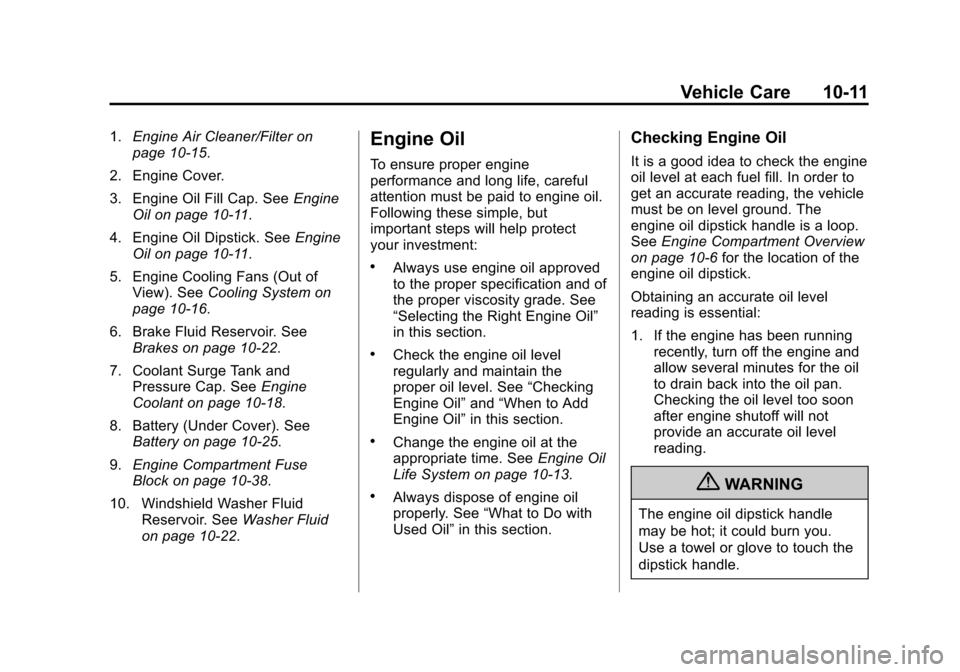
1.Engine Air Cleaner/Filter on
page 10‑15.
2. Engine Cover.
3. Engine Oil Fill Cap. See Engine
Oil on page 10‑11.
4. Engine Oil Dipstick. See Engine
Oil on page 10‑11.
5. Engine Cooling Fans (Out of View). See Cooling System on
page 10‑16.
6. Brake Fluid Reservoir. See Brakes on page 10‑22.
7. Coolant Surge Tank and Pressure Cap. See Engine
Coolant on page 10‑18.
8. Battery (Under Cover). See Battery on page 10‑25.
9. Engine Compartment Fuse
Block on page 10‑38.
10. Windshield Washer Fluid Reservoir. See Washer Fluid
on page 10‑22.Engine Oil
To ensure proper engine
performance and long life, careful
attention must be paid to engine oil.
Following these simple, but
important steps will help protect
your investment:
.Always use engine oil approved
to the proper specification and of
the proper viscosity grade. See
“Selecting the Right Engine Oil”
in this section.
.Check the engine oil level
regularly and maintain the
proper oil level. See “Checking
Engine Oil” and“When to Add
Engine Oil” in this section.
.Change the engine oil at the
appropriate time. See Engine Oil
Life System on page 10‑13.
.Always dispose of engine oil
properly. See “What to Do with
Used Oil” in this section.
Checking Engine Oil
It is a good idea to check the engine
oil level at each fuel fill. In order to
get an accurate reading, the vehicle
must be on level ground. The
engine oil dipstick handle is a loop.
SeeEngine Compartment Overview
on page 10‑6 for the location of the
engine oil dipstick.
Obtaining an accurate oil level
reading is essential:
1. If the engine has been running recently, turn off the engine and
allow several minutes for the oil
to drain back into the oil pan.
Checking the oil level too soon
after engine shutoff will not
provide an accurate oil level
reading.
{WARNING
The engine oil dipstick handle
may be hot; it could burn you.
Use a towel or glove to touch the
dipstick handle.