2013 CHEVROLET MALIBU buttons
[x] Cancel search: buttonsPage 60 of 436
Black plate (8,1)Chevrolet Malibu Owner Manual - 2013 - CRC - 6/6/12
3-8 Seats and Restraints
Heated Front Seats
{WARNING
If you cannot feel temperature
change or pain to the skin, the
seat heater may cause burns. To
reduce the risk of burns, people
with such a condition should use
care when using the seat heater,
especially for long periods of
time. Do not place anything on
the seat that insulates against
heat, such as a blanket, cushion,
cover, or similar item. This may
cause the seat heater to
overheat. An overheated seat
heater may cause a burn or may
damage the seat.
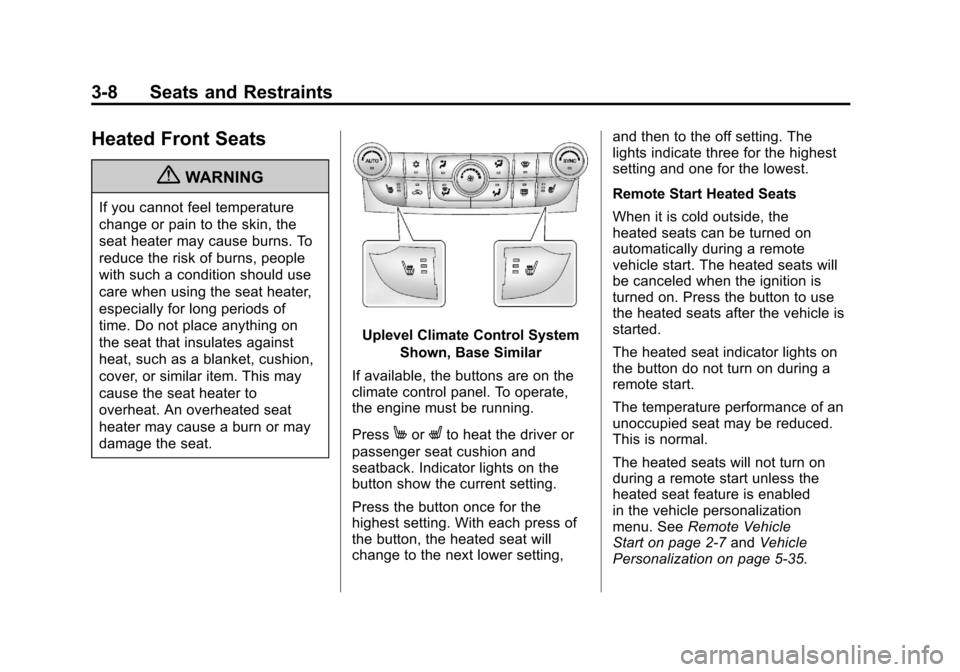
Uplevel Climate Control SystemShown, Base Similar
If available, the buttons are on the
climate control panel. To operate,
the engine must be running.
Press
MorLto heat the driver or
passenger seat cushion and
seatback. Indicator lights on the
button show the current setting.
Press the button once for the
highest setting. With each press of
the button, the heated seat will
change to the next lower setting, and then to the off setting. The
lights indicate three for the highest
setting and one for the lowest.
Remote Start Heated Seats
When it is cold outside, the
heated seats can be turned on
automatically during a remote
vehicle start. The heated seats will
be canceled when the ignition is
turned on. Press the button to use
the heated seats after the vehicle is
started.
The heated seat indicator lights on
the button do not turn on during a
remote start.
The temperature performance of an
unoccupied seat may be reduced.
This is normal.
The heated seats will not turn on
during a remote start unless the
heated seat feature is enabled
in the vehicle personalization
menu. See
Remote Vehicle
Start on page 2‑7 andVehicle
Personalization on page 5‑35.
Page 98 of 436
Black plate (46,1)Chevrolet Malibu Owner Manual - 2013 - CRC - 6/6/12
3-46 Seats and Restraints
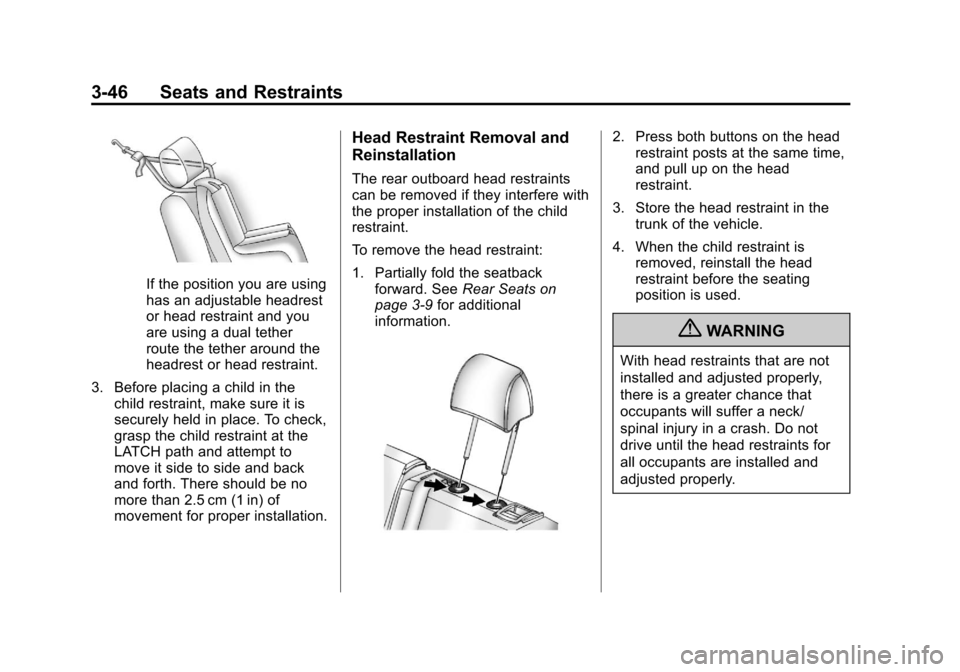
If the position you are using
has an adjustable headrest
or head restraint and you
are using a dual tether
route the tether around the
headrest or head restraint.
3. Before placing a child in the child restraint, make sure it is
securely held in place. To check,
grasp the child restraint at the
LATCH path and attempt to
move it side to side and back
and forth. There should be no
more than 2.5 cm (1 in) of
movement for proper installation.
Head Restraint Removal and
Reinstallation
The rear outboard head restraints
can be removed if they interfere with
the proper installation of the child
restraint.
To remove the head restraint:
1. Partially fold the seatbackforward. See Rear Seats on
page 3‑9 for additional
information.
2. Press both buttons on the head restraint posts at the same time,
and pull up on the head
restraint.
3. Store the head restraint in the trunk of the vehicle.
4. When the child restraint is removed, reinstall the head
restraint before the seating
position is used.
{WARNING
With head restraints that are not
installed and adjusted properly,
there is a greater chance that
occupants will suffer a neck/
spinal injury in a crash. Do not
drive until the head restraints for
all occupants are installed and
adjusted properly.
Page 113 of 436
Black plate (5,1)Chevrolet Malibu Owner Manual - 2013 - CRC - 6/6/12
Instruments and Controls 5-5
Clock
The infotainment system controls
are used to access the time and
date settings through the menu
system. The clock menu can only
be used with the radio on while in
ON/RUN or ACC/ACCESSORY.
SeeOverview (Radio with CD and
Touchscreen) on page 7‑5 or
Overview (Radio with CD) on
page 7‑2 for information about how
to use the menu system. For
vehicles with a navigation system,
see the separate navigation manual.
Setting the Clock (Radio
with CD)
To set the time:
1. Press the CONFIG button and select Time Settings.
2. Select Set Time.
3. Turn the TUNE/MENU knob to adjust the highlighted number.
4. Press the TUNE/MENU knob to select the next number. 5. To save the time and return to
the Time Settings menu, press
the BACK
/button at any time
or press the TUNE/MENU knob
after adjusting the minutes.
Setting the 12/24 Hour Format
1. Press the CONFIG button and select Time Settings.
2. Highlight 12/24 Hour Format.
3. Press the TUNE/MENU knob to select the 12 hour or 24 hour
display format.
Setting the Clock (Radio with
CD and Touchscreen)
To set the time:
1. Press the CONFIG button toenter the menu options. Turn the
TUNE/MENU knob to scroll
through the available setup
features. Press the TUNE/MENU
knob or press the Time screen
button to display other options
within that feature. 2. Press + or
−to increase or
decrease the Hours and Minutes
displayed on the clock.
12/24 HR Format: Press the 12 HR
screen button for standard time;
press the 24 HR screen button for
military time.
Day + or Day −:Press the Day +
or Day −display buttons to increase
or decrease the day.
Display: Press Display to turn the
display of the time on the screen on
or off.
Power Outlets
The accessory power outlets can be
used to plug in electrical equipment,
such as a cell phone or MP3 player.
There are two accessory power
outlets: one on the center stack
below the climate control system,
and one under the armrest inside
the center console storage.
Page 132 of 436
Black plate (24,1)Chevrolet Malibu Owner Manual - 2013 - CRC - 6/6/12
5-24 Instruments and Controls
Door Ajar Light
This light comes on in the Driver
Information Center (DIC) when a
door is open or not securely latched.
Before driving, check that all doors
are properly closed.
Information Displays
Center Stack Display
Infotainment and vehicle
personalization information displays
in the center stack screen. See:
.The navigation system manual
andInfotainment on page 7‑1.
.Vehicle Personalization on
page 5‑35.
The center stack controls only need
a light touch to operate and work
best with bare hands. The controls
will work with most gloves although
they may take longer to respond.
Use the finger pad rather than the
finger tip to minimize response time.
If the controls are not responding,
remove the gloves.
Driver Information
Center (DIC)
The DIC displays information about
the vehicle. It also displays warning
messages if a system problem is
detected. See Vehicle Messages on
page 5‑28. All messages appear in
the DIC display in the center of the
instrument cluster.
The vehicle may also have features
that can be customized through the
controls on the radio. See Vehicle
Personalization on page 5‑35.
DIC Operation and Displays
The DIC has different displays,
which can be accessed by using the
DIC buttons on the turn signal lever
to the left of the steering wheel. The
DIC displays trip, fuel, vehicle
system information, and warning
messages if a system problem is
detected.
Page 133 of 436
Black plate (25,1)Chevrolet Malibu Owner Manual - 2013 - CRC - 6/6/12
Instruments and Controls 5-25
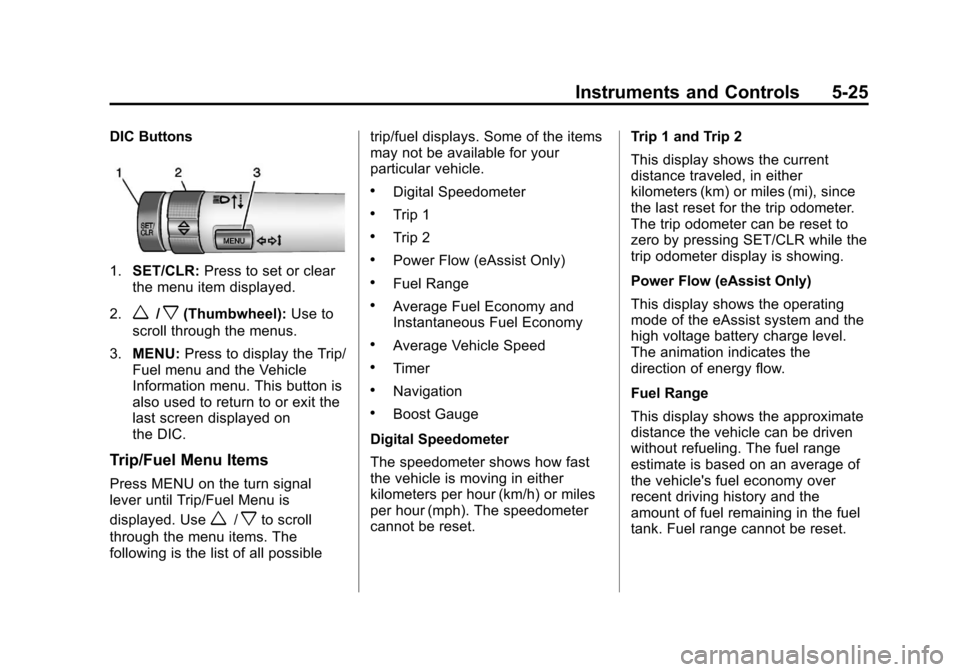
DIC Buttons
1.SET/CLR: Press to set or clear
the menu item displayed.
2.
w/x(Thumbwheel): Use to
scroll through the menus.
3. MENU: Press to display the Trip/
Fuel menu and the Vehicle
Information menu. This button is
also used to return to or exit the
last screen displayed on
the DIC.
Trip/Fuel Menu Items
Press MENU on the turn signal
lever until Trip/Fuel Menu is
displayed. Use
w/xto scroll
through the menu items. The
following is the list of all possible trip/fuel displays. Some of the items
may not be available for your
particular vehicle.
.Digital Speedometer
.Trip 1
.Trip 2
.Power Flow (eAssist Only)
.Fuel Range
.Average Fuel Economy and
Instantaneous Fuel Economy
.Average Vehicle Speed
.Timer
.Navigation
.Boost Gauge
Digital Speedometer
The speedometer shows how fast
the vehicle is moving in either
kilometers per hour (km/h) or miles
per hour (mph). The speedometer
cannot be reset. Trip 1 and Trip 2
This display shows the current
distance traveled, in either
kilometers (km) or miles (mi), since
the last reset for the trip odometer.
The trip odometer can be reset to
zero by pressing SET/CLR while the
trip odometer display is showing.
Power Flow (eAssist Only)
This display shows the operating
mode of the eAssist system and the
high voltage battery charge level.
The animation indicates the
direction of energy flow.
Fuel Range
This display shows the approximate
distance the vehicle can be driven
without refueling. The fuel range
estimate is based on an average of
the vehicle's fuel economy over
recent driving history and the
amount of fuel remaining in the fuel
tank. Fuel range cannot be reset.
Page 148 of 436
Black plate (40,1)Chevrolet Malibu Owner Manual - 2013 - CRC - 6/6/12
5-40 Instruments and Controls
Return to Factory Settings
Select Return to Factory Settings for
the option to return all vehicle
personalization to the default
settings. Turn the TUNE/MENU
knob to select Yes or No. Press
TUNE/MENU to confirm and go
back to the last menu.
Universal Remote
System
SeeRadio Frequency Statement on
page 13‑21 for information
regarding Part 15 of the Federal
Communications Commission (FCC)
rules and Industry Canada
Standards RSS-GEN/210/220/310.
Universal Remote System
Programming
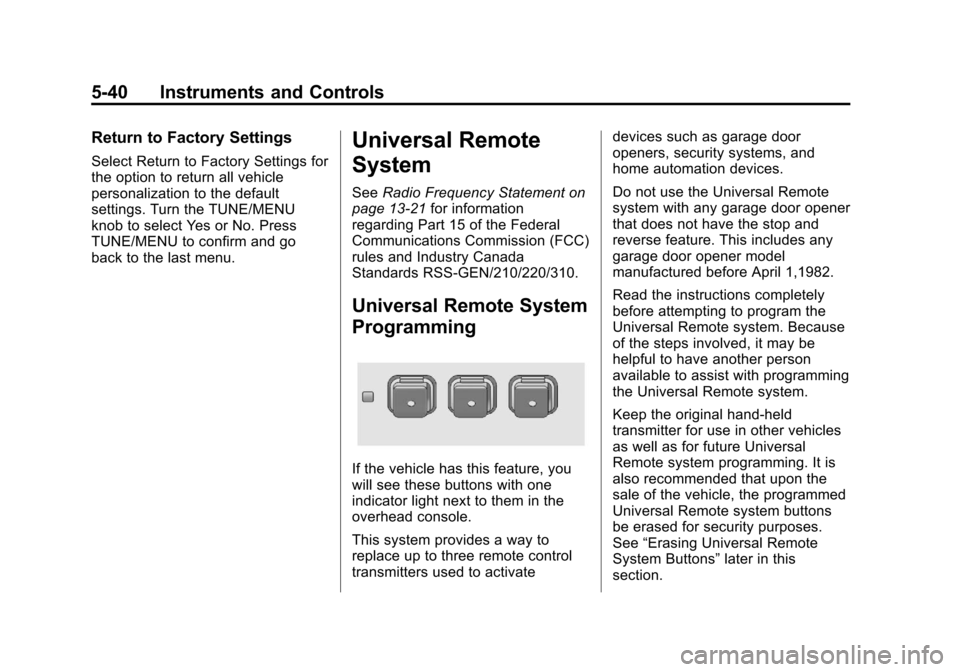
If the vehicle has this feature, you
will see these buttons with one
indicator light next to them in the
overhead console.
This system provides a way to
replace up to three remote control
transmitters used to activate devices such as garage door
openers, security systems, and
home automation devices.
Do not use the Universal Remote
system with any garage door opener
that does not have the stop and
reverse feature. This includes any
garage door opener model
manufactured before April 1,1982.
Read the instructions completely
before attempting to program the
Universal Remote system. Because
of the steps involved, it may be
helpful to have another person
available to assist with programming
the Universal Remote system.
Keep the original hand-held
transmitter for use in other vehicles
as well as for future Universal
Remote system programming. It is
also recommended that upon the
sale of the vehicle, the programmed
Universal Remote system buttons
be erased for security purposes.
See
“Erasing Universal Remote
System Buttons” later in this
section.
Page 149 of 436
Black plate (41,1)Chevrolet Malibu Owner Manual - 2013 - CRC - 6/6/12
Instruments and Controls 5-41
When programming a garage door,
park outside of the garage. Park
directly in line with and facing the
garage door opener motor-head or
gate motor-head. Be sure that
people and objects are clear of the
garage door or gate being
programmed.
It is recommended that a new
battery be installed in the hand-held
transmitter for quicker and more
accurate transmission of the
radio-frequency signal.
Programming the Universal
Remote System
For questions or help programming
the Universal Remote system, call
1-800-355-3515 or go to
www.homelink.com.
Programming a garage door opener
involves time-sensitive actions, so
read the entire procedure before
starting. Otherwise, the device will
time out and the procedure will have
to be repeated.To program up to three devices:
1. Hold the end of the hand-held
transmitter about 3 to 8 cm
(1 to 3 in) away from the
Universal Remote system
buttons while keeping the
indicator light in view. The
hand-held transmitter was
supplied by the manufacturer
of the garage door opener
receiver (motor-head unit).
2. At the same time, press and hold both the hand-held
transmitter button and one of the
three Universal Remote system
buttons to be used to operate
the garage door. Do not release
the Universal Remote system
button or the hand-held
transmitter button until the
indicator light changes from a
slowly to a rapidly flashing light.
You now may release both
buttons. Some entry gates and garage
door openers may require
substitution of Step 2 with the
procedure noted in
“Gate
Operator and Canadian
Programming” later in this
section.
3. Press and hold for five seconds the newly trained Universal
Remote system button (the
button selected in Step 2) while
observing the indicator light and
garage door activation.
.If the indicator light stays on
continuously or the garage
door starts to move when
the Universal Remote
system button is pressed
and released, then the
programming is complete.
There is no need to
continue programming
Steps 4–6.
Page 150 of 436
Black plate (42,1)Chevrolet Malibu Owner Manual - 2013 - CRC - 6/6/12
5-42 Instruments and Controls
.If the Universal Remote
system indicator light blinks
rapidly for two seconds,
then turns to a constant
light and the garage door
does not move, continue
with programming
Steps 4–6.
It may be helpful to have
another person assist with
the remaining Steps 4–6.
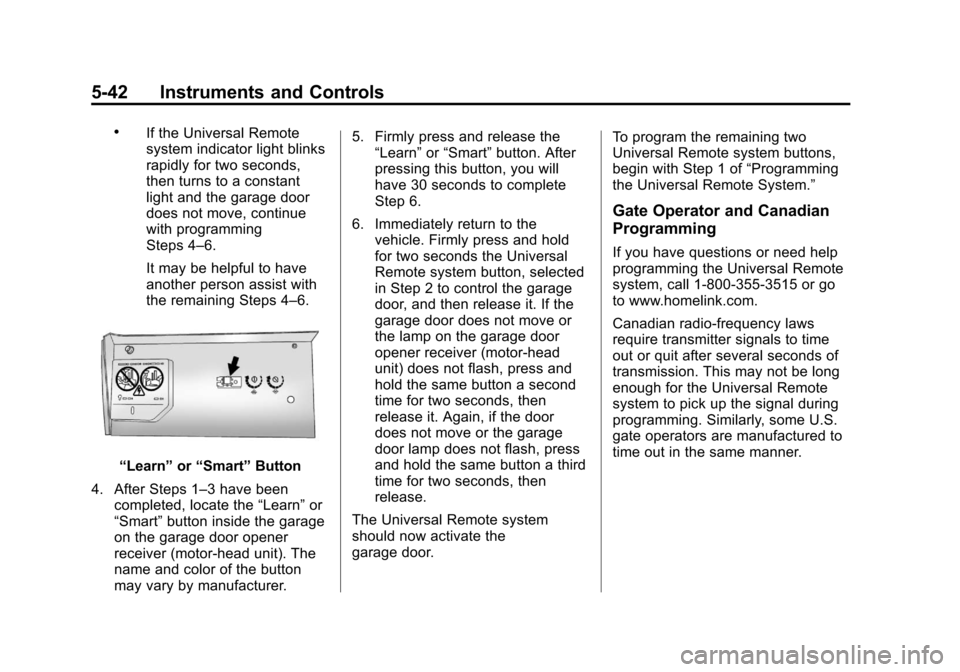
“Learn”or“Smart” Button
4. After Steps 1–3 have been completed, locate the “Learn”or
“Smart” button inside the garage
on the garage door opener
receiver (motor-head unit). The
name and color of the button
may vary by manufacturer. 5. Firmly press and release the
“Learn” or“Smart” button. After
pressing this button, you will
have 30 seconds to complete
Step 6.
6. Immediately return to the vehicle. Firmly press and hold
for two seconds the Universal
Remote system button, selected
in Step 2 to control the garage
door, and then release it. If the
garage door does not move or
the lamp on the garage door
opener receiver (motor-head
unit) does not flash, press and
hold the same button a second
time for two seconds, then
release it. Again, if the door
does not move or the garage
door lamp does not flash, press
and hold the same button a third
time for two seconds, then
release.
The Universal Remote system
should now activate the
garage door. To program the remaining two
Universal Remote system buttons,
begin with Step 1 of
“Programming
the Universal Remote System.”
Gate Operator and Canadian
Programming
If you have questions or need help
programming the Universal Remote
system, call 1-800-355-3515 or go
to www.homelink.com.
Canadian radio-frequency laws
require transmitter signals to time
out or quit after several seconds of
transmission. This may not be long
enough for the Universal Remote
system to pick up the signal during
programming. Similarly, some U.S.
gate operators are manufactured to
time out in the same manner.