2013 CHEVROLET MALIBU light
[x] Cancel search: lightPage 250 of 436
Black plate (34,1)Chevrolet Malibu Owner Manual - 2013 - CRC - 6/6/12
9-34 Driving and Operating
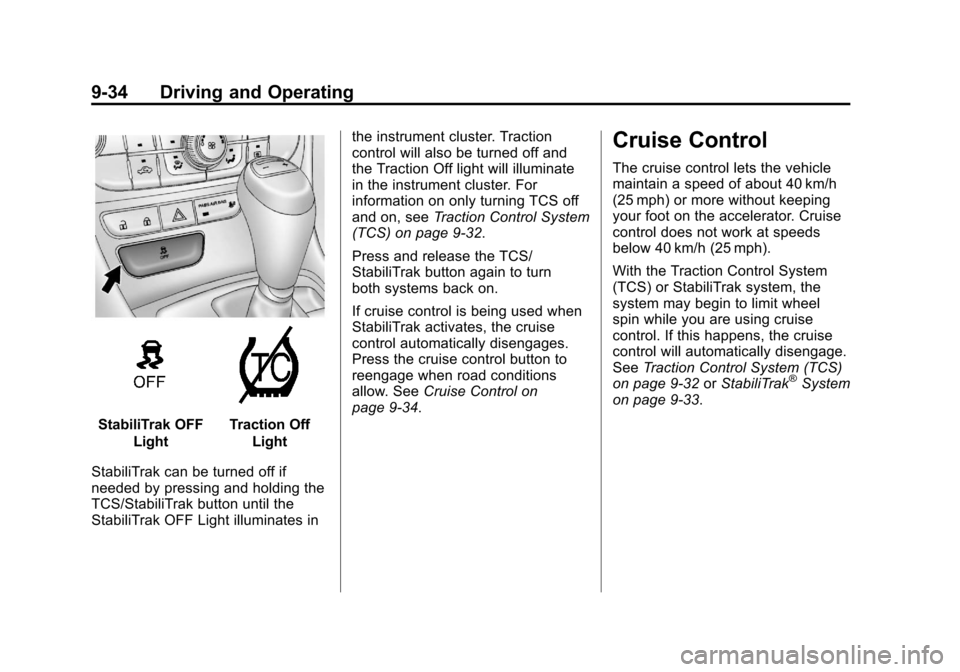
StabiliTrak OFFLightTraction OffLight
StabiliTrak can be turned off if
needed by pressing and holding the
TCS/StabiliTrak button until the
StabiliTrak OFF Light illuminates in the instrument cluster. Traction
control will also be turned off and
the Traction Off light will illuminate
in the instrument cluster. For
information on only turning TCS off
and on, see
Traction Control System
(TCS) on page 9‑32.
Press and release the TCS/
StabiliTrak button again to turn
both systems back on.
If cruise control is being used when
StabiliTrak activates, the cruise
control automatically disengages.
Press the cruise control button to
reengage when road conditions
allow. See Cruise Control on
page 9‑34.
Cruise Control
The cruise control lets the vehicle
maintain a speed of about 40 km/h
(25 mph) or more without keeping
your foot on the accelerator. Cruise
control does not work at speeds
below 40 km/h (25 mph).
With the Traction Control System
(TCS) or StabiliTrak system, the
system may begin to limit wheel
spin while you are using cruise
control. If this happens, the cruise
control will automatically disengage.
See Traction Control System (TCS)
on page 9‑32 orStabiliTrak
®System
on page 9‑33.
Page 251 of 436
Black plate (35,1)Chevrolet Malibu Owner Manual - 2013 - CRC - 6/6/12
Driving and Operating 9-35
{WARNING
Cruise control can be dangerous
where you cannot drive safely at
a steady speed. So, do not use
the cruise control on winding
roads or in heavy traffic.
Cruise control can be dangerous
on slippery roads. On such roads,
fast changes in tire traction can
cause excessive wheel slip, and
you could lose control. Do not use
cruise control on slippery roads.
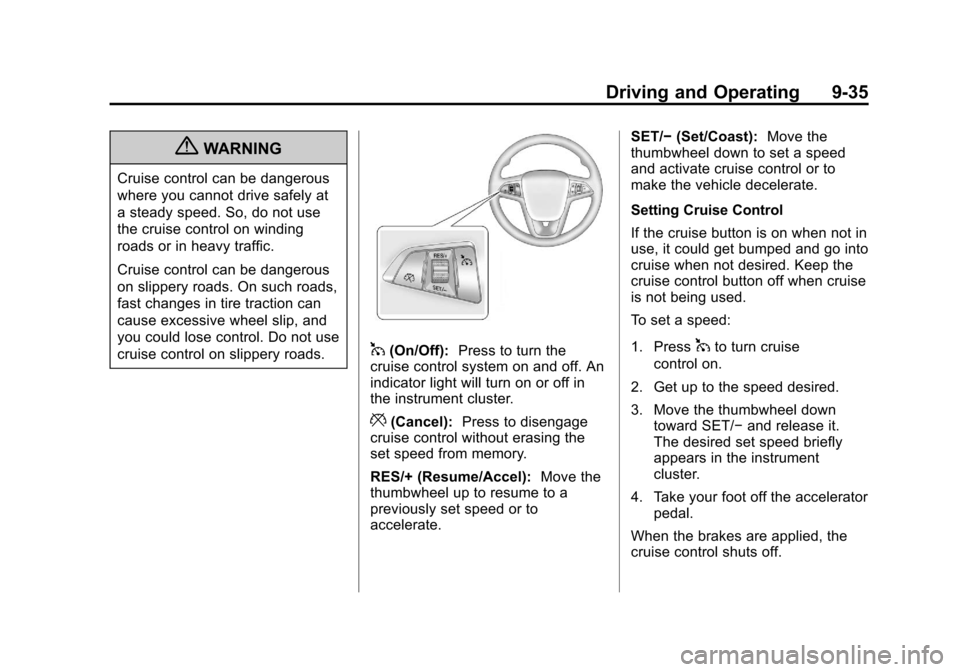
1(On/Off):Press to turn the
cruise control system on and off. An
indicator light will turn on or off in
the instrument cluster.
*(Cancel): Press to disengage
cruise control without erasing the
set speed from memory.
RES/+ (Resume/Accel): Move the
thumbwheel up to resume to a
previously set speed or to
accelerate. SET/−
(Set/Coast): Move the
thumbwheel down to set a speed
and activate cruise control or to
make the vehicle decelerate.
Setting Cruise Control
If the cruise button is on when not in
use, it could get bumped and go into
cruise when not desired. Keep the
cruise control button off when cruise
is not being used.
To set a speed:
1. Press
1to turn cruise
control on.
2. Get up to the speed desired.
3. Move the thumbwheel down toward SET/− and release it.
The desired set speed briefly
appears in the instrument
cluster.
4. Take your foot off the accelerator pedal.
When the brakes are applied, the
cruise control shuts off.
Page 252 of 436
Black plate (36,1)Chevrolet Malibu Owner Manual - 2013 - CRC - 6/6/12
9-36 Driving and Operating
Resuming a Set Speed
If the cruise control is set at a
desired speed and then the brakes
are applied, the cruise control is
disengaged without erasing the set
speed from memory. Once the
vehicle speed is about 40 km/h
(25 mph) or greater, move the
thumbwheel up toward RES/+
briefly and then release it. The
vehicle returns to the previously set
speed and stays there.
Increasing Speed While Using
Cruise Control
If the cruise control system is
already activated:
.Move the thumbwheel up toward
RES/+ and hold it until the
vehicle accelerates to the
desired speed, then release it.
.To increase the speed in small
amounts, move the thumbwheel
up toward RES/+ briefly and
then release it. Each time this is
done, the vehicle goes about
1.6 km/h (1 mph) faster.Reducing Speed While Using
Cruise Control
If the cruise control system is
already activated:
.Move the thumbwheel toward
SET/−
and hold until the desired
lower speed is reached, then
release it.
.To slow down in very small
amounts, move the thumbwheel
toward SET/− briefly. Each time
this is done, the vehicle goes
about 1.6 km/h (1 mph) slower.
Passing Another Vehicle While
Using Cruise Control
Use the accelerator pedal to
increase vehicle speed. When you
take your foot off the pedal, the
vehicle will slow down to the
previously set cruise control speed.
Using Cruise Control on Hills
How well the cruise control works
on hills depends upon the vehicle
speed, load, and the steepness of
the hills. When going up steep hills, you might have to step on the
accelerator pedal to maintain
the vehicle speed. When going
downhill, you might have to brake or
shift to a lower gear to maintain the
vehicle speed. When the brakes are
applied the cruise control is
disengaged.
Ending Cruise Control
There are three ways to end cruise
control:
.Step lightly on the brake pedal;
when cruise control disengages,
the indicator light will not be lit.
.Press*.
.Press1to turn the cruise
control system off completely.
The cruise control cannot be
resumed.
Erasing Speed Memory
The cruise control set speed is
erased from memory if
1is pressed
or if the vehicle is turned off.
Page 256 of 436

Black plate (40,1)Chevrolet Malibu Owner Manual - 2013 - CRC - 6/6/12
9-40 Driving and Operating
Turning the System On and Off
The URPA system can be turned on
and off using the park assist button
next to the shift lever.
The indicator light next to the park
assist button lights up when the
system is on and turns off when it
has been disabled.
When the system is off, a message
displays on the Driver Information
Center (DIC). The message
disappears after a short period
of time.
URPA defaults to the on setting
each time the vehicle is started.
When the System Does Not
Seem to Work Properly
The following messages may be
displayed on the DIC:
SERVICE PARK ASSIST:If this
message occurs, take the vehicle to
your dealer to repair the system.
PARK ASSIST OFF: If the URPA
system does not activate due to a
temporary condition, this message
displays on the DIC. This can occur
under the following conditions:
.The driver has disabled the
system.
.The ultrasonic sensors are not
clean. Keep the vehicle's rear
bumper free of mud, dirt, snow,
ice, and slush. For cleaning
instructions, see Exterior Care
on page 10‑97.
.The park assist sensors are
covered by frost or ice. Frost or
ice can form around and behind
the sensors and may not always
be seen; this can occur after
washing the vehicle in cold weather. The message may not
clear until the frost or ice has
melted.
.An object was hanging out of the
trunk during the last drive cycle.
Once the object is removed,
URPA will return to normal
operation.
.The bumper is damaged. Take
the vehicle to your dealer to
repair the system.
.Other conditions, such as
vibrations from a jackhammer or
the compression of air brakes on
a very large truck, are affecting
system performance.
Rear Vision
Camera (RVC)
The vehicle may have an RVC
system. Read this entire section
before using it.
The RVC system can assist the
driver when backing up by
displaying a view of the area behind
the vehicle.
Page 259 of 436
Black plate (43,1)Chevrolet Malibu Owner Manual - 2013 - CRC - 6/6/12
Driving and Operating 9-43
Lane Departure
Warning (LDW)
The vehicle may have an LDW
system. Read this entire section
before using the system.
{WARNING
The LDW system is an aid to help
the vehicle stay in the driving
lane. It does not steer the vehicle.
The LDW system may not:
.Provide enough time to avoid
a crash.
.Detect lane markings under
bad weather conditions or if
the windshield is dirty.
.Detect lane markings and will
not detect road edges.
.Warn that the vehicle is
crossing a lane marking if the
system does not detect the
lane marking.(Continued)
WARNING (CONTINUED)
If LDW only detects lane
markings on one side of the road,
it will only warn you when
departing the lane on the side
where it has detected a lane
marker. Even with LDW, always
keep your attention on the road
and maintain proper vehicle
position within the lane, or vehicle
damage, injury, or death could
occur. Always keep the
windshield clean and do not use
LDW in bad weather conditions.
When the vehicle crosses a
detected lane marking, the LDW
indicator will flash and three beeps
will sound. LDW will not warn if the
turn signal is on or if a sharp
maneuver is made.
How the System Works
The LDW camera sensor is on the
windshield ahead of the rearview
mirror.
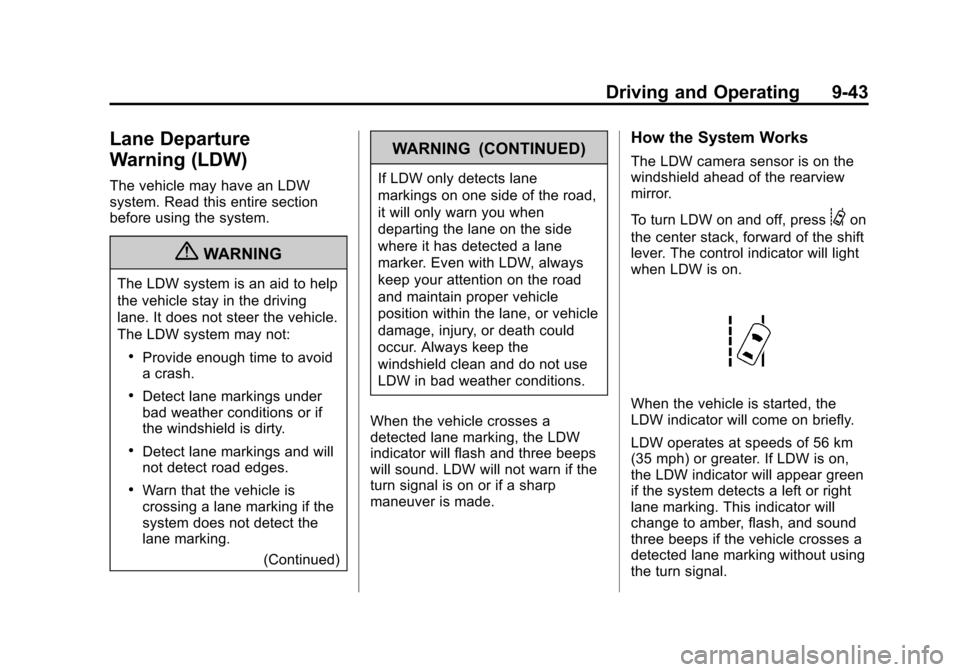
To turn LDW on and off, press
@on
the center stack, forward of the shift
lever. The control indicator will light
when LDW is on.
When the vehicle is started, the
LDW indicator will come on briefly.
LDW operates at speeds of 56 km
(35 mph) or greater. If LDW is on,
the LDW indicator will appear green
if the system detects a left or right
lane marking. This indicator will
change to amber, flash, and sound
three beeps if the vehicle crosses a
detected lane marking without using
the turn signal.
Page 265 of 436
Black plate (49,1)Chevrolet Malibu Owner Manual - 2013 - CRC - 6/6/12
Driving and Operating 9-49
{WARNING
If a fire starts while you are
refueling, do not remove the
nozzle. Shut off the flow of fuel by
shutting off the pump or by
notifying the station attendant.
Leave the area immediately.
Notice: If a new fuel cap is
needed, be sure to get the right
type of cap from your dealer. The
wrong type of fuel cap might not
fit properly, might cause the
malfunction indicator lamp to
light, and could damage the fuel
tank and emissions system. See
Malfunction Indicator Lamp on
page 5‑14.
Filling a Portable Fuel
Container
{WARNING
Filling a portable fuel container
while it is in the vehicle can cause
fuel vapors that can ignite either
by static electricity or other
means. You or others could be
badly burned and the vehicle
could be damaged. Always:
.Use approved fuel
containers.
.Remove container from
vehicle, trunk, or pickup bed
before filling.
(Continued)
WARNING (CONTINUED)
.Place container on the
ground.
.Place the nozzle inside the fill
opening of the container
before dispensing fuel, and
keep it in contact with the fill
opening until filling is
complete.
.Do not smoke while
pumping fuel.
Page 267 of 436
Black plate (1,1)Chevrolet Malibu Owner Manual - 2013 - CRC - 6/6/12
Vehicle Care 10-1
Vehicle Care
General Information
General Information . . . . . . . . . . 10-2
California Proposition65 Warning . . . . . . . . . . . . . . . . . 10-3
California Perchlorate Materials Requirements . . . . 10-3
Accessories and Modifications . . . . . . . . . . . . . . . 10-3
Vehicle Checks
Doing Your OwnService Work . . . . . . . . . . . . . . . 10-4
Hood . . . . . . . . . . . . . . . . . . . . . . . . 10-5
Engine Compartment Overview . . . . . . . . . . . . . . . . . . . 10-6
Engine Oil . . . . . . . . . . . . . . . . . . 10-11
Engine Oil Life System . . . . . 10-13
Automatic Transmission Fluid . . . . . . . . . . . . . . . . . . . . . . 10-14
Engine Air Cleaner/Filter . . . . 10-15
Cooling System . . . . . . . . . . . . 10-16
Engine Coolant . . . . . . . . . . . . . 10-18
Engine Overheating . . . . . . . . 10-20
Washer Fluid . . . . . . . . . . . . . . . 10-22
Brakes . . . . . . . . . . . . . . . . . . . . . 10-22
Brake Fluid . . . . . . . . . . . . . . . . . 10-23 Battery . . . . . . . . . . . . . . . . . . . . . 10-25
Starter Switch Check . . . . . . . 10-26
Automatic Transmission Shift
Lock Control Function
Check . . . . . . . . . . . . . . . . . . . . . 10-26
Ignition Transmission Lock Check . . . . . . . . . . . . . . . . . . . . . 10-26
Park Brake and P (Park) Mechanism Check . . . . . . . . 10-27
Wiper Blade Replacement . . . . . . . . . . . . . . 10-27
Headlamp Aiming
Headlamp Aiming . . . . . . . . . . 10-28
Bulb Replacement
Bulb Replacement . . . . . . . . . . 10-28
Halogen Bulbs . . . . . . . . . . . . . . 10-28
High Intensity Discharge(HID) Lighting . . . . . . . . . . . . . 10-29
LED Lighting . . . . . . . . . . . . . . . 10-29
Headlamps, Front Turn Signal, Sidemarker, and
Parking Lamps . . . . . . . . . . . . 10-29
Fog Lamps . . . . . . . . . . . . . . . . . 10-32
Taillamps, Turn Signal, Stoplamps, and Back-Up
Lamps (LS and LT) . . . . . . . . 10-33 Taillamps, Turn Signal,
Stoplamps, and Back-Up
Lamps (LTZ) . . . . . . . . . . . . . . 10-34
License Plate Lamp . . . . . . . . 10-35
Replacement Bulbs . . . . . . . . . 10-36
Electrical System
High Voltage Devices and Wiring . . . . . . . . . . . . . . . . . . . . . 10-37
Electrical System Overload . . . . . . . . . . . . . . . . . . 10-37
Fuses . . . . . . . . . . . . . . . . . . . . . . 10-38
Engine Compartment Fuse Block . . . . . . . . . . . . . . . . . . . . . 10-38
Instrument Panel Fuse Block . . . . . . . . . . . . . . . . . . . . . 10-42
Wheels and Tires
Tires . . . . . . . . . . . . . . . . . . . . . . . . 10-44
All-Season Tires . . . . . . . . . . . . 10-45
Winter Tires . . . . . . . . . . . . . . . . 10-45
Summer Tires . . . . . . . . . . . . . . 10-46
Tire Sidewall Labeling . . . . . . 10-46
Tire Designations . . . . . . . . . . . 10-48
Tire Terminology andDefinitions . . . . . . . . . . . . . . . . 10-49
Tire Pressure . . . . . . . . . . . . . . . 10-52
Tire Pressure for High-Speed Operation . . . . . . . . . . . . . . . . . 10-53
Page 271 of 436
Black plate (5,1)Chevrolet Malibu Owner Manual - 2013 - CRC - 6/6/12
Vehicle Care 10-5
Hood
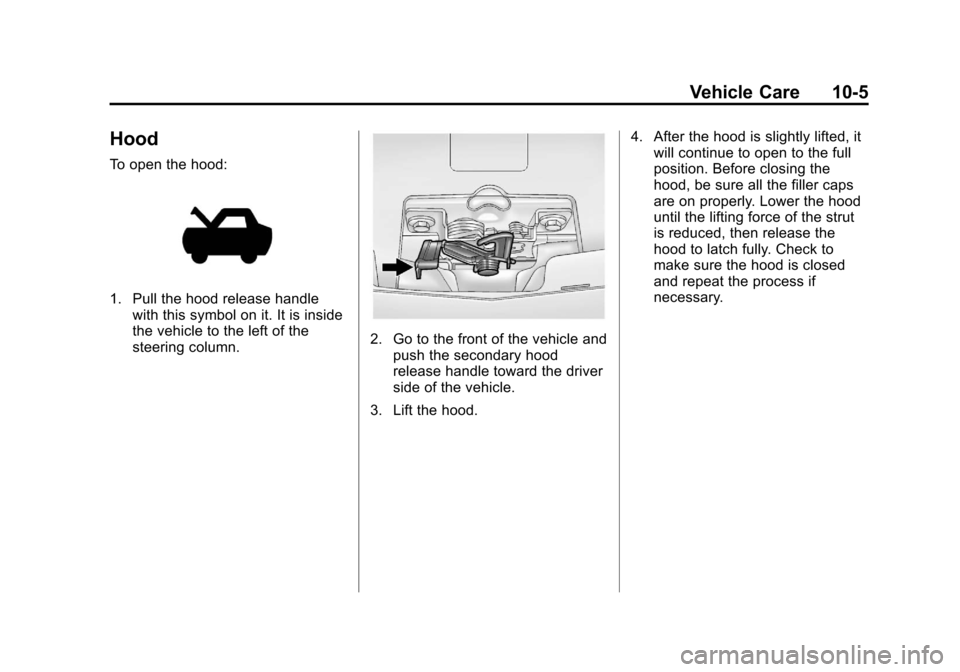
To open the hood:
1. Pull the hood release handlewith this symbol on it. It is inside
the vehicle to the left of the
steering column.
2. Go to the front of the vehicle andpush the secondary hood
release handle toward the driver
side of the vehicle.
3. Lift the hood. 4. After the hood is slightly lifted, it
will continue to open to the full
position. Before closing the
hood, be sure all the filler caps
are on properly. Lower the hood
until the lifting force of the strut
is reduced, then release the
hood to latch fully. Check to
make sure the hood is closed
and repeat the process if
necessary.