2013 CHEVROLET MALIBU center console
[x] Cancel search: center consolePage 23 of 436
Black plate (17,1)Chevrolet Malibu Owner Manual - 2013 - CRC - 6/6/12
In Brief 1-17
Vehicle Features
Radio(s)
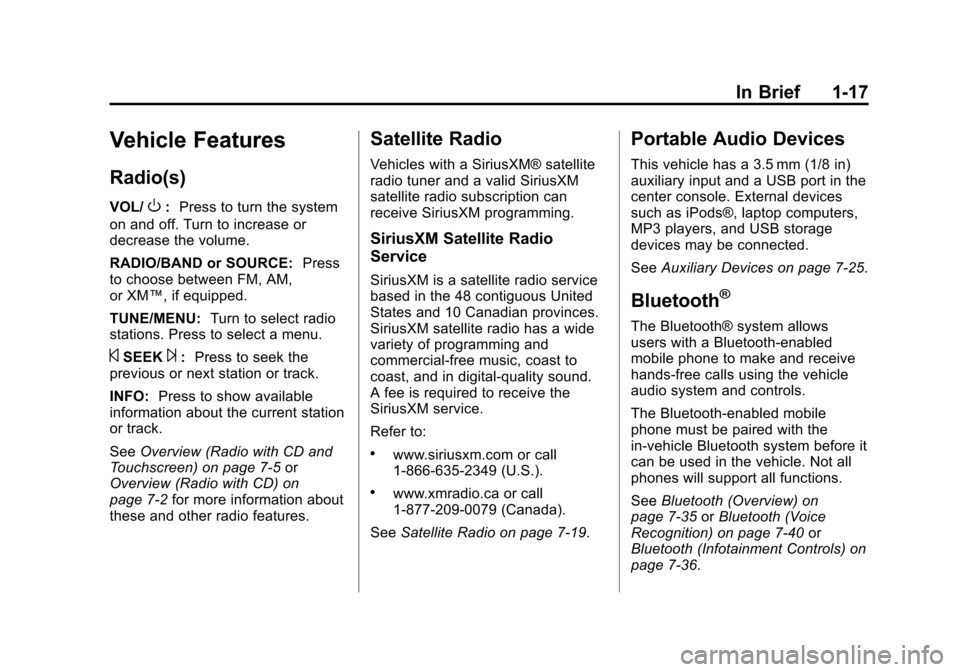
VOL/O:Press to turn the system
on and off. Turn to increase or
decrease the volume.
RADIO/BAND or SOURCE: Press
to choose between FM, AM,
or XM™, if equipped.
TUNE/MENU: Turn to select radio
stations. Press to select a menu.
©SEEK¨: Press to seek the
previous or next station or track.
INFO: Press to show available
information about the current station
or track.
See Overview (Radio with CD and
Touchscreen) on page 7‑5 or
Overview (Radio with CD) on
page 7‑2 for more information about
these and other radio features.
Satellite Radio
Vehicles with a SiriusXM® satellite
radio tuner and a valid SiriusXM
satellite radio subscription can
receive SiriusXM programming.
SiriusXM Satellite Radio
Service
SiriusXM is a satellite radio service
based in the 48 contiguous United
States and 10 Canadian provinces.
SiriusXM satellite radio has a wide
variety of programming and
commercial-free music, coast to
coast, and in digital-quality sound.
A fee is required to receive the
SiriusXM service.
Refer to:
.www.siriusxm.com or call
1-866-635-2349 (U.S.).
.www.xmradio.ca or call
1-877-209-0079 (Canada).
See Satellite Radio on page 7‑19.
Portable Audio Devices
This vehicle has a 3.5 mm (1/8 in)
auxiliary input and a USB port in the
center console. External devices
such as iPods®, laptop computers,
MP3 players, and USB storage
devices may be connected.
SeeAuxiliary Devices on page 7‑25.
Bluetooth®
The Bluetooth® system allows
users with a Bluetooth-enabled
mobile phone to make and receive
hands-free calls using the vehicle
audio system and controls.
The Bluetooth-enabled mobile
phone must be paired with the
in-vehicle Bluetooth system before it
can be used in the vehicle. Not all
phones will support all functions.
SeeBluetooth (Overview) on
page 7‑35 orBluetooth (Voice
Recognition) on page 7‑40 or
Bluetooth (Infotainment Controls) on
page 7‑36.
Page 26 of 436
Black plate (20,1)Chevrolet Malibu Owner Manual - 2013 - CRC - 6/6/12
1-20 In Brief
Lane Departure
Warning (LDW)
For vehicles with LDW, it is intended
to help avoid unintentional lane
departures. It may provide a
warning if the vehicle is crossing a
lane without using a turn signal.
LDW uses a camera sensor to
detect the lane markings. It only
operates at speeds of 56 km
(35 mph) or greater.
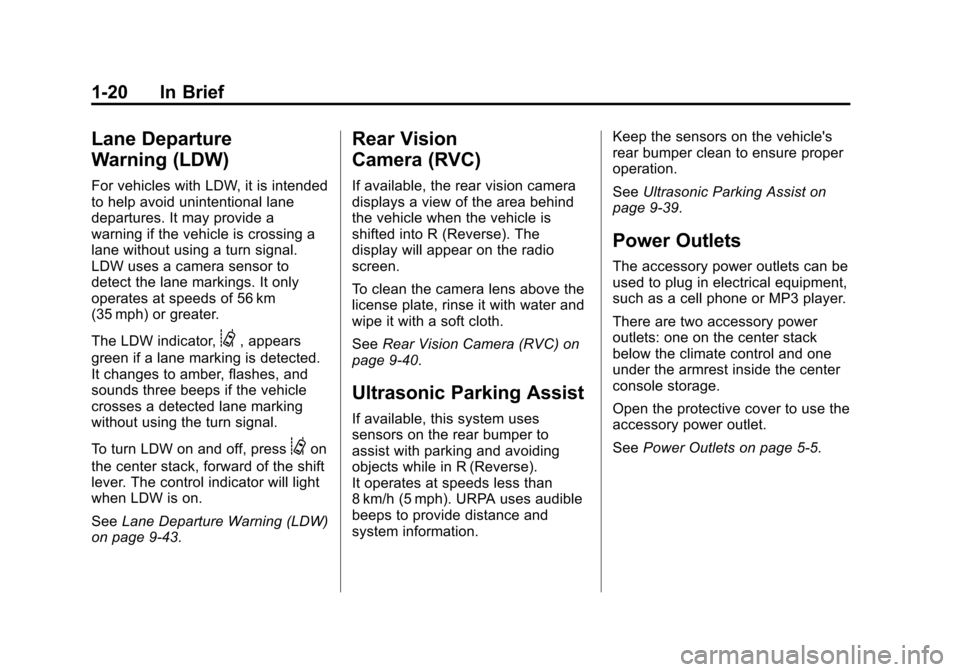
The LDW indicator,
@, appears
green if a lane marking is detected.
It changes to amber, flashes, and
sounds three beeps if the vehicle
crosses a detected lane marking
without using the turn signal.
To turn LDW on and off, press
@on
the center stack, forward of the shift
lever. The control indicator will light
when LDW is on.
See Lane Departure Warning (LDW)
on page 9‑43.
Rear Vision
Camera (RVC)
If available, the rear vision camera
displays a view of the area behind
the vehicle when the vehicle is
shifted into R (Reverse). The
display will appear on the radio
screen.
To clean the camera lens above the
license plate, rinse it with water and
wipe it with a soft cloth.
See Rear Vision Camera (RVC) on
page 9‑40.
Ultrasonic Parking Assist
If available, this system uses
sensors on the rear bumper to
assist with parking and avoiding
objects while in R (Reverse).
It operates at speeds less than
8 km/h (5 mph). URPA uses audible
beeps to provide distance and
system information. Keep the sensors on the vehicle's
rear bumper clean to ensure proper
operation.
See
Ultrasonic Parking Assist on
page 9‑39.
Power Outlets
The accessory power outlets can be
used to plug in electrical equipment,
such as a cell phone or MP3 player.
There are two accessory power
outlets: one on the center stack
below the climate control and one
under the armrest inside the center
console storage.
Open the protective cover to use the
accessory power outlet.
See Power Outlets on page 5‑5.
Page 38 of 436
Black plate (6,1)Chevrolet Malibu Owner Manual - 2013 - CRC - 6/6/12
2-6 Keys, Doors, and Windows
Programming Transmitters to
the Vehicle
Only RKE transmitters programmed
to the vehicle will work. If a
transmitter is lost or stolen, a
replacement can be purchased and
programmed through your dealer.
The vehicle can be reprogrammed
so that lost or stolen transmitters no
longer work. Any remaining
transmitters will need to be
reprogrammed. Each vehicle can
have up to eight transmitters
matched to it.
Starting the Vehicle with a Low
Transmitter Battery
If the transmitter battery is weak, the
DIC may display NO REMOTE
DETECTED when you try to start
the vehicle. The REPLACE
BATTERY IN REMOTE KEY
message may also be displayed at
this time.To start the vehicle:
1. Open the center console and
place the transmitter in the
transmitter pocket with the
buttons facing the front of the
vehicle.
2. With the vehicle in P (Park) or N (Neutral), press the brake
pedal and press the START
button. See Starting the Engine
on page 9‑18.
Replace the transmitter battery
as soon as possible.
Battery Replacement
Replace the battery if the DIC
indicates that battery replacement is
necessary. See Key and Lock
Messages on page 5‑31.
The battery is not rechargeable. To
replace the battery:
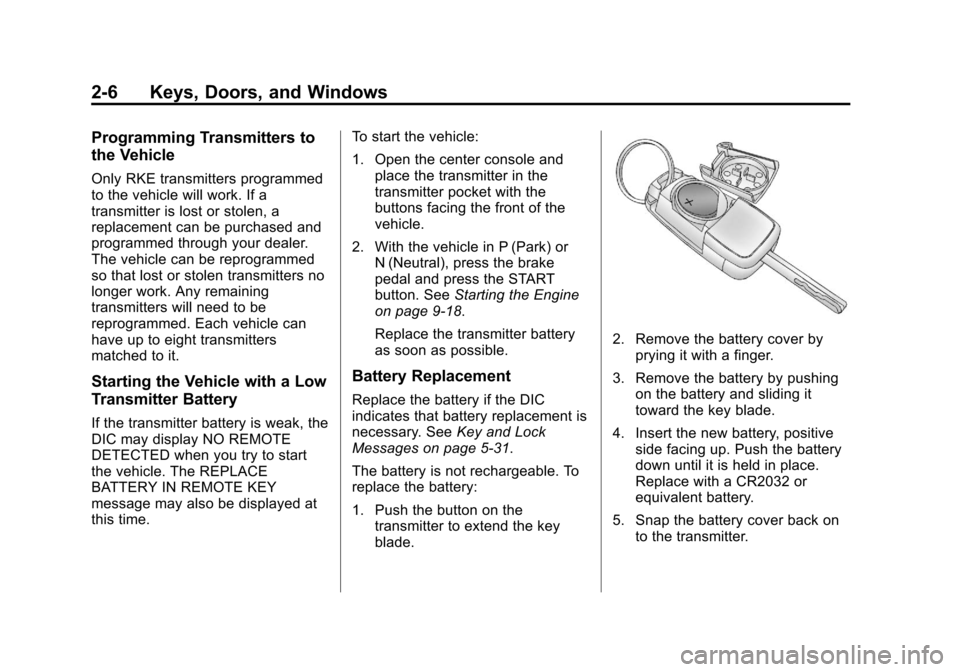
1. Push the button on the transmitter to extend the key
blade.
2. Remove the battery cover byprying it with a finger.
3. Remove the battery by pushing on the battery and sliding it
toward the key blade.
4. Insert the new battery, positive side facing up. Push the battery
down until it is held in place.
Replace with a CR2032 or
equivalent battery.
5. Snap the battery cover back on to the transmitter.
Page 47 of 436
Black plate (15,1)Chevrolet Malibu Owner Manual - 2013 - CRC - 6/6/12
Keys, Doors, and Windows 2-15
If the RKE transmitter appears to be
undamaged, try another transmitter.
Or, you may try placing the
transmitter in the transmitter pocket
in the center console. See“Starting
the Vehicle with a Low Transmitter
Battery” underRemote Keyless
Entry (RKE) System Operation on
page 2‑3.
If the engine does not start with the
other transmitter or when the
transmitter is in the pocket in the
center console, your vehicle needs
service. See your dealer who can
service the theft-deterrent system
and have a new transmitter
programmed to the vehicle.
Do not leave the key or device that
disarms or deactivates the
theft-deterrent system in the vehicle.Exterior Mirrors
Convex Mirrors
{WARNING
A convex mirror can make things,
like other vehicles, look farther
away than they really are. If you
cut too sharply into the right lane,
you could hit a vehicle on the
right. Check the inside mirror or
glance over your shoulder before
changing lanes.
The passenger side mirror is convex
shaped. A convex mirror's surface is
curved so more can be seen from
the driver seat.
Power Mirrors
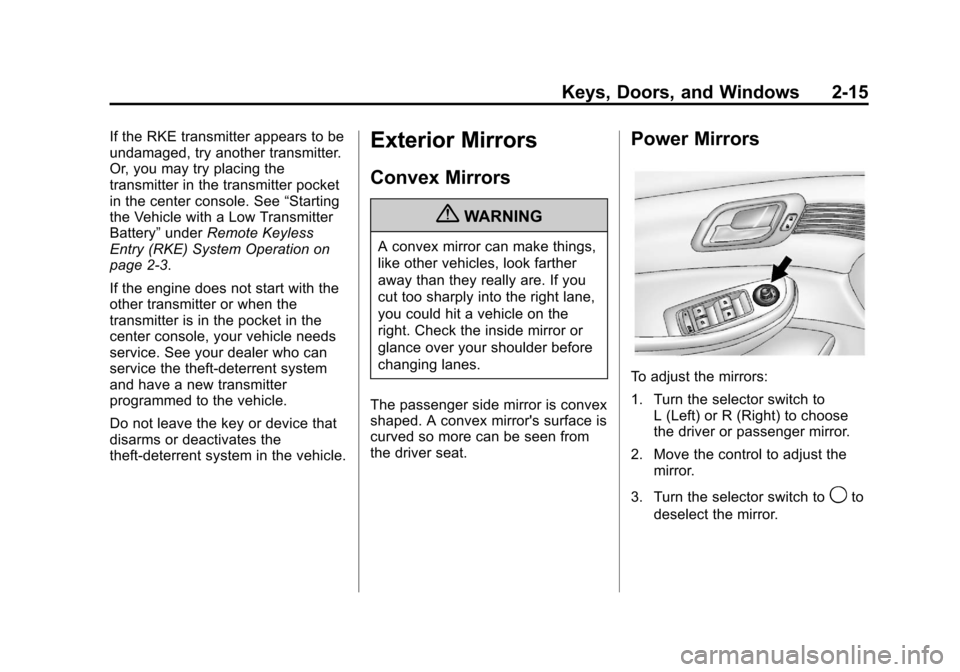
To adjust the mirrors:
1. Turn the selector switch to L (Left) or R (Right) to choose
the driver or passenger mirror.
2. Move the control to adjust the mirror.
3. Turn the selector switch to
9to
deselect the mirror.
Page 105 of 436
Black plate (1,1)Chevrolet Malibu Owner Manual - 2013 - CRC - 6/6/12
Storage 4-1
Storage
Storage Compartments
Instrument Panel Storage . . . . . 4-1
Glove Box . . . . . . . . . . . . . . . . . . . . 4-1
Cupholders . . . . . . . . . . . . . . . . . . . 4-2
Sunglasses Storage . . . . . . . . . . 4-2
Center Console Storage . . . . . . 4-3
Additional Storage Features
Cargo Tie-Downs . . . . . . . . . . . . . 4-3
Convenience Net . . . . . . . . . . . . . 4-3
Storage
Compartments
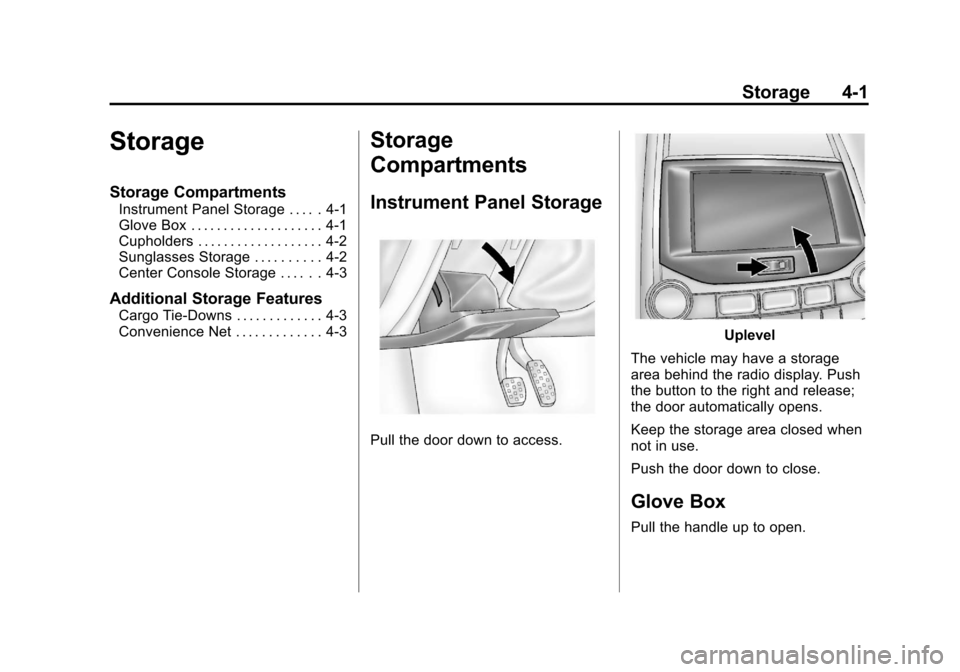
Instrument Panel Storage
Pull the door down to access.
Uplevel
The vehicle may have a storage
area behind the radio display. Push
the button to the right and release;
the door automatically opens.
Keep the storage area closed when
not in use.
Push the door down to close.
Glove Box
Pull the handle up to open.
Page 106 of 436
Black plate (2,1)Chevrolet Malibu Owner Manual - 2013 - CRC - 6/6/12
4-2 Storage
Cupholders
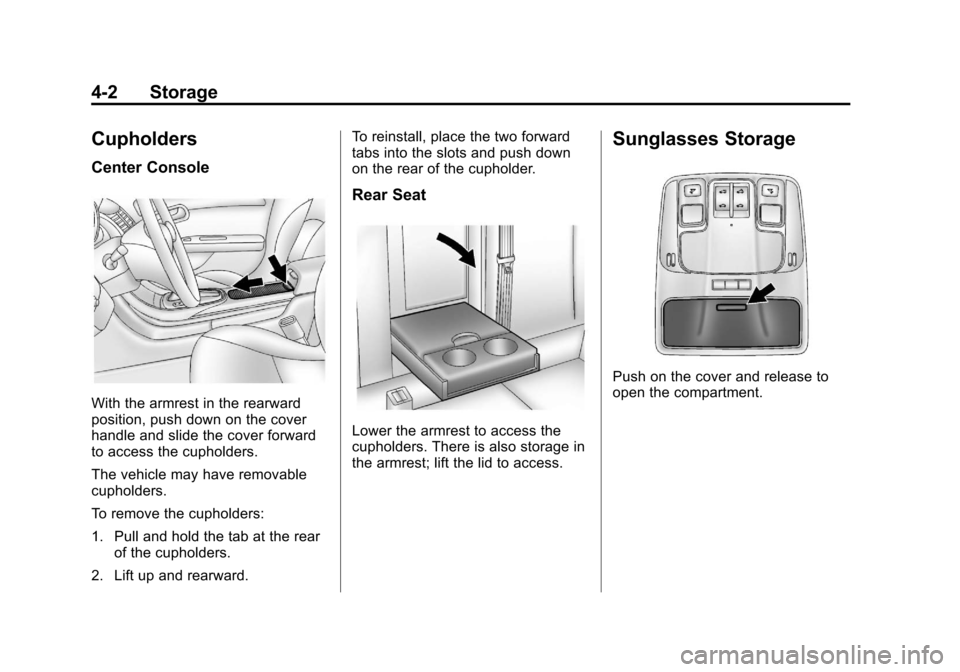
Center Console
With the armrest in the rearward
position, push down on the cover
handle and slide the cover forward
to access the cupholders.
The vehicle may have removable
cupholders.
To remove the cupholders:
1. Pull and hold the tab at the rearof the cupholders.
2. Lift up and rearward. To reinstall, place the two forward
tabs into the slots and push down
on the rear of the cupholder.
Rear Seat
Lower the armrest to access the
cupholders. There is also storage in
the armrest; lift the lid to access.
Sunglasses Storage
Push on the cover and release to
open the compartment.
Page 107 of 436
Black plate (3,1)Chevrolet Malibu Owner Manual - 2013 - CRC - 6/6/12
Storage 4-3
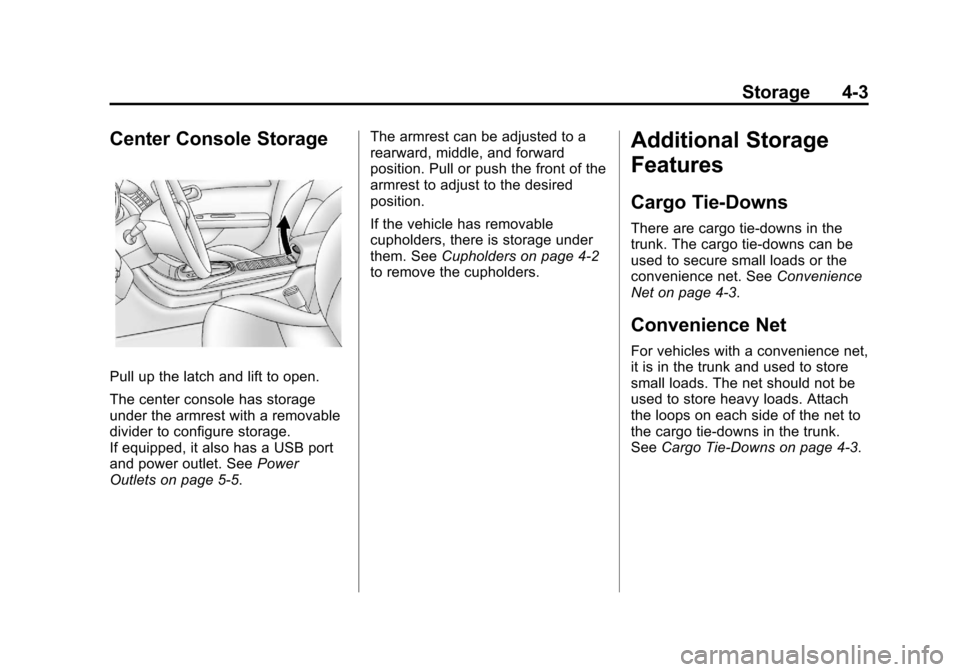
Center Console Storage
Pull up the latch and lift to open.
The center console has storage
under the armrest with a removable
divider to configure storage.
If equipped, it also has a USB port
and power outlet. SeePower
Outlets on page 5‑5. The armrest can be adjusted to a
rearward, middle, and forward
position. Pull or push the front of the
armrest to adjust to the desired
position.
If the vehicle has removable
cupholders, there is storage under
them. See
Cupholders on page 4‑2
to remove the cupholders.
Additional Storage
Features
Cargo Tie-Downs
There are cargo tie‐downs in the
trunk. The cargo tie‐downs can be
used to secure small loads or the
convenience net. See Convenience
Net on page 4‑3.
Convenience Net
For vehicles with a convenience net,
it is in the trunk and used to store
small loads. The net should not be
used to store heavy loads. Attach
the loops on each side of the net to
the cargo tie-downs in the trunk.
See Cargo Tie-Downs on page 4‑3.
Page 113 of 436
Black plate (5,1)Chevrolet Malibu Owner Manual - 2013 - CRC - 6/6/12
Instruments and Controls 5-5
Clock
The infotainment system controls
are used to access the time and
date settings through the menu
system. The clock menu can only
be used with the radio on while in
ON/RUN or ACC/ACCESSORY.
SeeOverview (Radio with CD and
Touchscreen) on page 7‑5 or
Overview (Radio with CD) on
page 7‑2 for information about how
to use the menu system. For
vehicles with a navigation system,
see the separate navigation manual.
Setting the Clock (Radio
with CD)
To set the time:
1. Press the CONFIG button and select Time Settings.
2. Select Set Time.
3. Turn the TUNE/MENU knob to adjust the highlighted number.
4. Press the TUNE/MENU knob to select the next number. 5. To save the time and return to
the Time Settings menu, press
the BACK
/button at any time
or press the TUNE/MENU knob
after adjusting the minutes.
Setting the 12/24 Hour Format
1. Press the CONFIG button and select Time Settings.
2. Highlight 12/24 Hour Format.
3. Press the TUNE/MENU knob to select the 12 hour or 24 hour
display format.
Setting the Clock (Radio with
CD and Touchscreen)
To set the time:
1. Press the CONFIG button toenter the menu options. Turn the
TUNE/MENU knob to scroll
through the available setup
features. Press the TUNE/MENU
knob or press the Time screen
button to display other options
within that feature. 2. Press + or
−to increase or
decrease the Hours and Minutes
displayed on the clock.
12/24 HR Format: Press the 12 HR
screen button for standard time;
press the 24 HR screen button for
military time.
Day + or Day −:Press the Day +
or Day −display buttons to increase
or decrease the day.
Display: Press Display to turn the
display of the time on the screen on
or off.
Power Outlets
The accessory power outlets can be
used to plug in electrical equipment,
such as a cell phone or MP3 player.
There are two accessory power
outlets: one on the center stack
below the climate control system,
and one under the armrest inside
the center console storage.