2013 CHEVROLET CAPTIVA SPORT ECO mode
[x] Cancel search: ECO modePage 3 of 374

Black plate (3,1)Chevrolet Captiva Sport Owner Manual - 2013 - crc - 11/12/12
Introduction iii
The names, logos, emblems,
slogans, vehicle model names, and
vehicle body designs appearing in
this manual including, but not limited
to, GM, the GM logo, CHEVROLET,
the CHEVROLET Emblem, and
CAPTIVA are trademarks and/or
service marks of General Motors
LLC, its subsidiaries, affiliates,
or licensors.
This manual describes features that
may or may not be on your specific
vehicle either because they are
options that you did not purchase or
due to changes subsequent to the
printing of this owner manual. Please refer to the purchase
documentation relating to your
specific vehicle to confirm each of
the features found on your vehicle.
Keep this manual in the vehicle for
quick reference.
Using this Manual To quickly locate information about
the vehicle, use the Index in the
back of the manual. It is an
alphabetical list of what is in the
manual and the page number where
it can be found.
About Driving the Vehicle As with other vehicles of this type,
failure to operate this vehicle
correctly may result in loss of
control or an accident. Be sure to
read the driving guidelines in this
manual in the section called “ Driving and Operating ” and specifically
Driver Behavior on page 9 ‑ 2 ,
Driving Environment on page 9 ‑ 2 ,
and Vehicle Design on page 9 ‑ 2 .
Danger, Warnings, and
Cautions Warning messages found on vehicle
labels and in this manual describe
hazards and what to do to avoid or
reduce them.
Danger indicates a hazard with a
high level of risk which will result in
serious injury or death.
Warning or Caution indicates a
hazard that could result in injury or
death.
{ WARNING
These mean there is something
that could hurt you or other
people.
Litho in U.S.A.
Part No. 22738461 B Second Printing ©
2012 General Motors LLC. All Rights Reserved.
Page 29 of 374
Black plate (3,1)Chevrolet Captiva Sport Owner Manual - 2013 - crc - 11/12/12
Keys, Doors, and Windows 2-3
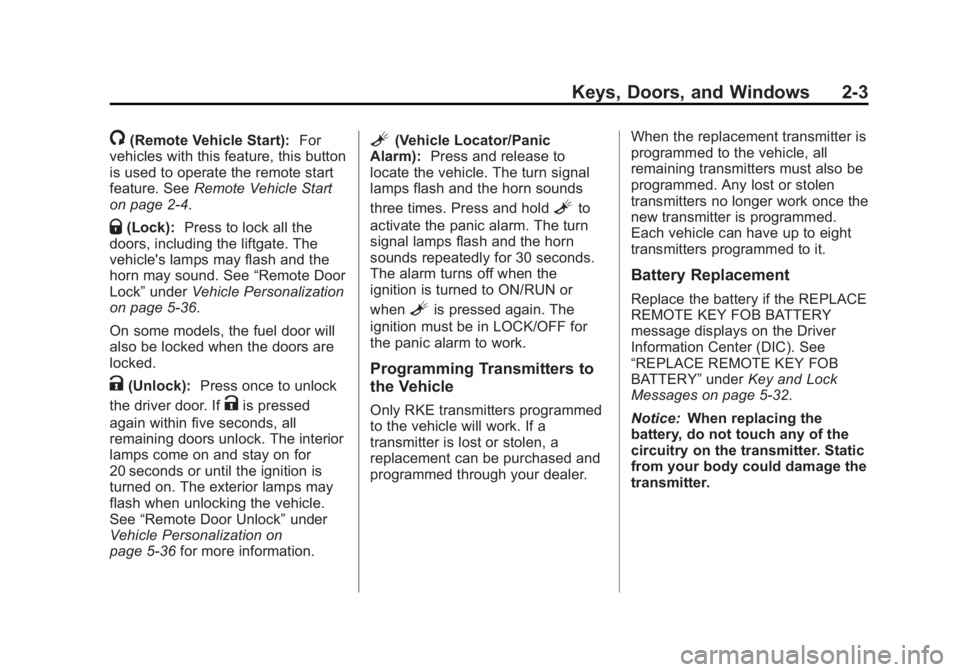
/ (Remote Vehicle Start): For
vehicles with this feature, this button
is used to operate the remote start
feature. See Remote Vehicle Start
on page 2 ‑ 4 .
Q (Lock): Press to lock all the
doors, including the liftgate. The
vehicle's lamps may flash and the
horn may sound. See “ Remote Door
Lock ” under Vehicle Personalization
on page 5 ‑ 36 .
On some models, the fuel door will
also be locked when the doors are
locked.
K (Unlock): Press once to unlock
the driver door. If
K is pressed
again within five seconds, all
remaining doors unlock. The interior
lamps come on and stay on for
20 seconds or until the ignition is
turned on. The exterior lamps may
flash when unlocking the vehicle.
See “ Remote Door Unlock ” under
Vehicle Personalization on
page 5 ‑ 36 for more information. L (Vehicle Locator/Panic
Alarm): Press and release to
locate the vehicle. The turn signal
lamps flash and the horn sounds
three times. Press and hold
L to
activate the panic alarm. The turn
signal lamps flash and the horn
sounds repeatedly for 30 seconds.
The alarm turns off when the
ignition is turned to ON/RUN or
when
L is pressed again. The
ignition must be in LOCK/OFF for
the panic alarm to work.
Programming Transmitters to
the Vehicle Only RKE transmitters programmed
to the vehicle will work. If a
transmitter is lost or stolen, a
replacement can be purchased and
programmed through your dealer. When the replacement transmitter is
programmed to the vehicle, all
remaining transmitters must also be
programmed. Any lost or stolen
transmitters no longer work once the
new transmitter is programmed.
Each vehicle can have up to eight
transmitters programmed to it.
Battery Replacement Replace the battery if the REPLACE
REMOTE KEY FOB BATTERY
message displays on the Driver
Information Center (DIC). See
“ REPLACE REMOTE KEY FOB
BATTERY ” under Key and Lock
Messages on page 5 ‑ 32 .
Notice: When replacing the
battery, do not touch any of the
circuitry on the transmitter. Static
from your body could damage the
transmitter.
Page 63 of 374
Black plate (21,1)Chevrolet Captiva Sport Owner Manual - 2013 - crc - 11/12/12
Seats and Restraints 3-21
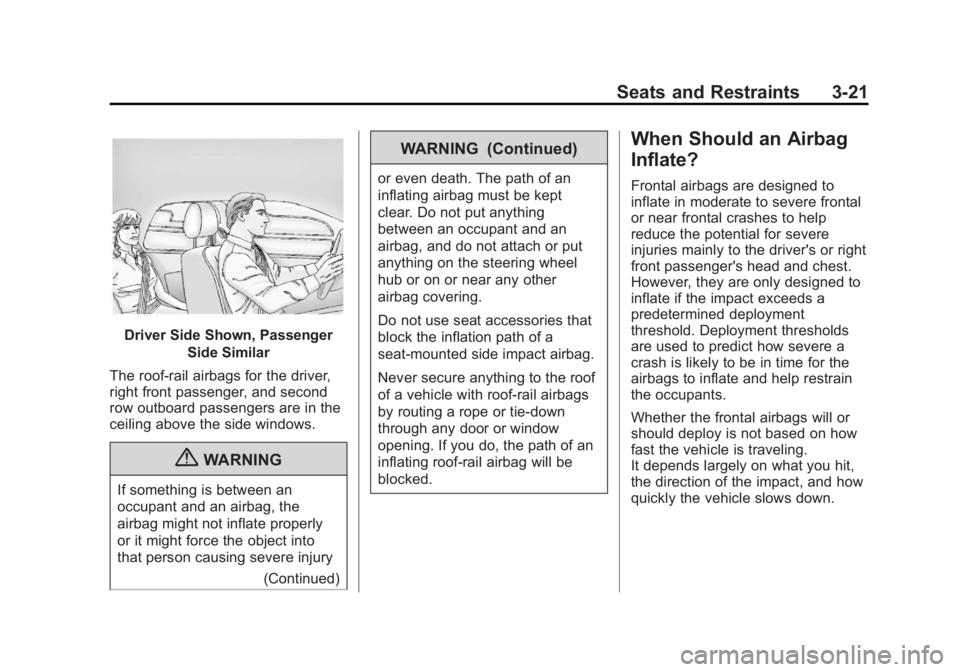
Driver Side Shown, Passenger
Side Similar
The roof-rail airbags for the driver,
right front passenger, and second
row outboard passengers are in the
ceiling above the side windows.
{ WARNING
If something is between an
occupant and an airbag, the
airbag might not inflate properly
or it might force the object into
that person causing severe injury
(Continued) WARNING (Continued) or even death. The path of an
inflating airbag must be kept
clear. Do not put anything
between an occupant and an
airbag, and do not attach or put
anything on the steering wheel
hub or on or near any other
airbag covering.
Do not use seat accessories that
block the inflation path of a
seat-mounted side impact airbag.
Never secure anything to the roof
of a vehicle with roof-rail airbags
by routing a rope or tie ‐ down
through any door or window
opening. If you do, the path of an
inflating roof-rail airbag will be
blocked. When Should an Airbag
Inflate? Frontal airbags are designed to
inflate in moderate to severe frontal
or near frontal crashes to help
reduce the potential for severe
injuries mainly to the driver's or right
front passenger's head and chest.
However, they are only designed to
inflate if the impact exceeds a
predetermined deployment
threshold. Deployment thresholds
are used to predict how severe a
crash is likely to be in time for the
airbags to inflate and help restrain
the occupants.
Whether the frontal airbags will or
should deploy is not based on how
fast the vehicle is traveling.
It depends largely on what you hit,
the direction of the impact, and how
quickly the vehicle slows down.
Page 65 of 374
Black plate (23,1)Chevrolet Captiva Sport Owner Manual - 2013 - crc - 11/12/12
Seats and Restraints 3-23determined by the location and
severity of the side impact. In a
rollover event, roof-rail airbag
deployment is determined by the
direction of the roll.
What Makes an Airbag
Inflate? In a deployment event, the sensing
system sends an electrical signal
triggering a release of gas from the
inflator. Gas from the inflator fills the
airbag causing the bag to break out
of the cover and deploy. The inflator,
the airbag, and related hardware are
all part of the airbag module.
Frontal airbag modules are located
inside the steering wheel and
instrument panel. For vehicles with
seat-mounted side impact airbags,
there are airbag modules in the side
of the front seatbacks closest to the
door. For vehicles with roof-rail
airbags, there are airbag modules in
the ceiling of the vehicle, near the
side windows that have occupant
seating positions. How Does an Airbag
Restrain? In moderate to severe frontal or
near frontal collisions, even belted
occupants can contact the steering
wheel or the instrument panel. In
moderate to severe side collisions,
even belted occupants can contact
the inside of the vehicle.
Airbags supplement the protection
provided by safety belts. Frontal
airbags distribute the force of the
impact more evenly over the
occupant's upper body, stopping the
occupant more gradually. Seat ‐
mounted side impact and roof-rail
airbags distribute the force of the
impact more evenly over the
occupant's upper body.
Rollover capable roof-rail airbags
are designed to help contain the
head and chest of occupants in the
outboard seating positions in the
first and second rows. The rollover
capable roof-rail airbags are
designed to help reduce the risk of full or partial ejection in rollover
events, although no system can
prevent all such ejections.
But airbags would not help in many
types of collisions, primarily
because the occupant's motion is
not toward those airbags. See When
Should an Airbag Inflate? on
page 3 ‑ 21 for more information.
Airbags should never be regarded
as anything more than a supplement
to safety belts.
What Will You See after
an Airbag Inflates? After the frontal airbags and
seat-mounted side impact airbags
inflate, they quickly deflate, so
quickly that some people may not
even realize an airbag inflated.
Roof-rail airbags may still be at least
partially inflated for some time after
they deploy. Some components of
the airbag module may be hot for
several minutes. For location of the
airbag modules, see What Makes
an Airbag Inflate? on page 3 ‑ 23 .
Page 100 of 374
Black plate (4,1)Chevrolet Captiva Sport Owner Manual - 2013 - crc - 11/12/12
5-4 Instruments and Controls For vehicles with Rainsense ™
windshield wipers, the moisture
sensor is next to the inside rearview
mirror and is mounted on the
windshield. When active, these
sensors are able to detect moisture
on the windshield and automatically
turn on the wipers.
To turn on the Rainsense feature,
the wipers must be set to one of the
five delay settings on the lever.
Each of the five settings adjusts the
sensitivity of the sensor.
Since different drivers have different
setting preferences, it is
recommended that the mid-range
setting (position 3) be used initially.
For more wipes, select the higher
settings; for fewer wipes, select the
lower settings located closer to the
off position on the lever.
The sensor automatically controls
the frequency of the wipes from the
off setting to the high speed setting
according to the weather conditions. The wipers can be left in a
Rainsense mode even when it is not
raining.
When Rainsense is active, the
headlamps turn on automatically if
the exterior lamp control is in the
AUTO position and the wipers are
active.
Windshield Washer
{ WARNINGIn freezing weather, do not use
the washer until the windshield is
warmed. Otherwise the washer
fluid can form ice on the
windshield, blocking your vision.
Pull the windshield wiper lever to
spray windshield washer fluid and
activate the wipers. The wipers will
continue until the lever is released
or the maximum wash time is
reached. Rear Window Wiper/
Washer The rear wiper and rear wash button
is on the instrument panel above the
climate control system.
= (Rear Wiper/Washer): Press to
wash and wipe the rear window.
The rear window washer uses the
same reservoir as the windshield
washer. Check the windshield
washer reservoir level if the front
windshield can be worked, but no
fluid is sprayed when the rear
washer is activated. See Washer
Fluid on page 10 ‑ 20 .
5 (Delay): Press to turn the
delayed wiping on or off.
Compass The vehicle may have a compass in
the Driver Information Center (DIC).
Page 116 of 374
Black plate (20,1)Chevrolet Captiva Sport Owner Manual - 2013 - crc - 11/12/12
5-20 Instruments and Controls
Engine Coolant
Temperature Warning
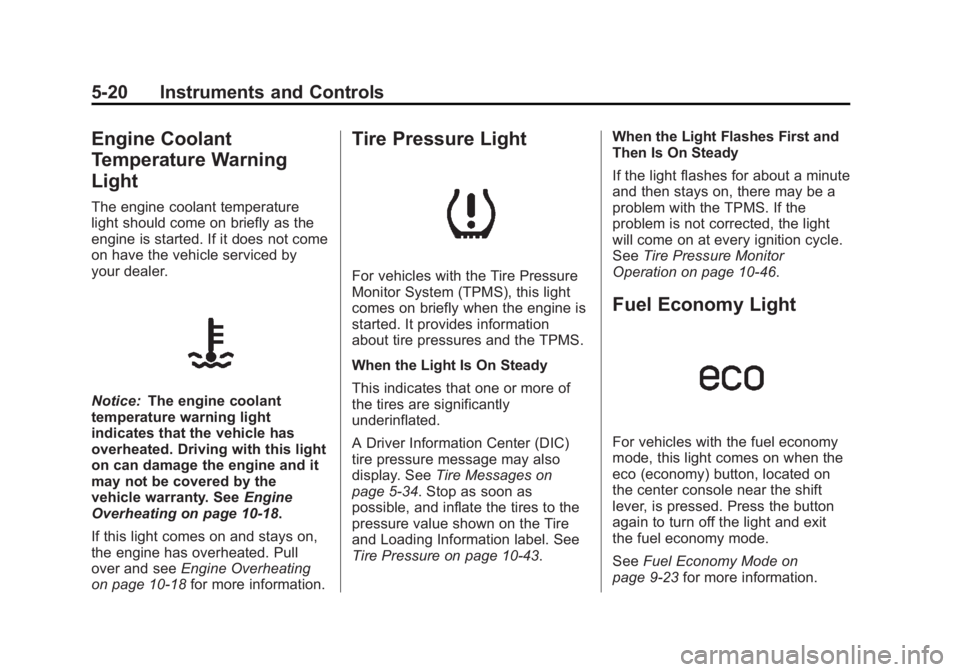
Light The engine coolant temperature
light should come on briefly as the
engine is started. If it does not come
on have the vehicle serviced by
your dealer.
Notice: The engine coolant
temperature warning light
indicates that the vehicle has
overheated. Driving with this light
on can damage the engine and it
may not be covered by the
vehicle warranty. See Engine
Overheating on page 10 ‑ 18 .
If this light comes on and stays on,
the engine has overheated. Pull
over and see Engine Overheating
on page 10 ‑ 18 for more information. Tire Pressure Light
For vehicles with the Tire Pressure
Monitor System (TPMS), this light
comes on briefly when the engine is
started. It provides information
about tire pressures and the TPMS.
When the Light Is On Steady
This indicates that one or more of
the tires are significantly
underinflated.
A Driver Information Center (DIC)
tire pressure message may also
display. See Tire Messages on
page 5 ‑ 34 . Stop as soon as
possible, and inflate the tires to the
pressure value shown on the Tire
and Loading Information label. See
Tire Pressure on page 10 ‑ 43 . When the Light Flashes First and
Then Is On Steady
If the light flashes for about a minute
and then stays on, there may be a
problem with the TPMS. If the
problem is not corrected, the light
will come on at every ignition cycle.
See Tire Pressure Monitor
Operation on page 10 ‑ 46 .
Fuel Economy Light
For vehicles with the fuel economy
mode, this light comes on when the
eco (economy) button, located on
the center console near the shift
lever, is pressed. Press the button
again to turn off the light and exit
the fuel economy mode.
See Fuel Economy Mode on
page 9 ‑ 23 for more information.
Page 138 of 374
Black plate (42,1)Chevrolet Captiva Sport Owner Manual - 2013 - crc - 11/12/12
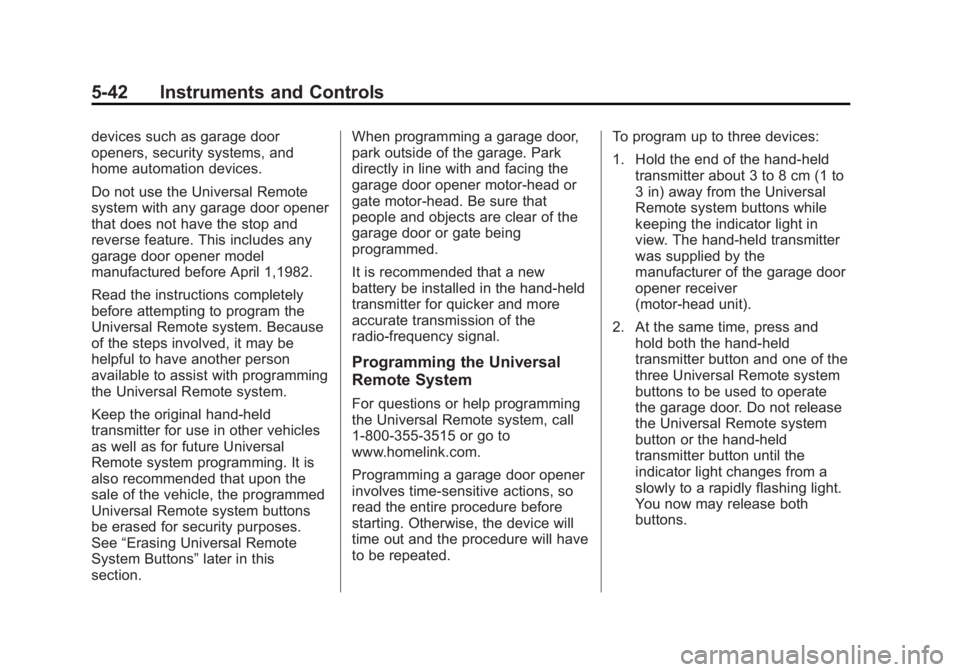
5-42 Instruments and Controls devices such as garage door
openers, security systems, and
home automation devices.
Do not use the Universal Remote
system with any garage door opener
that does not have the stop and
reverse feature. This includes any
garage door opener model
manufactured before April 1,1982.
Read the instructions completely
before attempting to program the
Universal Remote system. Because
of the steps involved, it may be
helpful to have another person
available to assist with programming
the Universal Remote system.
Keep the original hand-held
transmitter for use in other vehicles
as well as for future Universal
Remote system programming. It is
also recommended that upon the
sale of the vehicle, the programmed
Universal Remote system buttons
be erased for security purposes.
See “ Erasing Universal Remote
System Buttons ” later in this
section. When programming a garage door,
park outside of the garage. Park
directly in line with and facing the
garage door opener motor-head or
gate motor-head. Be sure that
people and objects are clear of the
garage door or gate being
programmed.
It is recommended that a new
battery be installed in the hand-held
transmitter for quicker and more
accurate transmission of the
radio-frequency signal.
Programming the Universal
Remote System For questions or help programming
the Universal Remote system, call
1-800-355-3515 or go to
www.homelink.com.
Programming a garage door opener
involves time-sensitive actions, so
read the entire procedure before
starting. Otherwise, the device will
time out and the procedure will have
to be repeated. To program up to three devices:
1. Hold the end of the hand-held
transmitter about 3 to 8 cm (1 to
3 in) away from the Universal
Remote system buttons while
keeping the indicator light in
view. The hand-held transmitter
was supplied by the
manufacturer of the garage door
opener receiver
(motor-head unit).
2. At the same time, press and
hold both the hand-held
transmitter button and one of the
three Universal Remote system
buttons to be used to operate
the garage door. Do not release
the Universal Remote system
button or the hand-held
transmitter button until the
indicator light changes from a
slowly to a rapidly flashing light.
You now may release both
buttons.
Page 152 of 374
Black plate (4,1)Chevrolet Captiva Sport Owner Manual - 2013 - crc - 11/12/12
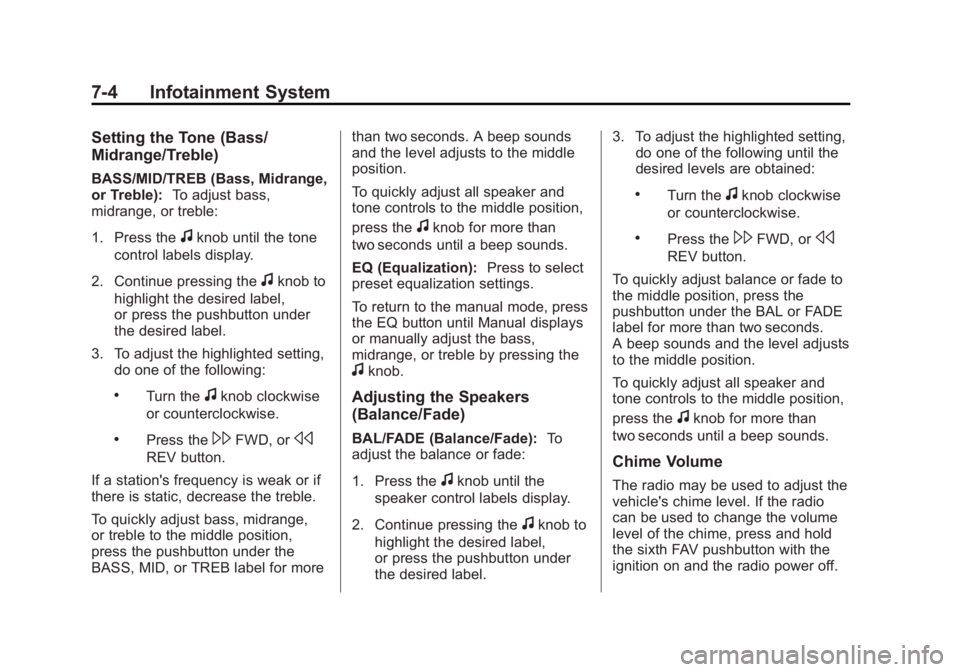
7-4 Infotainment System Setting the Tone (Bass/
Midrange/Treble) BASS/MID/TREB (Bass, Midrange,
or Treble): To adjust bass,
midrange, or treble:
1. Press the
f knob until the tone
control labels display.
2. Continue pressing the
f knob to
highlight the desired label,
or press the pushbutton under
the desired label.
3. To adjust the highlighted setting,
do one of the following: .
Turn the
f knob clockwise
or counterclockwise. .
Press the
\ FWD, or
sREV button.
If a station's frequency is weak or if
there is static, decrease the treble.
To quickly adjust bass, midrange,
or treble to the middle position,
press the pushbutton under the
BASS, MID, or TREB label for more than two seconds. A beep sounds
and the level adjusts to the middle
position.
To quickly adjust all speaker and
tone controls to the middle position,
press the
f knob for more than
two seconds until a beep sounds.
EQ (Equalization): Press to select
preset equalization settings.
To return to the manual mode, press
the EQ button until Manual displays
or manually adjust the bass,
midrange, or treble by pressing the
f knob.
Adjusting the Speakers
(Balance/Fade) BAL/FADE (Balance/Fade): To
adjust the balance or fade:
1. Press the
f knob until the
speaker control labels display.
2. Continue pressing the
f knob to
highlight the desired label,
or press the pushbutton under
the desired label. 3. To adjust the highlighted setting,
do one of the following until the
desired levels are obtained: .
Turn the
f knob clockwise
or counterclockwise. .
Press the
\ FWD, or
s REV button.
To quickly adjust balance or fade to
the middle position, press the
pushbutton under the BAL or FADE
label for more than two seconds.
A beep sounds and the level adjusts
to the middle position.
To quickly adjust all speaker and
tone controls to the middle position,
press the
f knob for more than
two seconds until a beep sounds.
Chime Volume
The radio may be used to adjust the
vehicle's chime level. If the radio
can be used to change the volume
level of the chime, press and hold
the sixth FAV pushbutton with the
ignition on and the radio power off.