2013 BMW 640I GRAN COUPE reset
[x] Cancel search: resetPage 94 of 305
In the event of a pressure loss, the diameter and
therefore the rotational speed of the corre‐
sponding wheel change. This is detected and
reported as a flat tire.
Functional requirements
The system must have been initialized when the
tire inflation pressure was correct; otherwise,
reliable signaling of a flat tire is not ensured. In‐
itialize the system after each correction of the
tire inflation pressure and after every tire or
wheel change.
System limits Sudden tire damage
Sudden serious tire damage caused by
external influences cannot be indicated in ad‐
vance.◀
A natural, even pressure loss in all four tires can‐
not be detected. Therefore, check the tire infla‐
tion pressure regularly.
The system could be delayed or malfunction in
the following situations:▷When the system has not been initialized.▷When driving on a snowy or slippery road
surface.▷Sporty driving style: slip in the drive wheels,
high lateral acceleration.▷When driving with snow chains.
Status display
The current status of the Flat Tire Monitor can
be displayed on the Control Display, e.g.,
whether or not the FTM is active.
1."Vehicle Info"2."Vehicle status"3. "Flat Tire Monitor"
The status is displayed.
Initialization
The initialization process adopts the set inflation
tire pressures as reference values for the detec‐
tion of a flat tire. Initialization is started by con‐
firming the inflation pressures.
Do not initialize the system when driving with
snow chains.1."Vehicle Info"2."Vehicle status"3. "Reset"4.Start the engine - do not drive away.5.Start the initialization with "Reset".6.Drive away.
The initialization is completed while driving,
which can be interrupted at any time.
The initialization automatically continues when
driving resumes.
Indication of a flat tire The yellow warning lamp lights up. A
Check Control message is displayed.
There is a flat tire or a major loss in tire
inflation pressure.
1.Reduce your speed and stop cautiously.
Avoid sudden braking and steering maneu‐
vers.2.Check whether the vehicle is fitted with reg‐
ular tires or run-flat tires.
Run-flat tires, refer to page 255, are labeled
with a circular symbol containing the letters
RSC marked on the tire sidewall.
Do not continue driving without run-flat
tires
Do not continue driving if the vehicle is not
equipped with run-flat tires; continued driving
may result in serious accidents.◀
When a flat tire is indicated, DSC Dynamic Sta‐
bility Control is switched on if necessary.
Actions in the event of a flat tire
Normal tires
1.Identify the damaged tire.Seite 94ControlsSafety94
Online Edition for Part no. 01 40 2 900 405 - 03 12 490
Page 135 of 305
Toward red: warmer.▷Lever for changing the air flow direction, ar‐
row 2.▷Thumbwheels for continuous opening and
closing of the vents, arrow 3.
Parked-car ventilation
The concept
The parked-car ventilation ventilates the vehicle
interior and lowers its temperature, if necessary.
The system can be switched on and off directly
or by using two preset switch-on times. It re‐
mains switched on for 30 minutes.
Operation can be performed via iDrive.
Parked-car ventilation
Using the preset switch-on time or when oper‐
ated directly: any external temperature.
Open the vents to allow air to flow out.
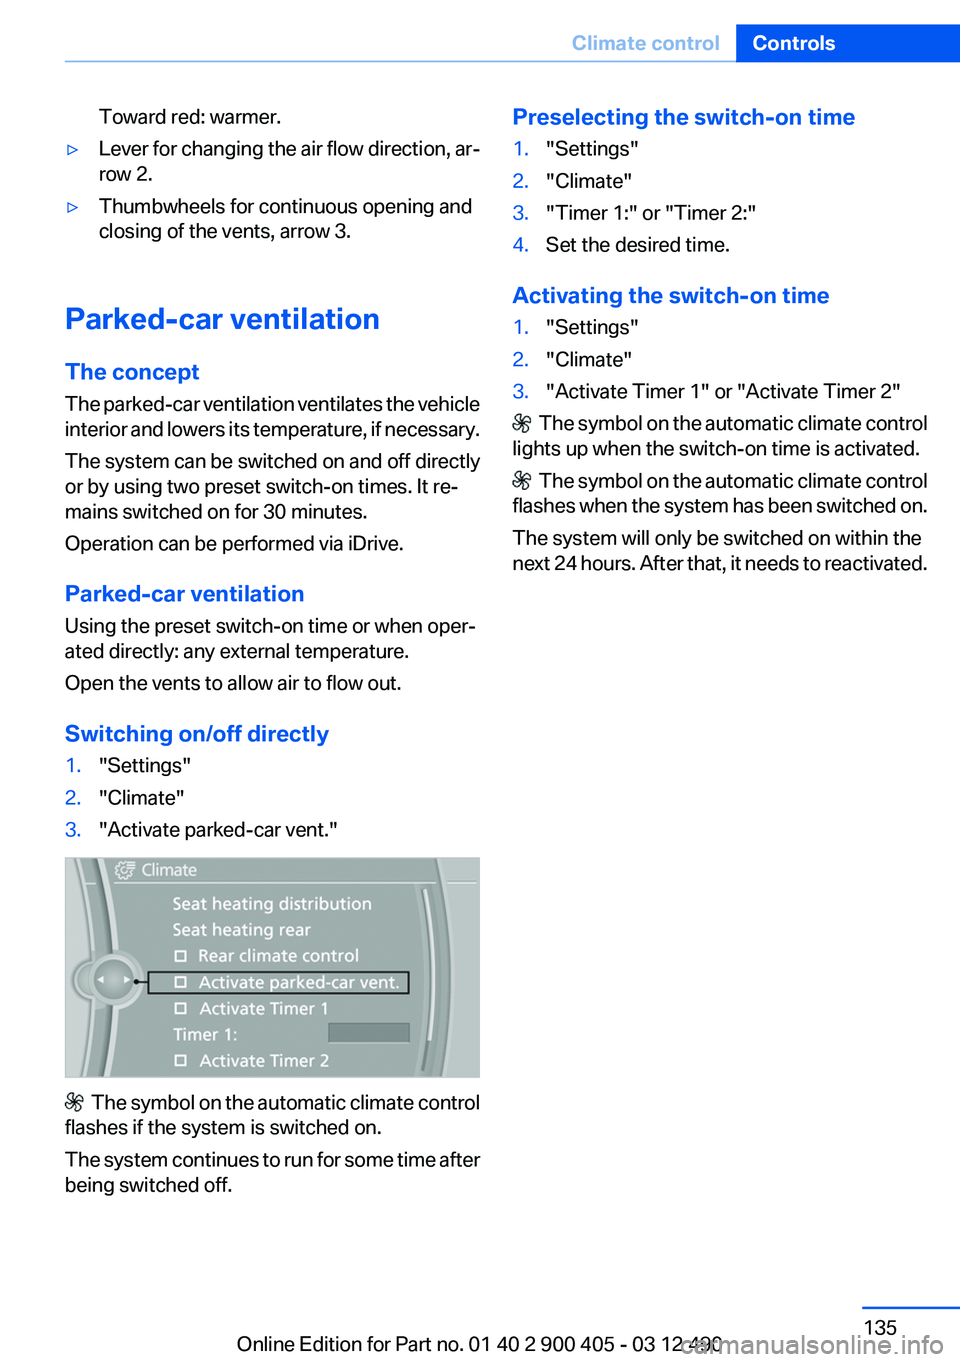
Switching on/off directly
1."Settings"2."Climate"3."Activate parked-car vent."
The symbol on the automatic climate control
flashes if the system is switched on.
The system continues to run for some time after
being switched off.
Preselecting the switch-on time1."Settings"2."Climate"3."Timer 1:" or "Timer 2:"4.Set the desired time.
Activating the switch-on time
1."Settings"2."Climate"3."Activate Timer 1" or "Activate Timer 2"
The symbol on the automatic climate control
lights up when the switch-on time is activated.
The symbol on the automatic climate control
flashes when the system has been switched on.
The system will only be switched on within the
next 24 hours. After that, it needs to reactivated.
Seite 135Climate controlControls135
Online Edition for Part no. 01 40 2 900 405 - 03 12 490
Page 157 of 305
Via the iDrive1."Settings"2."ECO PRO mode"
or
1."Settings"2."Driving mode"3."Configure ECO PRO"
Configure the program.
ECO PRO Tip
▷"ECO PRO limit:":
Set ECO Pro speed at which an ECO PRO
Tip is to be displayed.▷"ECO PRO speed warning":
A reminder is displayed if the set ECO PRO
speed is exceeded.
ECO PRO climate control
"ECO PRO climate control"
The climate control is adjusted to be fuel-effi‐
cient.
By making a slight change to the set tempera‐
ture, or adjusting the rate of heating or cooling
of the passenger compartment fuel consump‐
tion can be economized.
The output of the seat heater is also reduced.
ECO PRO Potential
The percentage of potential savings that can be
achieved with the current configuration is dis‐
played.
Indications on the Control Display
EfficientDynamics
Information on fuel consumption and technol‐
ogy can be displayed during driving.
1."Vehicle Info"2."EfficientDynamics"Displaying fuel consumption history
The average fuel consumption can be displayed
within an adjustable time frame.
"Consumption history"
Adjusting fuel consumption history
time frame
Select the symbol. Select the symbol.
Resetting fuel consumption history
1.Open "Options".2."Reset consumption history"
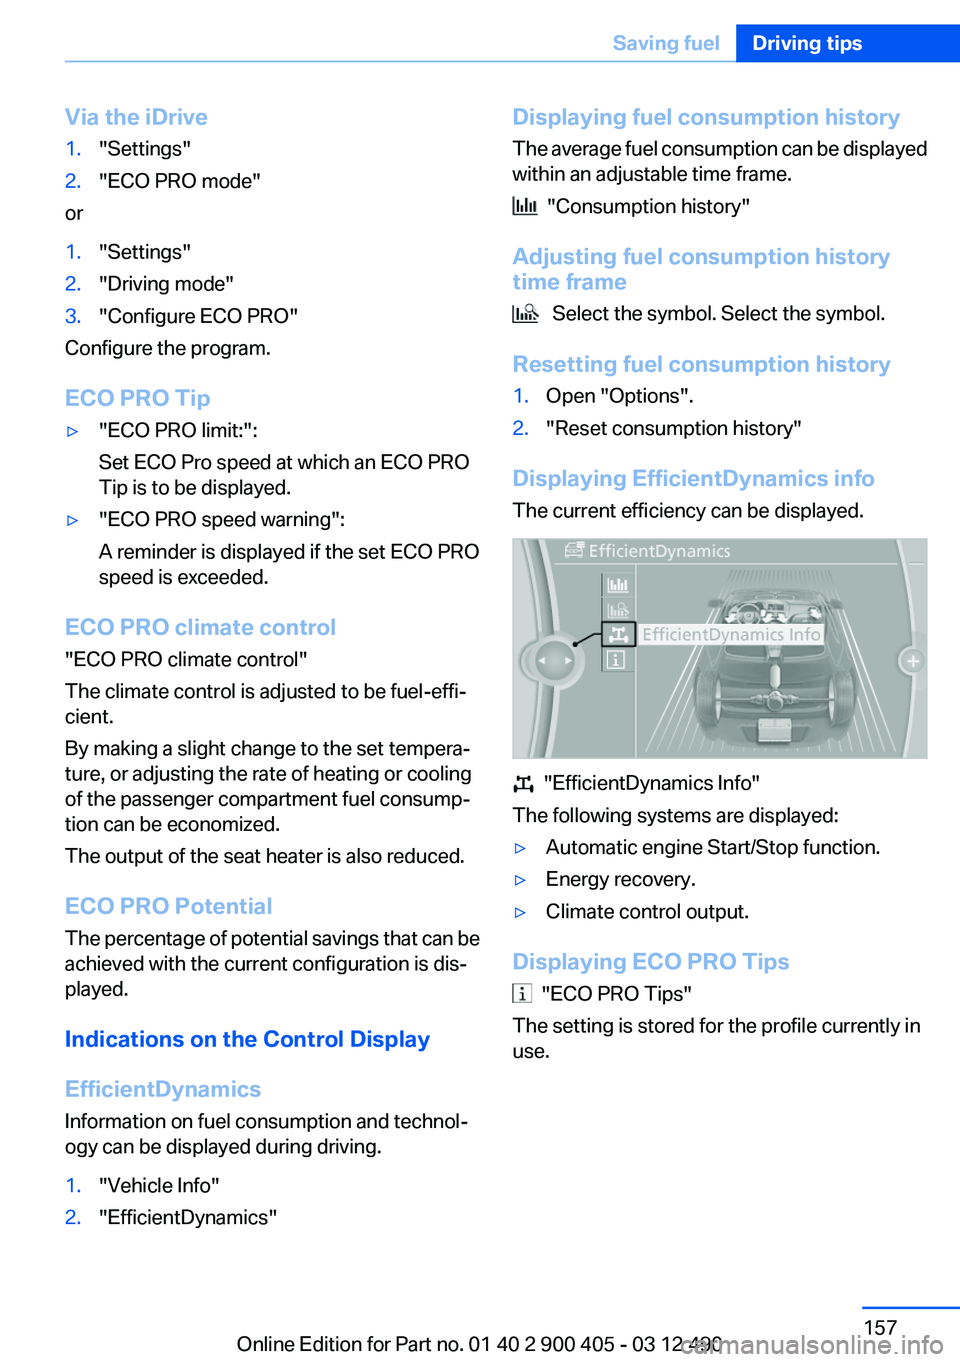
Displaying EfficientDynamics info
The current efficiency can be displayed.
"EfficientDynamics Info"
The following systems are displayed:
▷Automatic engine Start/Stop function.▷Energy recovery.▷Climate control output.
Displaying ECO PRO Tips
"ECO PRO Tips"
The setting is stored for the profile currently in
use.
Seite 157Saving fuelDriving tips157
Online Edition for Part no. 01 40 2 900 405 - 03 12 490
Page 182 of 305
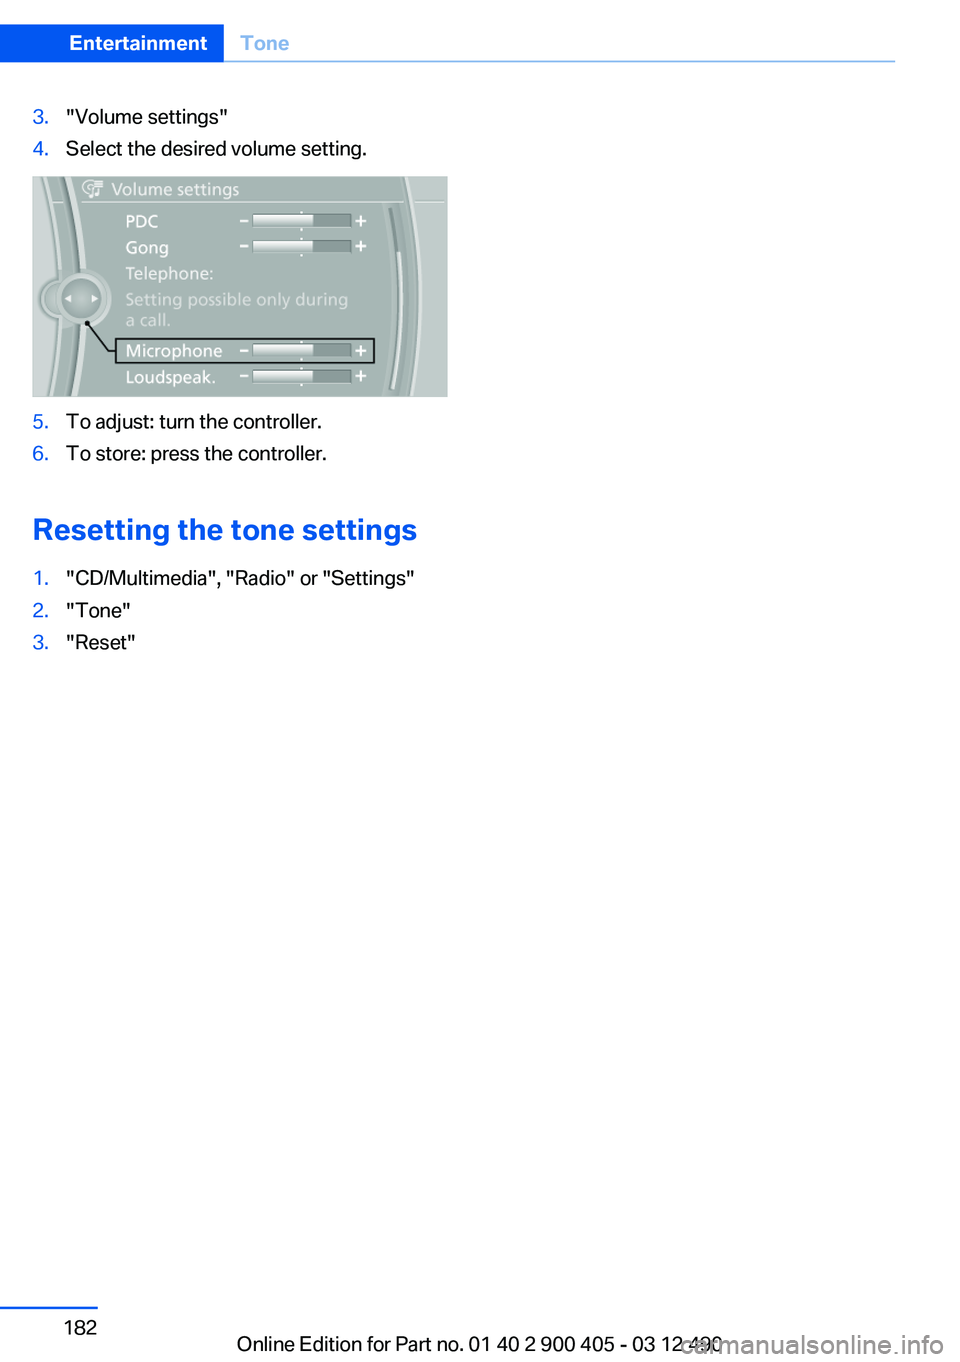
3."Volume settings"4.Select the desired volume setting.5.To adjust: turn the controller.6.To store: press the controller.
Resetting the tone settings
1."CD/Multimedia", "Radio" or "Settings"2."Tone"3."Reset"Seite 182EntertainmentTone182
Online Edition for Part no. 01 40 2 900 405 - 03 12 490
Page 189 of 305
The setting is stored for the remote control cur‐
rently in use.
Deleting favorites1."Satellite radio"2. "Manage favorites"3.Highlight the desired favorite.4.Open "Options".5."Delete entry"
Traffic Jump
Traffic and weather information for a selected
region is broadcast every few minutes.
Selecting a region
1."Radio"2."Satellite radio"3.Open "Options".4."Set jump"5.Select the desired region.
The region is stored for the remote control cur‐
rently in use.
Activating/deactivating the jump
1."Radio"2."Satellite radio"3. "Jump to:"
Information for the selected region is broadcast
as soon as it is available.
A new panel opens.
Canceling the Traffic Jump: "Cancel".
SymbolMeaning Information will be broadcast shortly. Information is currently being broad‐
cast.
Select one of the symbols to deactivate Traffic
Jump.
Automatic update
About twice a year, Sirius performs an update of
the channel names and positions. The update
takes place automatically and may take several
minutes.
Notes▷Reception may not be available in some sit‐
uations, such as under certain environmen‐
tal or topographic conditions. The satellite
radio has no influence on this.▷The signal may not be available in tunnels or
underground garages next to tall buildings
or near trees, mountains or other powerful
sources of radio interference.
Stored stations
General information
It is possible to store up to 40 stations.
Calling up a station
1."Radio"2."Presets"3.Select the desired station.
Storing a station
The station currently selected is stored.
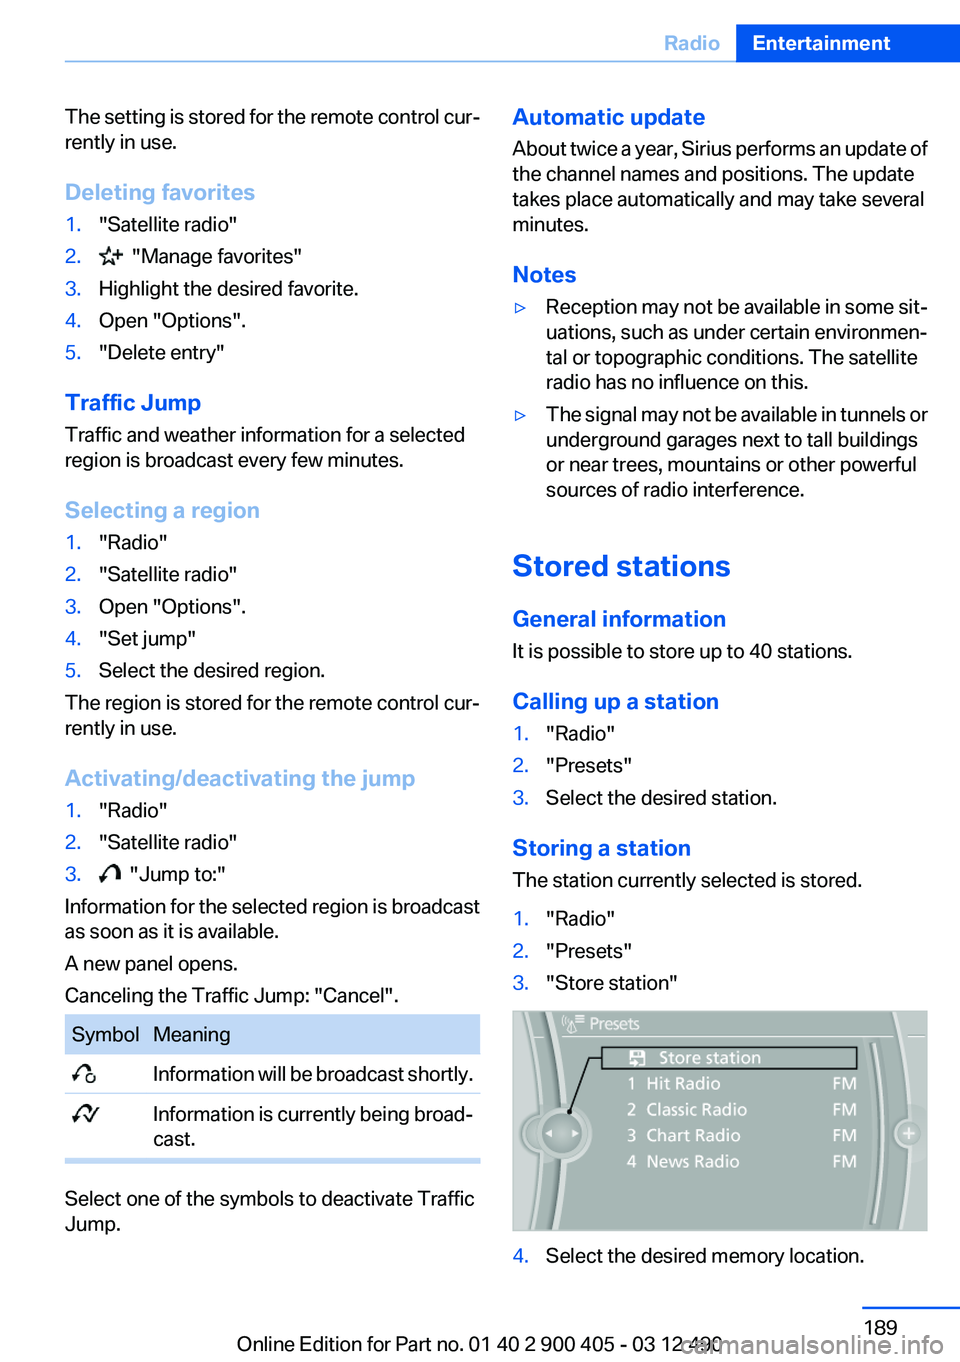
1."Radio"2."Presets"3."Store station"4.Select the desired memory location.Seite 189RadioEntertainment189
Online Edition for Part no. 01 40 2 900 405 - 03 12 490
Page 190 of 305
The list of stored stations is stored for the re‐
mote control currently in use.
The stations can also be stored on the program‐
mable memory buttons, refer to page 20.
Deleting a station1."Radio"2."Presets"3.Select the desired station.4."Options" Open.5."Delete entry"Seite 190EntertainmentRadio190
Online Edition for Part no. 01 40 2 900 405 - 03 12 490
Page 207 of 305
▷The volume of the sound output is depend‐
ent on the device. If necessary, adjust the
volume on the device.▷Up to four external devices can be paired
with the vehicle.
Requirements
▷The device is suitable. Information under
www.bmwusa.com/bluetooth.▷The device is ready for operation.▷The ignition is switched on.▷Bluetooth is activated on the vehicle, refer to
page 215, and on the device.▷Bluetooth presettings must be made on the
device, such as for a connection without
confirmation or visibility; refer to the device
operating instructions.▷A number with at least four and a maximum
of 16 digits is defined as the Bluetooth pass‐
key. It is only required once for pairing.
Pairing and connecting
Pairing a device
To avoid becoming distracted and posing
an unnecessary hazard both to your own vehi‐
cle's occupants and to other road users, only
pair the device while the vehicle is stationary.◀
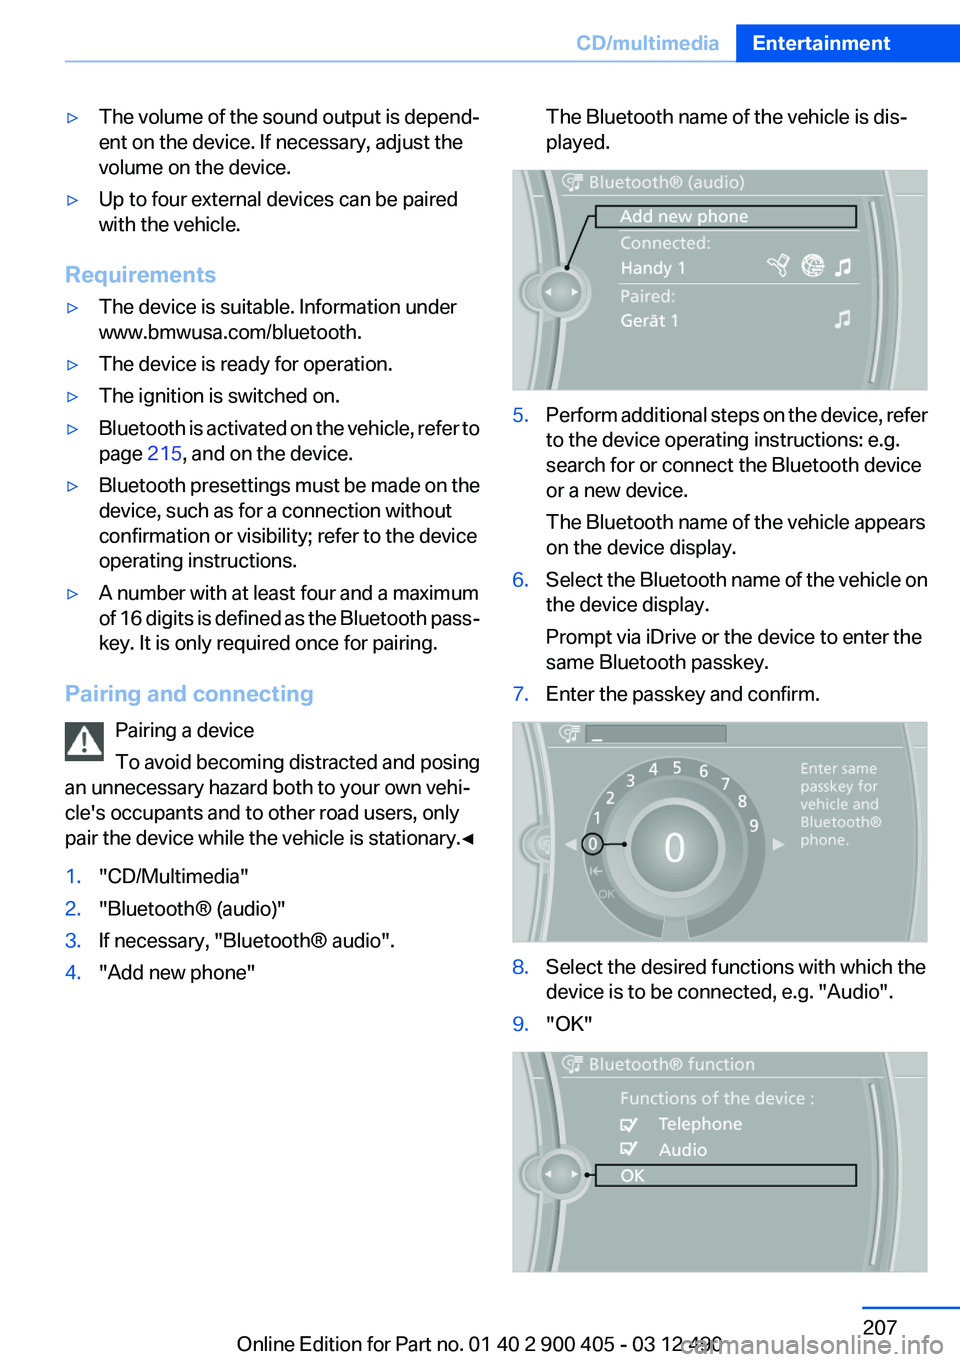
1."CD/Multimedia"2."Bluetooth® (audio)"3.If necessary, "Bluetooth® audio".4."Add new phone"The Bluetooth name of the vehicle is dis‐
played.5.Perform additional steps on the device, refer
to the device operating instructions: e.g.
search for or connect the Bluetooth device
or a new device.
The Bluetooth name of the vehicle appears
on the device display.6.Select the Bluetooth name of the vehicle on
the device display.
Prompt via iDrive or the device to enter the
same Bluetooth passkey.7.Enter the passkey and confirm.8.Select the desired functions with which the
device is to be connected, e.g. "Audio".9."OK"Seite 207CD/multimediaEntertainment207
Online Edition for Part no. 01 40 2 900 405 - 03 12 490
Page 215 of 305
When the mobile phone is used via the vehicle,
heed the operating manual of the mobile phone.
Pairing/unpairing the mobile
phone
General information
The following functions are available:▷Use of a mobile phone as a telephone.▷Use of a mobile phone as an additional tele‐
phone.▷Use of a mobile phone as an audio source.▷Use of an audio device as an audio source.
Requirements
▷The mobile phone is suitable.▷The mobile phone is ready for operation.▷Bluetooth is activated in the vehicle and on
the mobile phone.▷Bluetooth presettings may need to be made
on the mobile phone, e.g., for a connection
without confirmation or visibility, refer to the
mobile phone operating instructions.▷Deactivate Bluetooth audio if necessary.▷A number with at least four and a maximum
of 16 digits was defined as the Bluetooth
passkey. It is only required once for pairing.▷The ignition is switched on.
Activating/deactivating Bluetooth
Bluetooth is not permitted everywhere. Comply
with all safety guidelines and regulations.
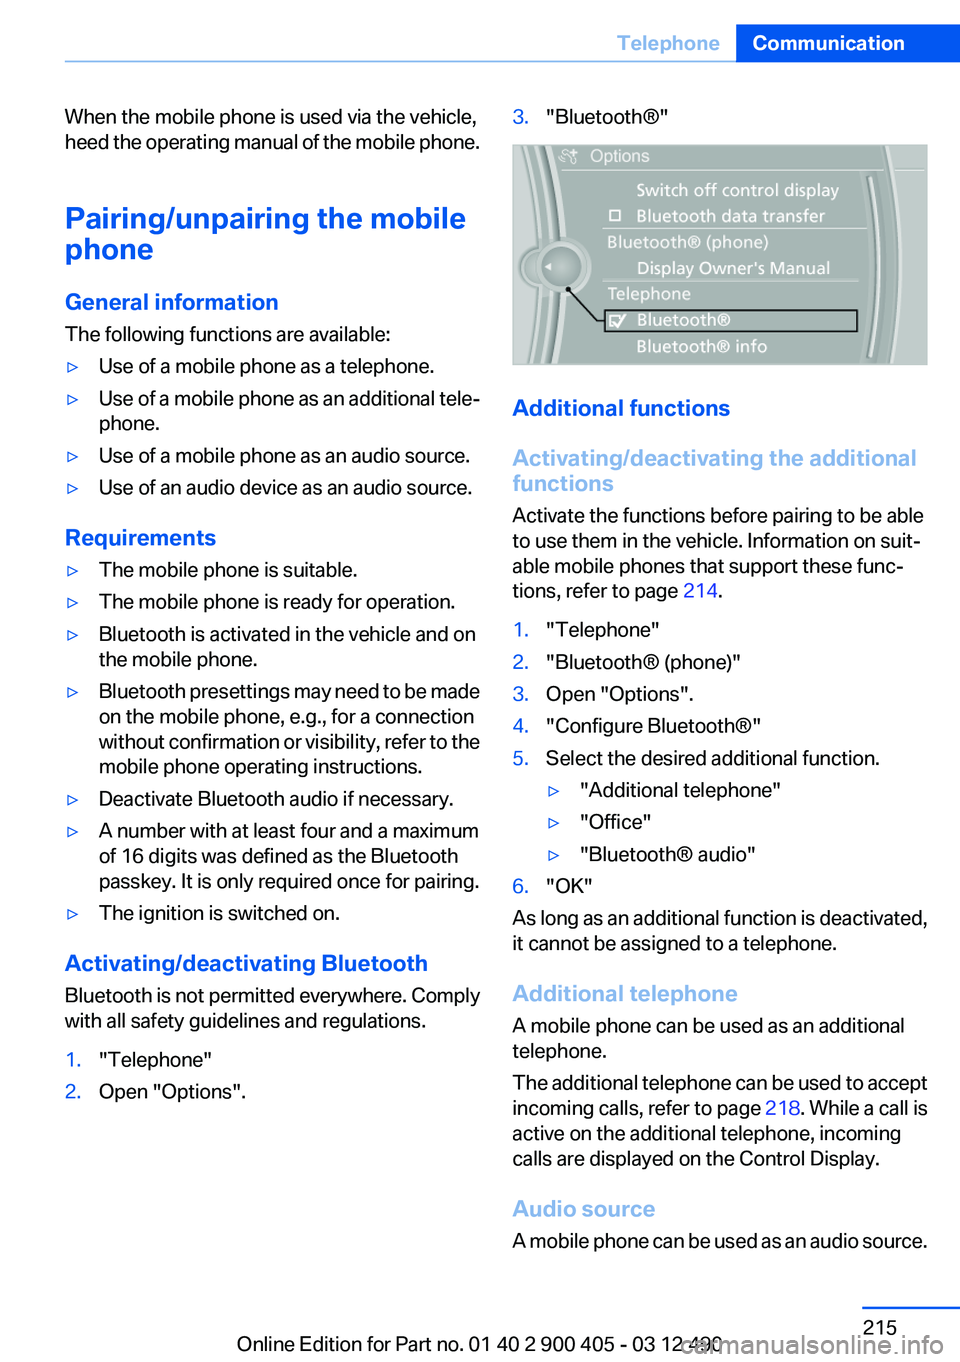
1."Telephone"2.Open "Options".3."Bluetooth®"
Additional functions
Activating/deactivating the additional
functions
Activate the functions before pairing to be able
to use them in the vehicle. Information on suit‐
able mobile phones that support these func‐
tions, refer to page 214.
1."Telephone"2."Bluetooth® (phone)"3.Open "Options".4."Configure Bluetooth®"5.Select the desired additional function.▷"Additional telephone"▷"Office"▷"Bluetooth® audio"6."OK"
As long as an additional function is deactivated,
it cannot be assigned to a telephone.
Additional telephone
A mobile phone can be used as an additional
telephone.
The additional telephone can be used to accept
incoming calls, refer to page 218. While a call is
active on the additional telephone, incoming
calls are displayed on the Control Display.
Audio source
A mobile phone can be used as an audio source.
Seite 215TelephoneCommunication215
Online Edition for Part no. 01 40 2 900 405 - 03 12 490