Page 171 of 252
170Audio
Adjusting the SoundHAUDIO button
AUDIO MENU
Sound Setup
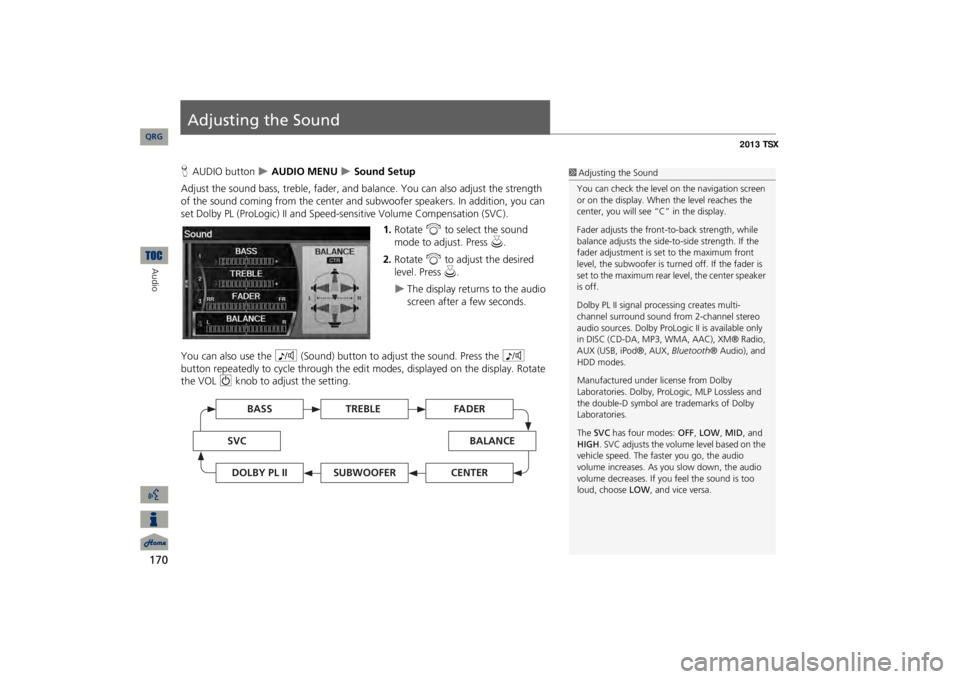
Adjust the sound bass, treble, fader, and ba
lance. You can also adjust the strength
of the sound coming from the center and
subwoofer speakers. In
addition, you can
set Dolby PL (ProLogic) II and Speed-s
ensitive Volume Compensation (SVC).
1.Rotate
i
to select the sound
mode to adjust. Press
u
.
2.Rotate
i
to adjust the desired
level. Press
u
.
The display returns to the audio screen after a few seconds.
You can also use the
8
(Sound) button to adjust the sound. Press the
8
button repeatedly to cycle through the edit
modes, displayed on the display. Rotate
the VOL
9
knob to adjust the setting.
1Adjusting the SoundYou can check the level on the navigation screen or on the display. When the level reaches the center, you will see “C” in the display. Fader adjusts the front-t
o-back strength, while
balance adjusts the side-to-side strength. If the fader adjustment is set to the maximum front level, the subwoofer is turned off. If the fader is set to the maximum rear level, the center speaker is off. Dolby PL II signal proc
essing creates multi-
channel surround sound fro
m 2-channel stereo
audio sources. Dolby ProL
ogic II is available only
in DISC (CD-DA, MP3, WMA, AAC), XM® Radio, AUX (USB, iPod®, AUX,
Bluetooth
® Audio), and
HDD modes. Manufactured under license from Dolby Laboratories. Dolby, ProL
ogic, MLP Lossless and
the double-D symbol are trademarks of Dolby Laboratories. The
SVC
has four modes:
OFF
, LOW
, MID
, and
HIGH
. SVC adjusts the volume level based on the
vehicle speed. The faster you go, the audio volume increases. As you slow down, the audio volume decreases. If you feel the sound is too loud, choose
LOW
, and vice versa.
TREBLE
BASS
SVC
BALANCE
FADER
SUBWOOFER
DOLBY PL II
CENTER
QRG
Page 175 of 252
174Bluetooth® HandsFreeLink®
Bluetooth
® HandsFreeLink®
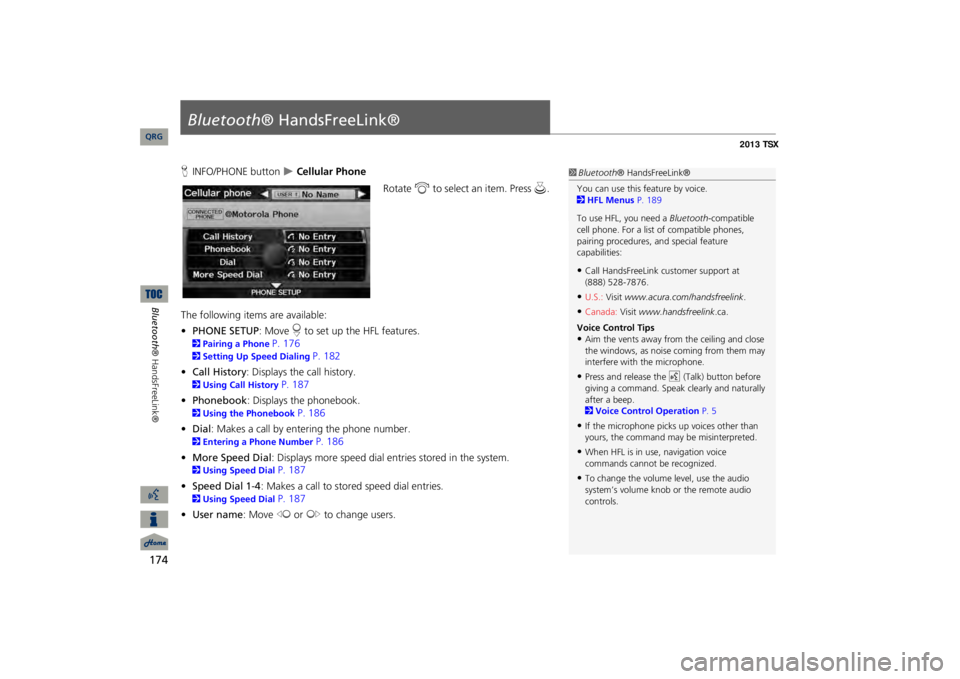
HINFO/PHONE button
Cellular Phone
Rotate
i
to select an item. Press
u
.
The following item
s are available:
•PHONE SETUP
: Move
r to set up the HFL features.
2Pairing a Phone
P. 176
2Setting Up Speed Dialing
P. 182
•Call History
: Displays the call history.
2Using Call History
P. 187
•Phonebook
: Displays the phonebook.
2Using the Phonebook
P. 186
•Dial
: Makes a call by entering the phone number.
2Entering a Phone Number
P. 186
•More Speed Dial
: Displays more speed dial en
tries stored in the system.
2Using Speed Dial
P. 187
•Speed Dial 1-4
: Makes a call to stored speed dial entries.
2Using Speed Dial
P. 187
•User name
: Move
w
or
y
to change users.
1Bluetooth
® HandsFreeLink®
You can use this feature by voice. 2HFL Menus
P. 189
To use HFL, you need a
Bluetooth
-compatible
cell phone. For a list of compatible phones, pairing procedures,
and special feature
capabilities:•Call HandsFreeLink
customer support at
(888) 528-7876.•U.S.:
Visit
www.acura.com/handsfreelink
.
•Canada:
Visit
www.handsfreelink
.ca.
Voice Control Tips•Aim the vents away from the ceiling and close the windows, as noise coming from them may interfere with the microphone.•Press and release the
d
(Talk) button before
giving a command. Speak clearly and naturally after a beep. 2Voice Control Operation
P. 5
•If the microphone picks up voices other than yours, the command may
be misinterpreted.
•When HFL is in use, navigation voice commands cannot be recognized.•To change the volume level, use the audio system’s volume knob or the remote audio controls.
QRG
Page 195 of 252
194AcuraLink® Messages
AcuraLink® MessagesAcuraLink® provides a direct communication link between your vehicle and Acura. Working through XM® Radio, AcuraLink works in conjunction with your vehicle’s navigation system,
Bluetooth
® HandsFreeLink® (HFL), and au
dio system to send and
receive messages.Reading MessagesAn envelope icon appears at the botto
m left of the navigation screen when
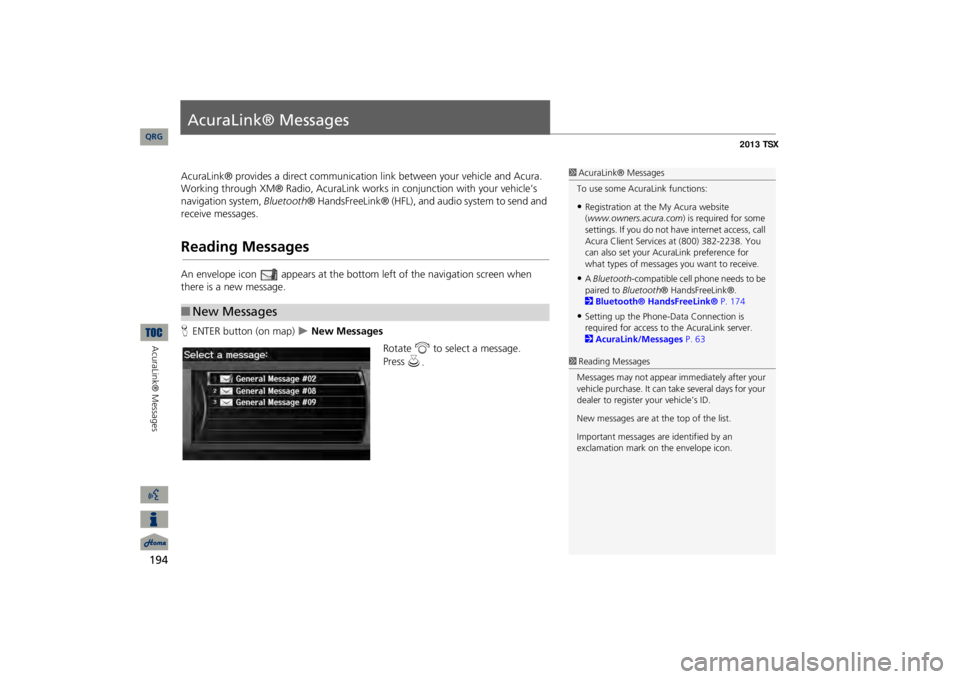
there is a new message. HENTER button (on map)
New Messages
Rotate
i
to select a message.
■New Messages
1AcuraLink® MessagesTo use some AcuraLink functions:•Registration at the My Acura website (www.owners.acura.com
) is required for some
settings. If you do not ha
ve internet access, call
Acura Client Services
at (800) 382-2238. You
can also set your AcuraLink preference for what types of messages you want to receive.•A Bluetooth
-compatible cell phone needs to be
paired to
Bluetooth
® HandsFreeLink®.
2Bluetooth® HandsFreeLink®
P. 174
•Setting up the Phone-D
ata Connection is
required for access to the AcuraLink server. 2AcuraLink/Messages
P. 63
1Reading MessagesMessages may not appear
immediately after your
vehicle purchase. It can ta
ke several days for your
dealer to register your vehicle’s ID. New messages are at the top of the list.Important messages are identified by an exclamation mark on the envelope icon.
QRG
Press
u
.
Page 197 of 252
196
AcuraLink® Messages
Message Options
AcuraLink® Messages
•Diagnostic Info
: Provides information about the ca
use for a warning indicator or
multi-information message. Rotate
i
to select
Check Later
or
Check Now
. If
you choose to check the information now,
AcuraLink lets you know whether you
should see your dealer immediately or
later in accordance
with the level of
severity. Call your dealer or find the near
est dealer. (If your navigation system is
still at the start-up disclaimer screen, select
OK
before checking the information.)
•Maintenance Minder
: Tells you exactly which main
tenance item is due along
with the multi-information message.•Recalls/Campaigns
: Reminds you of a recall or important safety information. You
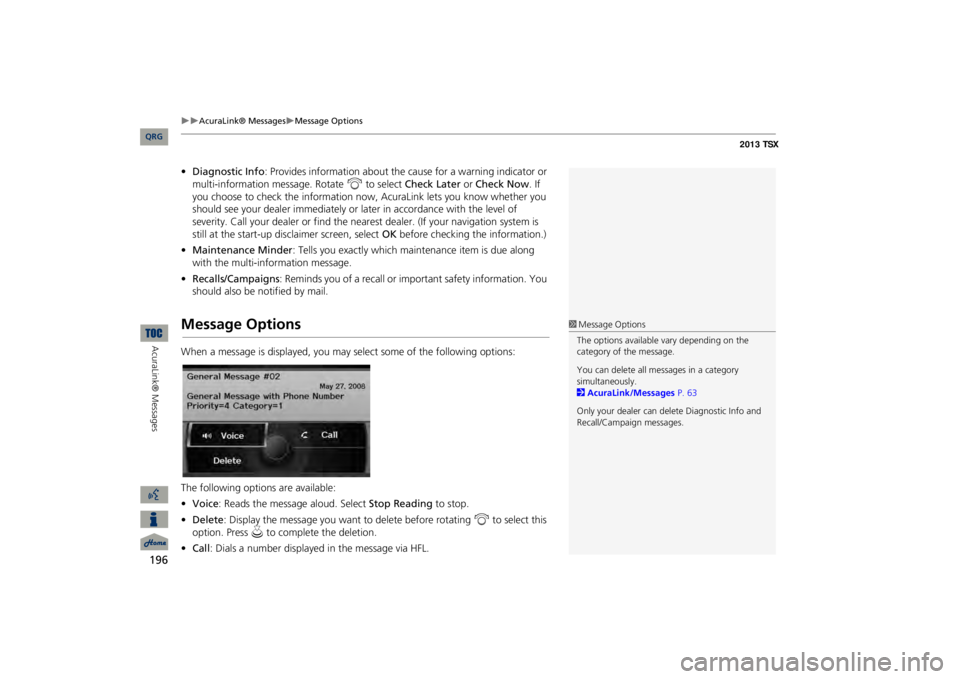
should also be notified by mail.Message OptionsWhen a message is displayed, you may select some of the following options: The following options are available: •Voice
: Reads the message aloud. Select
Stop Reading
to stop.
•Delete
: Display the message you want to delete before rotating
i
to select this
option. Press
u
to complete the deletion.
•Call
: Dials a number displayed in the message via HFL.
1Message OptionsThe options available
vary depending on the
category of the message. You can delete all me
ssages in a category
simultaneously. 2AcuraLink/Messages
P. 63
Only your dealer can delete Diagnostic Info and Recall/Campaign messages.
QRG
Page 200 of 252
199
Other Features
This section describes the useful functions incorporated into the
navigation system to help make your
journey easier and more enjoyable.Calendar
................................................ 200
Calculator
.............................................. 202
Unit Conversion ..................................
. 202
Information Functions
.......................... 204
Scenic Road Information ......................
204
System/Device Information ...................
204
Map Data Update Status ......................
205
Roadside Assistance .............................
205
Key to ZAGAT Ratings ..........................
206
Show Wallpaper...................................
207
Rearview Camera
.................................. 208
QRG2013 TSX
Page 205 of 252
204Other Features
Information FunctionsScenic Road InformationHINFO/PHONE button
Other
Scenic Road Information
View a list of scenic road
s for each state (U.S. only).
1.Rotate
i
to select a state.
2.Rotate
i
to select a scenic road.
Press
u
.
3.Rotate
i
to set the place as a
destination or add to the destination list. Press
u
.
System/Device InformationHINFO/PHONE button
Other
System/Device Information
View database, software, device, an
d vehicle identification information.
1Scenic Road InformationIf you select a scenic
road that runs through
multiple states, only the portion of the road in the selected state is displayed. You can also set the scenic road as a destination or waypoint. 1System/Device InformationYou will need this information when ordering an update DVD. 2Obtaining a Navigation Update DVD P. 227
QRG
Press
u
.
Page 209 of 252
208Other Features
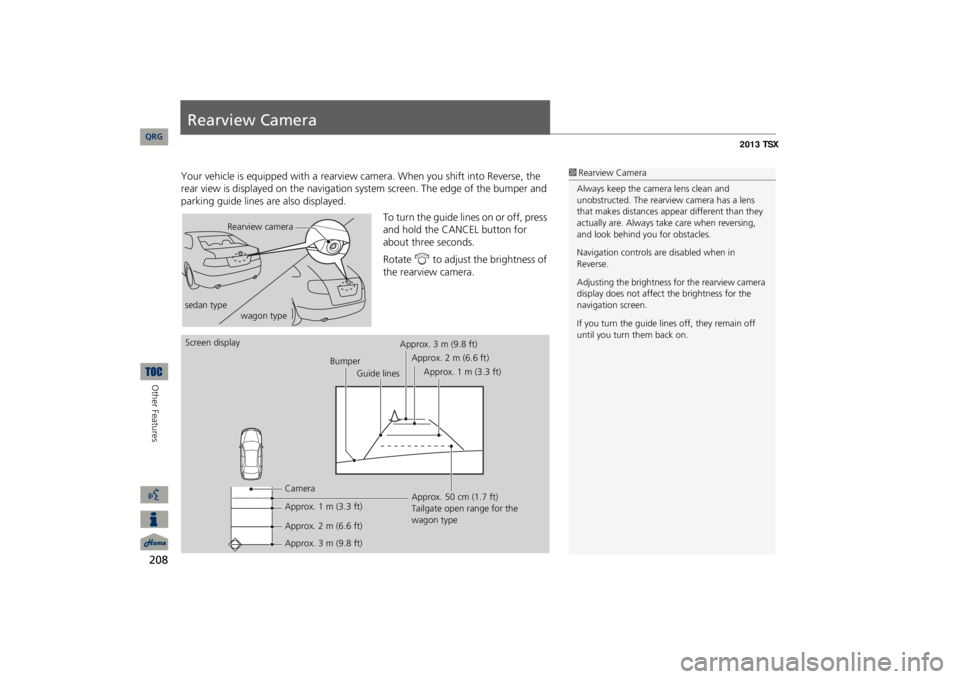
Rearview CameraYour vehicle is equipped wi
th a rearview camera. When
you shift into Reverse, the
rear view is displayed on the navigation sy
stem screen. The edge of the bumper and
parking guide lines are also displayed.
To turn the guide lines
on or off, press
and hold the CANCEL button for about three seconds. Rotate
i
to adjust the brightness of
the rearview camera.
1Rearview CameraAlways keep the camera lens clean and unobstructed. The rearview
camera has a lens
that makes distances appear different than they actually are. Always take care when reversing, and look behind you for obstacles. Navigation controls ar
e disabled when in
Reverse.Adjusting the brightness for the rearview camera display does not affect the brightness for the navigation screen. If you turn the guide lines off, they remain off until you turn them back on.
Rearview camera
sedan type
wagon type
Screen display
Bumper
Guide lines
Camera Approx. 1 m (3.3 ft) Approx. 2 m (6.6 ft) Approx. 3 m (9.8 ft)
Approx. 50 cm (1.7 ft) Tailgate open range for the wagon type
Approx. 3 m (9.8 ft)
Approx. 2 m (6.6 ft)
Approx. 1 m (3.3 ft)
QRG
Page 210 of 252
209
Troubleshooting
Troubleshooting
................................... 210
Map, Voice, Entering Destinations ........
210
Traffic ..................................................
212
Guidance, Routing ...............................
213
Update DVD, Coverage, Map Errors .....
215
Display, Accessories..............................
215
Rear Camera ........................................
215
Miscellaneous Questions ......................
216
Error Messages
...................................... 217
Navigation System ................................
217
Disc Player............................................
218
iPod® ..................................................
219
USB Flash Drive ....................................
220
QRG2013 TSX