2013.5 PEUGEOT 5008 wheel
[x] Cancel search: wheelPage 167 of 404

8
Safety165
For the airbags to be fully effective, observe the following safety rules:
Sit in a normal upright position. Wear a correctly adjusted seat belt. Do not leave anything between the occupants and the airbags (a child, pet, object...). This could hamper the operation of the airbags or injure the occupants. After an accident or if the vehicle has been stolen or broken into, have the airbag systems checked. All work on the airbag system must be carried out by a PEUGEOT dealer or a qualified workshop. Even if all of the precautions mentioned are observed, a risk of injury or of minor burns to the head, chest or arms when an airbag is deployed cannot be ruled out. The bag inflates almost instantly (within a few milliseconds) then deflates within the same time discharging the hot gas via openings provided for this purpose.
Lateral airbags
Use only approved covers on the seats, compatible with the deployment the lateral airbags. For information on the range of seat covers suitable for your vehicle, you can contact a PEUGEOT dealer. Refer to the "Accessories" section. Do not fix or attach anything to the seat backs (clothing...). This could cause injury to the chest or arms if the lateral airbag is deployed. Do not sit with the upper part of the body any nearer to the door than necessary.
Front airbags
Do not drive holding the steering wheel by its spokes or resting your hands on the centre part of the wheel. Passengers must not place their feet on the dashboard. If possible, do not smoke as deployment of the airbags can cause burns or the risk of injury from a cigarette or pipe. Never remove or pierce the steering wheel or hit it violently.
Curtain airbags
Do not fix or attach anything to the roof. This could cause injury to the head if the curtain airbag is deployed. If fitted on your vehicle, do not remove the grab handles installed on the roof, they play a part in securing the curtain airbags.
Page 169 of 404
9
Driving167
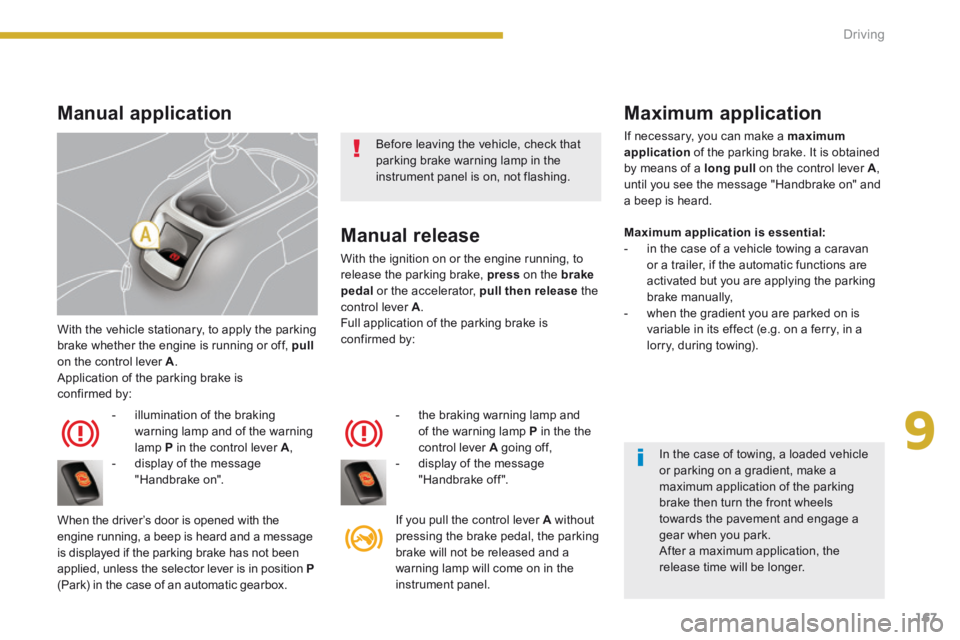
With the vehicle stationary, to apply the parking brake whether the engine is running or off, pullon the control lever A . Application of the parking brake is confirmed by:
- illumination of the braking
warning lamp and of the warning lamp P in the control lever A , - display of the message "Handbrake on".
When the driver’s door is opened with the engine running, a beep is heard and a message is displayed if the parking brake has not been applied, unless the selector lever is in position P
(Park) in the case of an automatic gearbox.
Manual release
With the ignition on or the engine running, to release the parking brake, press on the brakepedal or the accelerator, pull then release the control lever A . Full application of the parking brake is confirmed by:
- the braking warning lamp and
of the warning lamp P in the the control lever A going off, - display of the message "Handbrake off ".
If you pull the control lever A without pressing the brake pedal, the parking brake will not be released and a warning lamp will come on in the
instrument panel.
Manual application Maximum application
If necessary, you can make a maximum application of the parking brake. It is obtained by means of a long pull on the control lever A , until you see the message "Handbrake on" and a beep is heard.
Maximum application is essential: - in the case of a vehicle towing a caravan or a trailer, if the automatic functions are activated but you are applying the parking brake manually, - when the gradient you are parked on is variable in its effect (e.g. on a ferry, in a lorry, during towing).
Before leaving the vehicle, check that parking brake warning lamp in the instrument panel is on, not flashing.
In the case of towing, a loaded vehicle or parking on a gradient, make a maximum application of the parking brake then turn the front wheels towards the pavement and engage a gear when you park. After a maximum application, the release time will be longer.
Page 170 of 404
Driving
168
Automatic application,
engine off
With the vehicle stationary, the parking brake is automatically applied when the engine is switched off. The application of the parking brake is
confirmed by: - illumination of the braking confirmed by: - illumination of the braking confirmed by:
warning lamp and of the warning lamp P in the control lever A , - display of the message "Handbrake on".
Automatic release
The electric parking brake releases automatically and progressively when you press the accelerator: Manual gearbox: press down fully on the clutch pedal, engage first gear or reverse, press on the accelerator pedal and move off. Electronic gearbox : select position A , Mor R then press on the accelerator pedal. Automatic gearbox: select position D , Mor R then press on the accelerator pedal.
- the braking warning lamp and of the warning lamp P in the control lever A going off, - display of the message "Handbrake off ".
An audible signal will confirm to you the application/ release of your electric parking brake. Full release of the parking brake is confirmed by:
To immobilise the vehicle,
engine running
With the engine running and the vehicle stationary, in order to immobilise the vehicle it is essential to manually apply the parking brake by pulling on control lever A .
- illumination of the braking warning lamp and the warning lamp P in the control lever A , - display of the message "Handbrake on".
When the driver’s door is opened, an audible signal heard and a message is displayed if the parking brake has not been applied, unless the selector lever is in position P (Park) in the case of an automatic gearbox.
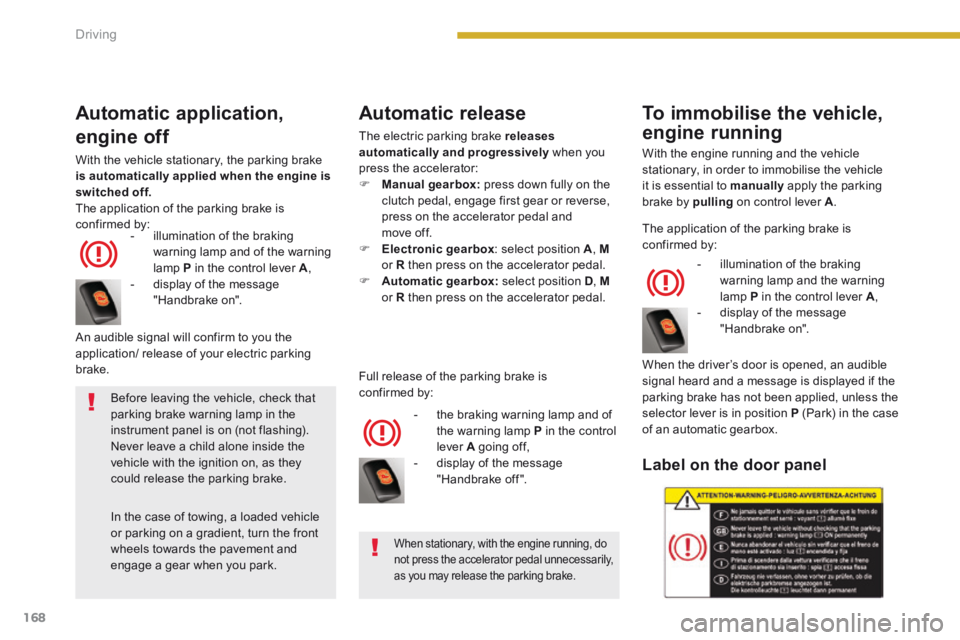
Label on the door panel
When stationary, with the engine running, do not press the accelerator pedal unnecessarily, as you may release the parking brake.
Before leaving the vehicle, check that parking brake warning lamp in the
instrument panel is on (not flashing). Never leave a child alone inside the vehicle with the ignition on, as they could release the parking brake.
In the case of towing, a loaded vehicle or parking on a gradient, turn the front wheels towards the pavement and engage a gear when you park.
The application of the parking brake is confirmed by:
Page 174 of 404
Driving
172
SituationsConsequences
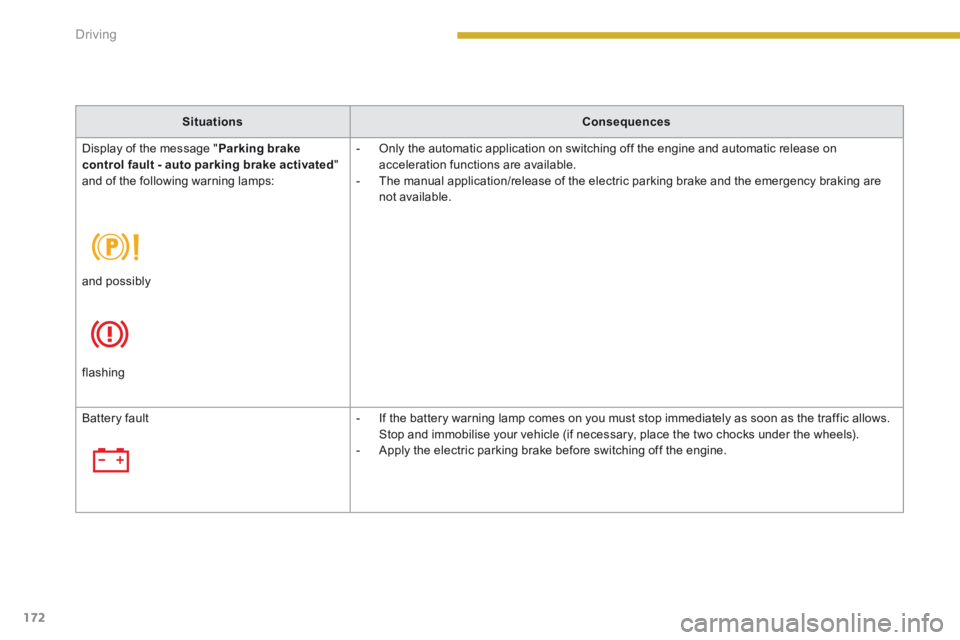
Display of the message " Parking brake control fault - auto parking brake activated " and of the following warning lamps:
- Only the automatic application on switching off the engine and automatic release on acceleration functions are available. - The manual application/release of the electric parking brake and the emergency braking are not available.
and possibly
flashing
Battery fault - If the battery warning lamp comes on you must stop immediately as soon as the traffic allows. Stop and immobilise your vehicle (if necessary, place the two chocks under the wheels). - Apply the electric parking brake before switching off the engine.
Page 189 of 404
9
Driving187
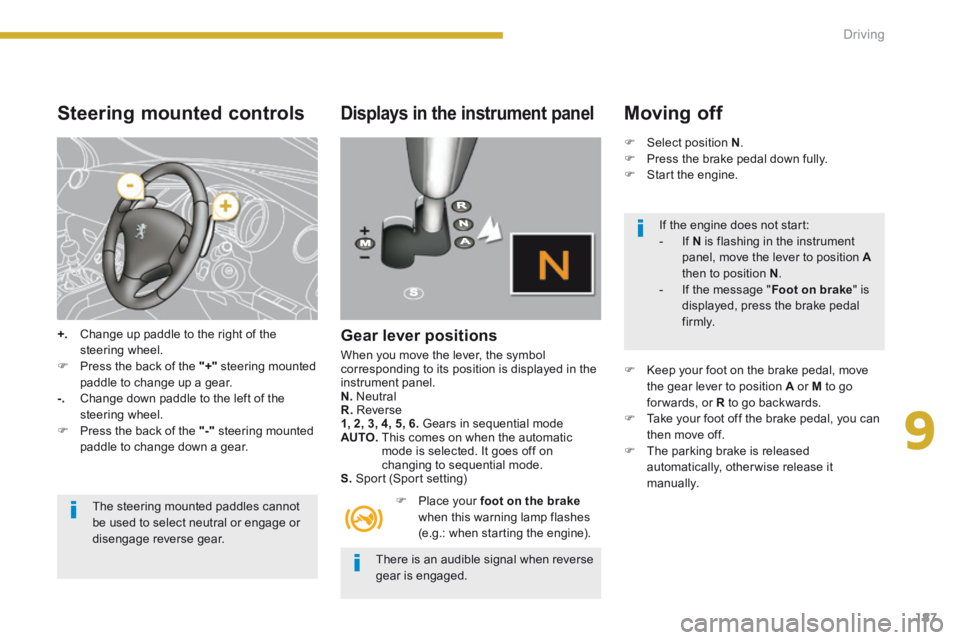
Steering mounted controls
+. Change up paddle to the right of the steering wheel. Press the back of the "+" steering mounted paddle to change up a gear. -. Change down paddle to the left of the steering wheel.
Press the back of the "-" steering mounted paddle to change down a gear.
The steering mounted paddles cannot be used to select neutral or engage or
disengage reverse gear.
Displays in the instrument panel
Gear lever positions
When you move the lever, the symbol corresponding to its position is displayed in the instrument panel. N. Neutral R. Reverse 1, 2, 3, 4, 5, 6. Gears in sequential mode AUTO. This comes on when the automatic mode is selected. It goes off on changing to sequential mode. S. Sport (Sport setting)
Place your foot on the brakewhen this warning lamp flashes (e.g.: when starting the engine).
Moving off
Select position N . Press the brake pedal down fully. Start the engine.
Keep your foot on the brake pedal, move the gear lever to position A or M to go for wards, or R to go backwards. Take your foot off the brake pedal, you can then move off. The parking brake is released automatically, otherwise release it manually.
There is an audible signal when reverse gear is engaged.
If the engine does not start: - If N is flashing in the instrument panel, move the lever to position Athen to position N . - If the message " Foot on brake " is displayed, press the brake pedal f i r m l y.
Page 215 of 404
11
Practical information213
Temporary puncture repair kit
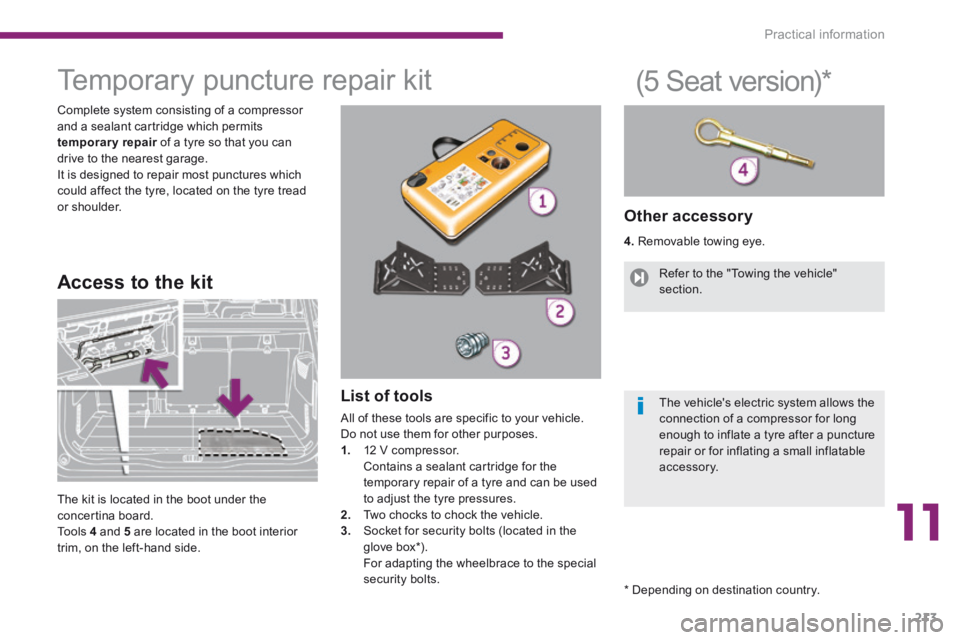
Complete system consisting of a compressor and a sealant cartridge which permits temporary repair of a tyre so that you can temporary repair of a tyre so that you can temporary repairdrive to the nearest garage. It is designed to repair most punctures which could affect the tyre, located on the tyre tread or shoulder.
List of tools
All of these tools are specific to your vehicle.
Do not use them for other purposes. 1. 12 V compressor. Contains a sealant cartridge for the temporary repair of a tyre and can be used to adjust the tyre pressures. 2. Two chocks to chock the vehicle. 3. Socket for security bolts (located in the glove box*) . For adapting the wheelbrace to the special security bolts.
Other accessory
4. Removable towing eye.
Access to the kit
(5 Seat version) *
The kit is located in the boot under the concertina board. To o l s 4 and 5 are located in the boot interior trim, on the left-hand side.
Refer to the "Towing the vehicle" section.
The vehicle's electric system allows the connection of a compressor for long
enough to inflate a tyre after a puncture repair or for inflating a small inflatable accessory.
* Depending on destination country.
Page 216 of 404
Practical information
214
Description of the kit
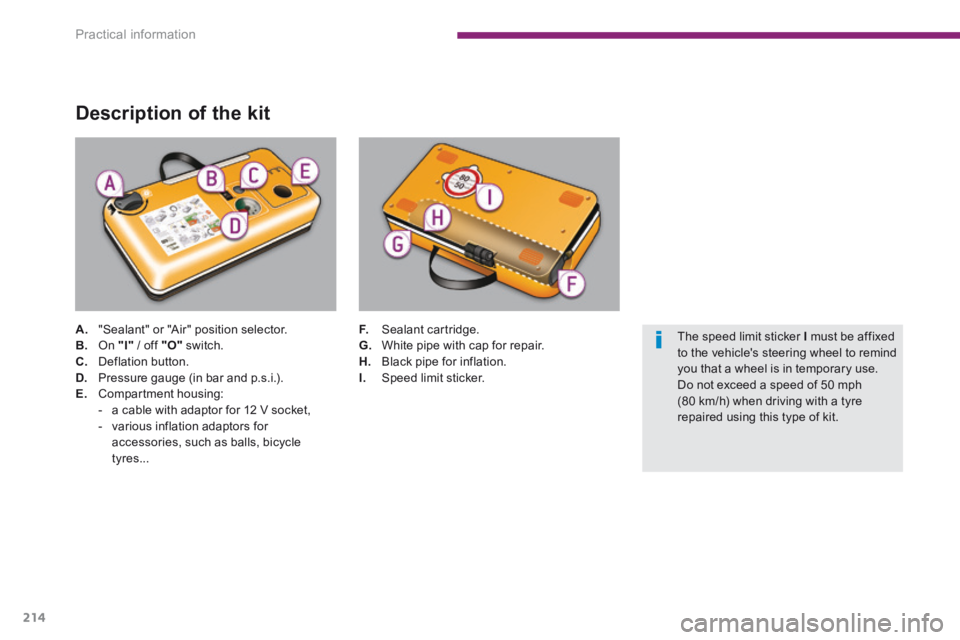
A. "Sealant" or "Air" position selector. B. On "I" / off "O" switch. C. Deflation button. D. Pressure gauge (in bar and p.s.i.). E. Compartment housing: - a cable with adaptor for 12 V socket, - various inflation adaptors for
accessories, such as balls, bicycle tyres...
F. Sealant cartridge. G. White pipe with cap for repair. H. Black pipe for inflation. I. Speed limit sticker.
The speed limit sticker I must be affixed to the vehicle's steering wheel to remind you that a wheel is in temporary use. Do not exceed a speed of 50 mph (80 km/h) when driving with a tyre repaired using this type of kit.
Page 218 of 404
Practical information
216
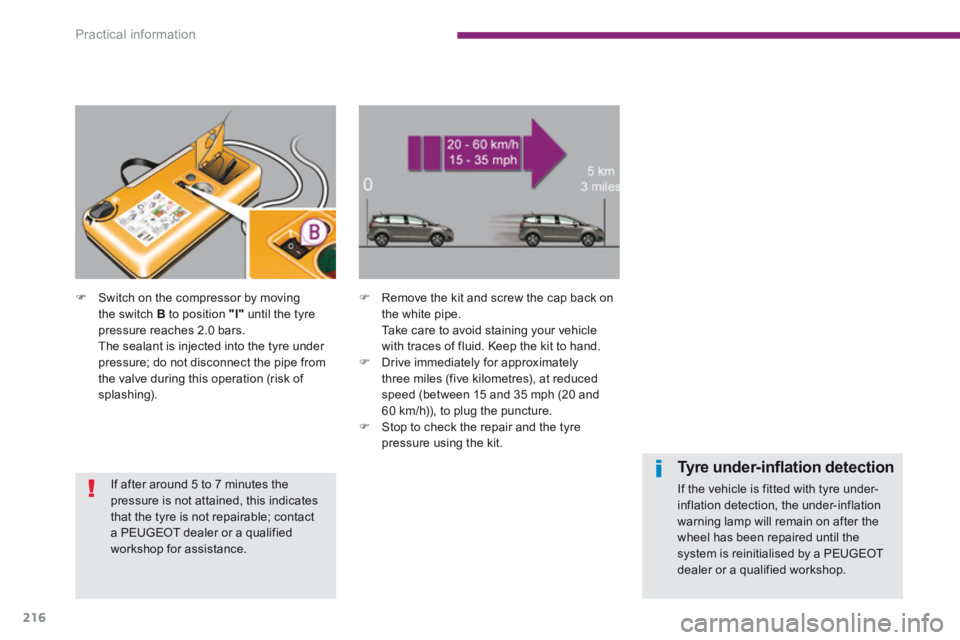
Switch on the compressor by moving the switch B to position "I" until the tyre pressure reaches 2.0 bars. The sealant is injected into the tyre under pressure; do not disconnect the pipe from the valve during this operation (risk of splashing).
Remove the kit and screw the cap back on the white pipe. Take care to avoid staining your vehicle with traces of fluid. Keep the kit to hand. Drive immediately for approximately three miles (five kilometres), at reduced speed (between 15 and 35 mph (20 and 60 km/h)), to plug the puncture. Stop to check the repair and the tyre pressure using the kit.
Tyre under-infl ation detection
If the vehicle is fitted with tyre under-inflation detection, the under-inflation warning lamp will remain on after the
wheel has been repaired until the system is reinitialised by a PEUGEOT dealer or a qualified workshop.
If after around 5 to 7 minutes the pressure is not attained, this indicates that the tyre is not repairable; contact a PEUGEOT dealer or a qualified workshop for assistance.