2013.5 PEUGEOT 2008 brake
[x] Cancel search: brakePage 4 of 336

.
.
Contents
Instrument panels 21
Indicator and warning lamps 23
Gauges and indicators 33
Trip computer 38
Trip computer with touch screen 40
Setting the date and time 43
Monitoring
Familiarisation
Remote control key
44
Alarm 51
Electric windows 53
Boot 55
Panoramic sunroof 56
Access
Front seats 57
Rear seats 59
Steering wheel adjustment 60
Mirrors 61
Ventilation 63
Heating 65
Manual air conditioning 65
Dual-zone digital air conditioning 67
Front demist - defrost 70
Rear screen demist - defrost 70
Interior fi ttings 71
Boot fi ttings 75
Comfort
Starting - Stopping the engine 79
Manual parking brake 80
Manual gearbox 81
5-speed electronic gearbox 82
6-speed electronic gearbox 85
Automatic gearbox 89
Gear shift indicator 92
Stop & Start 93
Hill start assist 96
Speed limiter 97
Cruise control 99
Parking sensors 102
Park Assist 104
Driving
Lighting controls 108
LED lamps 112
Daytime running lamps 112
Automatic illumination of headlamps 114
Headlamp adjustment 115
Cornering lighting 116
Wiper controls 117
Automatic rain sensitive wipers 119
Courtesy lamps 121
Interior mood lighting 122
Visibility
Eco-driving
Page 10 of 336

8Familiarisation
11. Front side window demisting/defrosting vent. 12 . Instrument panel. 13. Windscreen demisting/defrosting vent. 14 . Sunshine sensor. 15. Glove box / Passenger's airbag deactivation. 16. Passenger's airbag. 17. Multifunction screen / Audio system. 18. Central adjustable air vents. 19. Central locking and hazard warning buttons.
Instruments and controls
1. Cruise control / speed limiter controls. 2. Steering mounted controls for the touch screen. 3. Wiper / screenwash / trip computer stalk. 4. Lighting and direction indicator stalk 5. Bonnet release lever. 6. Steering wheel adjustment control. 7. Driver's airbag. Horn. 8. Headlamp height adjustment. 9. Switch panel. 10. Side adjustable air vents.
20. Heating / air conditioning controls. 21. 12 V accessory socket. USB port / auxiliary socket. Additional USB port. 22. Open storage. Cup holder. 23. Gear lever. 24. Grip control switch. 25. Parking brake. 26. Panoramic sunroof blind opening and closing control. 2 7. Closed storage compartment. 28. Rear 12 V socket.
Page 19 of 336

.
17
9394
94
Familiarisation
Driving safely
Stop & Start
Going into engine STOP mode
The "ECO" warning lamp comes on in the instrument panel and the engine goes into standby:
Going into engine START mode
Deactivation / Reactivation
You can deactivate the system at any time by pressing the "ECO OFF" button; the button's warning lamp comes on.
The system is automatically reactivated every time the engine is started with the key.
Before refuelling or doing anything under the bonnet, you must switch off the ignition with the key.
The "ECO" warning lamp goes off and the engine restarts:
- with a manual gearbox , when you press the clutch pedal, - with an electronic gearbox : ● with the gear lever in position A or M,when you release the brake pedal, ● or with the gear lever in position N and brake pedal released, when you move the gear lever to position A or M , ● or when you engage reverse.
- with a manual gearbox , at speeds below 12 mph (20 km/h), when you place the gear lever into neutral, and you release the clutch pedal, - with an electronic gearbox , at speeds below 5 mph (8 km/h), when you press the brake pedal or you place the gear lever into position N .
In certain circumstances, START mode may be invoked automatically; the "ECO" warning lamp flashes for a few seconds, then goes off.
In certain circumstances, STOP mode may not be available; the "ECO" warning lamp flashes for a few seconds, then goes off.
Page 21 of 336

19
Eco-driving Eco-driving is a range of everyday practices that allow the motorist to optimise their fuel consumption and CO2 emissions.
Optimise the use of your gearbox
With a manual gearbox, move off gently and change up without waiting. During acceleration change up early.
With an automatic or electronic gearbox, give preference to automatic mode and avoid pressing the accelerator pedal heavily or suddenly.
The gear shift indicator invites you engage the most suitable gear: as soon as the indication is displayed in the instrument panel, follow it straight away. For vehicles fitted with an electronic or automatic gearbox, this indicator appears only in manual mode.
Drive smoothly
Maintain a safe distance between vehicles, use engine braking rather than the brake pedal, and press the accelerator progressively. These practices contribute towards a reduction in fuel consumption and CO2emissions and also helps reduce the background traffic noise.
If your vehicle has cruise control, make use of the system at speeds above 25 mph (40 km/h) when the traffic is flowing well.
Control the use of your electrical
equipment
Before moving off, if the passenger compartment is too warm, ventilate it by opening the windows and air vents before using the air conditioning. Above 30 mph (50 km/h), close the windows and leave the air vents open. Remember to make use of equipment that can help keep the temperature in the passenger compartment down (sunroof and window blinds...). Switch off the air conditioning, unless it has automatic regulation, as soon as the desired temperature is attained. Switch off the demisting and defrosting controls, if not automatic. Switch off the heated seat as soon as possible.
Switch off the headlamps and front foglamps when the level of light does not require their use.
Avoid running the engine before moving off, particularly in winter; your vehicle will warm up much faster while driving.
As a passenger, if you avoid connecting your multimedia devices (film, music, video game...), you will contribute towards limiting the
consumption of electrical energy, and so of fuel. Disconnect your portable devices before leaving the vehicle.
Page 27 of 336

1
25
Monitoring
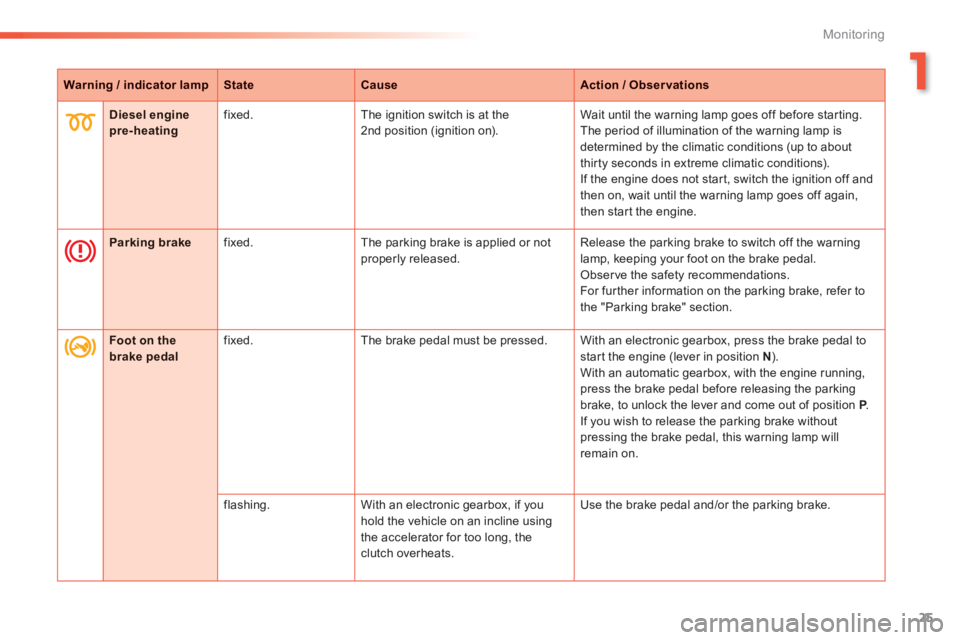
Warning / indicator lampStateCauseAction / Observations
Diesel engine pre-heating fixed. The ignition switch is at the 2nd position (ignition on). Wait until the warning lamp goes off before starting. The period of illumination of the warning lamp is determined by the climatic conditions (up to about thirty seconds in extreme climatic conditions). If the engine does not start, switch the ignition off and then on, wait until the warning lamp goes off again, then start the engine.
Parking brake fixed. The parking brake is applied or not properly released. Release the parking brake to switch off the warning lamp, keeping your foot on the brake pedal. Observe the safety recommendations. For further information on the parking brake, refer to the "Parking brake" section.
Foot on the brake pedal fixed. The brake pedal must be pressed. With an electronic gearbox, press the brake pedal to start the engine (lever in position N ). With an automatic gearbox, with the engine running, press the brake pedal before releasing the parking brake, to unlock the lever and come out of position P . P . PIf you wish to release the parking brake without
pressing the brake pedal, this warning lamp will remain on.
flashing. With an electronic gearbox, if you hold the vehicle on an incline using
the accelerator for too long, the clutch overheats.
Use the brake pedal and/or the parking brake.
Page 31 of 336

1
29
Monitoring
Warning / indicator lampStateCauseAction / Observations
Braking fixed. The braking system fluid level has dropped significantly. You must stop as soon as it is safe to do so. Top up with brake fluid listed by PEUGEOT. If the problem persists, have the system checked by a PEUGEOT dealer or a qualified workshop.
+ fixed, associated with the ABS warning lamp.
The electronic brake force distribution (EBFD) system has a fault. You must stop as soon as it is safe to do so. Have it checked by a PEUGEOT dealer or a qualified workshop.
Maximum coolant temperature
fixed with the needle in the red zone. The temperature of the cooling system is too high. Stop as soon as it is safe to do so. Wait until the engine has cooled down before topping up the level, if necessary. If the problem persists, contact a PEUGEOT dealer or a qualified workshop.
Anti-lock Braking System (ABS)
fixed. The anti-lock braking system has a fault. The vehicle retains conventional braking. Drive carefully at reduced speed and contact a PEUGEOT dealer or a qualified workshop without d e l ay.
Dynamic stability control (DSC/ASR)
flashing. The DSC/ASR regulation is operating. The system optimises traction and improves the directional stability of the vehicle in the event of loss of grip or trajectory.
fixed. The DSC/ASR system has a fault. Have it checked by a PEUGEOT dealer or a qualified workshop.
Page 82 of 336

80
Driving
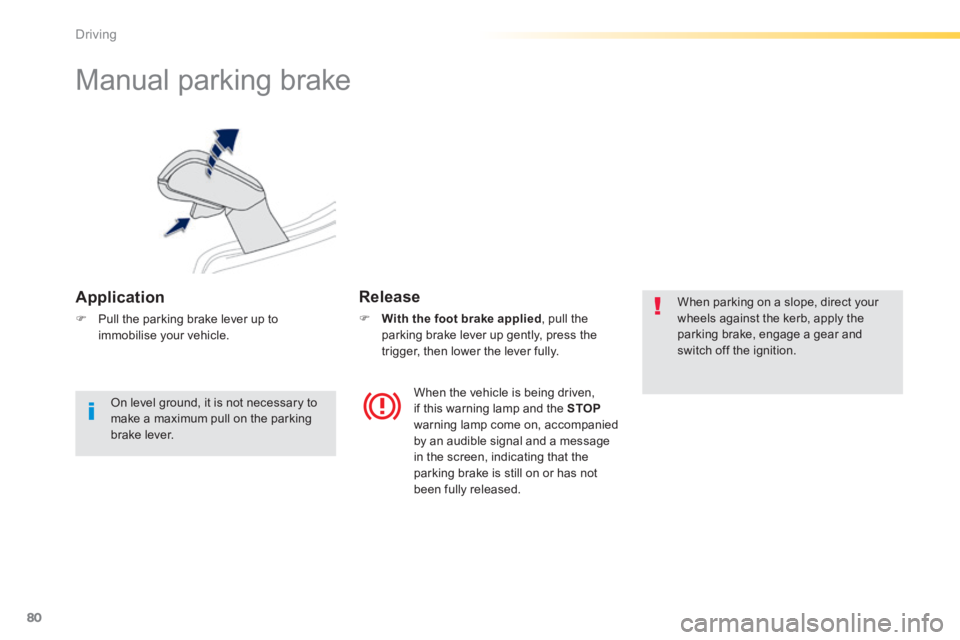
Manual parking brake
Application
Pull the parking brake lever up to immobilise your vehicle.
Release
With the foot brake applied , pull the parking brake lever up gently, press the trigger, then lower the lever fully.
When parking on a slope, direct your wheels against the kerb, apply the parking brake, engage a gear and switch off the ignition.
When the vehicle is being driven, if this warning lamp and the STOPwarning lamp come on, accompanied by an audible signal and a message in the screen, indicating that the parking brake is still on or has not been fully released.
On level ground, it is not necessary to make a maximum pull on the parking
brake lever.
Page 84 of 336

82
Driving
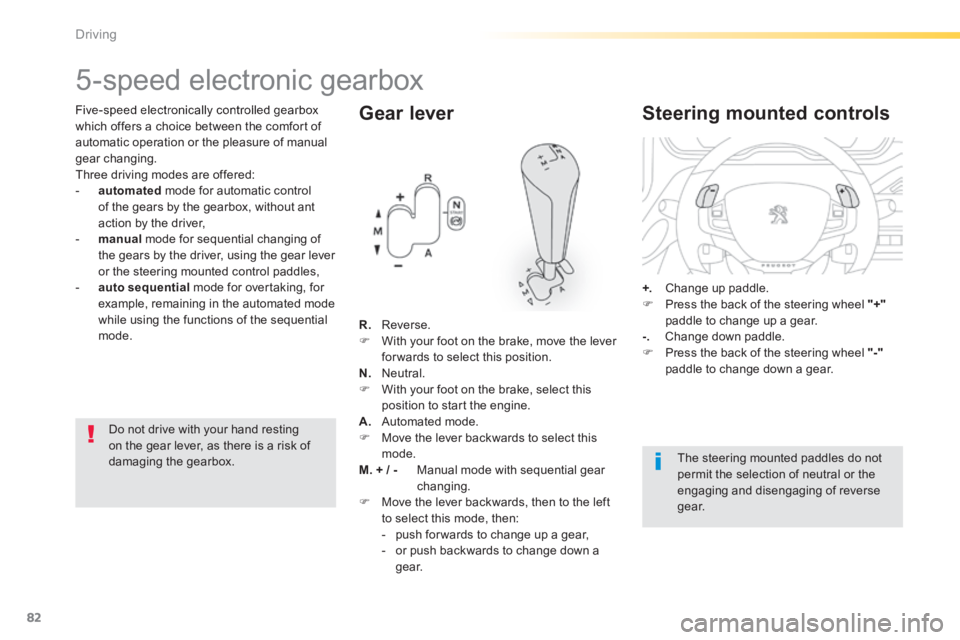
Five-speed electronically controlled gearbox which offers a choice between the comfort of automatic operation or the pleasure of manual gear changing. Three driving modes are offered: - automated mode for automatic control of the gears by the gearbox, without ant action by the driver, - manual mode for sequential changing of the gears by the driver, using the gear lever or the steering mounted control paddles, - auto sequential mode for overtaking, for example, remaining in the automated mode while using the functions of the sequential mode.
5-speed electronic gearbox
Gear lever
R. Reverse . With your foot on the brake, move the lever for wards to select this position. N. Neutral. With your foot on the brake, select this position to start the engine. A. Automated mode. Move the lever backwards to select this mode. M. + / - Manual mode with sequential gear changing. Move the lever backwards, then to the left to select this mode, then: - push for wards to change up a gear, - or push backwards to change down a g e a r.
Steering mounted controls
+. Change up paddle. Press the back of the steering wheel "+"paddle to change up a gear. -. Change down paddle. Press the back of the steering wheel "-"paddle to change down a gear.
The steering mounted paddles do not permit the selection of neutral or the engaging and disengaging of reverse g e a r.
Do not drive with your hand resting on the gear lever, as there is a risk of damaging the gearbox.