2012 VOLKSWAGEN GOLF MK6 display
[x] Cancel search: displayPage 283 of 516
Brake system malfunction
you brake and find that vehicle doesn't brake
nearly as
come on
and a m essage may appear in the instrument ter display. you believe the vehic le is safe to
d rive, immediately take it to the nearest authorized
Volkswagen dealer or authorized Volkswagen
Service
f or repair. Drive slowly and very
carefully , for the longer stopping distance ,
and be ready to push longer and harder on the
brake pedal to slow the vehicle down.
Brake booster
The brake booster works only when the engine is
running . in creases the force on the brakes above
and beyond the pressure put on the brake pedal by
the driver .
New brake pad s do not provide maximum braking performance.
miles You can
compensate for the reduc ed braking force by putting more pressure on the brake
pedal.
other vehicles too closel y or put yourself into other situations that might require sudden, hard braking , especially
when the brake pads have not b ee n broken
in.
Overh eated brakes reduce the vehicle's stopping power and increa se stopping distances considerably.
that are long or s teep, always reduce speed
and shift into lower gear (manual or automat-
184 While driving
ic transmission). This let the vehicle use
engine braking and reduce the load on the brakes. Otherwise, the brake system could overheat and possibly fail.
A damaged front spoiler or a non-standard spoiler can redu ce airflow to th e brakes and make them overheat.
Wet brakes or brakes coated with ice or road
salt react slower and need longer stopping distances.
apply the brakes to tes t them .
Driving when the brake booster is not working increases stopping distances and can
cause accidents and serious per sonal inju
rie s.
Nev er let the vehicle coas t when the
the bra ke booster is not working (suc h
a s wh en th e vehic le is being towed) , a lot more pedal force is needed to slow down and stop.
Neve r the brake s by keeping your foot on the brak e pedal when you do not want to brak e. Constant pres sure on the brake ped al
ca n make the brak es overheat. Riding the bra kes substantially r educe brakin g performance, increase stopping distance, and can
cause complete brake system failure .
that are long or s teep, always reduce speed and shift into lower gear (manua l or automatic tran smission). This gine brakin g and reduce the load on t he brakes. Otherwise, the brake system cou ld
o ve rheat and possibly fail. use the brakes when you n eed them to slow the vehicle down more or to stop.
Page 300 of 516
tires are identica l to those that were removed
and even if the tire pressure does not change 264.
WARNING
Improper use of the button can cause the tire sure
and tire wear.
Do not rely on the Tire Pressure Check your tires and have no
signs of damage , such as punctures , cuts , cracks ,
and Remove any objects that become
to the body of tire it self.
When you take delivery of the vehicle, the Tire Pressure Monitoring is calib ra ted
fo r the facto ry- recommended cold tire
pressure for the tires on your vehicle, as shown on
the label inside the driver door 138.
reinstalled or rep lacement wheels and tires are
identical to those that wer e removed and even if
the tire pressure does not change
you have to adjust the tire pressure on a
w arm tire ,
138 .
determines that the air pressure in at least one tire is too low, care fully check the sure in cannot be mined by looking at the tir e . This is especially true of low-profile tires .
you have work done on your wheels or tires, inform the workshop that the vehicle is
equ ipped with a Tire Pressure Monitoring
New tires may expand slightly the first time they are driven at high speeds, which can
trigger a tire pressure warning. Remember that lire
pressu re can only be pro perly measured when the
tire is "co ld "
repla ce old tires with tires that have been approved by Volkswagen for you r vehi-
cle type .
P up Proper response
A chime may also sound .
T he infl ation pressure of one or more tires is sign ifica ntly lower than the benchmark pres-Reduce
speed immediately! Avoid fast corne ring
su re set by the driver or a tire has structural and
hard braking! I damage. Depending on vehicle equipment , Check the
condition and pressure of a message may ment cluste r display.
D river assistance systems
Page 323 of 516
Never pour or operating or on the engine. These
work on the system or the
disconnect the 12 battery. Make sure the is when you disconnect the battery , or the
have a functional, approved fire extinguisher nearby .
Warning
When changing or topping off fluids, make sure that you pour the voirs. Adding the wrong type of operating
and are
you find spot s
o f
first read and note the introductory in formation and heed the on
icon
appea rs Engine hood not prope rly closed.
in the dis-
th e engine hood is open or not closed properly ,
t he warning comes on in the i nstrument
D epending on your vehicle 's equ ipmen t and tio n s, a symbo l showing that the hood is not closed may appea r in the instrument cluste r
disp la y instead of th e warning light. The symbol be displayed even after the ignition is
swi tched off. Th e display goes out abo ut 15
onds afte r t he vehicle has been locked with the doors closed .
224 Care, cleaning , maintenance Proper
response
and instrument cluster text messa ges can cause the to break down in traffic and sion and serious
Page 441 of 516
emergency Breakdown . . . . . . . . . . . . . . . . . . . . . . . . 299
Checklist . . . . . . . . . . . . . . . . . . . . . . . . . 299
Emergen cy flashers . . . . . . . . . . . . . . . . . 299
Pr otecti ng yourself and the
. . . . . 299
Infrared-ref lecting windshield . . . . . . . . . . 128
cluster . . . . . . . . . . . . . . . . . . . . . 15
Brightn ess . . . . . . . . . . . . . . . . . . . . . . . . 126
Display . . . . . . . . . . . . . . . . . . . . . . . . . 18, 19
Displays . . . . . . . . . . . . . . . . . . . . . . . . . . . 24
light . . . . . . . . . . . . . . . . . . . . . . . 15 . . . . . . . . . . . . . . . . . . . . . . . . 18 Menu structure . . . . . . . . . . . . . . . . . . . . . . 24
Service reminder display . . . . . . . . . . . . . . 22
. . . . . . . . . . . . . . . . . . . . . . . . . . . 15 Using menus . . . . . . . . . . . . . . . . . . . . . . . 25
Warning lights . . . . . . . . . . . . . . . .
cluster displays . . . . . . . . . . . . 24
. .
. . . . .
light . . . . . . .
Jump-start Using jumper cables . . . . . . . . . . . . . . . . 328 Jump-starting
. . . . . . . . . . . . . 169
Keyless Go. . . . . . . . . . . . . . . . . . . . . . . 167
Starter button . . . . . . . . . . . . . . . . . . . . . . 167
Unlocking and locking vehicle . . . . . . . . . .
44 Keyless Access locking and starting system .4.4
Keys
Battery replaceme nt (vehic le key ) . . . . . . . 39
see
. . . . . . . . . . . . 177
L
Labels .............•................ 291
safety seat . . . . . . . . . . . . . .
......................... 118
Launch
control program . . . . . . . . . . . . . . 177
Lifting vehicle Checklist . . . . . . . . . . . . . . . . . . . . . . . . . 313 Jack .....................•....... 313
With ja ck . . . . . . . . . . . . . . . . . . . . . . . . . 313
Light Acoustic warnings . . . . . . . . . . . . . . . . . . 124 Adaptive Front Lighting . . . . . . . . . . . . . . 126
Daytime running lights . . . . . . . . . . . . . . . 125
Functions . . . . . . . . . . . . . . . . .
. . . . . . . 125
Headlight range adjustment . . . . . . . . . . . 126
. . . . 122
illumination . . . . . . . . . . . . . . . 126 lights . . . . . . . . . . . . . . . . . . . . . . 127
Ligh t swi tch . . . . . . . . . . . . . . . . . . . . . . . 124
Low beams . . . . . . . . . . . . . . . . . . . . . . . . 124
Reading lights . . . . . . . . . . . . .
. . . . . . . 127
. . . . 124 Light bulb malfunction . . . .
Light bulb replacement
Checklist . . . . . . . . . . . . . . . . . . . . . . . . 321 Preparations . . . . . . . . . . . . . . . . . . . . . . 321
Lights . . . . . . . . . . . . . . . . . . . . . . . . . . . . . . . . . . . . . . 124
Turn signal lever . . . . . . . . . . . . . . . . . . . . 123
Loading Driving with an open rear hatch . . . . . . . . 138
Genera l instructions . . . . . . . . . . . . . . . . . 137
Luggage compartment . . . . . . . . . . . . . . .
141 Luggage compartment
cess
Unlocking and locking vehicle . . . . . . . . . . 44
Low beam s . . . . . . . . . . . . . . . . . . . . . . . . . 124
Luggage
compartment . . . . . . . . . . . . . . . . 141 Luggage compartm ent cover . . . . . . . . . . 143
Luggage compartment light . . . . . . . . . . . 127
Page 443 of 516
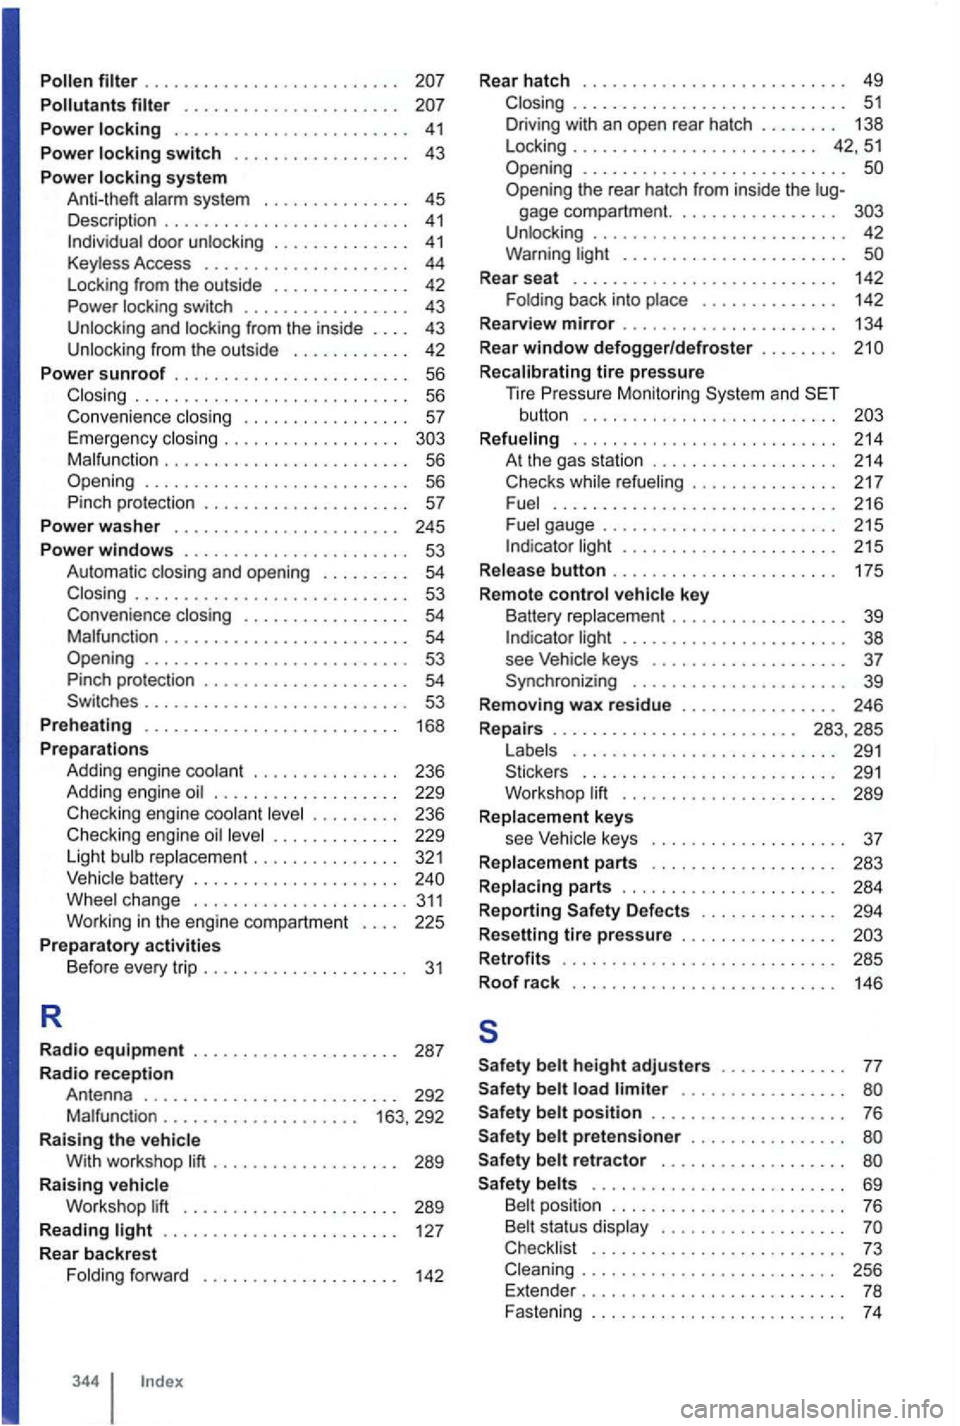
Pollen . . . . . . . . . . . . . . . . . . . . . . . . . .
Pollutants . . . . . . . . . . . . . . . . . . . . . .
Power locking . . . . . . . . . . . . . . . . . . . . . . . . 41
Power locking switch . . . . . . . . . . . . . . . . . . 43
Pow
er locking system A nl i-lheft alarm system . . . . . . . . . . . . . . . 45
Description . . . . . . . . . . . . . . . . . . . . . . . . . 41 doo r unlocking . . . . . . . . . . . . . . 41 Keyless Access . . . . . . . . . . . . . . . . . . . . . 44
L ock ing from the outside . . . . . . . . . . . . . . 42
Power
lock ing switch . . . . . . . . . . . . . . . . . 43
Un locking and locking fr om the inside . . . . 43
Un locking from the outside . . . . . . . . . . . . 42
Power s
unroof . . . . . . . . . . . . . . . . . . . . . . . . 56 ............ ................ 56
Conv enience closing . . . . . . . . . . . . . . . . 57 Emergency closing . . . . . . . . . . . . . . . . . . M alfun ction . . . . . . . . . . . . . . . . . . . . . . . . . 56 Opening ..............•............ 56
Pinch protection . . . . . . . . . . . . . . . . . . . . 57
Pow
er wa sh er . . . . . . . . . . . . . . . . . . . . . . . 245
Power windows . . . . . . . . . . . . . . . . . . . . . . . 53
Automa tic and open ing . . . . . . . . . 54 ............................ 53
Conven ience closing . . . . . . . . . . . . . . . . . 54 Ma lfunction . . . . . . . . . . . . . . . . . . . . . . . . 54 Opening ........................... 53
P inc h protection . . . . . . . . . . . . . . . . . . . . 54 Sw itc hes . . . . . . . . . . . . . . . . . . . . . . . . . . 53
Prehea ting . . . . . . . . . . . . . . . . . . . .
. . . . . 168
Preparations
Addi ng engine coolant . . . . . . . . . . . . . . . 236
Adding engine
. . . . . . . . . . . . . . . . . . . 229
Checki ng engine coolant . . . . . . . . . 236
Checking e ngi ne . . . . . . . . . . . . . 229
Light bulb repla cemen t . . . . . . . . . . . . . . . 321
Vehic le battery . . . . . . . . . . . . . . . . . . . . .
. . . . . . 127
Rear backrest
F oldi ng forward . . . . . . . . . .
. . . . . . . . . 142
344
Rear hatch . . . . . . . . . . . . . . . . . . . . . . . . . . . 49 . . . . . . . . . . . . . . . . . . . . . . . . . . . . 51
D riving with an open rear hatch . . . . . . . . 138
L ock ing . . . . . . . . . . . . . . . . . . . . . . . . . 42, 5 1
Open ing
........................... Opening the rear hatch from inside the gage compartm ent. . . . . . . . . . . . . . . . . U nlock ing . . . . . . . . . . . . . . . . . . . . . . . . . . 42
Warning li ght . . . . . . . . . . . . . . . . . . . . .
Rear seat . . . . . . . . . . . . . . . . . . . 142
F olding back int o place . . . . . . . . . . . . . . 142
Rearv iew
mirror . . . . . . . . . . . . . . . . . . . . . . 134
Rear
window defogger/defroster . . . . . . . .
Recalibrating tire pressure
T ire Mo nito ring System and button . . . . . . . . . . . . . . . . . . . . . . . . . .
Refueling . . . . . . . . . . . . . . . . . . . . . . . . . . . 214 A t the gas station . . . . . . . . . . . . .
light . . . . . . . . . . . . . . . . . . . . . 215
Release
button . . . . . . . . . . . . . . . . . . . . . . . 175
Remote
control vehicle key
Ba ttery replacement . . . . . . . . . . . . . light . . . . . . . . . . . . . . . . . . . . . 38
see Vehicle keys . . . . . . . . . . . . . . . . . . 37
Synchronizing . . . . . . . . . . . . . . . . . . . . . . 39
Remov ing
wax residu e . . . . . . . . . . . . . . . . 246
Repa irs . . . . . . . . . . . . . . . . . . . . . . . . . 283, 285
L abels . . . . . . . . . . . .
. . . . . . . . . . . . . . 291
Sticker s . . . . . . . . . . . . . . . . . . . . . . . 291
Wo rkshop lift . . . . . . . . . . . . . . . . . . . . . 289
Replacement keys
see
keys . . . . . . . . . . . . . . . . 37
Replacement parts . . . . . . . . . . . . . . . . . . . 283
Replacing parts . . . . . . . . . . . . .
. . . . . . . . 284
Reporting Safety Defects . . . . . . . . .
. . . . 294
Resetting
tire pressure . . . . . . . . . . . . . . . .
Retrofit s . . . . . . . . . . . . . . . . . . . . . . . . . . . . 285 Roof rack
146
s
Safety belt height adjusters . . . . . . . . . . . . . 77
Safety belt load limiter . . . . . . . . . . . . . . . . . Safety belt position . . . . . . . . . . . . . . . . . . . . 76
Safety
belt pretensioner . . . . . . . . . . . . . .
S afety belt retractor . . . . . . . . . . . . . . . . . . .
Safety belts . . . . . . . . . . . . . . . . . . . . . . . . . . 69
Belt position . . . . . . . . . . . . . . . . . . . . . . . . 76
Belt status display . . . .
Checklist . . . . . . . . . . . . . . . . . . . . . . . . . . 73 . . . . . . . . . . . . . . . 256
Extender . . . . . . . . . . . . . . . . .
Page 455 of 516
lists
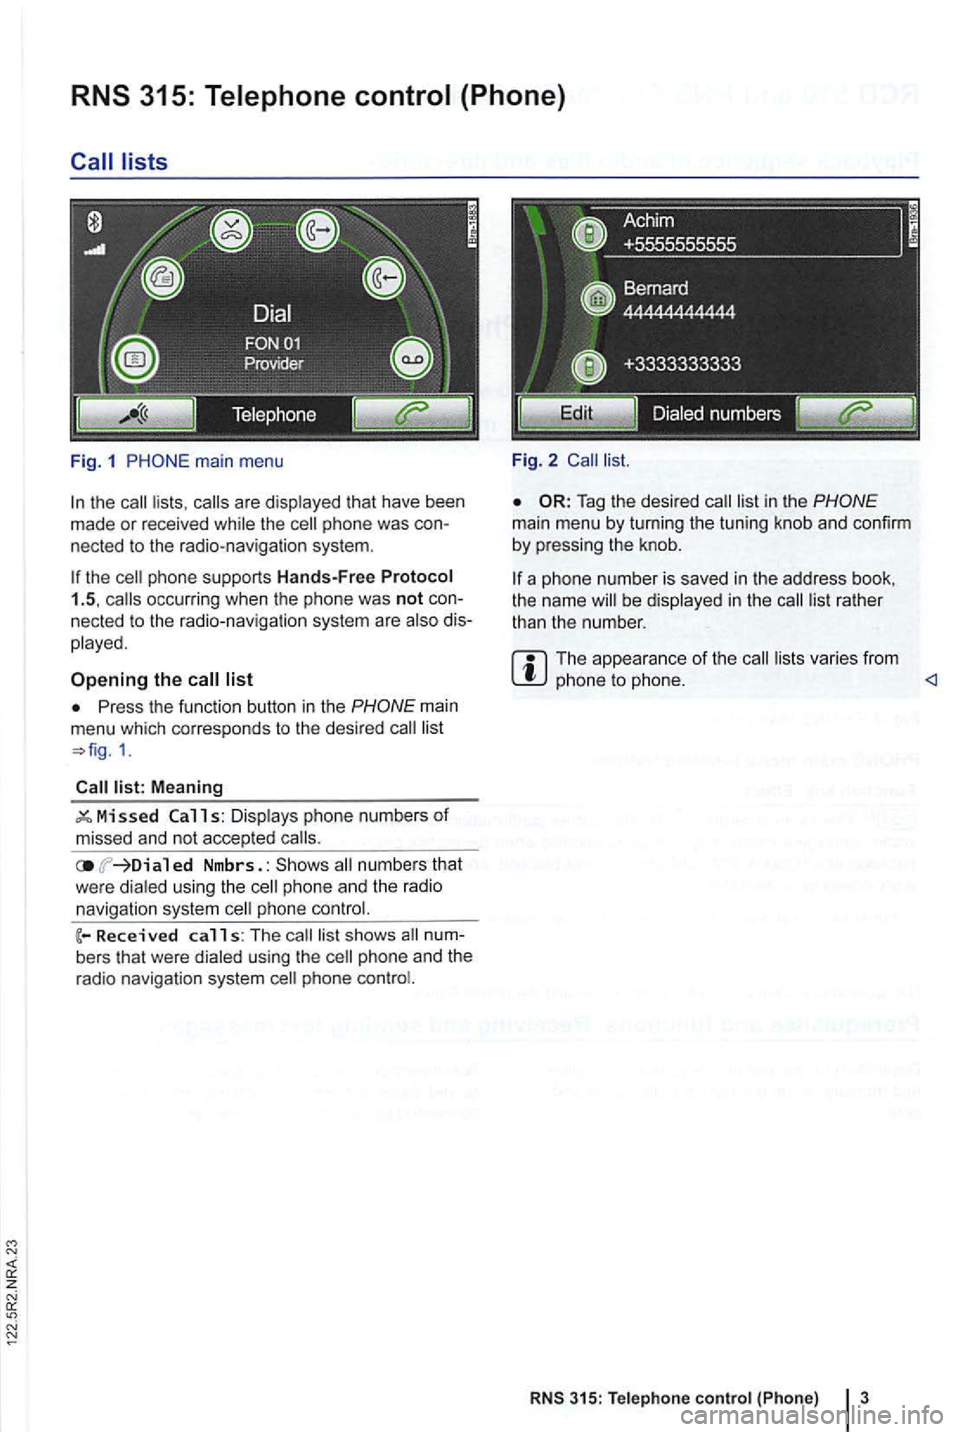
Fig. 1
the the
list
Press the function button in the
Meaning
ed Nmbrs. : numbers that
w ere dialed using th e phone an d the radio
navigation system phone
calls: The s hows
phone
Fi g. 2
Tag the desired
the name be displayed in the
The appea ra nce of the varies from phone to phone.
RNS 315: Tele phone control {Phone) 3
Page 456 of 516
are not but must be selected by using the
menu for track selection.
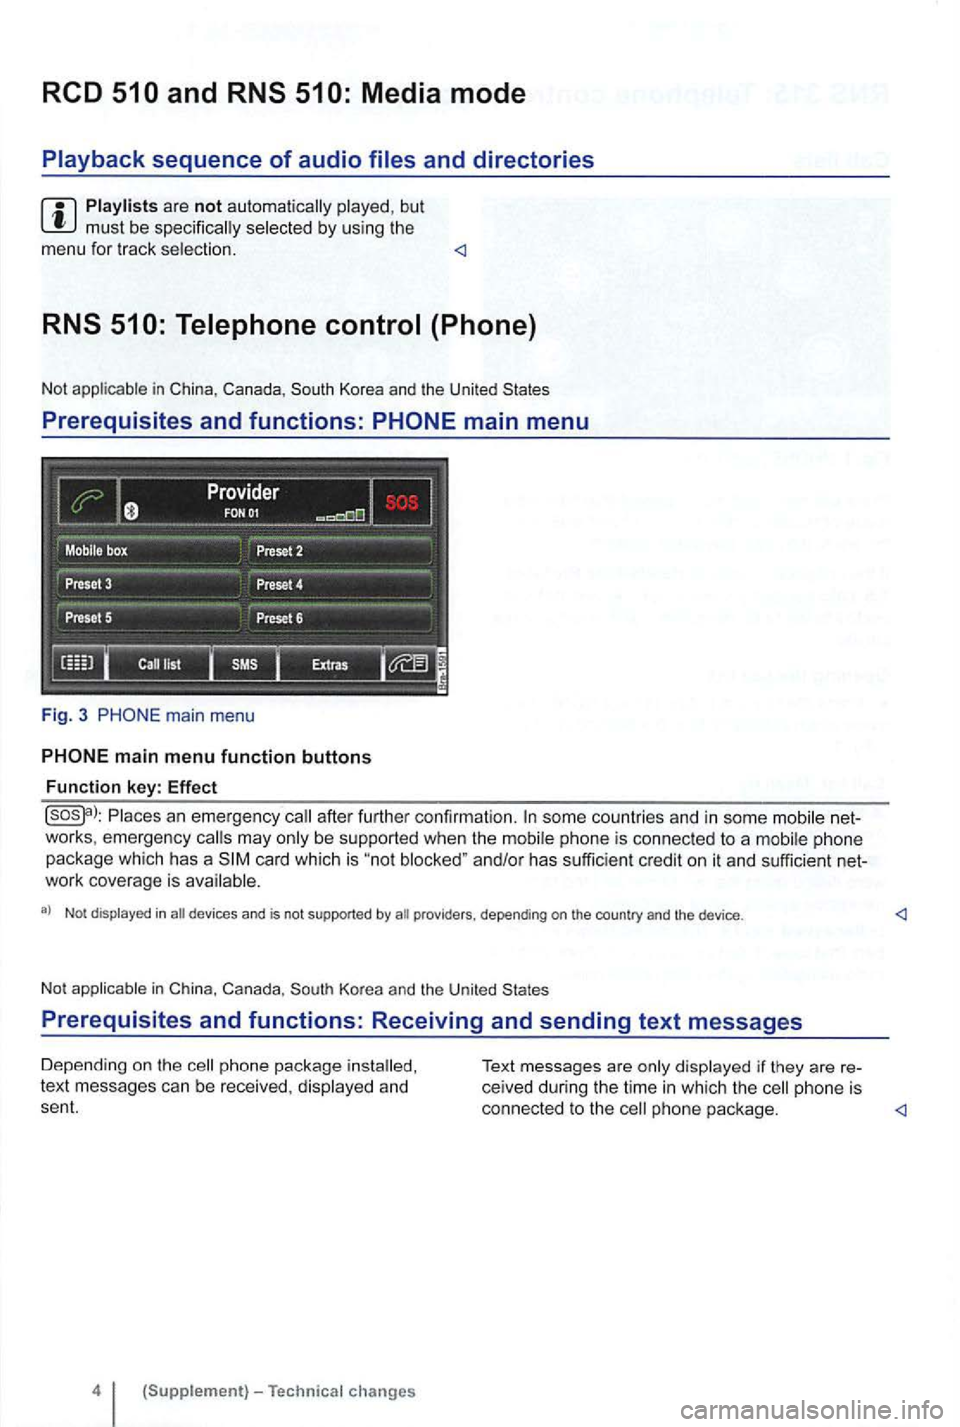
Prerequisites and functions: PHONE main menu
Fig. 3 PHO NE ma in menu
Places an eme rgency after further confirmat ion. some countries and in some mobile net
works , emergency may be supported when the mob ile phone is connec ted to a mobi le phone
package which has a card which is "no t and/or has suffic ien t credit on it and sufficient net
work coverage is
a) Not displayed in an devi ces and is not supported by
phone package text messages can be received , displayed and
sent. connected to the phone package.
Page 460 of 516
Accessing stations stored on station preset buttons
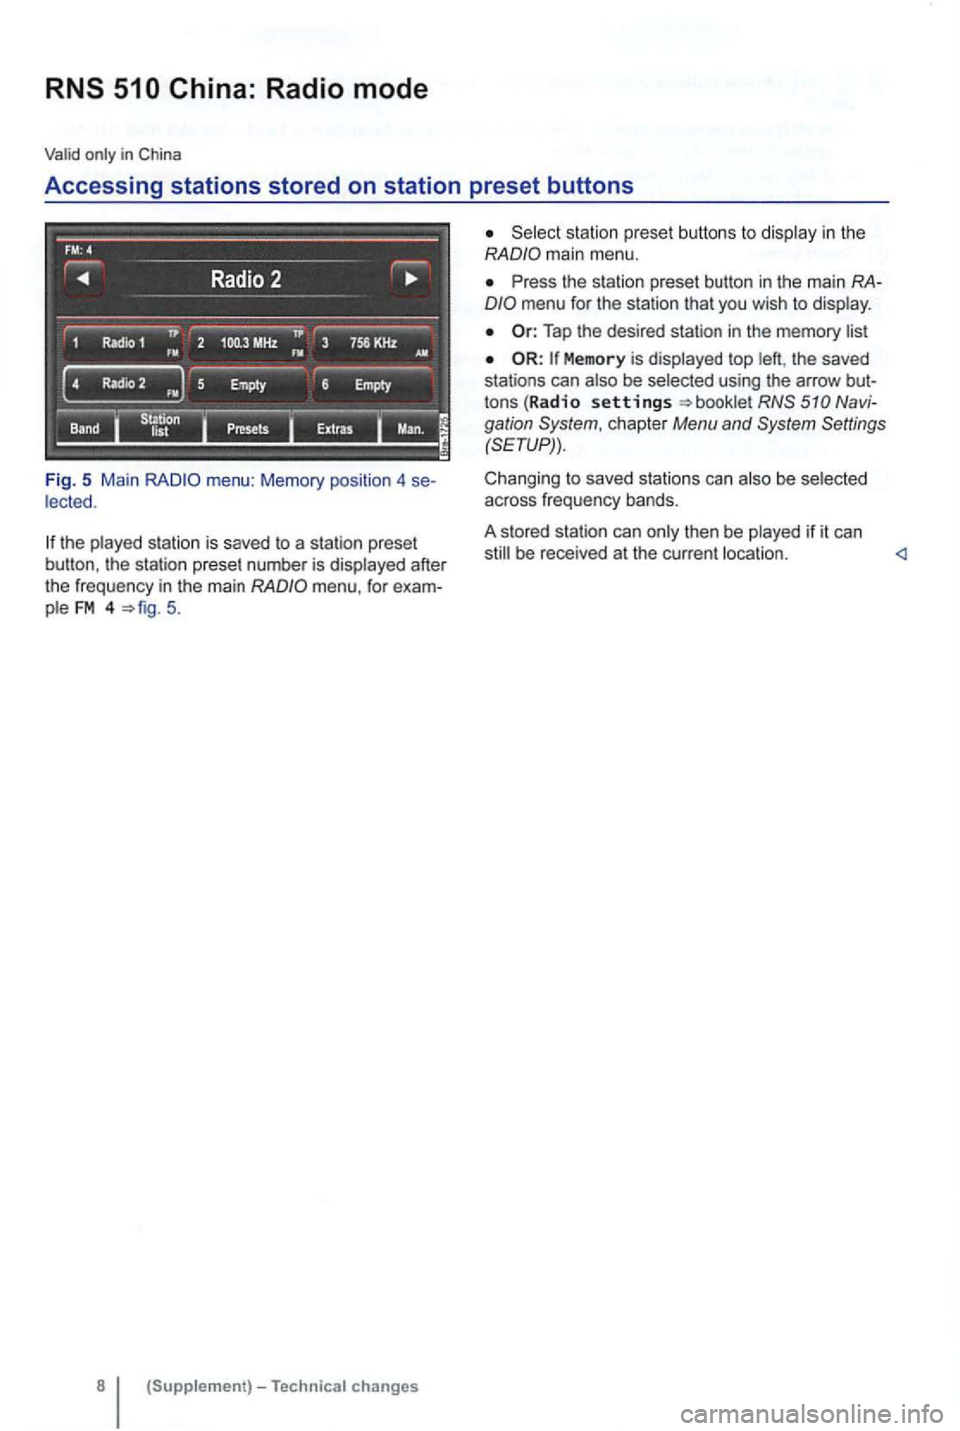
Fig. 5 Main
the played station is save d to a station preset
button, the station preset number is displayed after
the frequ ency
in the main 5.
(Supp l
ement)-Technical changes
main menu.
Press the statio n preset button in the main RAmenu for the station that you wish to display .
Memory is displayed top left , the saved
stations can also be selected using the arrow but
tons
(Radio settings chapter Menu and Settings
(SETUP)) .
Changing to saved stations can also be selected
across frequency bands.
A s tored station can only then
be played if it can
still be received at the current location .