Page 374 of 636
374 3-4. Using the hands-free phone system (for cellular phone)
■Using a short cut key
First menuSecond menuOperation detail
Dial “XXX (name)” - Dialing a number registered
in the phone book
Dial “XXX (number)” - Dialing the input numbers
Phone book add
entry - Adding a new number
Phone book change
name -Changing the name of a
phone number in the phone
book
Phone book delete
entry - Deleting phone book data
Phone book set
speed dial - Registering a speed dial
Phone book delete
speed dial - Deleting a speed dial
Phone book List
names - Listing the phone book data
Page 375 of 636
375
3-4. Using the hand
s-free phone system (for cellular phone)
3
Interior features
■Automatic volume adjustment
When vehicle speed reaches 50 mph (80 km/h) or more, the volume auto-
matically increases. The volume returns to the previous volume setting when
vehicle speed drops to 43 mph (70 km/h) or less.
■ When using a voice command
For numbers, say a combination of single digits from zero to nine, # (pound),
(star), and + (plus).
Say the command correctly and clearly.
■ Situations that the system ma y not recognize your voice
● When driving on a rough road
● When driving at high speeds
● When air is blowing out of the vents onto the microphone
● When the air conditioning fan emits a loud noise
■ Operations that cannot be performed while driving
●Operating the system with
● Registering a cellular phone to the system
■ Changing the passkey
P. 383
Page 380 of 636

380
3-4. Using the hands-free phone system (for cellular phone)
Setting a cellular phone
Registering a cellular phoneSelect “Pair Phone” using a voice command or , and perform
the procedure for registering a cellular phone. ( P. 370)
Registering a cellular phone in the hands-free phone system allows
the system to function. The followin g functions can be used for reg-
istered cellular phones:
■ Functions and operation procedures
To enter the menu for each function, follow the steps below using a
voice command or :
●Registering a cellular phone
1. “Setup (Setup)” 2. “Phone Setup” 3. “Pair Phone”
● Selecting the cellular phone to be used
1. “Setup (Setup)” 2. “Phone Setup” 3. “Select Phone”
● Changing a registered name
1. “Setup (Setup)” 2. “Phone Setup” 3. “Change Phone
Name (Change name)”
● Listing the registered cellular phones
1. “Setup (Setup)” 2. “Phone Setup” 3. “List Phones”
● Deleting a cellular phone
1. “Setup (Setup)” 2. “Phone Setup” 3. “Delete Phone”
● Changing the passkey
1. “Setup (Setup)” 2. “Phone Setup” 3. “Set Passkey”
● Turning the hands-free phone automatic connection on/off
1. “Setup (Setup)” 2. “Phone Setup” 3. “Handsfree
Power”
Page 383 of 636
383
3-4. Using the hand
s-free phone system (for cellular phone)
3
Interior features
Deleting a cellular phone
Select “Delete Phone” using a voice command or .
Select a cellular phone to be deleted by either of the following
methods and select “Confirm” using a voice command or :
a. Press the talk switch and say the name of the desired cellu- lar phone.
b. Press the talk switch and say “List phones”. While the name of the desired cellular phone is being read aloud, press the
talk switch.
Changing the passkey
Select “Set Passkey” using a voice command or .
Press the talk switch, say a 4 to 8-digit number, and select
“Confirm” using a voice command or .
The number should be input 1 digit at a time.
When the entire number to be registered as a passkey has
been input, press again.
STEP1
STEP2
STEP1
STEP2
STEP3
Page 396 of 636
396
3-5. Using the interior lights
Interior lights list
Your Toyota is equipped with an illuminated entry system to assist in
entering the vehicle. Owing to the fu nction of the system, the lights
shown in the following illustration automatically turn on/off accord-
ing to the presence of the electro nic key (vehicles with smart key
system), whether the doors are lo cked/unlocked, whether the doors
or glass hatch (if equipped) are opened/closed, the “ENGINE START
STOP” switch mode and en gine switch position.
Outer foot lights (vehicles with smart key system)
Personal/interior lights (P. 397)
Engine switch light (vehicle s without smart key system)
Front door courtesy light
Personal/interior light or interior light ( P. 397, 398)
Interior light ( P. 398)
Page 400 of 636

400 3-6. Using the storage features
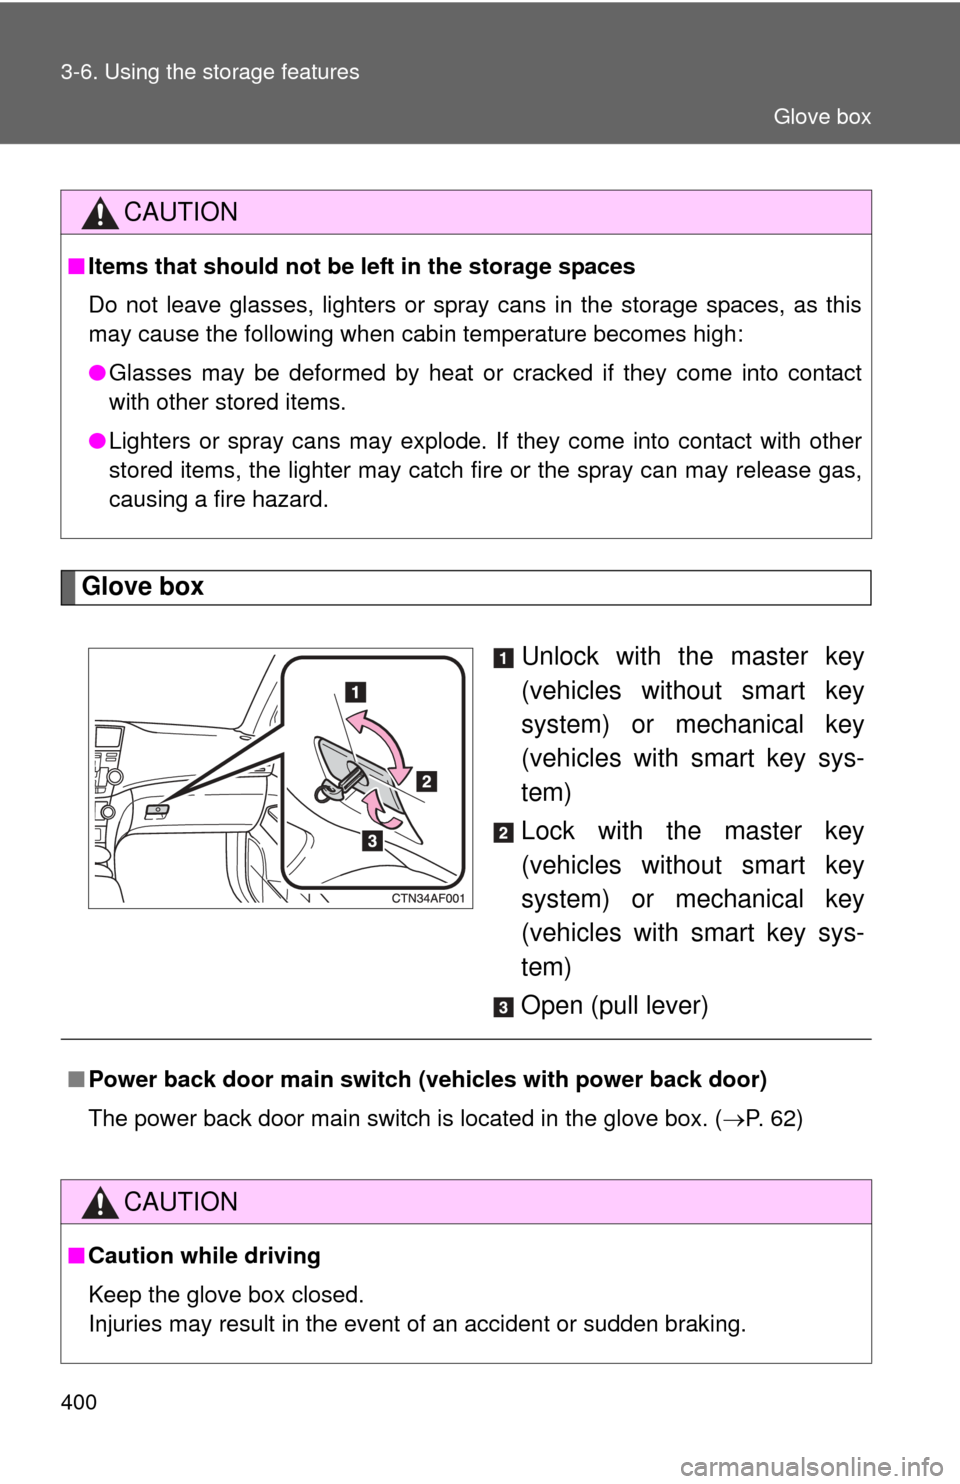
Glove boxUnlock with the master key
(vehicles without smart key
system) or mechanical key
(vehicles with smart key sys-
tem)
Lock with the master key
(vehicles without smart key
system) or mechanical key
(vehicles with smart key sys-
tem)
Open (pull lever)
CAUTION
■ Items that should not be left in the storage spaces
Do not leave glasses, lighters or spray cans in the storage spaces, as this
may cause the following when cabin temperature becomes high:
● Glasses may be deformed by heat or cracked if they come into contact
with other stored items.
● Lighters or spray cans may explode. If they come into contact with other
stored items, the lighter may catch fire or the spray can may release gas,
causing a fire hazard.
■Power back door main switch ( vehicles with power back door)
The power back door main switch is located in the glove box. ( P. 62)
CAUTION
■Caution while driving
Keep the glove box closed.
Injuries may result in the event of an accident or sudden braking.
Glove box
Page 418 of 636
418 3-7. Other interior features
■The power outlet can be used when
12 V
Vehicles without smart key system:
The engine switch is in the “ACC” or “ON” position.
Vehicles with smart key system:
The “ENGINE START STOP” switch is in ACCESSORY or IGNITION ON
mode.
120 VAC
Vehicles without smart key system:
The engine switch is in the “ON” position.
Vehicles with smart key system:
The “ENGINE START STOP” switch is in IGNITION ON mode.
Page 420 of 636
420
3-7. Other interior features
Seat heaters
■The seat heaters can be used when
Vehicles without smart key system
The engine switch is in the “ON” position. Vehicles with smart key system
The “ENGINE START STOP” switch is in IGNITION ON mode.
■ When not in use
Turn the knob fully counterclockwise. The indicator light turns off.
Press the knob into the recessed position.
Pops the knob out
On
The indicator light comes on.
Adjusts the seat tempera-
ture
The further you turn the knob
clockwise, the warmer the seat
becomes.Front passenger's seat
Driver's seat
: If equipped