2012 SUBARU OUTBACK battery replacement
[x] Cancel search: battery replacementPage 90 of 474

Keys..................................................................... 2-2
Key number ........................................................ 2-2
Immobilizer .......................................................... 2-3
Security ID plate .................................................. 2-3
Security indicator light ........................................ 2-4
Key replacement ................................................. 2-4
Door locks ........................................................... 2-4
Locking and unlocking from the outside .. ............ 2-4
Locking and unlocking from the inside ................ 2-5
Battery drainage prevention function ................... 2-6
Power door locking switches ............................. 2-6
Key lock-in prevention function ........................... 2-7
Remote keyless entry system ............................ 2-7
Locking the doors ............................................... 2-8
Unlocking the doors ............................................ 2-9
Opening the trunk lid (Legacy) ............................. 2-9
Unlocking the rear gate (Outback) ........................ 2-9
Vehicle finder function ......................................... 2-9
Sounding a panic alarm ...................................... 2-10
Selecting audible signal operation ...................... 2-10
Replacing the battery ......................................... 2-10
Replacing lost transmitters ................................. 2-12 Alarm system
..................................................... 2-15
System alarm operation ..................................... 2-15
Activating and deactivating the alarm system ..... 2-15
If you have accidentally triggered the alarm system ............................................................ 2-16
Arming the system ............................................ 2-16
Disarming the system ........................................ 2-17
Valet mode ........................................................ 2-18
Passive arming .................................................. 2-18
Tripped sensor identification .............................. 2-19
Shock sensors (dealer option).. .......................... 2-19
Child safety locks .............................................. 2-19
Windows ............................................................. 2-20
Power window operation by driver ..................... 2-20
Power window operation by passengers ............. 2-22
Initialization of power window .. .......................... 2-23
Trunk lid (Legacy) .............................................. 2-23
To open and close the trunk lid from outside . ..... 2-23
To open the trunk lid from inside. ....................... 2-24
Internal trunk lid release handle ......................... 2-24
Rear gate (Outback) ........................................... 2-26
Moonroof (if equipped) ...................................... 2-27
Moonroof switches ............................................ 2-28
Sun shade ......................................................... 2-29 Keys and doors
2
Page 99 of 474
2-10Keys and doors
NOTE
If the interval between presses is too
short when you press the “
”button
three times, the system may not re-
spond to the signals from the remote
transmitter.
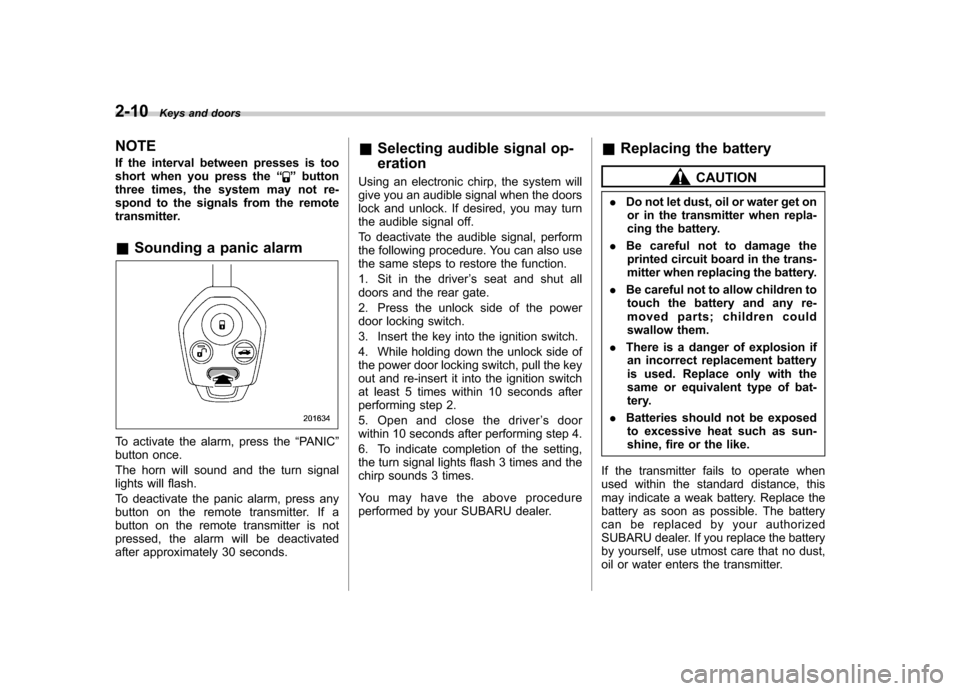
& Sounding a panic alarm
To activate the alarm, press the “PANIC ”
button once.
The horn will sound and the turn signal
lights will flash.
To deactivate the panic alarm, press any
button on the remote transmitter. If a
button on the remote transmitter is not
pressed, the alarm will be deactivated
after approximately 30 seconds. &
Selecting audible signal op- eration
Using an electronic chirp, the system will
give you an audible signal when the doors
lock and unlock. If desired, you may turn
the audible signal off.
To deactivate the audible signal, perform
the following procedure. You can also use
the same steps to restore the function.
1. Sit in the driver ’s seat and shut all
doors and the rear gate.
2. Press the unlock side of the power
door locking switch.
3. Insert the key into the ignition switch.
4. While holding down the unlock side of
the power door locking switch, pull the key
out and re-insert it into the ignition switch
at least 5 times within 10 seconds after
performing step 2.
5. Open and close the driver ’s door
within 10 seconds after performing step 4.
6. To indicate completion of the setting,
the turn signal lights flash 3 times and the
chirp sounds 3 times.
You may have the above procedure
performed by your SUBARU dealer. &
Replacing the battery
CAUTION
. Do not let dust, oil or water get on
or in the transmitter when repla-
cing the battery.
. Be careful not to damage the
printed circuit board in the trans-
mitter when replacing the battery.
. Be careful not to allow children to
touch the battery and any re-
moved parts; children could
swallow them.
. There is a danger of explosion if
an incorrect replacement battery
is used. Replace only with the
same or equivalent type of bat-
tery.
. Batteries should not be exposed
to excessive heat such as sun-
shine, fire or the like.
If the transmitter fails to operate when
used within the standard distance, this
may indicate a weak battery. Replace the
battery as soon as possible. The battery
can be replaced by your authorized
SUBARU dealer. If you replace the battery
by yourself, use utmost care that no dust,
oil or water enters the transmitter.
Page 110 of 474
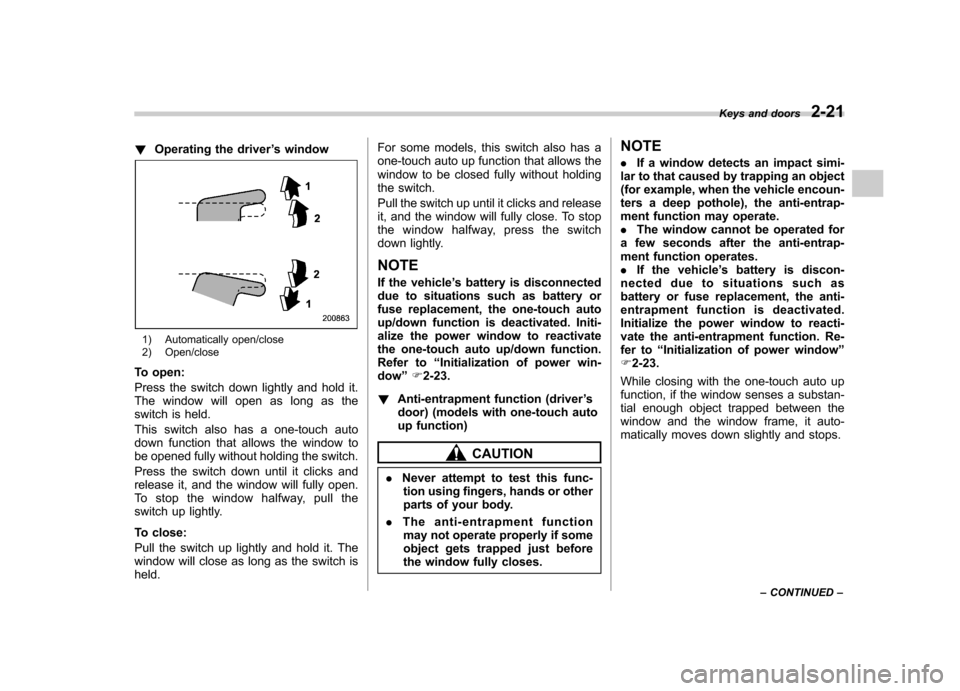
!Operating the driver ’s window
1) Automatically open/close
2) Open/close
To open:
Press the switch down lightly and hold it.
The window will open as long as the
switch is held.
This switch also has a one-touch auto
down function that allows the window to
be opened fully without holding the switch.
Press the switch down until it clicks and
release it, and the window will fully open.
To stop the window halfway, pull the
switch up lightly.
To close:
Pull the switch up lightly and hold it. The
window will close as long as the switch isheld. For some models, this switch also has a
one-touch auto up function that allows the
window to be closed fully without holding
the switch.
Pull the switch up until it clicks and release
it, and the window will fully close. To stop
the window halfway, press the switch
down lightly.
NOTE
If the vehicle ’s battery is disconnected
due to situations such as battery or
fuse replacement, the one-touch auto
up/down function is deactivated. Initi-
alize the power window to reactivate
the one-touch auto up/down function.
Refer to “Initialization of power win-
dow ”F 2-23.
! Anti-entrapment function (driver ’s
door) (models with one-touch auto
up function)
CAUTION
. Never attempt to test this func-
tion using fingers, hands or other
parts of your body.
. The anti-entrapment function
may not operate properly if some
object gets trapped just before
the window fully closes. NOTE .
If a window detects an impact simi-
lar to that caused by trapping an object
(for example, when the vehicle encoun-
ters a deep pothole), the anti-entrap-
ment function may operate.. The window cannot be operated for
a few seconds after the anti-entrap-
ment function operates.. If the vehicle ’s battery is discon-
nected due to situations such as
battery or fuse replacement, the anti-
entrapment functi on is deactivated.
Initialize the power window to reacti-
vate the anti-entrapment function. Re-
fer to “Initialization of power window ”
F 2-23.
While closing with the one-touch auto up
function, if the window senses a substan-
tial enough object trapped between the
window and the window frame, it auto-
matically moves down slightly and stops. Keys and doors
2-21
– CONTINUED –
Page 112 of 474
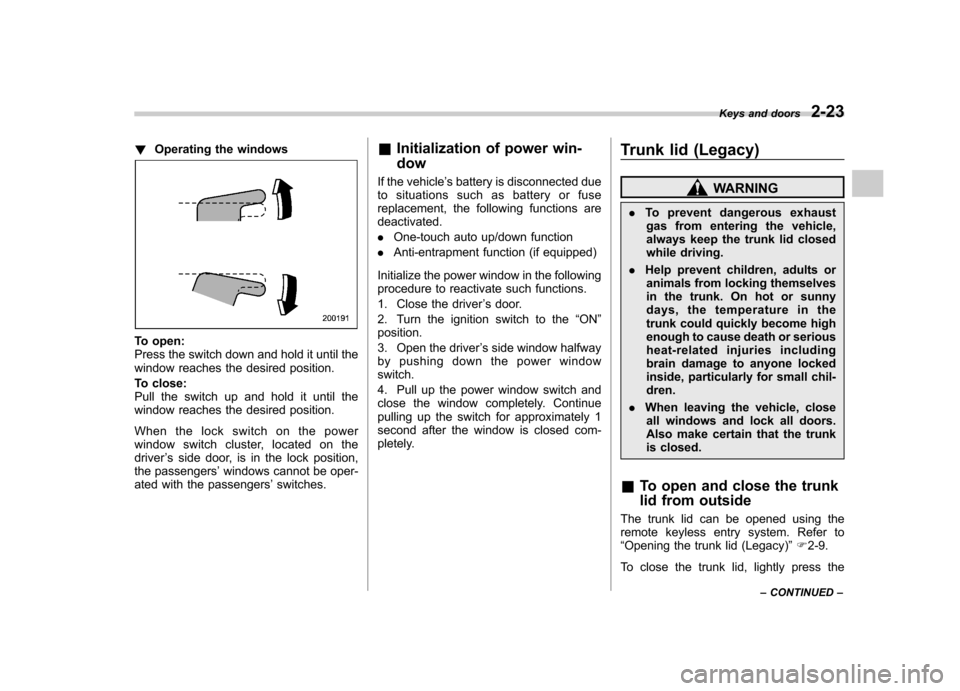
!Operating the windows
To open:
Press the switch down and hold it until the
window reaches the desired position.
To close:
Pull the switch up and hold it until the
window reaches the desired position.
When the lock switch on the power
window switch cluster, located on thedriver ’s side door, is in the lock position,
the passengers ’windows cannot be oper-
ated with the passengers ’switches. &
Initialization of power win- dow
If the vehicle ’s battery is disconnected due
to situations such as battery or fuse
replacement, the following functions aredeactivated. . One-touch auto up/down function
. Anti-entrapment function (if equipped)
Initialize the power window in the following
procedure to reactivate such functions.
1. Close the driver ’s door.
2. Turn the ignition switch to the “ON ”
position.
3. Open the driver ’s side window halfway
by pushing down the power window switch.
4. Pull up the power window switch and
close the window completely. Continue
pulling up the switch for approximately 1
second after the window is closed com-
pletely. Trunk lid (Legacy)
WARNING
. To prevent dangerous exhaust
gas from entering the vehicle,
always keep the trunk lid closed
while driving.
. Help prevent children, adults or
animals from locking themselves
in the trunk. On hot or sunny
days, the temperature in the
trunk could quickly become high
enough to cause death or serious
heat-related injuries including
brain damage to anyone locked
inside, particularly for small chil-dren.
. When leaving the vehicle, close
all windows and lock all doors.
Also make certain that the trunk
is closed.
& To open and close the trunk
lid from outside
The trunk lid can be opened using the
remote keyless entry system. Refer to“ Opening the trunk lid (Legacy) ”F 2-9.
To close the trunk lid, lightly press the Keys and doors
2-23
– CONTINUED –
Page 126 of 474
possible to switch between the A trip
meter and B trip meter indications while
the odometer/trip meter is lit up. If you do
not press the trip knob within 10 seconds
of illumination of the odometer/trip meter,
the odometer/trip meter will turn off.
Also, if you open and close the driver’s
door within 10 seconds of illumination of
the odometer/trip meter, the odometer/trip
meter will turn off.
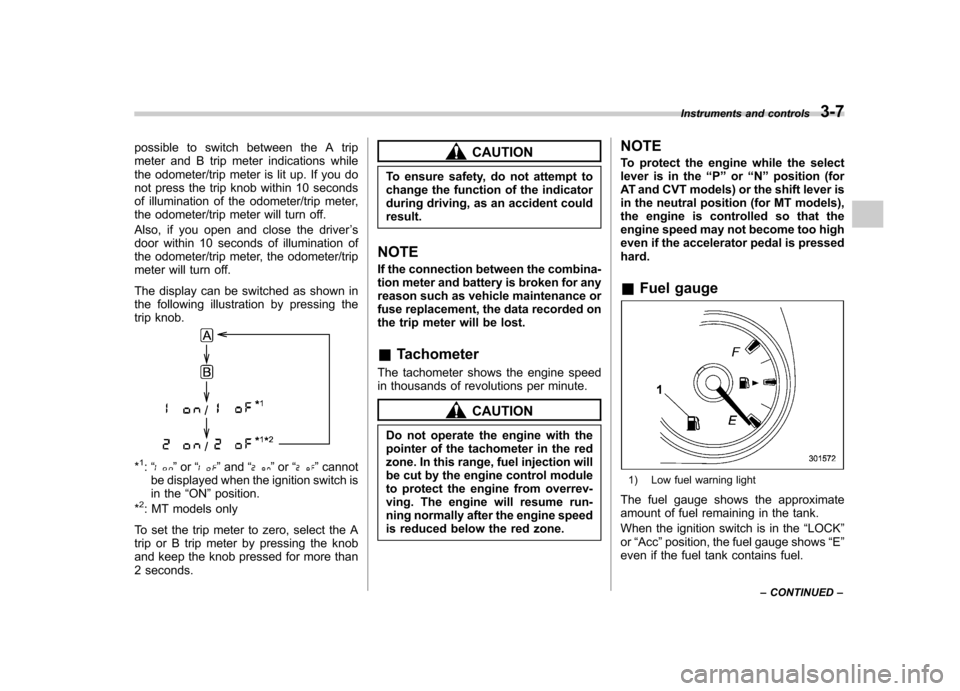
The display can be switched as shown in
the following illustration by pressing the
trip knob.
*1: “” or “”and “”or “”cannot
be displayed when the ignition switch is
in the “ON ”position.
*
2: MT models only
To set the trip meter to zero, select the A
trip or B trip meter by pressing the knob
and keep the knob pressed for more than
2 seconds.
CAUTION
To ensure safety, do not attempt to
change the function of the indicator
during driving, as an accident couldresult.
NOTE
If the connection between the combina-
tion meter and battery is broken for any
reason such as vehicle maintenance or
fuse replacement, the data recorded on
the trip meter will be lost. & Tachometer
The tachometer shows the engine speed
in thousands of revolutions per minute.
CAUTION
Do not operate the engine with the
pointer of the tachometer in the red
zone. In this range, fuel injection will
be cut by the engine control module
to protect the engine from overrev-
ving. The engine will resume run-
ning normally after the engine speed
is reduced below the red zone. NOTE
To protect the engine while the select
lever is in the
“P ” or “N ” position (for
AT and CVT models) or the shift lever is
in the neutral position (for MT models),
the engine is controlled so that the
engine speed may not become too high
even if the accelerator pedal is pressedhard.
& Fuel gauge
1) Low fuel warning light
The fuel gauge shows the approximate
amount of fuel remaining in the tank.
When the ignition switch is in the “LOCK ”
or “Acc ”position, the fuel gauge shows “E ”
even if the fuel tank contains fuel. Instruments and controls
3-7
– CONTINUED –
Page 291 of 474
7-14Starting and operating
will flash one time.
7. Repeat step 5 for any additional
transmitters (the system will accept up to
eight transmitters).
8. The system will exit the transmitter
learn mode if the key is turned to the“LOCK ”position, the door is closed or
after 2 minutes. & System maintenance
NOTE
In the event that the vehicle ’s battery is
replaced, discharged or disconnected,
it will be necessary to start the vehicle
a minimum of one time using the key
prior to activating the remote engine
start system. This is required to allow
the vehicle electronic systems to re-synchronize. ! Changing the batteries
CAUTION
. Do not let dust, oil or water get on
or in the remote engine start
transmitter when replacing the
battery.
. Be careful not to damage the
printed circuit board in the re-
mote engine start transmitter
when replacing the battery. .
Be careful not to allow children to
touch the battery and any re-
moved parts; children could
swallow them.
. There is a danger of explosion if
an incorrect replacement battery
is used. Replace only with the
same or equivalent type of bat-
tery.
. Batteries should not be exposed
to excessive heat such as sun-
shine, fire or the like.
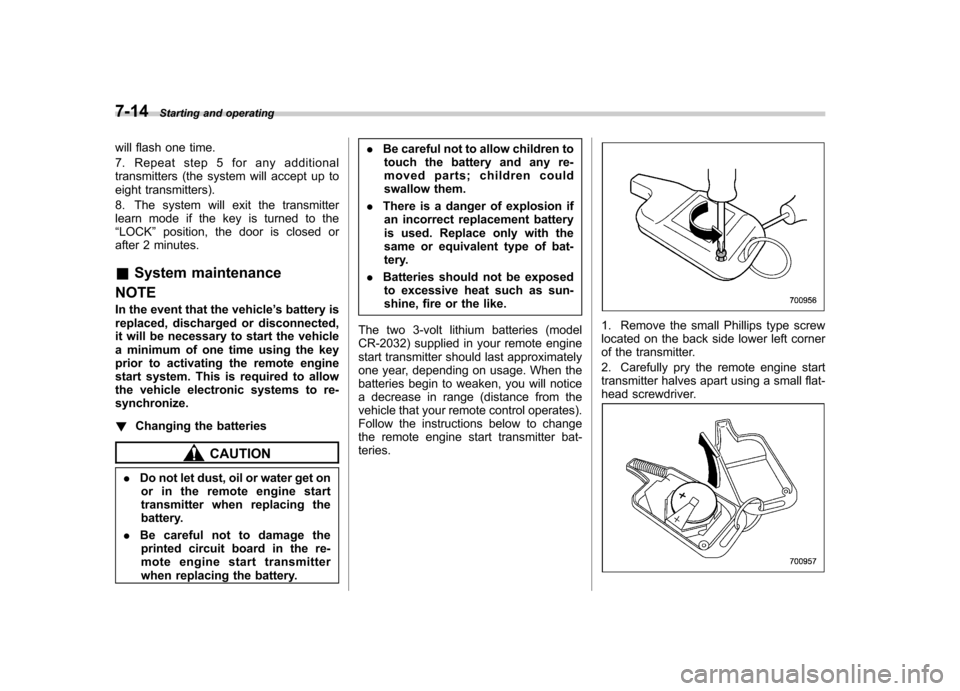
The two 3-volt lithium batteries (model
CR-2032) supplied in your remote engine
start transmitter should last approximately
one year, depending on usage. When the
batteries begin to weaken, you will notice
a decrease in range (distance from the
vehicle that your remote control operates).
Follow the instructions below to change
the remote engine start transmitter bat-teries.
1. Remove the small Phillips type screw
located on the back side lower left corner
of the transmitter.
2. Carefully pry the remote engine start
transmitter halves apart using a small flat-
head screwdriver.
Page 373 of 474

Maintenance and serviceTires and wheels .............................................. 11-30
Types of tires ................................................... 11-30
Tire pressure monitoring system (TPMS) (if equipped) ................................................... 11-30
Tire inspection ................................................. 11-32
Tire pressures and wear ................................... 11-32
Wheel balance .................................................. 11-34
Wear indicators ................................................ 11-35
Tire rotation direction mark .............................. 11-35
Tire rotation ..................................................... 11-35
Tire replacement .............................................. 11-36
Wheel replacement ........................................... 11-37
Aluminum wheels ............................................. 11-37
Windshield washer fluid .................................. 11-37
Replacement of wiper blades .......................... 11-39
Windshield wiper blade assembly ..................... 11-39
Windshield wiper blade rubber ......................... 11-40
Rear window wiper blade assembly (Outback) ....................................................... 11-41
Rear window wiper blade rubber (Outback) ... .... 11-41Battery
.............................................................. 11-43
Fuses ................................................................ 11-44
Installation of accessories .............................. 11-45
Replacing bulbs ............................................... 11-45
Headlight ......................................................... 11-45
Front turn signal light ...................................... 11-48
Front position light .......................................... 11-48
Front fog light (if equipped) .............................. 11-48
Rear combination lights ................................... 11-49
Tail/Back-up light (Outback) ............................. 11-51
License plate light ........................................... 11-52
Dome light ....................................................... 11-53
Map light ......................................................... 11-54
Vanity mirror light ............................................ 11-54
Door step light ................................................. 11-55
Cargo area light (Outback) ............................... 11-55
Trunk light (Legacy) ......................................... 11-55
Other bulbs ..................................................... 11-55
Page 374 of 474
Maintenance schedule
The scheduled maintenance items re-
quired to be serviced at regular intervals
are shown in the“Warranty and Main-
tenance Booklet ”.
For details about your maintenance sche-
dule, read the separate “Warranty and
Maintenance Booklet ”. Maintenance precautions
When maintenance and service are re-
quired, it is recommended that all work be
done by an authorized SUBARU dealer.
If you perform maintenance and service
by yourself, you should familiarize yourself
with the information provided in this
section on general maintenance and
service for your SUBARU.
Incorrect or incomplete service could
cause improper or unsafe vehicle opera-
tion. Any problems caused by improper
maintenance and service performed by
you are not eligible for warranty coverage.
WARNING
. Testing of an All-Wheel Drive
vehicle must NEVER be per-
formed on a single two-wheel
dynamometer or similar appara-
tus. Attempting to do so will
result in transmission damage
and in uncontrolled vehicle
movement and may cause an
accident or injuries to persons
nearby.
. Always select a safe area when
performing maintenance on yourvehicle. .
Always be very careful to avoid
injury when working on the vehi-
cle. Remember that some of the
materials in the vehicle may be
hazardous if improperly used or
handled, for example, batteryacid.
. Your vehicle should only be ser-
viced by persons fully competent
to do so. Serious personal injury
may result to persons not experi-
enced in servicing vehicles.
. Always use the proper tools and
make certain that they are wellmaintained.
. Never get under the vehicle sup-
ported only by a jack. Always use
safety stands to support thevehicle.
. Never keep the engine running in
a poorly ventilated area, such as
a garage or other closed areas.
. Do not smoke or allow open
flames around the fuel or battery.
This will cause a fire.
. Because the fuel system is under
pressure, replacement of the fuel
filter should be performed only
by your SUBARU dealer.
. Wear adequate eye protection to Maintenance and service
11-3
– CONTINUED –