2012 SUBARU OUTBACK heater
[x] Cancel search: heaterPage 6 of 474

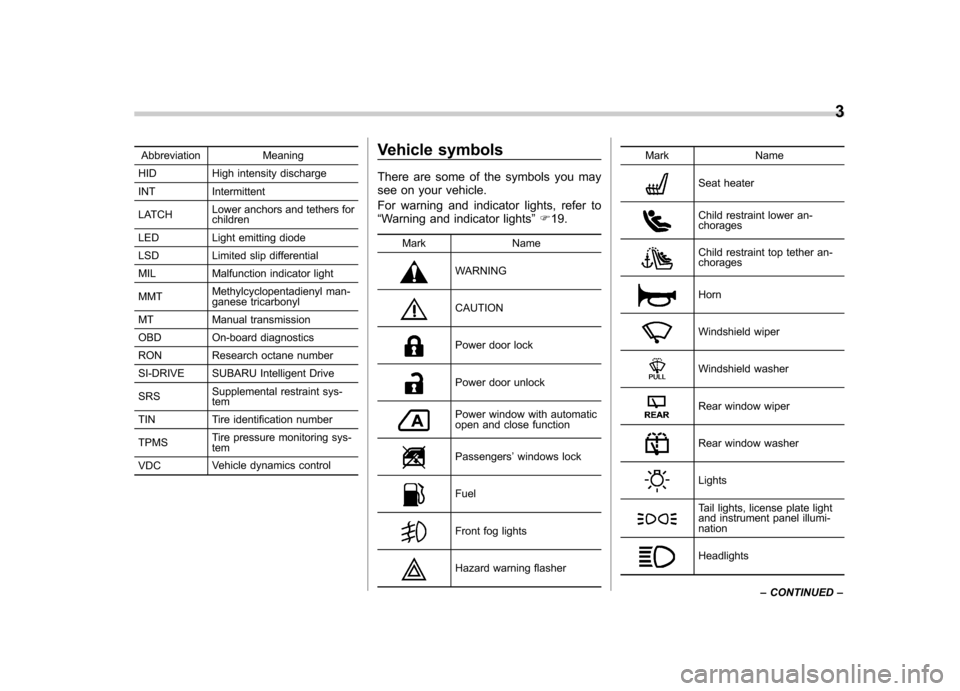
Abbreviation Meaning
HID High intensity discharge
INT Intermittent
LATCH Lower anchors and tethers for children
LED Light emitting diode
LSD Limited slip differential
MIL Malfunction indicator light MMT Methylcyclopentadienyl man-
ganese tricarbonyl
MT Manual transmission
OBD On-board diagnostics
RON Research octane number
SI-DRIVE SUBARU Intelligent Drive SRS Supplemental restraint sys- tem
TIN Tire identification number TPMS Tire pressure monitoring sys- tem
VDC Vehicle dynamics control Vehicle symbols
There are some of the symbols you may
see on your vehicle.
For warning and indicator lights, refer to “
Warning and indicator lights ”F 19.
Mark Name
WARNING
CAUTION
Power door lock
Power door unlock
Power window with automatic
open and close function
Passengers ’windows lock
Fuel
Front fog lights
Hazard warning flasher Mark Name
Seat heater
Child restraint lower an-
chorages
Child restraint top tether an-
chorages
Horn
Windshield wiper
Windshield washer
Rear window wiper
Rear window washer
Lights
Tail lights, license plate light
and instrument panel illumi-nation
Headlights3
– CONTINUED –
Page 24 of 474

Front seats........................................................... 1-2
Manual seat (if equipped) .................................... 1-3
Power seat (if equipped) ...................................... 1-4
Head restraint adjustment .................................... 1-6
Seat heater (if equipped) .................................... 1-6
Rear seats ............................................................ 1-7
Reclining the seatback (Outback) ......................... 1-8
Folding down the rear seatback ........................... 1-9
Head restraint adjustment ................................... 1-10
Armrest ............................................................. 1-12
Seatbelts ............................................................. 1-12
Seatbelt safety tips ............................................. 1-12
Emergency Locking Retractor (ELR) ................... 1-13
Automatic/Emergency Locking Retractor (A/ELR) ............................................................ 1-13
Seatbelt warning light and chime ........................ 1-14
Fastening the seatbelt ........................................ 1-14
Seatbelt maintenance ......................................... 1-20
Front seatbelt pretensioners ............................. 1-21
System monitors ................................................ 1-22
System servicing ................................................ 1-22 Precautions against vehicle modification
............ 1-22
Child restraint systems ..................................... 1-23
Where to place a child restraint system .............. 1-24
Choosing a child restraint system ...................... 1-25
Installing child restraint systems with A/ELR seatbelt ........................................................... 1-26
Installing a booster seat ..................................... 1-29
Installation of child restraint systems by use of lower and tether anchorages (LATCH) .............. 1-30
Top tether anchorages ....................................... 1-33
*SRS airbag (Supplemental Restraint System airbag) ................................................ 1-36
General precautions regarding SRS airbag system ............................................................ 1-36
Components ...................................................... 1-42
SUBARU advanced frontal airbag system, SRS side airbag and SRS curtain airbag .................. 1-45
System operation ............................................... 1-50
SRS airbag system monitors .............................. 1-62
SRS airbag system servicing ... .......................... 1-63
Precautions against vehicle modification ............ 1-64
Seat, seatbelt and SRS airbags1
Page 29 of 474

1-6Seat, seatbelt and SRS airbags
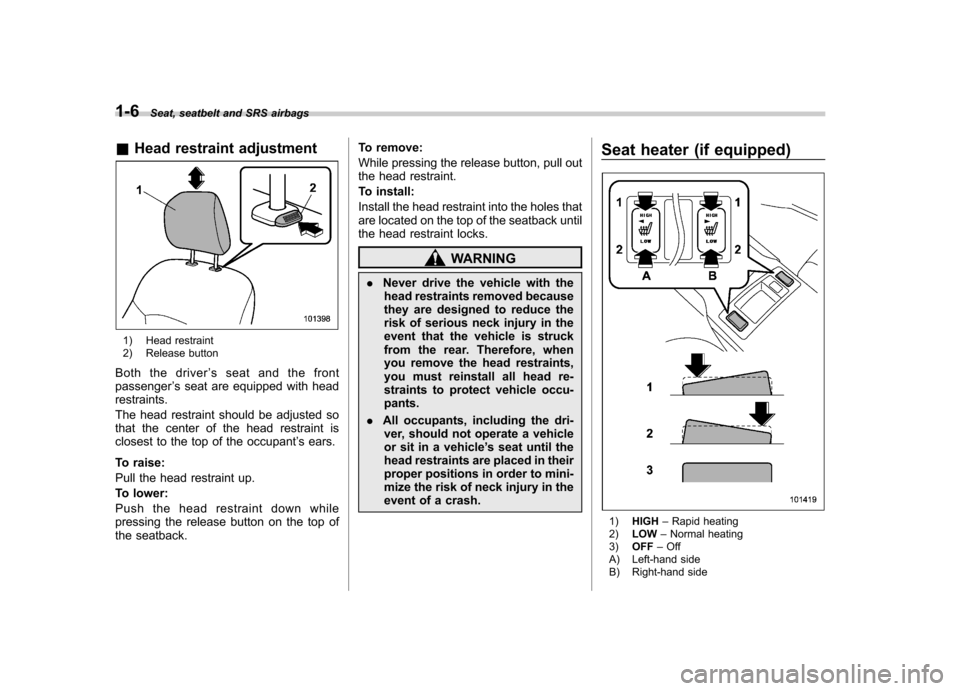
&Head restraint adjustment
1) Head restraint
2) Release button
Both the driver ’s seat and the front
passenger ’s seat are equipped with head
restraints.
The head restraint should be adjusted so
that the center of the head restraint is
closest to the top of the occupant ’s ears.
To raise:
Pull the head restraint up.
To lower:
Push the head restraint down while
pressing the release button on the top of
the seatback. To remove:
While pressing the release button, pull out
the head restraint.
To install:
Install the head restraint into the holes that
are located on the top of the seatback until
the head restraint locks.
WARNING
. Never drive the vehicle with the
head restraints removed because
they are designed to reduce the
risk of serious neck injury in the
event that the vehicle is struck
from the rear. Therefore, when
you remove the head restraints,
you must reinstall all head re-
straints to protect vehicle occu-pants.
. All occupants, including the dri-
ver, should not operate a vehicle
or sit in a vehicle ’s seat until the
head restraints are placed in their
proper positions in order to mini-
mize the risk of neck injury in the
event of a crash. Seat heater (if equipped)
1)
HIGH –Rapid heating
2) LOW –Normal heating
3) OFF –Off
A) Left-hand side
B) Right-hand side
Page 30 of 474

The seat heater operates when the igni-
tion switch is either in the“Acc ”or “ON ”
position.
To turn on the seat heater, press the “ LOW ”or “HIGH ”position on the switch,
as desired, depending on the tempera-ture.
Selecting the “HIGH ”position will cause
the seat to heat up quicker.
To turn off the seat heater, slightly press
the opposite side of the current position.
The indicator located on the switch illumi-
nates when the seat heater is in operation.
When the vehicle ’s interior is warmed
enough or before you leave the vehicle,
be sure to turn the switch off.
CAUTION
. There is a possibility that people
with delicate skin may suffer
slight burns even at low tempera-
tures if they use the seat heater
for a long period of time. When
using the heater, always be sure
to warn the persons concerned. .
Do not put anything on the seat
which insulates against heat,
such as a blanket, cushion, or
similar items. This may cause the
seat heater to overheat.
NOTE
Use of the seat heater for a long period
of time while the engine is not running
can cause battery discharge. Rear seats
WARNING
Seatbelts provide maximum re-
straint when the occupant sits well
back and upright in the seat. Do not
put cushions or any other materials
between occupants and seatbacks
or seat cushions. If you do so, the
risk of sliding under the lap belt and
of the lap belt sliding up over the
abdomen will increase, and both can
result in serious internal injury ordeath. Seat, seatbelt and SRS airbags
1-7
– CONTINUED –
Page 158 of 474

!Compass calibration
1. For optimum calibration, switch off all
nonessential electrical accessories (rear
window defogger, heater/air conditioning
system, spotlight, etc.) and ensure all
doors are shut.
2. Drive to an open, level area away from
large metallic objects or structures and
make certain the ignition switch is in the“ ON ”position.
3. Press and hold the compass button for
6 to 9 seconds, and then release it. The
compass will enter the calibration mode,then “C ” and the direction will be dis-
played.
4. Drive slowly in a circle until “C ”
disappears from the display. Driving in
two or three circles might be necessary.
The compass is now calibrated.
5. Further calibration may be necessary
should outside influences cause the com-
pass to read inaccurately. You will notice
any outside influence if the compass tends
to read in only one particular direction.
Should you encounter this situation, return
to step 1 of the above procedure and
recalibrate the compass. !
HomeLink®Wireless Control Sys-
tem
The HomeLink
®Wireless Control System
can be used to activate remote control
devices such as gate operators, garage
door openers, door locks, home lighting
and security systems.
There are three HomeLink
®buttons on the
mirror, each of which can be programmed
for operation of one desired device. For
details on the device types which can be
operated by this system, consult theHomeLink
®website at:
www.homelink.com or call 1-800-355-3515.
Note the following information about this system.
Ifyourvehicleisequippedwiththe HomeLink
®Wireless Control System, it
complies with Part 15 of the Federal
Communications Commission Rules in
the U.S. and the RSS-210 of Industry
Canada in Canada. Its operation is subject
to the following two conditions:
(1) this device may not cause harmful
interference, and (2) this device must
accept any interference received, includ-
ing interference that may cause undesiredoperation.
Changes and modifications to this system by anyone other than an authorized
service facility could void authorization to
use this equipment. HomeLink
®and the HomeLink®house are
registered trademarks of Johnson Con-
trols, Inc.
WARNING
. When programming the
HomeLink
®Wireless Control Sys-
tem, you may be operating a
garage door opener or other
device. Make sure that people
and objects are out of the way
ofthegaragedoororother
device to prevent potential harm
or damage.
. Do not use the HomeLink
®Wire-
less Control System with a gar-
age door opener that lacks the
safety stop and reverse feature
as required by applicable safety
standards. A garage door opener
which cannot detect an object,
signaling the door to stop and
reverse, does not meet these
safety standards. Using a garage
door opener without these fea-
tures increases risk of serious
injury or death. For more infor-
mation, consult the HomeLink
®
Instruments and controls 3-39
– CONTINUED –
Page 172 of 474

Ventilator control................................................. 4-2
Center ventilators ................................................ 4-2
Side ventilators ................................................... 4-2
Climate control panel .......................................... 4-3
Type A ................................................................ 4-3
Type B ................................................................ 4-4
Automatic climate control system (type B) ....... 4-5
Temperature sensors ........................................... 4-5
Manual climate control ....................................... 4-6
Airflow mode selection ........................................ 4-6
Temperature control ............................................ 4-7
Fan speed control ............................................... 4-7
Air conditioner control ........................................ 4-7
Air inlet selection ................................................ 4-7
Defrosting ............................................................ 4-8 Operating tips for heater and air
conditioner ........................................................ 4-8
Cleaning ventilator grille ...................................... 4-8
Efficient cooling after parking in direct sunlight ............................................................. 4-8
Lubrication oil circulation in the refrigerant circuit ................................................................ 4-9
Checking air conditioning system before summer season .............................................................. 4-9
Cooling and dehumidifying in high humidity and low temperature weather condition ..................... 4-9
Air conditioner compressor shut-off when engine is heavily loaded ................................................ 4-9
Refrigerant for your climate control system ... ....... 4-9
Air filtration system ............................................. 4-9
Replacing an air filter ......................................... 4-10Climate control
4
Page 179 of 474

4-8Climate control
ON position is selected, the indicator light
on the air inlet selection button illuminates.
OFF position (outside air) : Outside air is
drawn into the passenger compartment.
Press the air inlet selection button to the
OFF position when the interior has cooled
to a comfortable temperature and the road
is no longer dusty. The indicator light will
turn off.
WARNING
Continued operation in the ON posi-
tion may fog up the windows. Switch
to the OFF position as soon as the
outside dusty condition clears. Defrosting
Select the desired
“
”mode or “”mode
to defrost or dehumidify the windshield
and front door windows by performing the
following procedures.
For type A: Press the airflow control button
and select the “
”mode or “”mode.
For type B: Press the airflow mode
selection button to select the “
”mode
or press the defroster button to select the “
” mode.
NOTE
When the “
”mode or “”mode is
selected, the air conditioner compres-
sor automatically operates to more
quickly defog the windshield. At the
same time, the air inlet selection is
automatically set to the outside air
mode. For details, refer to “Airflow
mode selection ”F 4-6. Operating tips for heater and
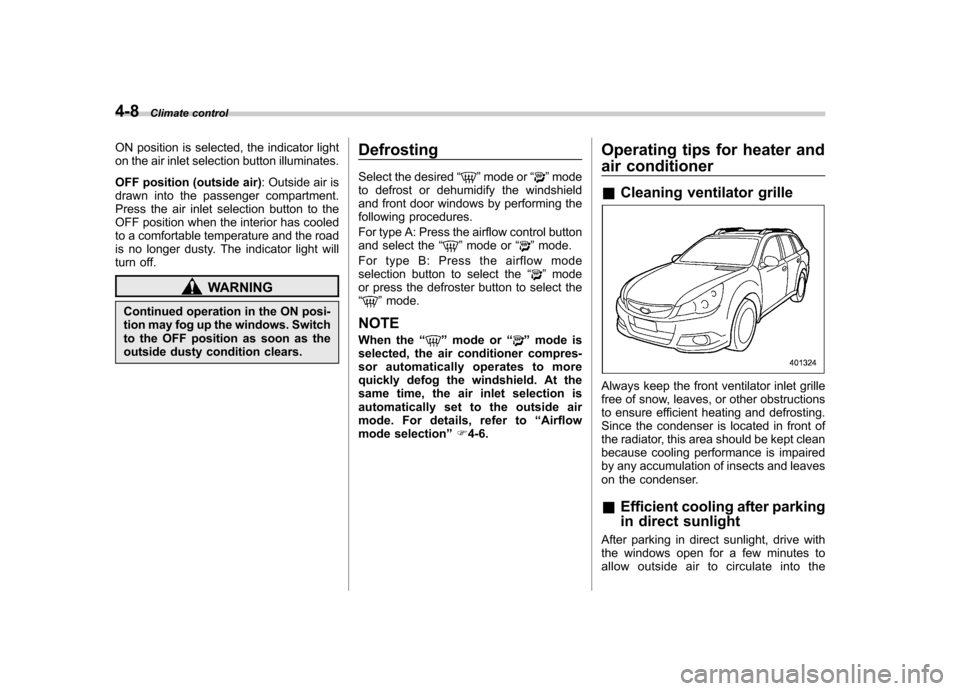
air conditioner &
Cleaning ventilator grille
Always keep the front ventilator inlet grille
free of snow, leaves, or other obstructions
to ensure efficient heating and defrosting.
Since the condenser is located in front of
the radiator, this area should be kept clean
because cooling performance is impaired
by any accumulation of insects and leaves
on the condenser. &Efficient cooling after parking
in direct sunlight
After parking in direct sunlight, drive with
the windows open for a few minutes to
allow outside air to circulate into the
Page 215 of 474

5-32Audio
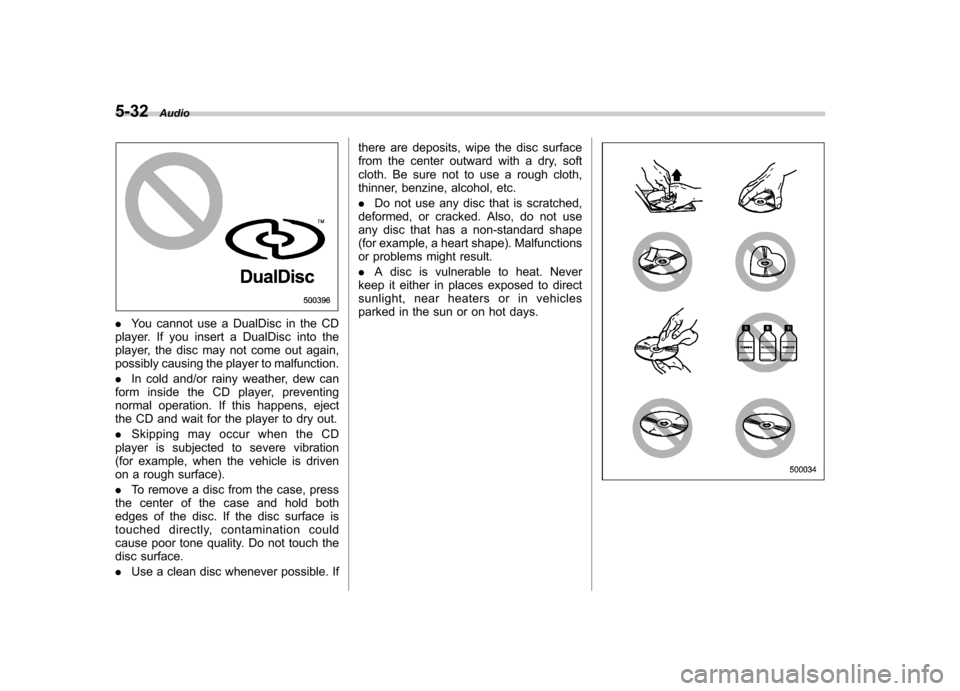
.You cannot use a DualDisc in the CD
player. If you insert a DualDisc into the
player, the disc may not come out again,
possibly causing the player to malfunction. . In cold and/or rainy weather, dew can
form inside the CD player, preventing
normal operation. If this happens, eject
the CD and wait for the player to dry out. . Skipping may occur when the CD
player is subjected to severe vibration
(for example, when the vehicle is driven
on a rough surface). . To remove a disc from the case, press
the center of the case and hold both
edges of the disc. If the disc surface is
touched directly, contamination could
cause poor tone quality. Do not touch the
disc surface. . Use a clean disc whenever possible. If there are deposits, wipe the disc surface
from the center outward with a dry, soft
cloth. Be sure not to use a rough cloth,
thinner, benzine, alcohol, etc. .
Do not use any disc that is scratched,
deformed, or cracked. Also, do not use
any disc that has a non-standard shape
(for example, a heart shape). Malfunctions
or problems might result. . A disc is vulnerable to heat. Never
keep it either in places exposed to direct
sunlight, near heaters or in vehicles
parked in the sun or on hot days.