2012 SUBARU OUTBACK AUX
[x] Cancel search: AUXPage 184 of 474

Antenna system...................................................... 5-3
Printed antenna ...................................................... 5-3
FM reception .......................................................... 5-3
Installation of accessories ...................................... 5-3
Audio set ................................................................. 5-4
Type A audio set (if equipped) ................................ 5-5
Type B audio set (if equipped) ................................ 5-6
Type C audio set (if equipped) ................................ 5-7
Power and audio controls ...................................... 5-8
Power switch and volume control ........................... 5-8
Sound controls and audio settings ......................... 5-8
Adjustable level of each mode ............................... 5-11
FM/AM radio operation ......................................... 5-12
FM selection (type A and B audio) ......................... 5-12
AM selection (type A and B audio) ......................... 5-12
FM/AM selection (type C audio) ............................. 5-12
Tuning .................................................................. 5-12
HD Radio
®Technology (Digital AM and FM Radio)
(type C audio) ..................................................... 5-15
RDS text display ................................................... 5-17
Station preset ....................................................... 5-18
Satellite radio operation (if equipped) ................. 5-19
Sirius XM Satellite Radio Activation (for U.S.A. only) ................................................................... 5-19
Satellite radio reception ......................................... 5-19
Displaying satellite radio ID of tuner ...................... 5-20
Band selection ...................................................... 5-20
Channel and category selection ............................. 5-21
Channel preset ...................................................... 5-22
When the following messages are displayed (type C audio) ..................................................... 5-22 CD player operation
..............................................5-23
Play file ................................................................ 5-23
How to insert a CD ............................................... 5-24
How to play back a CD ......................................... 5-24
To select a track from the beginning ..................... 5-24
Fast-forwarding and rewinding . ............................. 5-25
Repeating ............................................................. 5-26
Random playback ................................................. 5-27
Scan .................................................................... 5-28
Display selection (type A and B audio) .................. 5-28
Folder selection .................................................... 5-28
How to eject a CD from the player ......................... 5-29
When the following messages are displayed. . ........ 5-29
Auxiliary input jack ................................................5-30
Precautions to observe when handling a compact disc .......................................................5-31
USB storage device / iPod
®operations
(type B and C audio) ..........................................5-33
Play file ................................................................ 5-33
Connectable USB storage device .......................... 5-33
Connectable iPod
®models .................................... 5-33
Connecting USB storage device / iPod®................ 5-34
How to play back .................................................. 5-35
To select a track from the beginning ..................... 5-35
To select a chapter from the beginning when connecting iPod
®................................................ 5-35
Fast-forwarding and rewinding . ............................. 5-35
Repeating ............................................................. 5-36
Random playback ................................................. 5-36
SCAN (only when connecting USB storage device) ............................................................... 5-37 Audio
5
Page 188 of 474

&Type A audio set (if equipped)The audio set will operate only when the
ignition switch is in the “Acc ”or “ON ”
position. . Power and sound controls: refer to
page 5-8. Radio operation: refer to page 5-12
. Satellite radio operation (if equipped):
refer to page 5-19. CD (compact disc) player operation:
refer to page 5-23. Auxiliary input jack: refer to page 5-30 Audio
5-5
– CONTINUED –
Page 189 of 474

5-6Audio
& Type B audio set (if equipped)
The audio set will operate only when the
ignition switch is in the “Acc ”or “ON ”
position. . Power and audio controls: refer to page
5-8. Radio operation: refer to page 5-12
. Satellite radio operation (if equipped):
refer to page 5-19. CD (compact disc) player operation:
refer to page 5-23. Auxiliary input jack: refer to page 5-30
. USB storage device/iPod
®operation:
refer to page 5-33. Bluetooth
®audio: refer to page 5-43
. Hands-free system: refer to page 5-49
Page 190 of 474

&Type C audio set (if equipped)The audio set will operate only when the
ignition switch is in the “Acc ”or “ON ”
position. . Power and audio controls: refer to page
5-8. Radio operation: refer to page 5-12
. Satellite radio operation (if equipped):
refer to page 5-19. CD (compact disc) player operation:
refer to page 5-23. Auxiliary input jack: refer to page 5-30
. USB storage device/iPod
®operation:
refer to page 5-33. Bluetooth
®audio: refer to page 5-43
. Hands-free system: refer to page 5-49
NOTE
HD Radio Technology should be in-
cluded as a feature in the type C audio. Audio
5-7
Page 193 of 474

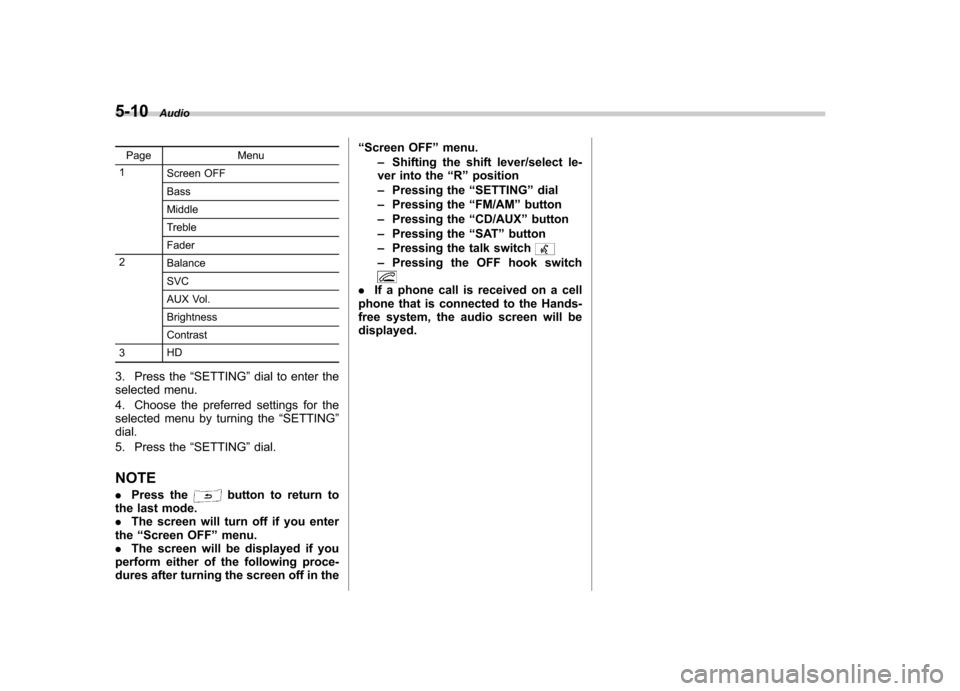
5-10Audio
Page Menu
1 Screen OFF BassMiddle
Treble Fader
2 BalanceSVC
AUX Vol. Brightness Contrast
3 HD
3. Press the “SETTING ”dial to enter the
selected menu.
4. Choose the preferred settings for the
selected menu by turning the “SETTING ”
dial.
5. Press the “SETTING ”dial.
NOTE . Press the
button to return to
the last mode. . The screen will turn off if you enter
the “Screen OFF ”menu.
. The screen will be displayed if you
perform either of the following proce-
dures after turning the screen off in the “
Screen OFF ”menu.
– Shifting the shift lever/select le-
ver into the “R ” position
– Pressing the “SETTING ”dial
– Pressing the “FM/AM ”button
– Pressing the “CD/AUX ”button
– Pressing the “SAT ”button
– Pressing the talk switch
–Pressing the OFF hook switch
. If a phone call is received on a cell
phone that is connected to the Hands-
free system, the audio screen will bedisplayed.
Page 194 of 474

&Adjustable level of each mode
Mode Range of levels (displayed)Initial setting Turn counterclockwise Turn clockwise
Volume Volume control 0 to 40 15 (type A and B audio)/16
(type C)For less volume For more volume
AUX volume control* (type
A and B audio) 0 to 40 15 For less volume For more volume
AUX volume control (type Caudio) LOW, MID, HIGH MID From HIGH to MID, MID to
LOW, LOW to HIGHFrom LOW to MID, MID to
HIGH, HIGH to LOW
Tone and balance Bass control �8 to +8 0 For less bass sound For more bass sound
Midrange control �8 to +8 0 For less midrange sound For more midrange sound
Treble control �8 to +8 0 For less treble sound For more treble sound
Fader R9 to F9 0 Front attenuated Rear attenuated
Balance L9 to R9 0 Right channel attenuated Left channel attenuated
Other settings SPEED VOLUME OFF to 2 OFF For less auto volume change For more auto volume change
CS Auto (type A audio) OFF to 2 OFF From 2 to 1, 1 to OFF From OFF to 1, 1 to 2
POSITION (type A audio) ALL, FR, FL ALL From FL to FR, FR to ALL From ALL to FR, FR to FL
SRS Sound (type B audio) OFF to ON OFF OFF ON
Beep (type B audio) OFF to ON ON OFF ON
Brightness (type C audio) �8 to +8 0 For less brightness For more brightness
Contrast (type C audio) �8 to +8 0 For less contrast For more contrast
HD Radio (type C audio) OFF to ON ON OFF ON
*For type A audio, only when an AUX audio product is connected. Audio
5-11
Page 207 of 474

5-24Audio
MP3: .Based on MPEG 1, 2 and 2.5 Layer 3
(type A and B audio). Based on MPEG 1, 2 and 2.5 Layer 2
and 3 (type C audio). Sampling rate (kHz): 48, 44.1, 32, 24,
22.05, 16, 12, 11.025, 8. Bit rate (kbps): 8 to 320 (type A and B
audio). Bit rate (kbps): 32 to 320 (type C audio)
. Supports variable bit rates
WMA (type B audio):. Based on Windows Media Audio 9
. Sampling rate (kHz): 48, 44.1, 32
. Bit rate (kbps): 32 to 192
WMA (type C audio): . Based on Windows Media Audio 7, 8
and 9 . Sampling rate (kHz): 48, 44.1, 32
. Bit rate (kbps): 32 to 192
AAC (type B audio):. Based on MPEG4 AAC
. Sampling rate (kHz): 48, 44.1, 32, 24,
22.05, 16, 12, 11.025, 8. Bit rate (kbps): 24 to 320
. Number of channels: 1 to 2ch AAC (type C audio):.
Based on MPEG2 AAC and MPEG4
AAC. Sampling rate (kHz): 48, 44.1, 32, 24,
22.05, 16, 12, 11.025, 8. Bit rate (kbps): 24 to 320
. Number of channels: 1 to 2ch
& How to insert a CD
While the ignition switch is in the “Acc ”or
“ ON ”position, hold a disc with a finger in
the center hole while gripping the edge of
the disc, then insert it in to the slot (with
the label side up) and the player will
automatically pull the disc into position.
NOTE
DO NOT INSERT TWO DISCS INTO THE
DISC INSERTION SLOT AT A TIME. & How to play back a CD
! When there is no CD inserted
Insert a CD by referring to “How to insert a
CD ”F 5-24.
When a CD is loaded, the player will start
playback of the CD, beginning with the
first track. !
When CD is in the player (type A)
When the
button is pressed, the
player will start playback. ! When CD is in the player (type B
and C)
Type B audio
Type C audio
Each brief press of the “CD/AUX ”button
changes the modes in the following sequence.
*: For type B audio, “BT-A ”is displayed.
When the CD mode is selected, the player
will start playback. & To select a track from the beginning
NOTE
With an MP3, WMA or AAC: . Skipping past the last track/file will
take you back to the first track/file in
the folder.
Page 211 of 474

5-28Audio
&Scan
Type A audio
Type B audio
Type C audio
The scan mode lets you listen to the first
10 seconds of each track/file in succes-
sion. Press the “SCAN ”button to start
scanning upward beginning with the track/
file(s) following the currently selected one.
After all track/file(s) in the disk/folder have
been scanned, normal playback will be
resumed. To cancel the scan mode, pressthe “SCAN ”button again.
NOTE
The scan mode will be cancelled if you
perform any of the following steps. . Press the “RPT/RDM ”button (type A
and B audio). . Press the “RPT ”button (type C
audio).. Press the “RDM ”button (type C
audio). .
Turn the “TUNE ”dial.
. Press the “
”or “”side of the
“ FOLDER ”button (type A and B audio).
. Press the “
”button.
. Press the “”or “”side of the
“ SEEK ”button.
. Select the radio or AUX mode.
. Turn off the power of the audio
equipment. . Turn the ignition switch to the
“ LOCK ”position.
& Display selection (type A and
B audio)
Type A audio
Type B audio
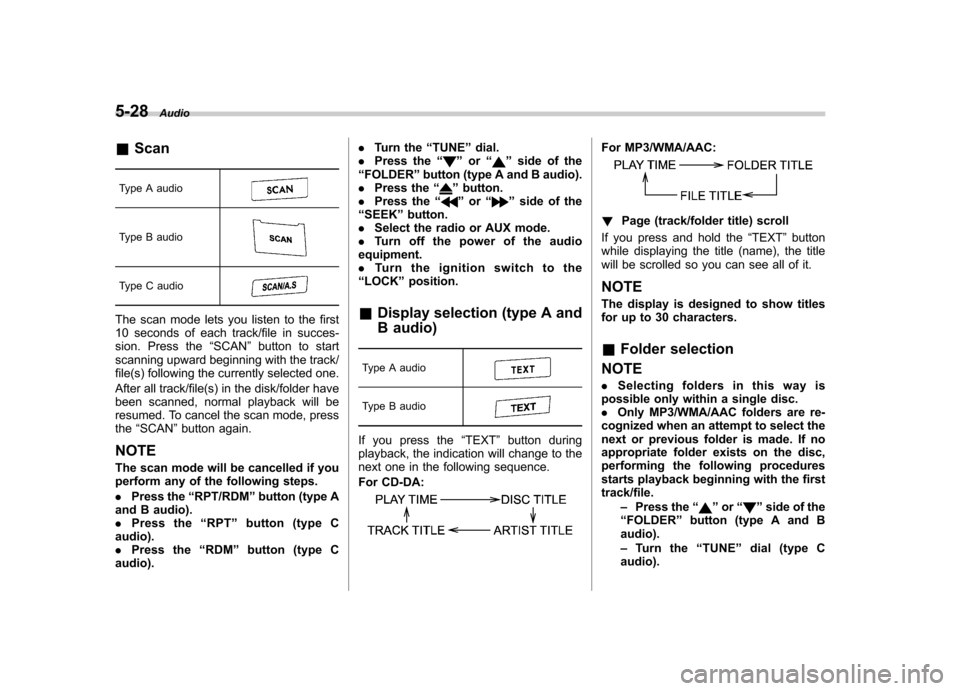
If you press the “TEXT ”button during
playback, the indication will change to the
next one in the following sequence.
For CD-DA:
For MP3/WMA/AAC:
! Page (track/folder title) scroll
If you press and hold the “TEXT ”button
while displaying the title (name), the title
will be scrolled so you can see all of it. NOTE
The display is designed to show titles
for up to 30 characters. & Folder selection
NOTE . Selecting folders in this way is
possible only within a single disc. . Only MP3/WMA/AAC folders are re-
cognized when an attempt to select the
next or previous folder is made. If no
appropriate folder exists on the disc,
performing the following procedures
starts playback beginning with the firsttrack/file.
–Press the “
”or “”side of the
“ FOLDER ”button (type A and B
audio). – Tu r n t h e “TUNE ”dial (type C
audio).