Page 372 of 474
Maintenance schedule....................................... 11-3
Maintenance precautions ................................... 11-3
Before checking or servicing in the engine compartment .................................................... 11-4
When checking or servicing in the engine compartment (2.5 L non-turbo models) .. ........... 11-4
When checking or servicing in the engine compartment while the engine is running .......... 11-5
Maintenance tips ................................................ 11-5
Removing and reinstalling clips .......................... 11-5
Removing air intake duct .................................... 11-7
Pulling off the fender lining ................................ 11-7
Engine hood ....................................................... 11-7
Engine compartment overview .......................... 11-9
2.5 L non-turbo models ...................................... 11-9
2.5 L turbo models ........................................... 11-10
3.6 L models .................................................... 11-11
Engine oil .......................................................... 11-12
Checking the oil level ....................................... 11-12
Changing the oil and oil filter ............................ 11-14
Recommended grade and viscosity .................. 11-16
Synthetic oil ..................................................... 11-16
Cooling system ................................................ 11-16
Cooling fan, hose and connections ................... 11-17
Engine coolant ................................................. 11-17
Air cleaner element .......................................... 11-18
Replacing the air cleaner element ..................... 11-18
Spark plugs ...................................................... 11-20
Recommended spark plugs .............................. 11-20
Drive belts ........................................................ 11-21 Manual transmission oil
.................................. 11-21
Recommended grade and viscosity .................. 11-21
Automatic transmission fluid .......................... 11-21
Checking the fluid level .................................... 11-21
Recommended fluid ......................................... 11-22
Continuously variable transmission fluid ...... 11-23
Front differential gear oil (AT and CVT models) .......................................................... 11-23
Checking the oil level ...................................... 11-23
Recommended grade and viscosity .................. 11-24
Rear differential gear oil .................................. 11-24
Recommended grade and viscosity .................. 11-24
Power steering fluid ........................................ 11-24
Checking the fluid level .................................... 11-24
Recommended fluid ......................................... 11-25
Brake fluid ........................................................ 11-25
Checking the fluid level .................................... 11-25
Recommended brake fluid ............................... 11-26
Clutch fluid (MT models) ................................. 11-26
Checking the fluid level .................................... 11-26
Recommended clutch fluid ............................... 11-27
Brake booster .................................................. 11-27
Brake pedal ...................................................... 11-28
Checking the brake pedal free play .................. 11-28
Checking the brake pedal reserve distance....... 11-28
Clutch pedal (MT models) ............................... 11-29
Checking the clutch function ............................ 11-29
Checking the clutch pedal free play .................. 11-29
Replacement of brake pad and lining ............ 11-29
Breaking-in of new brake pads and linings ....... 11-30 Maintenance and service
11
Page 375 of 474
11-4Maintenance and service
guard against getting oil or fluids
in your eyes. If something does
get in your eyes, thoroughly
wash them out with clean water.
. Do not tamper with the wiring of
the SRS airbag system or seat-
belt pretensioner system, or at-
tempt to take its connectors
apart, as that may activate the
system or it can render it inop-
erative. NEVER use a circuit
tester for these wiring. If your
SRS airbag or seatbelt preten-
sioner needs service, consult
your nearest SUBARU dealer. &
Before checking or servicing
in the engine compartment
WARNING
. Always stop the engine and apply
the parking brake to prevent the
vehicle from moving.
. Always let the engine cool down.
Engine parts become very hot
when the engine is running and
remain hot for some time after
the engine is stopped.
. Do not spill engine oil, engine
coolant, brake fluid or any other
fluid on hot engine components.
This may cause a fire.
. Always remove the key from the
ignition switch. When the ignition
switch is in the “ON ”position,
thecoolingfanmayoperate
suddenly even when the engine
is stopped.
. Before performing any servicing
on a vehicle equipped with a
remote engine start system tem-
porarily place that system in the
service mode to prevent it from
unexpectedly starting the engine. &
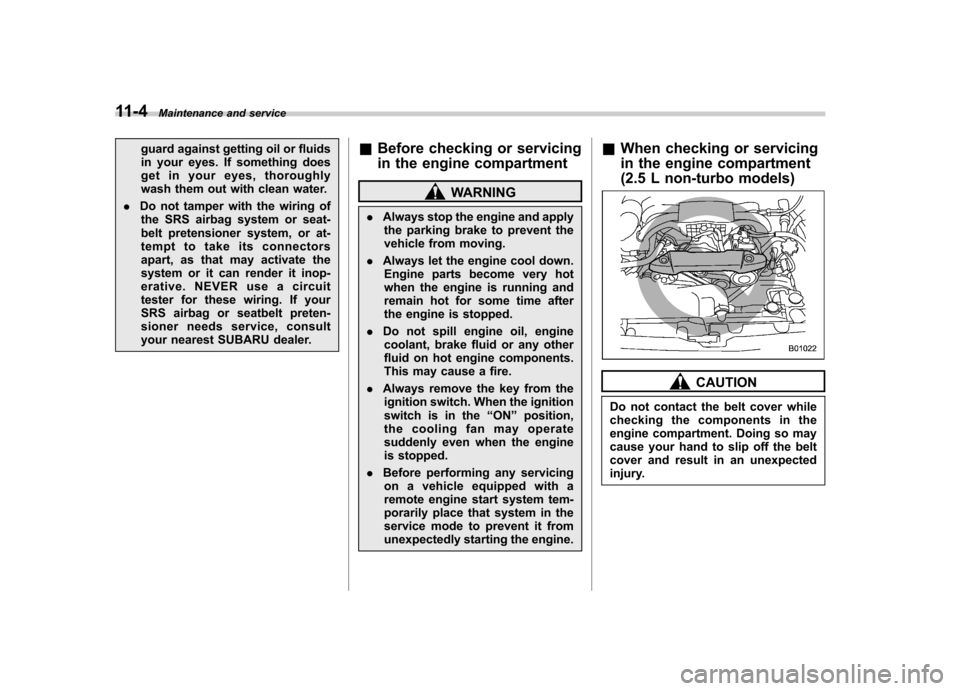
When checking or servicing
in the engine compartment
(2.5 L non-turbo models)
CAUTION
Do not contact the belt cover while
checking the components in the
engine compartment. Doing so may
cause your hand to slip off the belt
cover and result in an unexpected
injury.
Page 380 of 474
Engine compartment overview &2.5 L non-turbo models1) Power steering fluid reservoir
(page 11-24)
2) Clutch fluid reservoir (page 11-26)
3) Brake fluid reservoir (page 11-25)
4) Fuse box (page 11-44)
5) Battery (page 11-43)
6) Windshield washer tank (page 11-37)
7) Engine oil filler cap (page 11-12)
8) Engine coolant reservoir (page 11-17)
9) Radiator cap (page 11-17)
10) Engine oil level gauge (page 11-12)
11) Air cleaner case (page 11-18) Maintenance and service
11-9
– CONTINUED –
Page 381 of 474
11-10Maintenance and service
& 2.5 L turbo models
1) Power steering fluid reservoir
(page 11-24)
2) Clutch fluid reservoir (page 11-26)
3) Brake fluid reservoir (page 11-25)
4) Fuse box (page 11-44)
5) Battery (page 11-43)
6) Windshield washer tank (page 11-37)
7) Engine oil filler cap (page 11-12)
8) Engine coolant reservoir (page 11-17)
9) Radiator cap (page 11-17)
10) Engine oil level gauge (page 11-12)
11) Air cleaner case (page 11-18)
Page 382 of 474
&3.6 L models1) Power steering fluid reservoir
(page 11-24)
2) Differential gear oil level gauge (page 11-23)
3) Automatic transmission fluid level gauge (page 11-21)
4) Brake fluid reservoir (page 11-25)
5) Fuse box (page 11-44)
6) Battery (page 11-43)
7) Windshield washer tank (page 11-37)
8) Engine oil filler cap (page 11-12)
9) Engine coolant reservoir (page 11-17)
10) Radiator cap (page 11-17)
11) Engine oil level gauge (page 11-12)
12) Air cleaner case (page 11-18) Maintenance and service
11-11
Page 383 of 474
11-12Maintenance and service
Engine oil
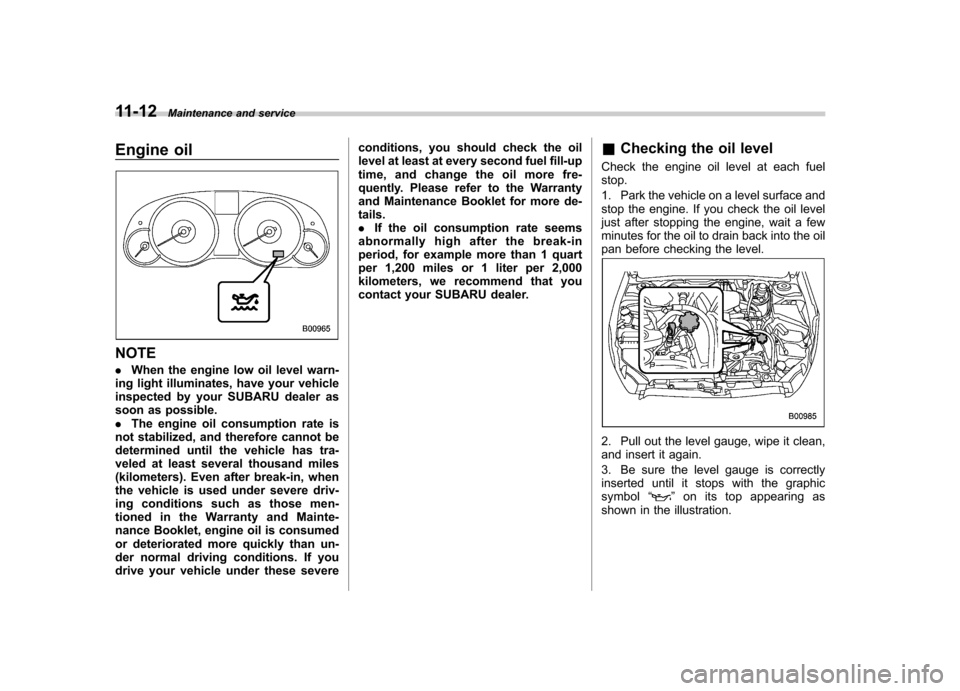
NOTE .When the engine low oil level warn-
ing light illuminates, have your vehicle
inspected by your SUBARU dealer as
soon as possible.. The engine oil consumption rate is
not stabilized, and therefore cannot be
determined until the vehicle has tra-
veled at least several thousand miles
(kilometers). Even after break-in, when
the vehicle is used under severe driv-
ing conditions such as those men-
tionedintheWarrantyandMainte-
nance Booklet, engine oil is consumed
or deteriorated more quickly than un-
der normal driving conditions. If you
drive your vehicle under these severe conditions, you should check the oil
level at least at every second fuel fill-up
time, and change the oil more fre-
quently. Please refer to the Warranty
and Maintenance Booklet for more de-tails..
If the oil consumption rate seems
abnormally high after the break-in
period, for example more than 1 quart
per 1,200 miles or 1 liter per 2,000
kilometers, we recommend that you
contact your SUBARU dealer. &
Checking the oil level
Check the engine oil level at each fuelstop.
1. Park the vehicle on a level surface and
stop the engine. If you check the oil level
just after stopping the engine, wait a few
minutes for the oil to drain back into the oil
pan before checking the level.
2. Pull out the level gauge, wipe it clean,
and insert it again.
3. Be sure the level gauge is correctly
inserted until it stops with the graphic
symbol “
”on its top appearing as
shown in the illustration.
Page 384 of 474
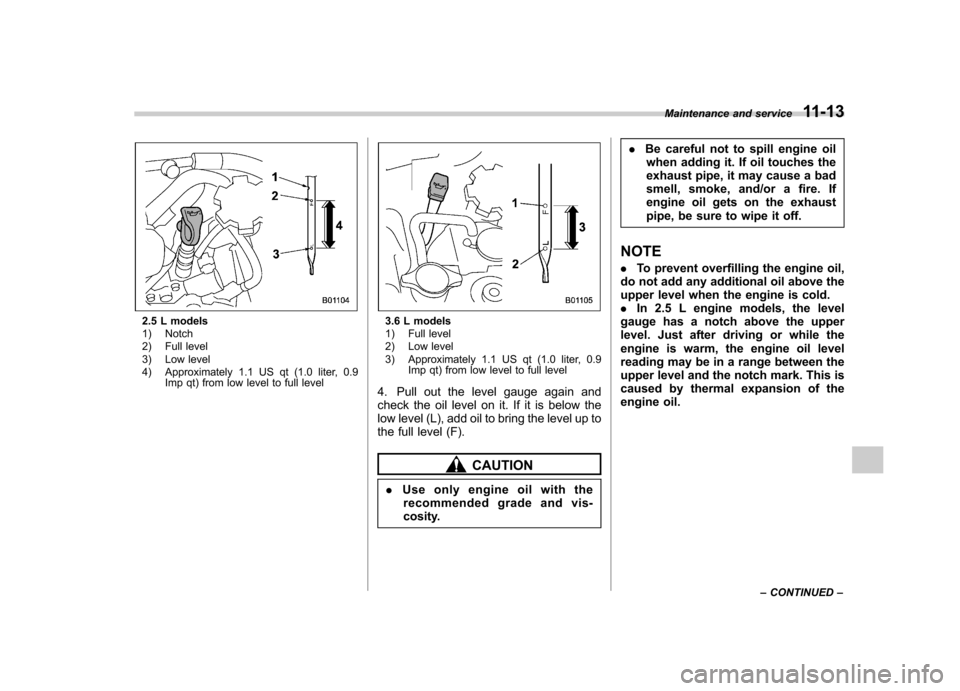
2.5 L models
1) Notch
2) Full level
3) Low level
4) Approximately 1.1 US qt (1.0 liter, 0.9Imp qt) from low level to full level3.6 L models
1) Full level
2) Low level
3) Approximately 1.1 US qt (1.0 liter, 0.9
Imp qt) from low level to full level
4. Pull out the level gauge again and
check the oil level on it. If it is below the
low level (L), add oil to bring the level up to
the full level (F).
CAUTION
. Use only engine oil with the
recommended grade and vis-
cosity. .
Be careful not to spill engine oil
when adding it. If oil touches the
exhaust pipe, it may cause a bad
smell, smoke, and/or a fire. If
engine oil gets on the exhaust
pipe, be sure to wipe it off.
NOTE . To prevent overfilling the engine oil,
do not add any additional oil above the
upper level when the engine is cold.. In 2.5 L engine models, the level
gauge has a notch above the upper
level. Just after driving or while the
engine is warm, the engine oil level
reading may be in a range between the
upper level and the notch mark. This is
caused by thermal expansion of the
engine oil. Maintenance and service
11-13
– CONTINUED –
Page 385 of 474
11-14Maintenance and service
&Changing the oil and oil filter
CAUTION
. If you change your own oil, be
sure to drain all the oil from the
filter before disposal.
. Do not dispose of used engine oil
by placing it in the trash, or by
pouring it onto the ground, into
sewers, or into any body of water.
Check with your local govern-
ment office for the proper dis-
posal options available to you.
Change the oil and oil filter according to
the maintenance schedule in the “War-
ranty and Maintenance Booklet ”.
The engine oil and oil filter must be
changed more frequently than listed in
the maintenance schedule when driving
on dusty roads, when short trips are
frequently made, or when driving in
extremely cold weather.
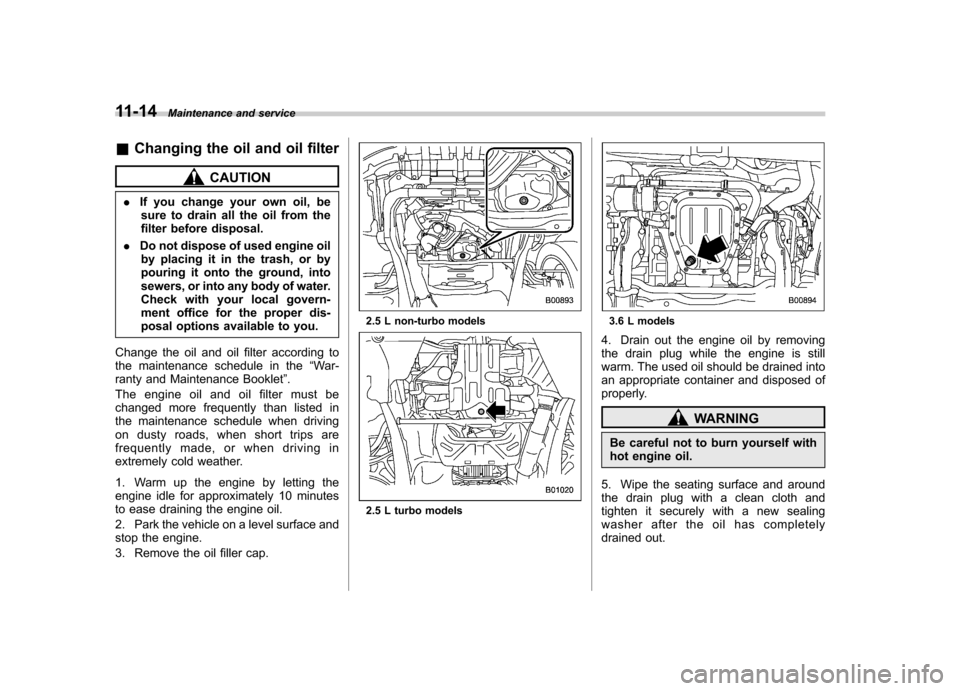
1. Warm up the engine by letting the
engine idle for approximately 10 minutes
to ease draining the engine oil.
2. Park the vehicle on a level surface and
stop the engine.
3. Remove the oil filler cap.
2.5 L non-turbo models
2.5 L turbo models
3.6 L models
4. Drain out the engine oil by removing
the drain plug while the engine is still
warm. The used oil should be drained into
an appropriate container and disposed of
properly.
WARNING
Be careful not to burn yourself with
hot engine oil.
5. Wipe the seating surface and around
the drain plug with a clean cloth and
tighten it securely with a new sealing
washer after the oil has completely
drained out.