Page 356 of 474

Engine overheating
WARNING
Never attempt to remove the radia-
tor cap until the engine has been
shut off and has fully cooled down.
When the engine is hot, the coolant
is under pressure. Removing the
cap while the engine is still hot
could release a spray of boiling hot
coolant, which could burn you very
seriously.
If the engine overheats, pull off the road
safely and stop the vehicle in a safe place. & If steam is coming from the
engine compartment
Turn off the engine and get everyone
away from the vehicle until it cools down. & If no steam is coming from
the engine compartment
NOTE
For details about how to check the
coolant level or how to add coolant,
refer to “Engine coolant ”F 11-17.
1. Keep the engine running at idlingspeed. 2. Open the hood to ventilate the engine
compartment. Refer to
“Engine hood ”
F 11-7.
Confirm that the cooling fan is turning. If
the fan is not turning, immediately turn off
the engine and contact your authorized
dealer for repair.
3. After the engine coolant temperature
has dropped, turn off the engine.
If the coolant temperature high warning
light illuminates, turn off the engine. Referto “Coolant temperature low indicator light/
Coolant temperature high warning light ”
F 3-13.
4. After the engine has fully cooled down,
check the coolant level in the reserve tank.
If the coolant level is below the “LOW ”
mark, add coolant up to the “FULL ”mark.
5. If there is no coolant in the reserve
tank, add coolant to the reserve tank.
Then remove the radiator cap and fill the
radiator with coolant.
If you remove the radiator cap from a hot
radiator, first wrap a thick cloth around the
radiator cap, then turn the cap counter-
clockwise slowly without pressing down
until it stops. Release the pressure from
the radiator. After the pressure has been
fully released, remove the cap by pressing
down and turning it. TowingWARNING
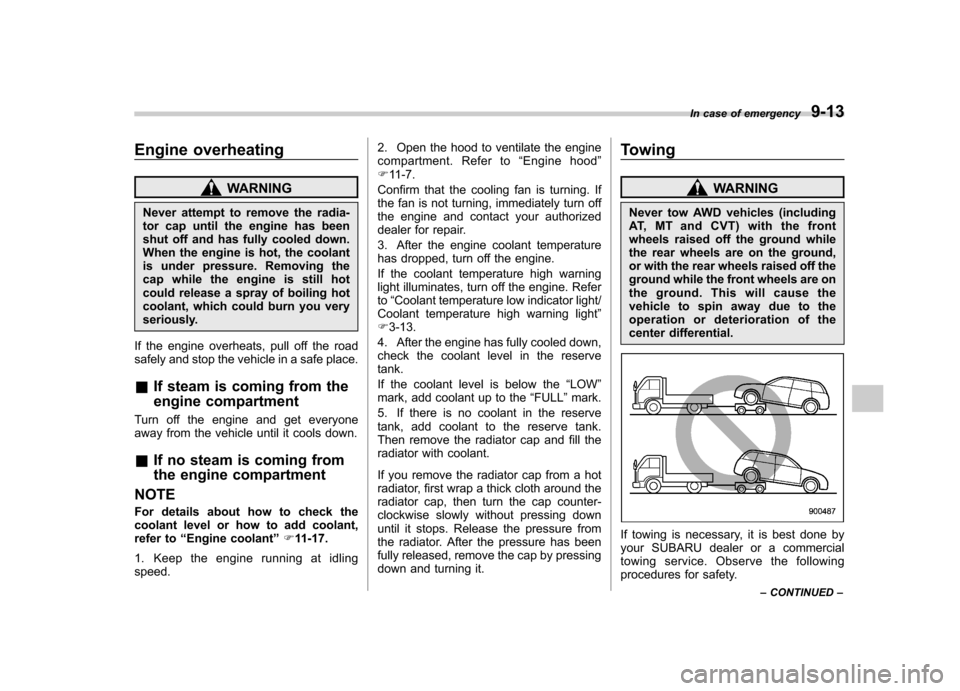
Never tow AWD vehicles (including
AT, MT and CVT) with the front
wheels raised off the ground while
the rear wheels are on the ground,
or with the rear wheels raised off the
ground while the front wheels are on
the ground. This will cause the
vehicle to spin away due to the
operation or deterioration of the
center differential.
If towing is necessary, it is best done by
your SUBARU dealer or a commercial
towing service. Observe the following
procedures for safety. In case of emergency
9-13
– CONTINUED –
Page 361 of 474

9-18In case of emergency
.If the cap cannot be removed,
contact your SUBARU dealer for inspection.
. After releasing the electronic
parking brake by using the elec-
tronic parking brake release tool,
make sure that the cap is rein-
stalled to the parking brake re-
lease device. If the cap is not
reinstalled, water or dust enters
the device and the device maymalfunction.
NOTE
It may be difficult to release the elec-
tronic parking brake by using the
electronic parking brake release tool.
Have your SUBARU dealer release the
electronic parking brake if necessary.
In the event that you cannot release the
electronic parking brake by pulling the
electronic parking brake switch or by
depressing the accelerator pedal, you
can release the electronic parking brake
manually by using the electronic parking
brake release tool.
1. Shift the shift lever in the “1 ” or “R ”
position (MT models) or the select lever in the “P ”position (AT and CVT models).
2. Turn the ignition switch to the “LOCK ”
position. 3. Make sure that the brake system
warning light and the indicator light on
the parking brake switch have turned off.
4. Use tire stops under the tires to
prevent the vehicle from moving.
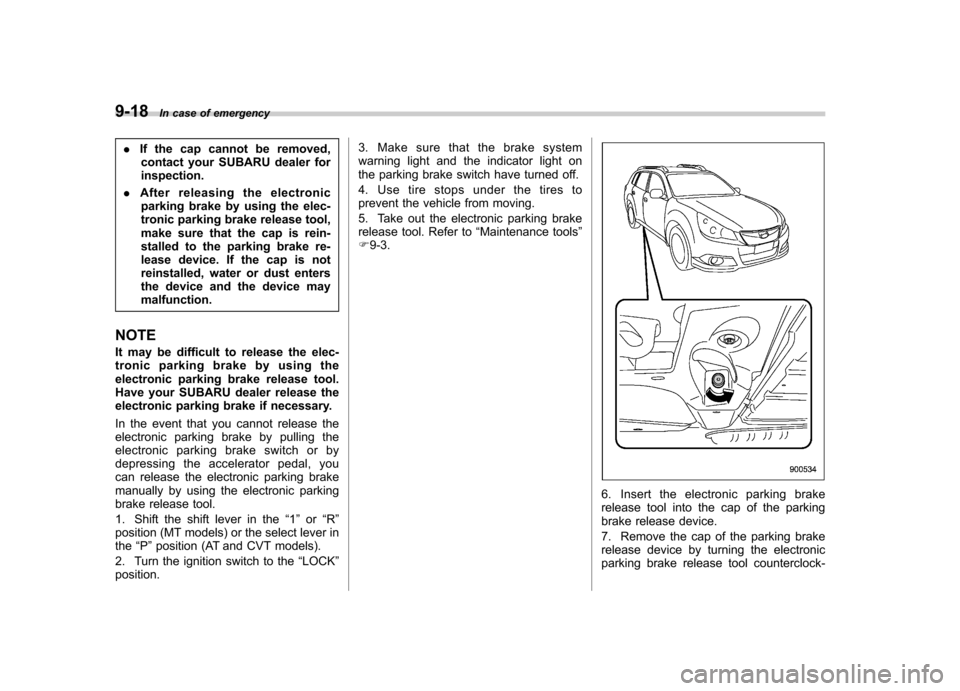
5. Take out the electronic parking brake
release tool. Refer to
“Maintenance tools ”
F 9-3.
6. Insert the electronic parking brake
release tool into the cap of the parking
brake release device.
7. Remove the cap of the parking brake
release device by turning the electronic
parking brake release tool counterclock-
Page 362 of 474

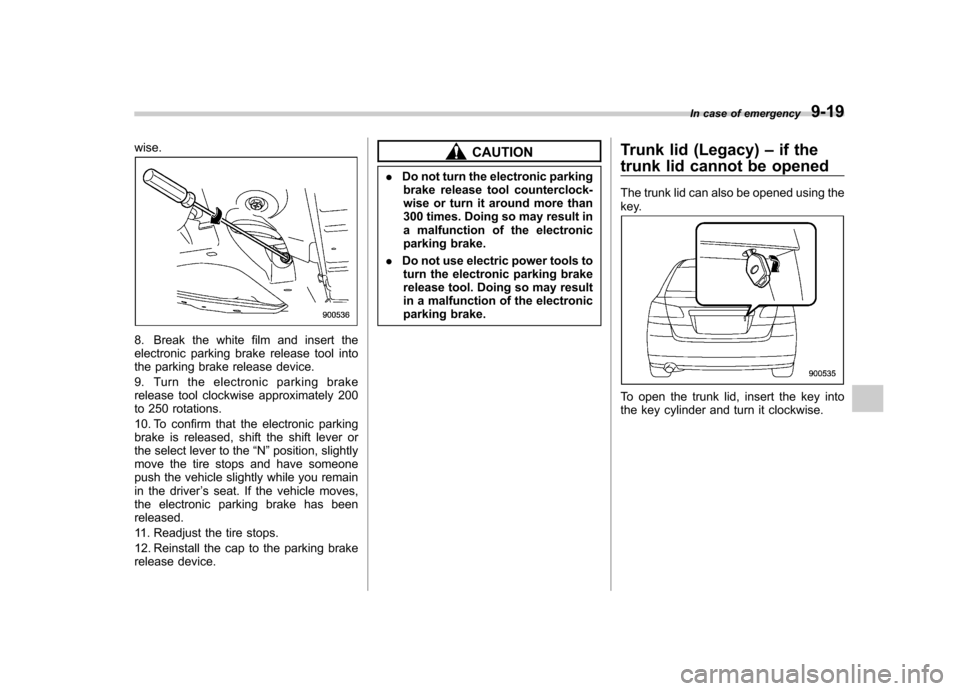
wise.
8. Break the white film and insert the
electronic parking brake release tool into
the parking brake release device.
9. Turn the electronic parking brake
release tool clockwise approximately 200
to 250 rotations.
10. To confirm that the electronic parking
brake is released, shift the shift lever or
the select lever to the“N ”position, slightly
move the tire stops and have someone
push the vehicle slightly while you remain
in the driver ’s seat. If the vehicle moves,
the electronic parking brake has beenreleased.
11. Readjust the tire stops.
12. Reinstall the cap to the parking brake
release device.
CAUTION
. Do not turn the electronic parking
brake release tool counterclock-
wise or turn it around more than
300 times. Doing so may result in
a malfunction of the electronic
parking brake.
. Do not use electric power tools to
turn the electronic parking brake
release tool. Doing so may result
in a malfunction of the electronic
parking brake. Trunk lid (Legacy)
–if the
trunk lid cannot be opened
The trunk lid can also be opened using the
key.
To open the trunk lid, insert the key into
the key cylinder and turn it clockwise. In case of emergency
9-19
Page 364 of 474
4. Insert the hex-head wrench in the end
of the motor shaft.
To lower the moonroof, turn the wrench clockwise.
To close the moonroof, turn the wrench counterclockwise.
Have your vehicle checked and repaired
by an authorized SUBARU dealer.In case of emergency
9-21
Page 376 of 474
&When checking or servicing
in the engine compartment
while the engine is running
WARNING
A running engine can be dangerous.
Keep your fingers, hands, clothing,
hair and tools away from the cooling
fan, belts and any other moving
engine parts. Removing rings,
watches and ties is advisable. Maintenance tips
Some clips and fender linings must be
removed before replacing the air cleaner
elements or specific bulbs. &
Removing and reinstalling clips
! Removing clips
There are several types of clips used for
your vehicle. ! Type A clips
1. Turn the clips counterclockwise using
a flat-head screwdriver until the center
portion of the clip is raised.
2. Remove the clips with a flat-head
screwdriver using leverage. !
Type B clips
1. Pull out the center portion of the clip
using a flat-head screwdriver as shown in
the illustration.
2. Pull the protruded center portion to
remove the entire body of the clip. Maintenance and service
11-5
– CONTINUED –
Page 377 of 474
11-6Maintenance and service
! Type C clips
1. Turn the clip counterclockwise using a
Phillips screwdriver until the center portion
of the clip is raised.
2. Remove the entire clip by pulling it up. !
Reinstalling clipsType A clips
Type B clips
Type C clips
Insert the clip without the center portion
first and then push the center portion of
the clip into the hole.
Page 412 of 474
&Rear window wiper blade
assembly (Outback)
1. Raise the wiper arm off the rear
window.
2. Turn the wiper blade assembly coun- terclockwise.
3. Pull the wiper blade assembly toward
you to remove it from the wiper arm. &
Rear window wiper blade
rubber (Outback)
1. Pull out the end of the blade rubber
assembly to unlock it from the plasticsupport.
Maintenance and service 11-41
– CONTINUED –
Page 417 of 474
11-46Maintenance and service
prints or grease on the bulb surface,
wipe them away with a soft cloth
moistened with alcohol.
NOTE . If headlight aiming is required, con-
sult your SUBARU dealer for proper
adjustment of the headlight aim.. It may be difficult to replace the
bulbs. We recommend that you have
the bulbs replaced by your SUBARU
dealer if necessary. ! Low beam light bulbs
1. Pull off the fender lining. For details,
refer to “Pulling off the fender lining ”F 11 -
7.
2. Remove the bulb cover, by turning it counterclockwise.
3. Disconnect the electrical connector.
4. Remove the retainer spring.
5. Replace the bulb, then set the retainer
spring securely.
6. Reconnect the electrical connector.
7. Install the bulb cover.
8. After replacing the bulb, reattach the
fender lining.