2012 SUBARU OUTBACK warning
[x] Cancel search: warningPage 169 of 474
3-50Instruments and controls
begins to flash slowly (after approximately
20 seconds), position the hand-held trans-
mitter of the device between 1 to 3 inches
(25 to 76 mm) away from the HomeLink
®button you wish to program.
3. Press and hold the hand-held trans-
mitter button. The HomeLink
®indicator
light will flash, first slowly and then rapidly.
4. When the indicator light begins to flash
rapidly, release both buttons.
The programming for the previous device
is now erased and the new device can be
operated by pressing the HomeLink
®button. ! Erasing HomeLink
®button memory
NOTE . Performing this procedure erases
the memory of all the preprogrammed
buttons simultaneously. The memory
of individual buttons cannot be erased.. It is recommended that upon the
sale of the vehicle, the memory of all
programmed HomeLink
®buttons be
erased for security purposes.
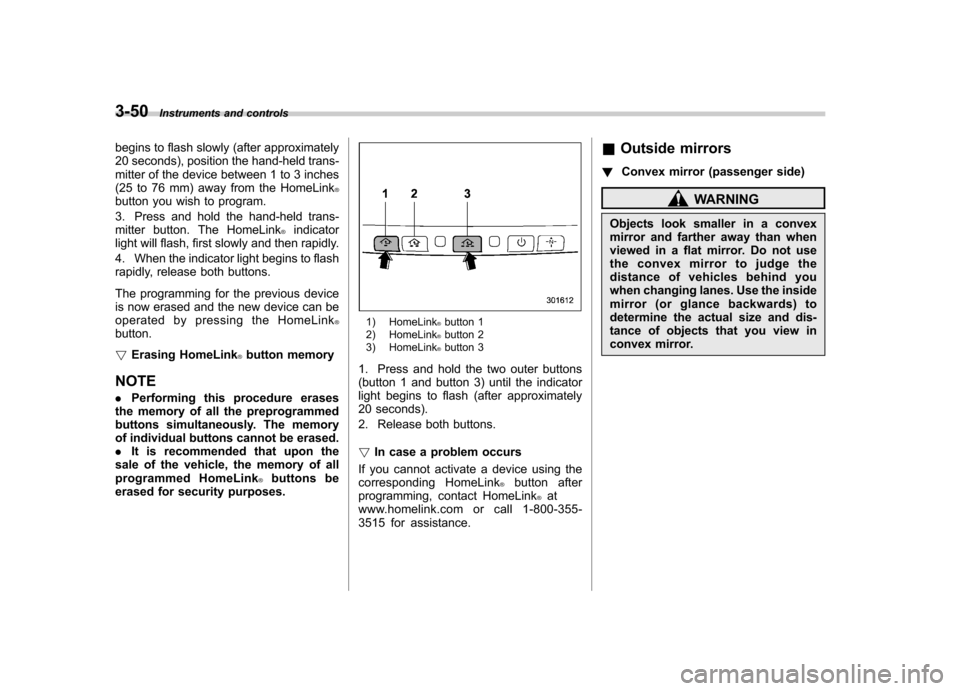
1) HomeLink®button 1
2) HomeLink®button 2
3) HomeLink®button 3
1. Press and hold the two outer buttons
(button 1 and button 3) until the indicator
light begins to flash (after approximately
20 seconds).
2. Release both buttons. ! In case a problem occurs
If you cannot activate a device using the
corresponding HomeLink
®button after
programming, contact HomeLink®at
www.homelink.com or call 1-800-355-
3515 for assistance. &
Outside mirrors
! Convex mirror (passenger side)
WARNING
Objects look smaller in a convex
mirror and farther away than when
viewed in a flat mirror. Do not use
the convex mirror to judge the
distance of vehicles behind you
when changing lanes. Use the inside
mirror (or glance backwards) to
determine the actual size and dis-
tance of objects that you view in
convex mirror.
Page 171 of 474
3-52Instruments and controls
Tilt/telescopic steering wheel
WARNING
Do not adjust the steering wheel tilt/
telescopic position while driving.
This may cause loss of vehicle
control and result in personal injury.
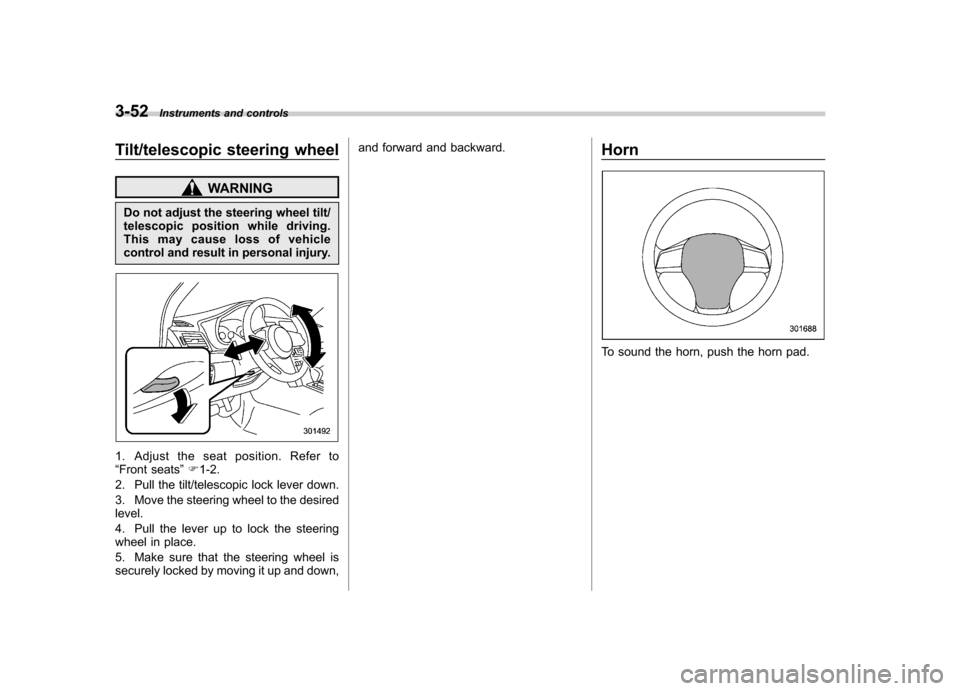
1. Adjust the seat position. Refer to “ Front seats ”F 1-2.
2. Pull the tilt/telescopic lock lever down.
3. Move the steering wheel to the desired level.
4. Pull the lever up to lock the steering
wheel in place.
5. Make sure that the steering wheel is
securely locked by moving it up and down, and forward and backward.
Horn
To sound the horn, push the horn pad.
Page 179 of 474
4-8Climate control
ON position is selected, the indicator light
on the air inlet selection button illuminates.
OFF position (outside air) : Outside air is
drawn into the passenger compartment.
Press the air inlet selection button to the
OFF position when the interior has cooled
to a comfortable temperature and the road
is no longer dusty. The indicator light will
turn off.
WARNING
Continued operation in the ON posi-
tion may fog up the windows. Switch
to the OFF position as soon as the
outside dusty condition clears. Defrosting
Select the desired
“
”mode or “”mode
to defrost or dehumidify the windshield
and front door windows by performing the
following procedures.
For type A: Press the airflow control button
and select the “
”mode or “”mode.
For type B: Press the airflow mode
selection button to select the “
”mode
or press the defroster button to select the “
” mode.
NOTE
When the “
”mode or “”mode is
selected, the air conditioner compres-
sor automatically operates to more
quickly defog the windshield. At the
same time, the air inlet selection is
automatically set to the outside air
mode. For details, refer to “Airflow
mode selection ”F 4-6. Operating tips for heater and
air conditioner &
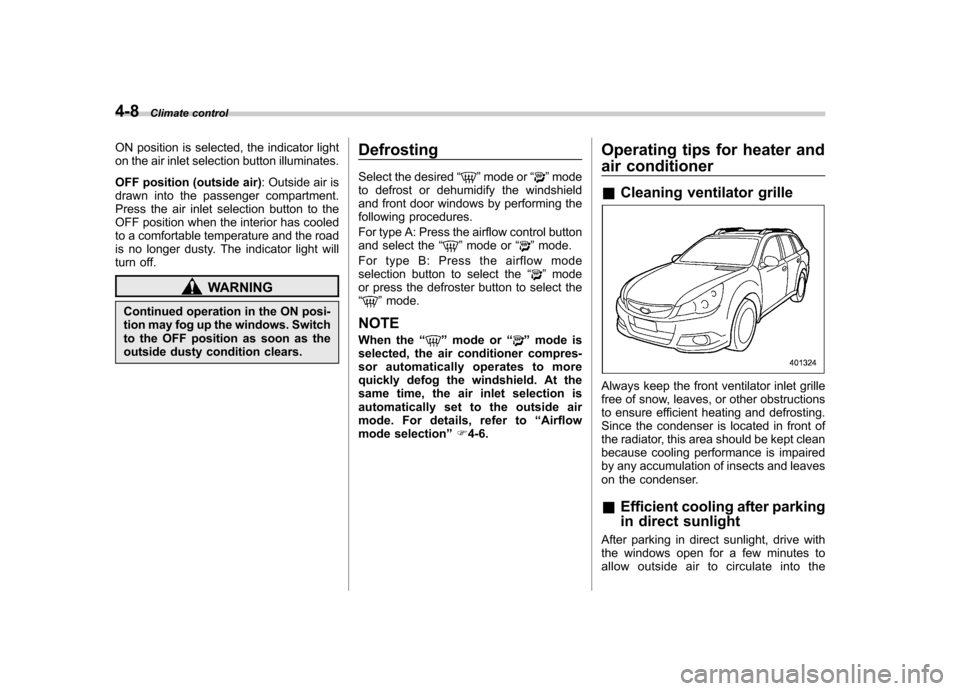
Cleaning ventilator grille
Always keep the front ventilator inlet grille
free of snow, leaves, or other obstructions
to ensure efficient heating and defrosting.
Since the condenser is located in front of
the radiator, this area should be kept clean
because cooling performance is impaired
by any accumulation of insects and leaves
on the condenser. &Efficient cooling after parking
in direct sunlight
After parking in direct sunlight, drive with
the windows open for a few minutes to
allow outside air to circulate into the
Page 217 of 474
5-34Audio
Type C audio:
Model Firmware version
iPod
®
5G 1.2.1~1.3
classic 1.0.0~1.1.2
nano 1.3.1
nano 2G 1.1.3
nano 3G 1.0.0~1.1.3
nano 4G 1.0.0~1.0.3
touch 1.1~2.2.1
iPhone
®
1G 3.1.3
3G 4.2.1
3G S 4.2.1 4 4.2.1
CAUTION
Do not connect an iPod
®other than
the previously stated models. Doing
so may result in a malfunction or,
depending on conditions, cause afire.
NOTE . iPod
®is a registered trademark of
Apple Inc. . You are only permitted to personally
copy and play copyright-free material or material that is legally permitted to
be copied and played by using aniPod
®and iTunes. Copyright infringe-
ment is prohibited by law.. To check the firmware version of an
iPod
®, connect it to a computer and
check the device manager. For further
information, see the User ’s Guide that
comes with the iPod
®.
. To update the firmware version of an
iPod
®, visit the Apple Inc. website.
. Depending on the model and firm-
ware version of an iPod
®, it may not
work properly or not operate at all. & Connecting USB storage de-
vice / iPod
®
WARNING
Do not operate an iPod
®while
driving. Doing so may distract your
attention from driving and could
lead to an accident.
CAUTION
. If the data stored on an iPod
®is
deleted while it is connected to
the in-vehicle system, the data
cannot be recovered. .
Do not store an iPod
®in the
vehicle. If an iPod®is left in the
vehicle for a long period of time,
it may be deformed, discolored
or damaged by high temperature.
NOTE . Even if a USB storage device or
iPod
®is connected, it cannot be played
unless the USB/iPod®mode is se-
lected. . Movies stored on a USB storage
device or an iPod
®cannot be played
while the storage device or iPod®is
connected to the system.. While an iPod
®is connected, the
iPod®cannot be operated using the
click wheel on the iPod®(except some
models). . When using an iPod
®by connecting
it to in-vehicle equipment, the order of
the list items displayed on the in-
vehicle equipment may be different
from that on the iPod
®. However, this
does not indicate a malfunction.. An iPod
®battery that is connected
to in-vehicle equipment will be charged
when the ignition switch is in the “ON ”
or “Acc ”position. However, activation
of the iPod
®may be delayed if the
battery charge of the iPod®is low.
. If an iPod®does not activate after
Page 233 of 474

5-50Audio
.The sound quality may degrade due
to the influence of the cell phone that is
connected to the system or the circum-
stances of the Bluetooth network. . When another Bluetooth
®device is
simultaneously connected, noise may
be heard in the voice coming from the
hands-free phone. ! Corresponding profiles for the cell phone
. HFP (Hands Free Profile): Ver. 1.0
. OPP (Object Push Profile): Ver. 1.1
& Certification for the Hands-
free system
CAUTION
FCC WARNING
Changes or modifications not ex-
pressly approved by the party re-
sponsible for compliance could void
the user ’s authority to operate the
equipment.
FCC ID: ACJ932C5ZZZ035
IC ID: 216J-C5ZZZ035
Made in Japan NOTE
This device complies with Part 15 of
the FCC Rules and Industry Canada
licence-exempt RSS standard(s). Op-
eration is subject to the following two
conditions: (1) this device may not
cause harmful interference, and (2) this
device must accept any interference,
including interference that may cause
undesired operation of this device. NOTE
This equipment has been tested and
found to comply with the limits for a
Class B digital device, pursuant to Part
15 of the FCC Rules. These limits are
designed to provide reasonable protec-
tion against harmful interference in a
residential installation. This equipment
may cause harmful interference to
radio communications, if it is not
installed and used in accordance with
the instructions. However, there is no
guarantee that interference will not
occur in a particular installation. If this
equipment does cause harmful inter-
ference to radio or television reception,
which can be determined by turning the
equipment off and on, the user is
encouraged to try to correct the inter-
ference by one or more of the followingmeasures..
Reorient or relocate the receiving
antenna.. Increase the separation between the
equipment and receiver.. Connect the equipment into an out-
let on a circuit different from that to
which the receiver is connected.. Consult the dealer or an experi-
enced radio/TV technician for help.. Changes or modifications not ex-
pressly approved by the party respon-
sible for compliance could void theuser ’s authority to operate the equip-
ment.. This equipment complies with FCC/
IC radiation exposure limits set forth
for an uncontrolled equipment and
meets the FCC radio frequency (RF)
Exposure Guidelines in Supplement C
to OET65 and RSS-102 of the IC radio
frequency (RF) Exposure rules. This
equipment has very low levels of RF
energy that it deemed to comply with-
out maximum permissive exposure
evaluation (MPE). But it is desirable
that it should be installed and operated
keeping the radiator at least 20 cm or
more away from person ’s body (ex-
cluding extremities: hands, wrists, feet
and ankles).
Page 235 of 474
5-52Audio
&Safety precautions
WARNING
. For safety reasons, avoid operat-
ing the cell phone while driving.
. Do not make a phone call while
driving. When you have an in-
coming call, stop the vehicle in a
safe location before taking the
incoming phone call. When you
have to absolutely take a phone
call, tell the caller “I’ ll call you
back ”. And then call the caller
back after stopping the vehicle in
a safe location.
. Part 15 FCC Rules
FCC Warning:
Any unauthorized changes of
modifications to this equipment
would void the user ’s authority to
operate this device.
CAUTION
. Do not leave the cell phone in the
vehicle. The temperature in the
vehicle may become extremely
high and cause a malfunction of
the cell phone. .
When using the cell phone, be
careful not to get it close to the
in-vehicle equipment. Getting it
too close to the in-vehicle equip-
ment may result in deterioration
in tone quality or a poor connect-
ing condition.
. In the frequency band used by
this equipment, along with indus-
trial, scientific and medical
equipment such as a microwave
oven, radio stations (a license is
required) to be used by the
production line in the factory to
identify movable bodies, specific
small power radio stations (a
license is not required) and ama-
teur radio stations (a license is
required) are being operated.
(These three types of radio sta-
tions are hereinafter referred toas “other radio stations ”.) Before
using this equipment, be sure to
check to see if “other radio
stations ”are being operated in
the vicinity. If there is detrimental
radio interference from this
equipment to “other radio sta-
tions ”, move the equipment to
another location as soon as
possible to avoid radio interfer-
ence. The frequency band used by this equipment is in the 2.4
GHz zone. The FH-SS modulation
is employed as a modulation
method. The expected inflicting
interference distance is less than
33 ft (10 m). This equipment uses
a full band and can avoid a band
used by a movable body identifi-
cation device.
& Using the Hands-free system
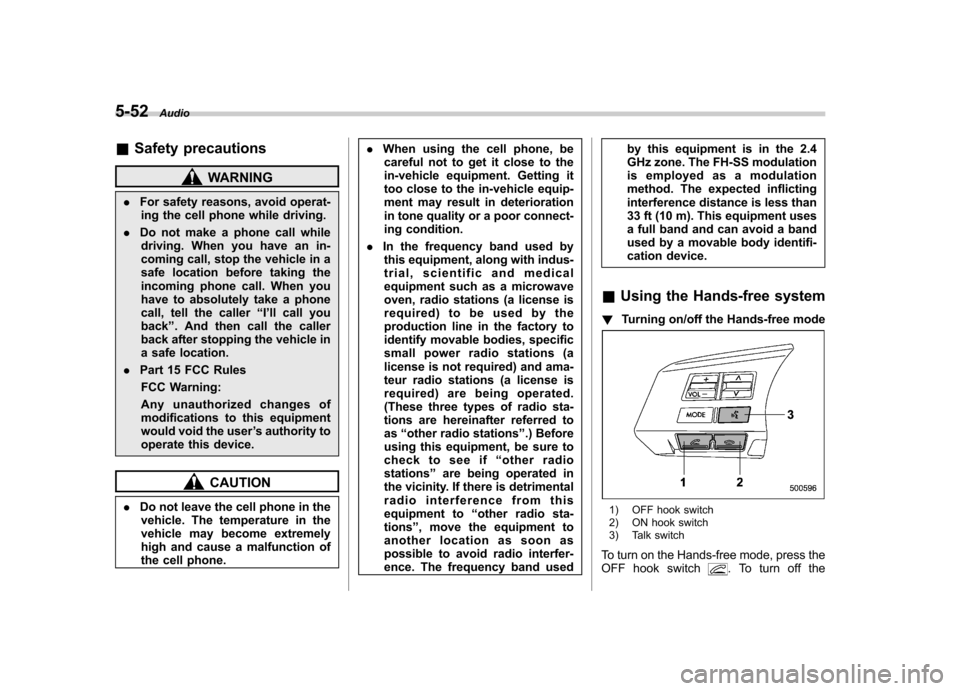
! Turning on/off the Hands-free mode
1) OFF hook switch
2) ON hook switch
3) Talk switch
To turn on the Hands-free mode, press the
OFF hook switch
. To turn off the
Page 266 of 474
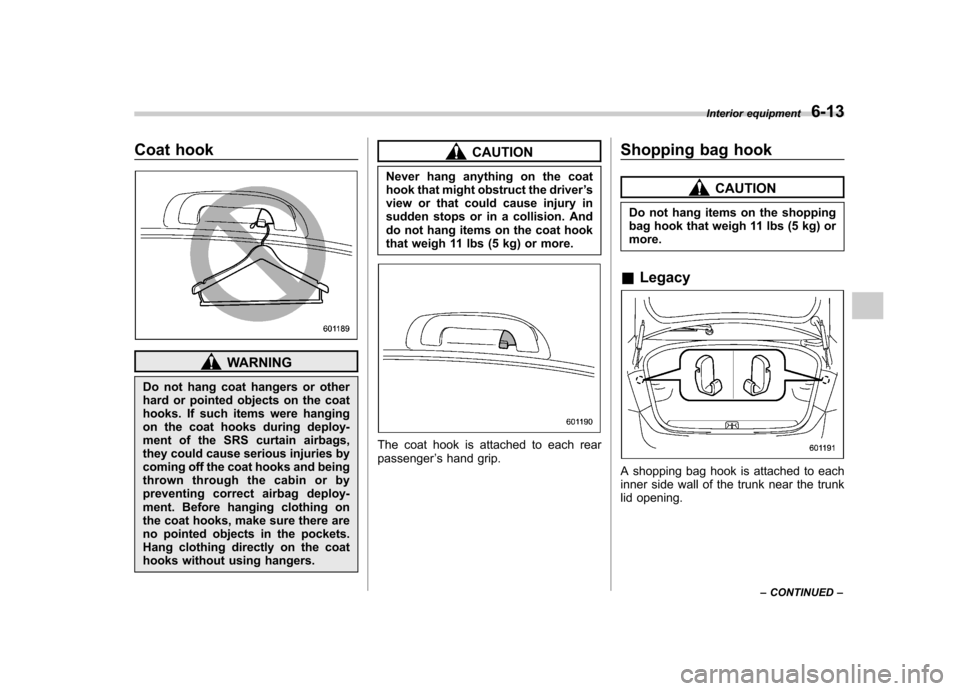
Coat hook
WARNING
Do not hang coat hangers or other
hard or pointed objects on the coat
hooks. If such items were hanging
on the coat hooks during deploy-
ment of the SRS curtain airbags,
they could cause serious injuries by
coming off the coat hooks and being
thrown through the cabin or by
preventing correct airbag deploy-
ment. Before hanging clothing on
the coat hooks, make sure there are
no pointed objects in the pockets.
Hang clothing directly on the coat
hooks without using hangers.
CAUTION
Never hang anything on the coat
hook that might obstruct the driver ’s
view or that could cause injury in
sudden stops or in a collision. And
do not hang items on the coat hook
that weigh 11 lbs (5 kg) or more.
The coat hook is attached to each rear passenger ’s hand grip. Shopping bag hook
CAUTION
Do not hang items on the shopping
bag hook that weigh 11 lbs (5 kg) ormore.
& Legacy
A shopping bag hook is attached to each
inner side wall of the trunk near the trunk
lid opening. Interior equipment
6-13
– CONTINUED –
Page 268 of 474
.Do not use more than one floor
mat. Cargo area cover (Outback
–if equipped)
The cargo area cover is provided for
covering the cargo area and to protect its
contents from direct sunlight. This cover is
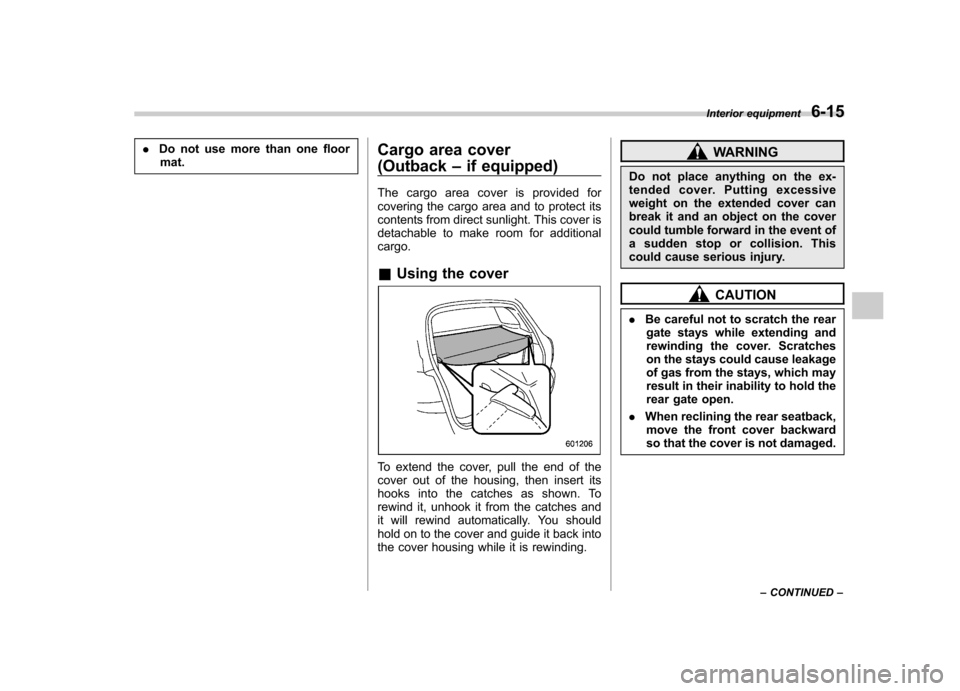
detachable to make room for additionalcargo. & Using the cover
To extend the cover, pull the end of the
cover out of the housing, then insert its
hooks into the catches as shown. To
rewind it, unhook it from the catches and
it will rewind automatically. You should
hold on to the cover and guide it back into
the cover housing while it is rewinding.
WARNING
Do not place anything on the ex-
tended cover. Putting excessive
weight on the extended cover can
break it and an object on the cover
could tumble forward in the event of
a sudden stop or collision. This
could cause serious injury.
CAUTION
. Be careful not to scratch the rear
gate stays while extending and
rewinding the cover. Scratches
on the stays could cause leakage
of gas from the stays, which may
result in their inability to hold the
rear gate open.
. When reclining the rear seatback,
move the front cover backward
so that the cover is not damaged. Interior equipment
6-15
– CONTINUED –