Page 225 of 463

Black plate (181,1)
北米Model "A1130BE-A" EDITED: 2011/ 6/ 7
system.& Air conditioner compressor
shut-off when engine is
heavily loadedTo improve acceleration and gas mileage,
the air conditioner compressor is designed
to temporarily shut off during air condi-
tioner operation whenever the accelerator
is fully depressed such as during rapid
acceleration or when driving on a steep
upgrade.&Refrigerant for your climate
control systemYour air conditioner uses ozone friendly
refrigerant HFC134a. Therefore, the meth-
od of adding, changing or checking the
refrigerant is different from the method for
CFC12 (freon). Consult your SUBARU
dealer for service. Repairs needed as a
result of using the wrong refrigerant are
not covered under warranty.
Air filtration systemReplace the filter element according to the
replacement schedule as follows. This
schedule should be followed to maintain
the filter ’s dust collection ability. Under
extremely dusty conditions, the filter
should be replaced more frequently. It is
recommended that you have your filter
checked or replaced by your SUBARU
dealer. For replacement, use only a
genuine SUBARU air filter kit.Replacement schedule:
Every 12 months or 7,500 miles (12,000
km) whichever comes first
CAUTION
Contact your SUBARU dealer if the
following occurs, even if it is not yet
time to change the filter:
. Reduction of the airflow through
the vents.
. Windshield gets easily fogged or
misted.NOTEThe filter can influence the air condi-
tioning, heating and defroster perfor- mance if not properly maintained.
&
Replacing an air filter1. Remove the glove box.
(1) Open the glove box.
(2) Remove the damper shaft from the
glove box.
Climate control
4-13
–CONTINUED –
4
Page 226 of 463
Black plate (182,1)
北米Model "A1130BE-A" EDITED: 2011/ 6/ 7
4-14
Climate control
(3) Pull out the glove box.
2. Remove the air filter.
3. Replace the air filter element with a
new one.
CAUTION
The arrow mark on the filter must
point UP.
4. Reinstall the glove box, and connect
the damper shaft.
5. Close the glove box.
Page 227 of 463
Black plate (183,1)
北米Model "A1130BE-A" EDITED: 2011/ 6/ 7
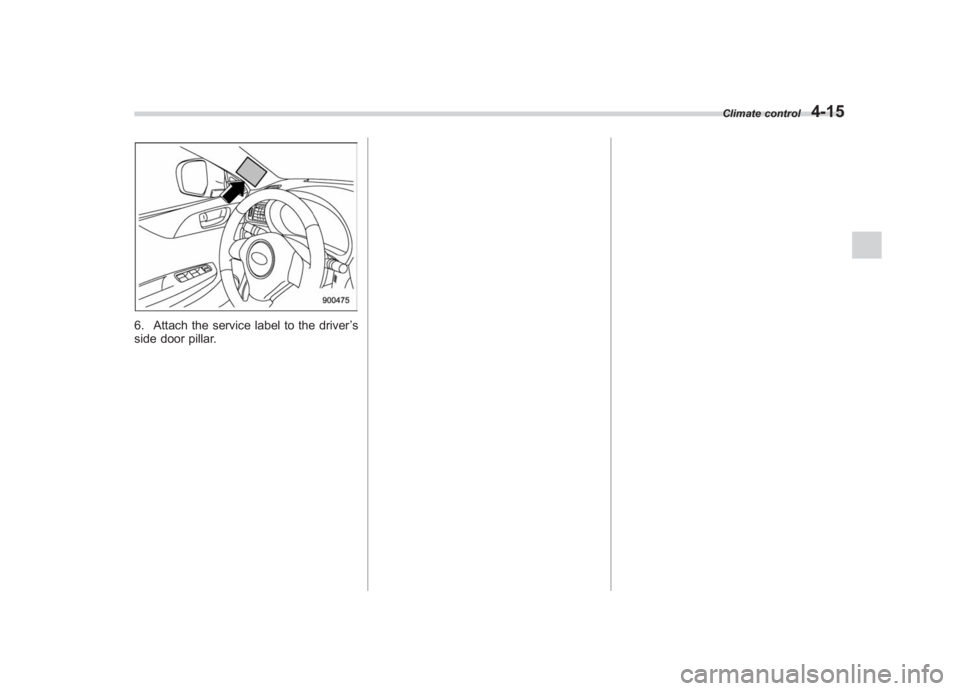
6. Attach the service label to the driver ’s
side door pillar.
Climate control
4-15
4
Page 228 of 463
Black plate (2,1)
Model "ALL_MODEL_MEMO" EDITED: 2007/ 6/ 22
Left Page————————————————————————————————————————
————————————————————————————————————————
————————————————————————————————————————
————————————————————————————————————————
————————————————————————————————————————
————————————————————————————————————————
————————————————————————————————————————
————————————————————————————————————————
————————————————————————————————————————
————————————————————————————————————————
————————————————————————————————————————
————————————————————————————————————————
————————————————————————————————————————
Page 229 of 463

Black plate (9,1)
北米Model "A1130BE-A" EDITED: 2011/ 6/ 6
Antenna system .................................................. 5-3
Roof antenna...................................................... 5-3
FM reception ....................................................... 5-3
Installation of accessories .................................. 5-4
Audio set ............................................................. 5-4
Type A audio set (if equipped) ............................. 5-5
Type B audio set (if equipped) ............................. 5-6
Power and sound controls................................. 5-7
Power switch and volume control ........................ 5-7
Sound control ..................................................... 5-7
Adjustable level of each mode ............................. 5-9
FM/AM radio operation...................................... 5-10
FM/AM selection................................................. 5-10
Tuning ............................................................... 5-10
Displaying radio PS (Program Service Name) and RT (Radio Text) ................................................ 5-12
Station preset .................................................... 5-12
Satellite radio operation (if equipped) .............. 5-13
Sirius XM
TM
Satellite Radio Activation (for U.S.A.
only) ................................................................ 5-13
Sirius satellite radio (for Canada only) ................ 5-13
Satellite radio reception ...................................... 5-13
Displaying satellite radio ID of tuner ................... 5-14
Band selection ................................................... 5-15
Channel and category selection .......................... 5-15
Channel preset ................................................... 5-16
Display selection ................................................ 5-16
CD player operation ........................................... 5-16
Play file.............................................................. 5-17
How to insert a CD(s) (type A) ............................ 5-17
How to insert a CD (type B) ................................ 5-18 How to play back a CD
...................................... 5-18
To select a track from the beginning .................. 5-18
Fast-forwarding and rewinding . .......................... 5-19
Repeating .......................................................... 5-19
Random playback .............................................. 5-20
Scan ................................................................. 5-20
Display selection ............................................... 5-21
Folder selection ................................................. 5-21
How to eject CDs from the player (type A) ..... ..... 5-22
How to eject a CD from the player (type B) .... ..... 5-22
When the following messages are displayed. . ..... 5-22
Auxiliary input jack (if equipped)...................... 5-23
Precautions to observe when handling a compact disc ................................................... 5-24
USB storage device / iPod
®operations
(type B audio) ................................................. 5-26
Play file............................................................. 5-26
Connectable USB storage device ....................... 5-26
Connectable iPod
®models ................................. 5-27
Connecting USB storage device / iPod
®............. 5-27
How to play back ............................................... 5-28
To select a track from the beginning .................. 5-29
To select a chapter from the beginning when connecting iPod
®............................................. 5-29
Fast-forwarding and rewinding . .......................... 5-29
Repeating .......................................................... 5-29
Random playback .............................................. 5-29
SCAN (only when connecting USB storage device) ............................................................ 5-30
Selecting category (only when connecting iPod
®) ............................................................. 5-30
Audio
5
Page 230 of 463

Black plate (10,1)
北米Model "A1130BE-A" EDITED: 2011/ 6/ 2
Audio
Display selection ................................................ 5-30
Folder selection (only when connecting USB storage device) ................................................ 5-30
When “CHECK DEVICE ”is displayed .................. 5-30
Audio control buttons ........................................ 5-31
MODE button..................................................... 5-31
“
” and “
”buttons ......................................... 5-31
Volume control buttons ...................................... 5-32
MUTE button (models without Hands-free system) ............................................................ 5-33
Bluetooth
®audio (type B audio) ....................... 5-33
Media format..................................................... 5-33
Setting Bluetooth
®audio .................................... 5-33
Bluetooth
®audio operation ................................ 5-34
Hands-free system (if equipped) ...................... 5-35
Tips for the Hands-free system.......................... 5-35
Certification for the Hands-free system ............... 5-36
Safety precautions ............................................. 5-37
Using the Hands-free system ............................. 5-38
Bluetooth
®setting ............................................. 5-46
Page 231 of 463
Black plate (187,1)
北米Model "A1130BE-A" EDITED: 2011/ 6/ 7
Antenna system& Roof antenna
CAUTION
. Be sure to lower the antenna rod
before entering garages, parking
towers and other locations with
low ceilings.
. Remove the antenna rod before
washing your car at a car wash. If
the antenna rod is left attached, it
may scratch the roof.
. When reinstalling the removed
antenna rod, be sure to fully
tighten it.
1) Unscrew
2) RemoveThe roof antenna is installed in the center
at the rear part of the roof.
It is possible to remove the antenna rod by
unscrewing it from its base.
& FM receptionAlthough FM is normally static free,
reception can be affected by the surround-
ing area, atmospheric conditions, station
strength and transmitter distance. Build-
ings or other obstructions may cause
momentary static, flutter or station inter-
ference. If reception continues to be
unsatisfactory, switch to a stronger station.
Audio
5-3
5
Page 232 of 463
Black plate (188,1)
北米Model "A1130BE-A" EDITED: 2011/ 6/ 7
5-4
Audio
Installation of accessoriesAlways consult your SUBARU dealer
before installing a citizen band radio or
other transmitting device in your vehicle.
Such devices may cause the electronic
control system to malfunction if they are
incorrectly installed or if they are not
suited for the vehicle.
Audio setYour SUBARU may be equipped with one
of the following audio sets. Refer to the
pages indicated in this section for operat-
ing details.NOTEIf a cell phone is placed near the audio
set, it may cause the audio set to emit
noise when the phone receives calls.
This noise does not indicate an audio
set malfunction. Note that a cell phone
should be placed as far as possible
from the audio set.