Page 9 of 24
 Blues Car Radio Manual ■Name of station - Displays the station name
■ Variable - Scrolling display of a long station name Changing the station name
is not permitted.
■ Fixed - Fixed display of station name, a long")
■Name of station - Displays the station name
■ Variable - Scrolling display of a long station name Changing the station name
is not permitted.
■ Fixed - Fixed display of station name, a long station name is not fully dis-
played The station name is firmly fixed (suitable for the A-Z list).
■ Delete presets - Deletes the stored stations
Note
■
RDS (Radio Data System) is used to transmit programme IDs and additional
services, thus enabling automatic station tracking, for example. In the event of
sufficiently satisfactory reception, the suitable RDS radio stations will display the
station name instead of the station frequency.■
In countries where the RDS (Radio Data System) function is not adequately
supported, we recommend turning off the AF and RDS setting, otherwise they
can affect the functionality of the radio.
■
The AF (alternative frequency) function ensures that the best receivable fre-
quency of the selected station is automatically and precisely set.
Ð
Media setup
›
Press the button SETUP
→ Media .
■ Activate AUX - Activation of the external audio source AUX on/off
■ Mix/repeat including subfolders - Playback of the tracks in modes Mix and Re-
peat including sub-folders on/off
■ Display ID3 tags - Display of the artist, album and track name in the screen of
the unit on/off 1)
Ð
Unit system setup
›
Press the button
SETUP
→ System .
■
Language - Defines the menu language for displays
■ Time/date - Time and date settings
■ Time - Time settings
■ Date - Date settings
■ Summer (DST) - Summer time adjustment on/off
■ Time format - Sets the time format
■ Date format - Sets the date format
■ Units - Sets units of measurement
■ Distance - Distance units
■ km - Kilometres
■ mi - Miles
■ Temperature - Temperature units
■ °C - Degrees Celsius
■ °F - Degrees Fahrenheit
■ Volume - Volume units
■ l - Litres
■ gall. (UK) - Gallons (UK)
■ gall. (US) - Gallons (US)
■ Speed - Speedunits
■ km/h - Kilometres per hour
■ mph - Miles per hour
■ Consumption - Consumption units
■ l/100 km - Litres per 100 kilometres
■ km/l - Kilometres per litre
■ mpg (US) - Miles per gallon (US)
■ mpg (UK) - Miles per gallon (UK)
■ Gas consumption - Gas consumption units
■ kg/100 km - Kilograms per 100 km
■ km/kg - Kilometres per kilogram
■ Display - screen setting
■ Brightness - Adjusts the brightness of the screen
■ Brightest - brightest level
■ Brighter - brighter level
■ Medium - medium level
■ Darker - darker level
■ Darkest - darkest level
■ Clock in standby mode - Time display in screen when the ignition is switched
on and the device is switched off £1)
Artists/track names are always displayed in the information display of the instrument cluster, regard-
less of the setting.
7Unit setup
Page 10 of 24
■Remove USB device safely - Safe removal of USB device 1)
■ Factory settings - Resets to factory settings
■ All - All settings
■ Sound - Sound setup
■ Radio - Radio setup
■ Vehicle - Vehicle system setup
■ Media - Media setup
■ System - System setup
■ Driving profile - Driving mode setup
■ Display off - Switches the display to the so-called energy-saving mode where
the display is black. The display can be switched on again by pressing the menu
knob 2
.
■ System information - Displays system information
■ Versions data - Displays version information
■ Device part number - Part number of the unit
■ Hardware - Hardware used
■ Software version - Software version
■ Copyright - Information on licences and copyrights used
Ð1)
If currently a sound is played from the USB device, this function is not active.
8Unit setup
Page 11 of 24
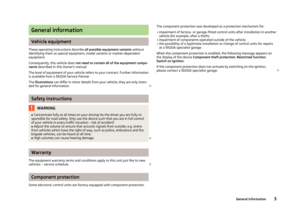
 Blues Car Radio Manual Radio
Main menu
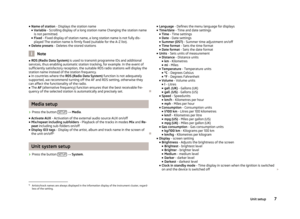
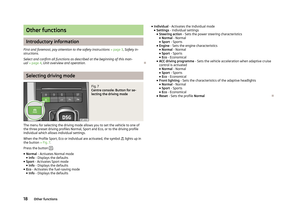
Fig. 4
Main menu/selecting the frequency band
First and foremost, pay attention to the safety instructions » page 3 , Safety in-
structions .
Select and confirm all functions as des")
Radio
Main menu
Fig. 4
Main menu/selecting the frequency band
First and foremost, pay attention to the safety instructions » page 3 , Safety in-
structions .
Select and confirm all functions as described at the beginning of this man- ual » page 4 , Unit overview and operation .
Accessing radio mode in main menu
›
Press the button RADIO.
Selecting a frequency band
Your radio allows reception of FM frequencies (memory bank FM1 and FM2) and the AM frequency bands (AM1 and AM2 memory bank).
›
Press the button RADIO
→ Confirm the selection with the function key
3
or
the button RADIO.
Saving a radio station›Set the desired radio station
» page 9, Station finding and press and hold
the corresponding function key 3
until a beep is heard.
Selecting a stored radio station from the preset list
›
In the selected frequency band, press the buttons and
or the function key
3
under the desired radio station.
Five presets are available in each memory bank.
Selecting a radio station from the station list
›
Press the buttons and or rotate the menu knob
2
to select and confirm
the desired station.
If no station list is available, the device will automatically search for radio sta- tions.
Symbols in the display
SymbolImportanceSound is mutedTraffic information station Station without traffic information , , , Currently selected frequency bandRadio station is selected by desired topic » page 6, Radio
setupRadio station from the station list is a station from the
preset list Auto-play of available radio stations
Ð
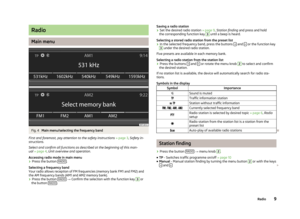
Station finding
›
Press the button RADIO
→ menu knob
2
.
■ TP - Switches traffic programme on/off » page 10
■ Manual - Manual station finding by turning the menu button
2
or with the keys
and £
9Radio
Page 12 of 24
 Blues Car Radio Manual ■Scan - auto--play all stations in the current frequency band, each station for
around five seconds
■ OK - Stop auto-play function at the current radio station
■ Skip - Selects another radio")
■Scan - auto--play all stations in the current frequency band, each station for
around five seconds
■ OK - Stop auto-play function at the current radio station
■ Skip - Selects another radio station
■ Auto store - Automatic station finding where the station with the strongest sig-
nal are stored in memory banks FM1, FM2Ð
Traffic programme TP
›
Press the button RADIO
→ menu knob
2
→ TP.
The display
in combination with a station name (e.g. in the station or preset
list), indicates a traffic programme station.
Traffic monitoring is indicated by the letters
in the display.
While playing in Media mode, the last selected radio station continues to be re-
ceived in the background if it supports traffic information. If a radio station is set
that does not support TP, the most appropriate TP station is set automatically in the background to continuously receive traffic reports in the media.
The radio works the same in a selected AM frequency range. If no traffic pro-
gramme station can be found because, for example, radio reception is interrupted
in general, No TP will be displayed instead of TP.
Ð
10Radio
Page 13 of 24
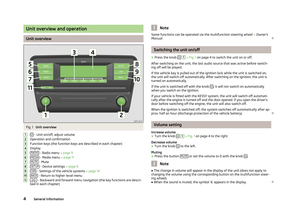
 Blues Car Radio Manual Media
Main menu
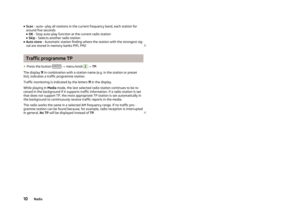
Fig. 5
Main menu/CD mode
First and foremost, pay attention to the safety instructions » page 3 , Safety in-
structions .
Select and confirm all functions as described at the beginni")
Media
Main menu
Fig. 5
Main menu/CD mode
First and foremost, pay attention to the safety instructions » page 3 , Safety in-
structions .
Select and confirm all functions as described at the beginning of this man- ual » page 4 , Unit overview and operation .
Accessing main menu in media mode
›
Press the button MEDIA.
■
USB - Changes to a connected external audio source at the USB in-
put 1)
» page 12
■ AUX - Changes to a connected external audio source at the AUX in-
put » page 12
Symbols in the displaySymbolImportanceSound is mutedTrack repeatRandom play , Currently selected audio sourceAuto-play of tracks
Ð
Using buttons
The buttons
or will always affect the currently heard audio source, irrespec-
tive of the current menu used.
It is also possible to change tracks in the menu of the currently played audio source using the function keys
3
.
Button
ActionOperationPress brieflyChanges to the beginning of the track being
played » table on page 12Each time you pressChanges to the beginning of the previous trackPress button for a long
period of timeFast-reverse of the track
Button
ActionOperationPress brieflyChanges to the beginning of the next trackPress button for a long
period of timeFast-forward of the track £1)
Operating an externally connected audio source is possible with certain restrictions, depending pri-
marily on the type of the connected device.
11Media
Page 14 of 24
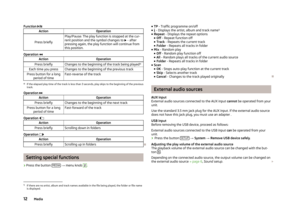
 Blues Car Radio Manual Function /ActionOperation
Press briefly
Play/Pause: The play function is stopped at the cur-
rent position and the symbol changes to £ - after
pressing again, the play function will continue f")
Function /ActionOperation
Press briefly
Play/Pause: The play function is stopped at the cur-
rent position and the symbol changes to £ - after
pressing again, the play function will continue from
this position.
Operation
ActionOperationPress brieflyChanges to the beginning of the track being played a)Each time you pressChanges to the beginning of the previous trackPress button for a long
period of timeFast-reverse of the tracka)
If the elapsed play time of the track is less than 3 seconds, play skips to the beginning of the previous
track.
Operation
ActionOperationPress brieflyChanges to the beginning of the next trackPress button for a long
period of timeFast-forward of the track
Operation
ActionOperationPress brieflyScrolling down in folders
Operation
ActionOperationPress brieflyScrolling up in folders
Ð
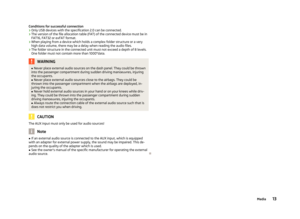
Setting special functions
› Press the button
MEDIA
→ menu knob
2
.
■
TP - Traffic programme on/off
■ - Displays the artist, album and track name 1)
■ Repeat - Displays the repeat options
■ Off - Repeat function off
■ Track - Repeats the current track
■ Folder - Repeats all tracks in folder
■ Mix - Random play
■ Off - Random play function off
■ All - Random plays all tracks of the current audio source
■ Folder - Repeats all tracks in folder
■ Scan
■ OK - Stops auto-play function at the current track
■ Skip - Selects another track
■ Cancel - Changes to the track played originallyÐ
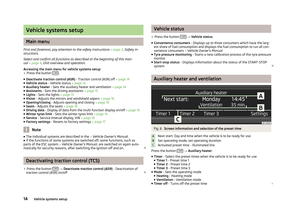
External audio sources
AUX input
External audio sources connected to the AUX input cannot be operated from your
unit.
Use the standard 3.5 mm jack plug for the AUX input. If the external audio source does not have this jack plug, you must use an adapter .
USB input
Before removing the USB device, proceed as follows:
External audio sources connected to the USB input can be operated from your
unit.
›
Press the button SETUP
→ System → Remove USB device safely .
Adjusting the play volume of the external audio source
The playback volume of the external audio source can be changed with the but-
ton
.
Depending on the connected audio source, the output volume can be changed on
the external audio source » page 6, Sound setup . £
1)
If there are no artist, album and track names available in the file being played, the folder or file name
is displayed.
12Media
Page 15 of 24
 Blues Car Radio Manual Conditions for successful connection› Only USB devices with the specification 2.0 can be connected.
› The version of the file allocation table (FAT) of the connected device must be in
FAT16, FAT32")
Conditions for successful connection› Only USB devices with the specification 2.0 can be connected.
› The version of the file allocation table (FAT) of the connected device must be in
FAT16, FAT32 or exFAT format.
› When playing from a device which holds a complex folder structure or a very
high data volume, there may be a delay when reading the audio files.
› The folder structure in the connected unit must not exceed a depth of 8 levels.
One folder must not contain more than 1000°data.WARNING■ Never place external audio sources on the dash panel. They could be thrown
into the passenger compartment during sudden driving manoeuvres, injuring
the occupants.■
Never place external audio sources close to the airbags. They could be
thrown into the passenger compartment when the airbags are deployed, in- juring the occupants.
■
Never hold external audio sources in your hand or on your knees while driv-
ing. They could be thrown into the passenger compartment during sudden driving manoeuvres, injuring the occupants.
■
Always route the connection cable of the external audio source such that is
does not restrict you when driving.
CAUTION
The AUX input must only be used for audio sources!
Note
■ If an external audio source is connected to the AUX input, which is equipped
with an adapter for external power supply, the sound may be impaired. This de-
pends on the quality of the adapter which is used.■
See the owner's manual of the specific manufacturer for operating the external
audio source.
Ð
13Media
Page 16 of 24
 Blues Car Radio Manual Vehicle systems setup
Main menu
First and foremost, pay attention to the safety instructions » page 3 , Safety in-
structions .
Select and confirm all functions as described at the beginning of this")
Vehicle systems setup
Main menu
First and foremost, pay attention to the safety instructions » page 3 , Safety in-
structions .
Select and confirm all functions as described at the beginning of this man- ual » page 4 , Unit overview and operation .
Accessing the main menu for vehicle systems setup
›
Press the button CAR.
■ Deactivate traction control (ASR) - Traction control (ASR) off » page 14
■ Vehicle status - Vehicle status » page 14
■ Auxiliary heater - Sets the auxiliary heater and ventilation » page 14
■ Assistants - Sets the driving assistants » page 15
■ Lights - Sets the lights » page 15
■ Vision - Adjusts the mirrors and windshield wipers » page 16
■ Opening/closing - Adjusts opening and closing » page 16
■ Seats - Adjusts the seats » page 16
■ Driving data - Display of data from the multi-function display on/off » page 16
■ Winter tyres limit - Sets the winter tyres limit » page 16
■ Service - Service interval display, VIN » page 16
■ Factory settings - Resets to factory settings » page 17
Note
■
The individual systems are described in the » Vehicle Owner's Manual .■If the functions of some systems are switched off, some functions, such as
parts of the ESC system » Vehicle Owner's Manual , are switched on again auto-
matically for security reasons, after switching the ignition off and on.
Ð
Deactivating traction control (TCS)
›
Press the button CAR
→ Deactivate traction control (ASR) - Deactivation of
traction control (ASR) on/off
Ð
Vehicle status›
Press the button CAR
→ Vehicle status .
■ Convenience consumers - Displays up to three consumers which have the larg-
est share of fuel consumption and displays the fuel consumption to run all con-
venience consumers » Vehicle Owner's Manual
■ Tyre pressure monitoring - Starts a new calibration process of the tyre pressure
monitor
■ Start-stop status - Displays information about the status of the START-STOP
system
Ð
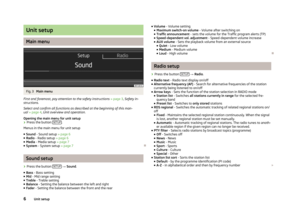
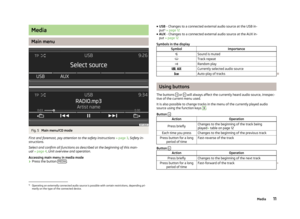
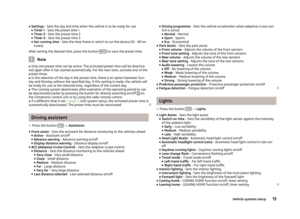
Auxiliary heater and ventilation
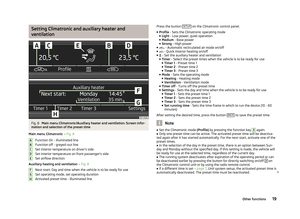
Fig. 6
Screen information and selection of the preset time
Next start: Day and time when the vehicle is to be ready for use
Set operating mode, set operating duration
Activated preset time - illuminated line
Press the button CAR
→ Auxiliary heater .
■ Timer - Select the preset times when the vehicle is to be ready for use
■ Timer 1 - Preset time 1
■ Timer 2 - Preset time 2
■ Timer 3 - Preset time 3
■ Mode - Sets the operating mode
■ Heating - Heating mode
■ Ventilation - Ventilation mode
■ Timer off - Turns off the preset time £
ABC14Vehicle systems setup

 Blues Car Radio Manual ■Remove USB device safely - Safe removal of USB device 1)
■ Factory settings - Resets to factory settings
■ All - All settings
■ Sound - Sound setup
■ Radio - Radio setup
■ Vehicle -")