Page 1 of 20
Quick RefeRence Guide
2012
MAXiMA
Page 2 of 20
*See your Owner’s Manual for information.
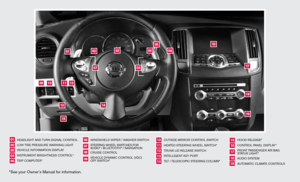
HeAd LiGHT And Tu Rn S iG nAL c OnTROL
LOW T iRe PRe SSuRe WARnin G LiGHT
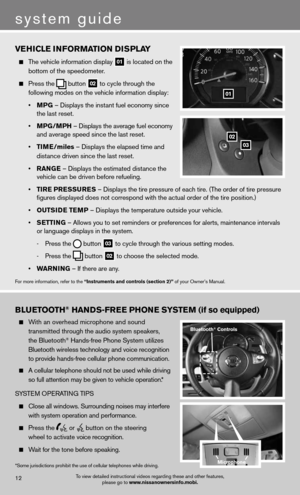
V e H icL e inf ORMAT iOn diSPLAY
in STR uM enT BR iGHTne SS cOnTROL*
TR iP c OMP uTeR* W
ind SHieL d W iPeR / WASHeR SW iT c H
ST eeRin G WHeeL SW iT c He S f OR
A udi O* / B L u eTO OTH
® / nAVi GATiOn
cR uiSe cOn TROL
Ve Hic Le d YnAM ic cOnTROL (Vdc)
Off SWi TcH* Ou
TSide MiRROR cOn TROL SWiTcH
H eATed STee Rin G WH eeL SW iTc H*
TR unk Lid R eLeAS e SW iTc H
inTe LLiGenT keY PORT
Ti LT / Te LeSc OP ic STee Rin G c OLu Mn* HOO
d ReLeAS e*
cOn TROL PA neL diSPLAY*
f RO nT PASS enGeR Ai R BAG
STATu S LiGHT*
A u d i O SYST eM
A uTOMATic c LiMATe c OnTROLS
07
02
06
0501
08
03
1110121314
1617181915
09
04
02
03
05
04
01
06
09
10
11
14
12
1315
16
171819
07
08
Page 3 of 20

TABLe Of cOnTenTS
Ess Ential i nformation
Loose fuel cap . . . . . . . . . . . . . . . . . . . . . . . . . . . . . . . . . . . .\
. . . . . . . . . . . . 2
Tire Pressure Monitoring System (TPMS) .......................... 2
Heated Steering Wheel (if so equipped) ............................3
first DrivE fEatur Es
ni SSAn intelligent k ey
® System.................................. 4
Trunk Lid Release ............................................... 5
Seat Adjustments .............................................. 5
Automatic drive Positioner (if so equipped) ......................... 6
Outside Mirror control Switch .................................... 6
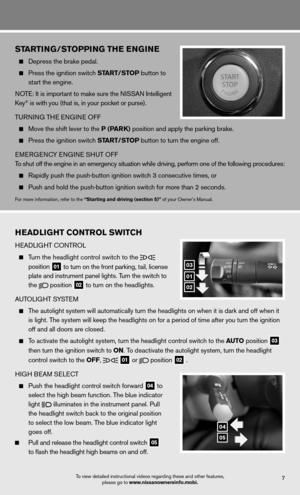
Starting/Stopping the engine ..................................... 7
Headlight control Switch ........................................ 7
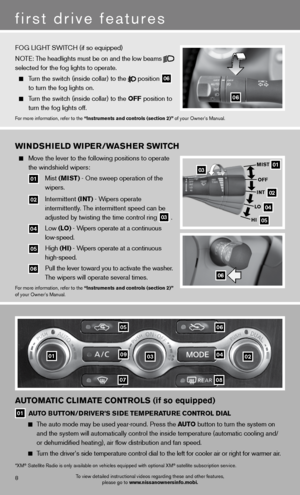
Windshield Wiper/Washer Switch ................................. 8
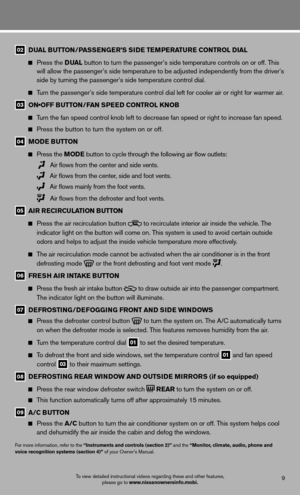
Automatic climate controls (if so equipped) ........................ 8
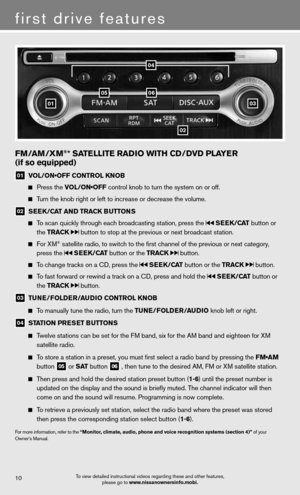
f M/AM/XM
® Satellite Radio with cd/ dVd Player (if so equipped) .....10
cruise control ................................................ 11
fuel-filler door ................................................ 11
s yst Em GuiDE
Vehicle information display ...................................... 12
Bluetooth
® Hands-free Phone System (if so equipped) ...............12
System Operating Tips ....................................... 12
Bluetooth
® System without navigation (if so equipped) ............ 13
Bluetooth® System with navigation (if so equipped) ...............15
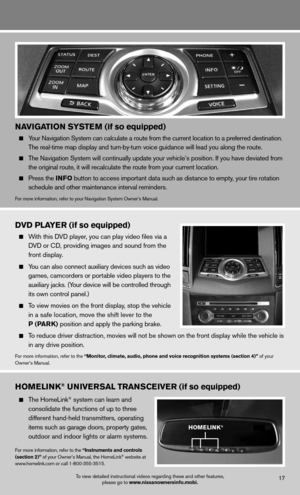
navigation System (if so equipped) ...............................17
d Vd Player (if so equipped) ..................................... 17
HomeLink
® universal Transceiver (if so equipped) ...................17
• A cellular telephone should not be used for any purpose while
driving so full attention may be given to vehicle operation.
• Always wear your seat belt.
• Supplemental air bags do not replace proper seat belt usage.
• Children 12 and under should always ride in the rear seat
properly secured in child restraints or seat belts according to
their age and weight.
• Do not drink and drive.
f or more information, refer to the “safety –– seats, seat belts and
supplemental restraint system (section 1)”, the “monitor, climate,
audio, phone and voice recognition systems (section 4)” and the
“starting and driving (section 5)” of your Owner’s Manual.
Additional information about your vehicle is also available in your Owner’s Manual, navigation System Owner’s Manual and at www.nissanusa.com. To view detailed
instructional videos, go to
www.nissanownersinfo.mobi/2012/maxima or snap this barcode with an appropriate barcode reader.
Page 4 of 20

A ChEC k tirE PrEssurE warning message will
appear in the vehicle information display
01 and the
low tire pressure warning light
02 will")
tirE Pr Essur E monitorin G systEm (tPms)
A ChEC k tirE PrEssurE warning message will
appear in the vehicle information display
01 and the
low tire pressure warning light
02 will
illuminate when one or more tires are
low on pressure and air is needed.
• The tire pressures should be checked when the
tires are cold. The tires are considered cold after
the vehicle has been parked for 3 hours or more or
driven less than 1 mile (1.6km) at moderate speeds.
After tire pressures are adjusted, drive the vehicle
at speeds above 16 MPH (25km/h). The Ch ECk
tirE P rEssurE warning message and low tire
pressure warning light will disappear.
When the low tire pressure warning light flashes for 1 minute and then \
remains on, the TPMS
is not functioning properly. Have the system checked by a NISSAN dealer.
Tire pressure rises and falls depending on the heat caused by the vehicle’s operation and the
outside temperature. Low outside temperature can lower the temperature o\
f the air inside the
tire, which can cause a lower tire inflation pressure. This may cause the low tire pressure
warning light to illuminate. If the warning light illuminates in low ambient temperature, check
the tire pressure in your tires.
• Check the tire pressure (including the spare tire) often and always prior to long distance trips.
The Tire and Loading Information label contains valuable information. Please refer to section 9,
“Technical and consumer information”, in your Owner’s Manual for the location of the Tire and
Loading Information label.
for more information, refer to the “instruments and controls (section 2)” , the “starting and driving (section 5)” and the
“maintenance and do-it-yourself (section 8)” of your Owner’s Manual.
loos E fuEl C aP
A loos E fuEl CaP warning message will appear
in the vehicle information display
01 when the fuel-
filler cap is not tightened correctly.
To tighten, turn the cap clockwise until a single click
is heard.
The warning message will disappear when the
vehicle detects the fuel-filler cap is properly
tightened and the reset button
02 is pressed.
if the cap is not properly tightened the Malfunction
indicator Light
may illuminate.
f
or more information, refer to the “instruments and controls (section 2)”
and the “Pre-driving checks and adjustments (section 3)” of your
Owner’s Manual.
To view detailed instructional videos regarding these and other features, please go to www.nissanownersinfo.mobi.
essential information
2
02
01
02
01
Page 5 of 20
To view detailed instructional videos regarding these and other features, please go to www.nissanownersinfo.mobi.3
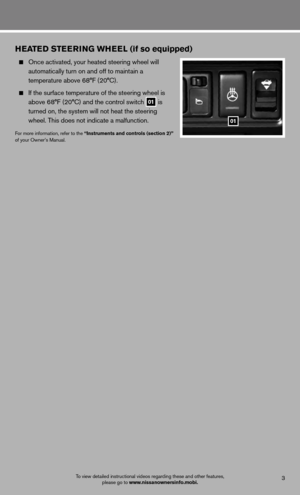
hEatED stEE rinG Wh EEl (if so equipped)
Once activated, your heated steering wheel will
automatically turn on and off to maintain a
temperature above 68°F (20°C).
if the surface temperature of the steering wheel is
above 68°F (20°C) and the control switch
01 is
turned on, the system will not heat the steering
wheel. This does not indicate a malfunction.
for more information, refer to the “instruments and controls (section 2)”
of your Owner’s Manual.
01
Page 6 of 20

4
first drive features
01
To view detailed instructional videos regarding these and other features, please go to www.nissanownersinfo.mobi.
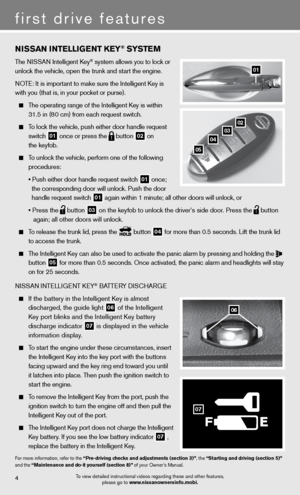
nissan intE lliGE nt k Ey® syst Em
The ni SSAn intelligent k ey® system allows you to lock or
unlock the vehicle, open the trunk and start the engine.
n OTe: it is important to make sure the intelligent k ey is
with you (that is, in your pocket or purse).
The operating range of the intelligent k ey is within
31.5 in (80 cm) from each request switch.
To lock the vehicle, push either door handle request
switch
01 once or press the
button
02 on
the keyfob.
To unlock the vehicle, perform one of the following
procedures:
• Push either door handle request switch
01 once;
the corresponding door will unlock. Push the door
handle request switch
01 again within 1 minute; all other doors will unlock, or
• Press the
button
03 on the keyfob to unlock the driver’s side door. Press the
button
again; all other doors will unlock.
To release the trunk lid, press the button
04 for more than 0.5 seconds. Lift the trunk lid
to access the trunk.
The Intelligent Key can also be used to activate the panic alarm by pressing and holding the
button
05 for more than 0.5 seconds. Once activated, the panic alarm and headlight\
s will stay
on for 25 seconds.
ni SSAn inTe LLiGenT keY
® BATTe RY diSc HARG e
If the battery in the Intelligent Key is almost
discharged, the guide light
06 of the intelligent
Key port blinks and the Intelligent Key battery
discharge indicator
07 is displayed in the vehicle
information display.
To start the engine under these circumstances, insert
the Intelligent Key into the key port with the buttons
facing upward and the key ring end toward you until
it latches into place. Then push the ignition switch to
start the engine.
To remove the intelligent k ey from the port, push the
ignition switch to turn the engine off and then pull the
intelligent k ey out of the port.
The intelligent k ey port does not charge the intelligent
Key battery. If you see the low battery indicator
07 ,
replace the battery in the Intelligent Key.
for more information, refer to the “Pre-driving checks and adjustments (section 3)”, the “starting and driving (section 5)”
and the “maintenance and do-it yourself (section 8)” of your Owner’s Manual.
0203
04
05
06
F
07
Page 7 of 20

sEat aDJ ustmEnts
To slide the seat forward or backward, push the
control switch
01 forward or backward.
To adjust the angle of the seatback, push the switch
02 forward or backward.
SeAT LifTe R (if so equipped for driver’s seat)
To adjust the angle and height of the seat cushion,
push the front or rear end of the switch
01 up or
down.
Lu MBAR S uPPORT (if so equipped for driver’s seat)
To adjust the seat lumbar area, push the front or rear end of the switch
03 .
f
or more information, refer to the “safety –– seats, seat belts and supplemental restraint system (section 1)” of your
Owner’s Manual.
0102
03
5To view detailed instructional videos regarding these and other features, please go to www.nissanownersinfo.mobi.
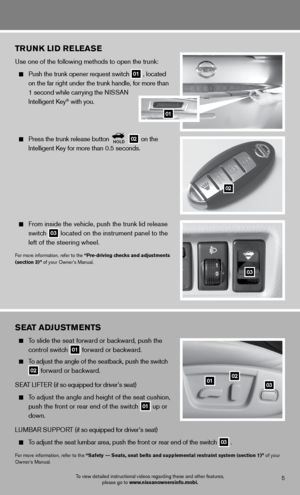
trunk liD rElEas E
use one of the following methods to open the trunk:
Push the trunk opener request switch
01 , located
on the far right under the trunk handle, for more than
1 second while carrying the n iSSAn
intelligent k ey
® with you.
Press the trunk release button
holD 02 on the
intelligent k ey for more than 0.5 seconds.
from inside the vehicle, push the trunk lid release
switch
03 located on the instrument panel to the
left of the steering wheel.
for more information, refer to the “Pre-driving checks and adjustments
(section 3)” of your Owner’s Manual.
03
02
01
Page 8 of 20

Two positions for the driver’s seat, steering column
and outside mirrors can be stored in the automatic
drive positioner memory.
follow")
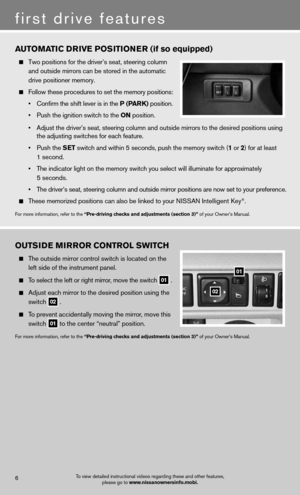
automatiC DrivE P osition Er (if so equipped)
Two positions for the driver’s seat, steering column
and outside mirrors can be stored in the automatic
drive positioner memory.
follow these procedures to set the memory positions:
• Confirm the shift lever is in the P (P ark) position.
• Push the ignition switch to the on position.
• Adjust the driver’s seat, steering column and outside mirrors to the desired positions using
the adjusting switches for each feature.
• Push the s Et switch and within 5 seconds, push the memory switch (1 or 2) for at least
1 second.
• The indicator light on the memory switch you select will illuminate for approximately
5 seconds.
• The driver’s seat, steering column and outside mirror positions are now set to your preference.
These memorized positions can also be linked to your NISSAN intelligent k ey®.
for more information, refer to the “Pre-driving checks and adjustments (section 3)” of your Owner’s Manual.
outsi DE mirror Control sWit Ch
The outside mirror control switch is located on the
left side of the instrument panel.
To select the left or right mirror, move the switch
01 .
Adjust each mirror to the desired position using the
switch
02 .
To prevent accidentally moving the mirror, move this
switch
01 to the center “neutral” position.
f
or more information, refer to the “Pre-driving checks and adjustments (section 3)” of your Owner’s Manual.
6
first drive features
To view detailed instructional videos regarding these and other features,
please go to www.nissanownersinfo.mobi.
01
02


Once activated, your heated steering wheel")