2012 MITSUBISHI ASX window
[x] Cancel search: windowPage 152 of 378

Precautions to observe when using wip-
ers and washers
E00510000070
l If
the moving wipers become blocked by ice
or other deposits on the glass, the motor may
burn out even if the wiper switch is turned to
OFF. If obstruction occurs, park your vehicle
in a safe place, turn off the engine, and clean
the deposits from the glass so that the wipers
operate smoothly.
l Do not use the wipers when the glass is dry.
They may scratch the glass surface and the
blades wear out prematurely.
l Before using the wipers in cold weather,
check that the wiper blades are not frozen on-
to the glass. The motor may burn out if the
wipers are used with the blades frozen onto
the glass.
l Avoid using the washer continuously for
more than 20 seconds. Do not operate the
washer when the fluid reservoir is empty.
Otherwise, the motor may burn out.
l Periodically check the level of washer fluid
in the reservoir and refill if required.
During cold weather, add a recommended
washer solution that will not freeze in the
washer reservoir. Failure to do so could re-
sult in loss of washer function and frost dam-
age to the system components. Rear window demister switch
E00507901186
The
rear window demister switch can be operated
when the engine is running.
Push the switch to turn on the rear window demis-
ter. It will be turned off automatically in about 20
minutes. To turn off the demister within about 20
minutes, push the switch again.
The indication lamp (A) will illuminate while the
demister is on. NOTE
l When
the rear window demister switch is
pressed, the outside rear-view mirrors are de-
fogged or defrosted. Refer to “Heated mir-
ror” on page 4-12.
l The demister switch is not to melt snow but
to clear mist.
Remove snow before use of the demister
switch.
l When cleaning the inside of the rear win-
dow, use a soft cloth and wipe gently along
the heater wires, being careful not to damage
the wires. l
Do
not allow objects to touch the inside of
the rear window glass, damaged or broken
wires may result. Instruments and controls
3-56
3
OGWE12E1
Page 162 of 378

Steering wheel height and reach
adjustment E00600700512
1. Release
the lever while holding the steering
wheel up.
2. Adjust the steering wheel to the desired posi- tion.
3. Securely lock the steering wheel by pulling the lever fully upward. A- Locked
B-
Release WARNING
l Do
not attempt to adjust the steering
wheel while you are driving the vehicle. Inside rear-view mirror
E00600800757
Adjust
the rear-view mirror only after making any
seat adjustments so you have a clear view to the
rear of the vehicle.
Type 1
Type 2
Type 3 WARNING
l Do
not attempt to adjust the rear-view
mirror while driving. This can be danger-
ous.
Always adjust the mirror before driving.
Adjust the rear-view mirror to maximize the view
through the rear window. To adjust the vertical mirror position
It
is possible to move the mirror up and down to ad-
just its position. To adjust the mirror position
It
is possible to move the mirror up/down and left/
right to adjust its position. Starting and driving
4-08
4
OGWE12E1
Page 164 of 378

l
If you want to stop automatic mode, press
the switch (3) and the indicator will go off.
To return to automatic mode, press the
switch again or perform the following opera-
tion.
[Except for vehicles equipped with keyless
operation system]
Turn the ignition switch to the “ON” posi-
tion after turning to the “LOCK” or “ACC”
position.
[For vehicles equipped with the keyless oper-
ation system] Put the operation mode in ON
after putting the operation mode in OFF. Outside rear-view mirrors
E00600900628
To adjust the mirror position E00601000642
The outside rear-view mirrors can be operated
when
the ignition switch or the operation mode is
in ON or ACC. WARNING
l Do
not attempt to adjust the rear-view
mirrors while driving. This can be danger-
ous.
Always adjust the mirrors before driving.
l Your vehicle is equipped with convex
type mirrors.
Please take into consideration, that ob-
jects you see in the mirror will look small-
er and farther away compared to a nor-
mal flat mirror.
Do not use this mirror to estimate dis-
tance of following vehicles when changing
lanes. 1. Place
the lever (A) to the same side as the mir-
ror whose adjustment is desired.
Except for vehicles equipped with the mirror
retractor switch
Vehicles equipped with the mirror retractor switch L- Left outside mirror adjustment
R- Right outside mirror adjustment
2. Press
the switch (B) to the left, right, up or
down to adjust the mirror position. 1- Up
2- Down
3- Right
4- Left
3. Return the lever (A) back to the middle posi- tion (•).
Retracting and extending the outside
mirrors E00601100643
The outside mirror can be folded in towards the
side
window to prevent damage when parking in
narrow areas. Starting and driving
4-10
4
OGWE12E1
Page 166 of 378

NOTE
l Functions
can be modified as stated below.
Consult a MITSUBISHI MOTORS Author-
ized Service Point.
On vehicles equipped with MITSUBISHI
Multi-Communication System (MMCS),
screen operations can be used to make the ad-
justment. Refer to the separate owner’s man-
ual for details. • Automatically extend when the followingoperation is performed.
[Except for vehicles equipped with key-
less operation system]
Turn the ignition switch to the “ON” or
“ACC” position.
[Vehicles equipped with keyless opera-
tion system]
Put the operation mode in ON or ACC.
• Automatically retract when the driver’s door is opened after turning the ignition
switch to the “LOCK” position or putting
the operation mode in OFF.
• Automatically extend when the vehicle speed reaches 30 km/h (19 mph).
• Deactivate the automatic extension func- tion.
Heated mirror E00601200497
To demist or defrost the outside rear-view mirrors,
press the rear window demister switch.
The
indication lamp (A) will illuminate while the
demister is on. The heater will be turned off automatically in about
20 minutes. Ignition switch
E00601401845
[For
vehicles equipped with keyless operation
system]
For information on operations for vehicles equip-
ped with the keyless operation system, refer to
“Keyless operation system: Engine switch” on
page 1-12.
[Except for vehicles equipped with keyless oper-
ation system] LOCK
The
engine is stopped and the steering wheel
locked. The key can only be inserted and removed
in this position.
ACC
The engine is stopped, but the audio system and oth-
er electric devices can be operated.
ON
The engine is running, and all the vehicle’s electri-
cal devices can be operated. Starting and driving
4-12
4
OGWE12E1
Page 174 of 378
gine will not stop automatically even if the ve-
hicle is stopped.
•
Driver’s seat belt is not fastened
• Bonnet is open
• After the engine restarts automatically, the vehicle speed has not exceeded ap-
proximately 5 km/h (3 mph)
• Brake booster vacuum pressure is low be- cause the brake pedal is depressed repeat-
edly or depressed harder than usual
• After the ignition switch is turned from the “ON” position to the “START” posi-
tion, approximately 30 seconds or more
have not elapsed.
• After the engine restarts automatically and the vehicle stops again within 10 sec-
onds.
• After presing the engine switch to start the engine from the operation mode is in
ON, approximately 30 seconds or more
have not elapsed
• Engine coolant temperature is low
• Ambient temperature is lower than ap- proximately 3 °C
• Air conditioning is operating and passen- ger compartment has not sufficiently
cooled
• Mode selection dial is set to the demister position.
Refer to “Demisting of the windscreen
and door windows: For quick demisting”
on page 5-08.
• When the air conditioning is operated in AUTO mode where the temperature con-
trol dial is set to the max. hot or the max.
cool position (for vehicles with automatic
air conditioning). • Electric power consumption is high, such
as when the rear window demister or oth-
er electrical components are operating or
the blower speed is set to a high setting.
• Battery voltage or battery performance is low
• Check engine warning lamp is illumina-
ted or the “ ”
display/indicator is blinking
l If the Auto Stop & Go (AS&G) system oper-
ates while the air conditioning is operating,
both the engine and the air conditioning com-
pressor will stop. Therefore, only the blower
will operate.
l If the demisting function and the Auto Stop
& Go (AS&G) system are needed at the
same time, it is recommended to set the
mode selection dial to the Foot/demister posi-
tion.
Refer to “Mode selection dial” on page
5-02.
l If the air conditioning is operating, set the
temperature control dial higher to lengthen
the time that the engine is stopped automati-
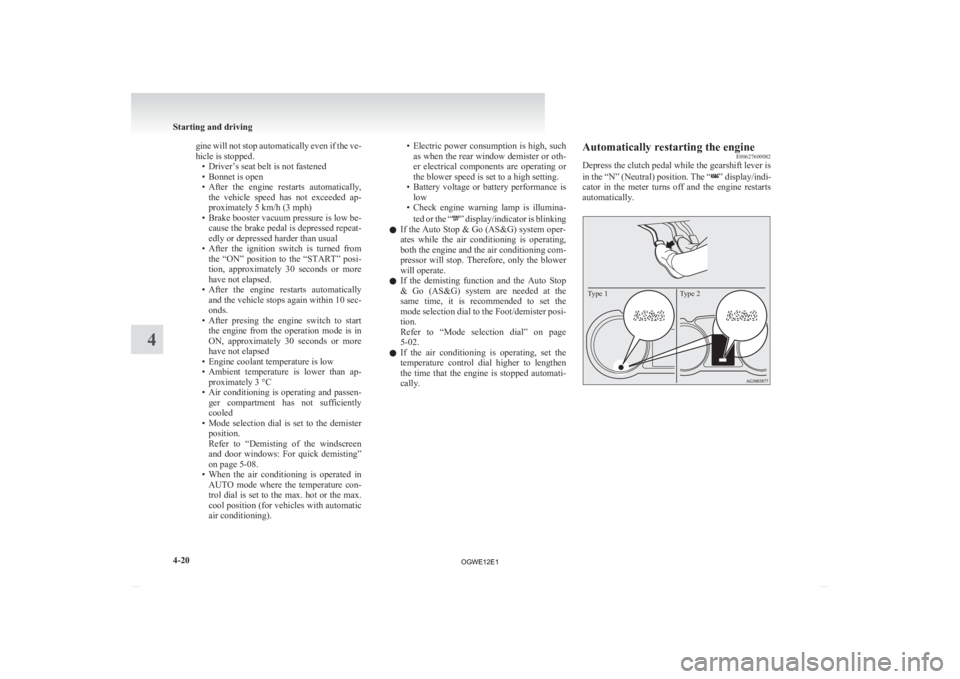
cally. Automatically restarting the engine
E00627600082
Depress the clutch pedal while the gearshift lever is
in
the “N” (Neutral) position. The “ ” display/indi-
cator
in the meter turns off and the engine restarts
automatically.
Type 2
Type 1 Starting and driving
4-20
4
OGWE12E1
Page 175 of 378

NOTE
l If the engine does not restart automatically or
if
the engine stalls, the oil pressure warning
lamp, charge warning lamp, and check en-
gine warning lamp will illuminate.
If this occurs, the engine will not restart even
if the clutch pedal is depressed again. While
depressing the brake pedal, fully depress the
clutch pedal and turn the ignition switch to
the “START” position to start the engine.
For details, refer to “Starting and stopping
the engine” on page 1-15 or “Starting” on
page 4-14. CAUTION
l
In
the following cases, the engine will re-
start automatically even if the engine was
stopped by the Auto Stop & Go (AS&G)
system. Pay attention, otherwise an unex-
pected accident might occur when the en-
gine restarts. • Vehicle speed is 3 km/h (2 mph) orhigher when coasting down a slope
• Brake booster vacuum pressure is low because the brake pedal is depressed
repeatedly or depressed harder than
usual
• Engine coolant temperature is low
• When the air conditioning is operated by pressing the air conditioning switch.
• When the preset temperature of the air conditioning is changed significant-
ly. CAUTION
• When
the air conditioning is operated
in AUTO mode where the tempera-
ture control dial is set to the max. hot
or the max. cool position (for vehicles
with automatic air conditioning).
• When the air conditioning is ON, the passenger compartment temperature
rises and the air conditioning compres-
sor operates to lower the temperature.
• Mode selection dial is set to the demis- ter position.
Refer to “Demisting of the windscreen
and door windows: For quick demist-
ing” on page 5-08
• Electric power consumption is high, such as when the rear window demis-
ter or other electrical components are
operating or the blower speed is set to
a high setting.
NOTE l If
the “Auto Stop & Go (AS&G) OFF”
switch is pressed to deactivate the Auto Stop
& Go (AS&G) system while the engine is
stopped automatically, the engine will not re-
start automatically even if the clutch pedal is
depressed.
l When the engine restarts automatically, the
audio volume may temporarily decrease.
This does not indicate a malfunction.
l When the engine is stopped automatically,
the air conditioning may temporarily change
the air volume.
This does not indicate a malfunction. To deactivate
E00627700070
The
Auto Stop & Go (AS&G) system is automati-
cally activated when the ignition switch is turned to
the “ON” position. You can deactivate the system
by pressing the “Auto Stop & Go (AS&G) OFF”
switch.
When the Auto Stop & Go (AS&G) system is deac-
tivated, the “ ” display/indicator will turn on.
To
reactivate the Auto Stop & Go (AS&G) system,
press the “Auto Stop & Go (AS&G) OFF” switch;
the display/indicator will turn off.
Type 1 Type 2 NOTE
l This
display/indicator will also turn on for a
few seconds when the ignition switch is
turned to the “ON” position or the operation
mode is put in ON. Starting and driving
4-21 4
OGWE12E1
Page 215 of 378

Foot/demister position
Air flows to the leg area, the windscreen and the
door windows. Demister position
Air
flows mainly to the windscreen and the door
windows. CAUTION
l
When
using the mode selection dial be-
tween the “ ” and “ ” positions, pre-
vent fogging by pressing the air selection
switch to select outside air.
(Refer to “Air selection switch” on page
5-04.)
NOTE l With
the mode selection dial between the
“ ”
and “ ” positions, the air flows main-
ly to the upper part of the passenger compart-
ment. With the mode selection dial between
the “ ”
and “ ” positions, the air flows
mainly to the leg area.
l With the mode selection dial in the “ ”
po-
sition, a small amount of air flows to the wind-
screen and the door windows.
l With the mode selection dial between the
“ ”
and “ ” positions, the air flows main-
ly to the leg area. With the mode selection di-
al between the “ ”
and “ ” positions, the
air flows mainly to the windscreen and door
windows. Heater/Air conditioning
E00700500449
The
heater/air conditioning can only be used while
the engine is running.
Control panel E00700600541
Heater/Manual air conditioning
Automatic air conditioning A- Temperature control dial
B-
Air selection switch
C- Blower speed selection dial
D- Air conditioning switch E- Mode selection dialF- Rear window demister switch ® p. 3-56
NOTE l On vehicles with the heater, button (D) is not
available for use. The indicator below the but-
ton doesn’t come on even if it is pushed. l
On
vehicles with automatic air conditioning,
there is an interior air temperature sensor (G)
in the illustrated position.
Never place anything over the sensor, since
doing so will prevent it from functioning prop-
erly. Blower speed selection dial
E00700700249
Select the blower speed by turning the blower
speed selection dial clockwise or anticlockwise.
Turn
the dial clockwise to increase the air flow and
anticlockwise to decrease the air flow.
Heater/
Manual air conditioning Automatic air conditioning For pleasant driving
5-03 5
OGWE12E1
Page 216 of 378

Temperature control dial
E00700900368
Turn the temperature control dial clockwise or anti-
clockwise.Heater/
Manual air conditioning Automatic air conditioningNOTE
l While
the engine coolant temperature is low,
the temperature of the air from the heater
will be cool/cold until the engine warms up,
even if you have selected warm air with the
dial.
l On vehicles with the automatic air condition-
ing, when the temperature is set to the high-
est or the lowest setting under the AUTO op-
eration, the air selection and the air condition-
ing will be automatically changed as follows.
• Quick Heating (When the temperature isset to the highest setting)
Outside air will be introduced and the air
conditioning will stop.
• Quick Cooling (When the temperature is set to the lowest setting)
Inside air will be recirculated and the air
conditioning will operate. The settings described above are the factory set-
tings.
The air selection and air conditioning
switches can be customized (function setting
changed), and the automatic switching of outside
air and the air conditioning according to operating
conditions can be changed as desired.
For further information, we recommend you to con-
sult a MITSUBISHI MOTORS Authorized Service
Point.
Refer to “Customizing the air conditioning switch
(Automatic air conditioning)” on page 5-05.
Refer to “Customizing the air selection” on page
5-05.
Air selection switch E00701300721
To change the air selection, simply press the air se-
lection
switch. There is a sound each time the
switch is pressed.
l Outside air: Indication lamp (A) is OFF
Outside air is introduced into the passenger
compartment.
l Recirculated air: Indication lamp (A) is ON
Air is recirculated inside the passenger com-
partment.
Heater/
Manual air conditioning Automatic air conditioning CAUTION
l
Normally, use the outside position to keep
the
windscreen and side windows clear
and quickly remove fog or frost from the
windscreen.
If high cooling performance is desired, or
if the outside air is dusty or otherwise con-
taminated use the recirculation position.
Switch to the outside position periodically
to increase ventilation so that the win-
dows do not become fogged up.
l Use of the recirculation position for exten-
ded time may cause the windows to fog up.
NOTE l On
vehicles with the heater and the manual
air conditioning, when the system operates
with the selection switch in the outside posi-
tion, the system automatically determines
whether to continue using outside air or to
perform recirculation. If the outside air tem-
perature is high, the system selects recircula-
tion and causes the indication lamp (A) in
the switch to illuminate (for vehicles with
the manual air conditioning, the system se-
lects recirculation to achieve rapid cooling).
Press the selection switch to return to outside
air introduction.
l On vehicles with the automatic air condition-
ing, when the mode selection dial or the blow-
er speed selection dial is set to the “AUTO”
position again after manual operation, the air
selection dial will also be automatically con-
trolled. For pleasant driving
5-04
5
OGWE12E1