2012 MERCEDES-BENZ SL ROADSTER navigation
[x] Cancel search: navigationPage 389 of 637
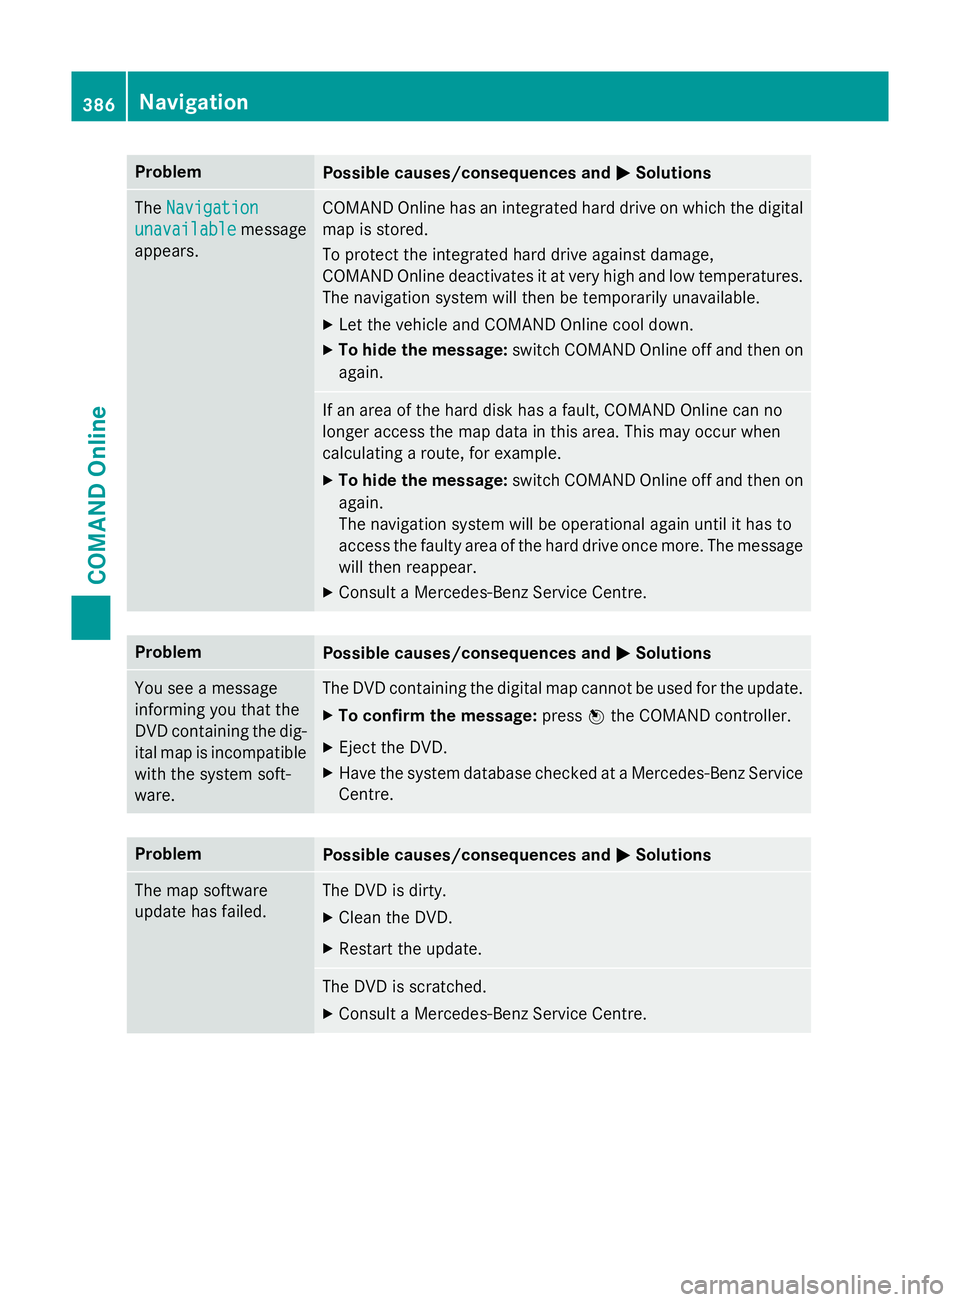
Problem
Possible causes/consequences and
M
MSolutions The
Navigation
Navigation
unavailable
unavailable message
appears. COMAND Online has an integrated hard drive on which the digital
map is stored.
To protect the integrated hard drive against damage,
COMAND Online deactivates it at very high and low temperatures. The navigation system will then be temporarily unavailable.
X Let the vehicle and COMAND Online cool down.
X To hide the message: switch COMAND Online off and then on
again. If an area of the hard disk has a fault, COMAND Online can no
longer access the map data in this area. This may occur when
calculating a route, for example.
X To hide the message: switch COMAND Online off and then on
again.
The navigation system will be operational again until it has to
access the faulty area of the hard drive once more. The message will then reappear.
X Consult a Mercedes-Benz Service Centre. Problem
Possible causes/consequences and
M MSolutions You see a message
informing you that the
DVD containing the dig-
ital map is incompatible
with the system soft-
ware. The DVD containing the digital map cannot be used for the update.
X To confirm the message: pressWthe COMAND controller.
X Eject the DVD.
X Have the system database checked at a Mercedes-Benz Service
Centre. Problem
Possible causes/consequences and
M MSolutions The map software
update has failed. The DVD is dirty.
X Clean the DVD.
X Restart the update. The DVD is scratched.
X Consult a Mercedes-Benz Service Centre. 386
NavigationCOMAND Online
Page 414 of 637
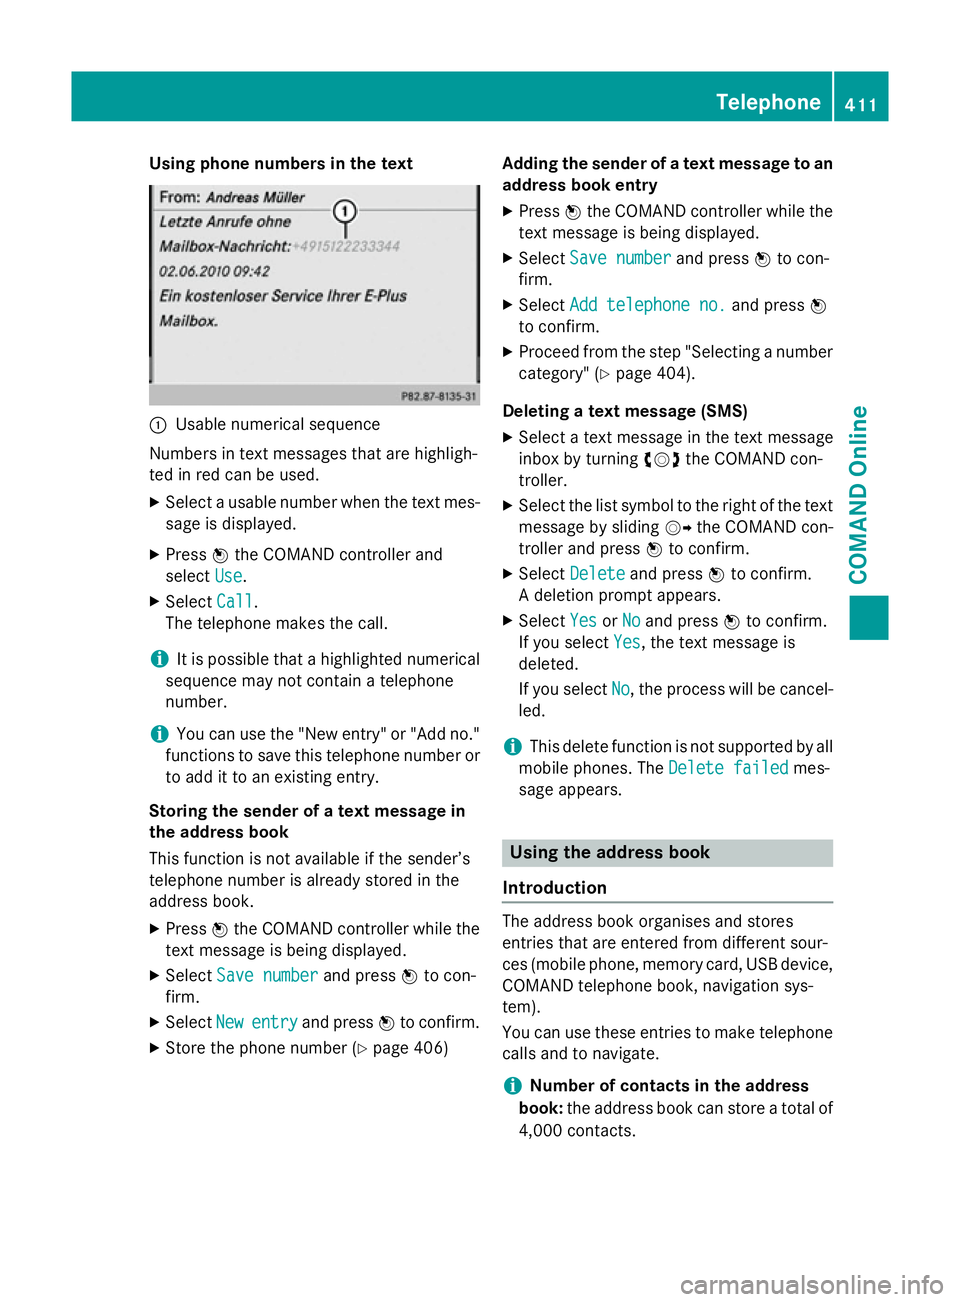
Using phone numbers in the text
:
Usable numerical sequence
Numbers in text messages that are highligh-
ted in red can be used.
X Select a usable number when the text mes-
sage is displayed.
X Press Wthe COMAND controller and
select Use
Use.
X Select Call
Call.
The telephone makes the call.
i It is possible that a highlighted numerical
sequence may not contain a telephone
number.
i You can use the "New entry" or "Add no."
functions to save this telephone number or to add it to an existing entry.
Storing the sender of a text message in
the address book
This function is not available if the sender’s
telephone number is already stored in the
address book.
X Press Wthe COMAND controller while the
text message is being displayed.
X Select Save number
Save number and pressWto con-
firm.
X Select New
New entry entry and press Wto confirm.
X Store the phone number (Y page 406)Adding the sender of a text message to an
address book entry
X Press Wthe COMAND controller while the
text message is being displayed.
X Select Save number
Save number and pressWto con-
firm.
X Select Add telephone no.
Add telephone no. and pressW
to confirm.
X Proceed from the step "Selecting a number
category" (Y page 404).
Deleting a text message (SMS)
X Select a text message in the text message
inbox by turning cVdthe COMAND con-
troller.
X Select the list symbol to the right of the text
message by sliding VYthe COMAND con-
troller and press Wto confirm.
X Select Delete Delete and press Wto confirm.
A deletion prompt appears.
X Select Yes YesorNo
No and press Wto confirm.
If you select Yes
Yes, the text message is
deleted.
If you select No No, the process will be cancel-
led.
i This delete function is not supported by all
mobile phones. The Delete failed
Delete failedmes-
sage appears. Using the address book
Introduction The address book organises and stores
entries that are entered from different sour-
ces (mobile phone, memory card, USB device,
COMAND telephone book, navigation sys-
tem).
You can use these entries to make telephone
calls and to navigate.
i Number of contacts in the address
book: the address book can store a total of
4,000 contacts. Telephone
411COMAND Online Z
Page 416 of 637
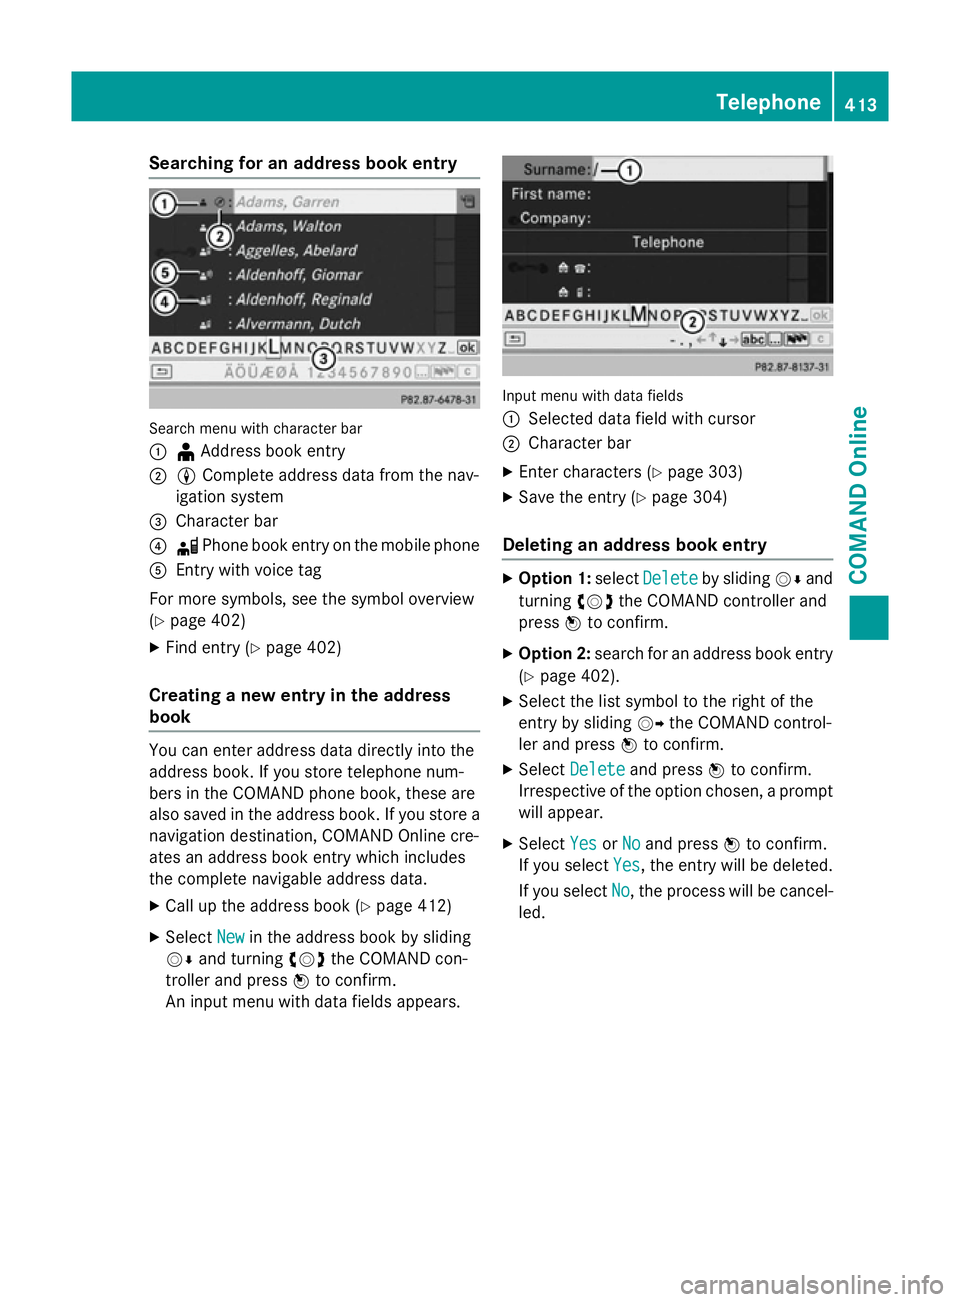
Searching for an address book entry
Search menu with character bar
:
¥Address book entry
; L Complete address data from the nav-
igation system
= Character bar
? d Phone book entry on the mobile phone
A Entry with voice tag
For more symbols, see the symbol overview
(Y page 402)
X Find entry (Y page 402)
Creating a new entry in the address
book You can enter address data directly into the
address book. If you store telephone num-
bers in the COMAND phone book, these are
also saved in the address book. If you store a
navigation destination, COMAND Online cre-
ates an address book entry which includes
the complete navigable address data.
X Call up the address book (Y page 412)
X Select New
New in the address book by sliding
VÆ and turning cVdthe COMAND con-
troller and press Wto confirm.
An input menu with data fields appears. Input menu with data fields
:
Selected data field with cursor
; Character bar
X Enter characters (Y page 303)
X Save the entry (Y page 304)
Deleting an address book entry X
Option 1: selectDelete Delete by sliding VÆand
turning cVdthe COMAND controller and
press Wto confirm.
X Option 2: search for an address book entry
(Y page 402).
X Select the list symbol to the right of the
entry by sliding VYthe COMAND control-
ler and press Wto confirm.
X Select Delete Delete and press Wto confirm.
Irrespective of the option chosen, a prompt
will appear.
X Select Yes
YesorNo
No and press Wto confirm.
If you select Yes
Yes, the entry will be deleted.
If you select No
No, the process will be cancel-
led. Telephone
413COMAND Online Z
Page 419 of 637
X
Enter the destination address
(Y page 326)
X Start route guidance.
The navigable address is added to the
address book entry automatically.
i This will provide you with an address book
entry that is suitable for navigation. Once
you have altered the address data in the
address entry menu, the altered address in
the navigation system will be used the next
time the system is started instead of the
postal address. Therefore always ensure
that the destination address is indeed the
required destination when navigation
starts from the address book.
Voice tags Introduction
You can enter voice tags via LINGUATRONIC
(see the separate operating instructions).
Once you have assigned a voice tag to an
address book entry, you can vocally call up
this entry and dial a phone number, for exam-
ple. You can add one voice tag per address
book entry.
Adding or changing a voice tag
X Search for an address book entry with or
without a voice tag (¦) (Y page 413).
X Select the list symbol to the right of the
entry by sliding VYthe COMAND control-
ler and press Wto confirm.
X Select Voice
Voice tag tagand press Wto confirm.
X Select Add
Add orChange
Change and press Wto con-
firm.
Subsequent operation is voice-controlled.
LINGUATRONIC guides you through the
dialogues.
Deleting a voice tag
X Search for an address book entry with a
voice tag (Y page 413).
X Select the list symbol to the right of the
entry by sliding VYthe COMAND control-
ler and press Wto confirm. X
Select Voice
Voice tag tagand press Wto confirm.
X Select Delete
Delete and press Wto confirm.
A deletion prompt appears.
X Select Yes
Yes orNo
No and press the 9button to
confirm.
If you select Yes Yes, COMAND Online deletes
the voice tag.
If you select No No, the process will be cancel-
led.
Listening to a voice tag X Search for an address book entry with a
voice tag (Y page 413).
X Select the list symbol to the right of the
entry by sliding VYthe COMAND control-
ler and press Wto confirm.
X Select Voice Voice tag tagand press Wto confirm.
X Select Listen
Listen and press Wto confirm.
You hear the voice tag.
Importing phone book entries This function allows you to store phone book
entries from the mobile phone in the address
book.
Possible sources are:
R the mobile phone
R the memory card
R the USB device
R the Bluetooth ®
interface
Imported phone book entries are indicated in
the phone book by different symbols
(Y page 402).
X Search for an entry in the phone book on
the mobile phone d(Ypage 402).
X Select the list symbol to the right of the
entry by sliding VYthe COMAND control-
ler and press Wto confirm.
X Select Save entry
Save entry and pressWto con-
firm.
The Data saved Data saved message appears. The
phone book entry is now saved as an
address book entry. 416
TelephoneCOMAND Online
Page 421 of 637
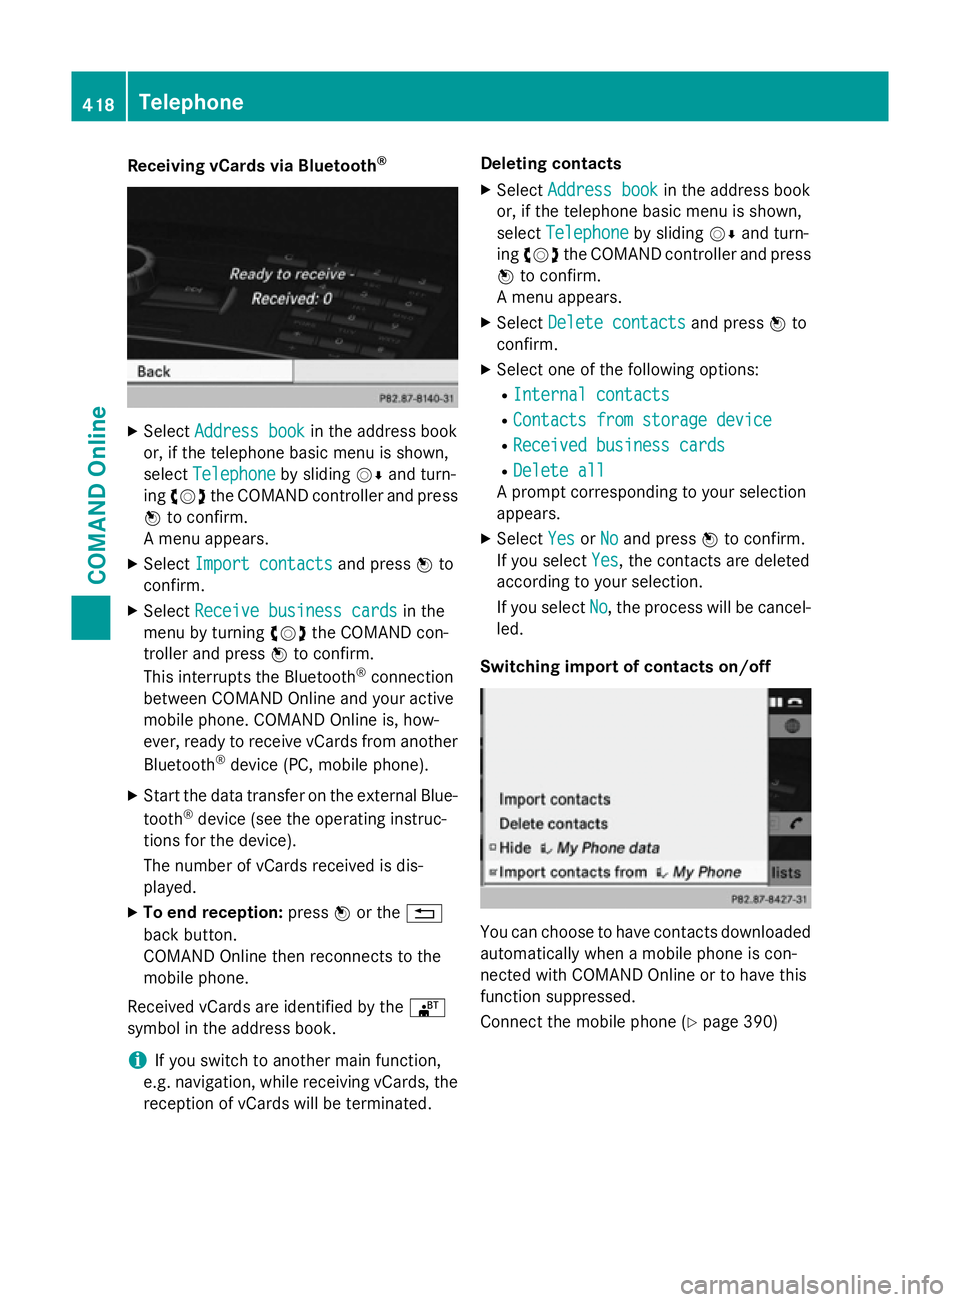
Receiving vCards via Bluetooth
®X
Select Address book
Address book in the address book
or, if the telephone basic menu is shown,
select Telephone
Telephone by slidingVÆand turn-
ing cVd the COMAND controller and press
W to confirm.
A menu appears.
X Select Import contacts
Import contacts and pressWto
confirm.
X Select Receive business cards
Receive business cards in the
menu by turning cVdthe COMAND con-
troller and press Wto confirm.
This interrupts the Bluetooth ®
connection
between COMAND Online and your active
mobile phone. COMAND Online is, how-
ever, ready to receive vCards from another
Bluetooth ®
device (PC, mobile phone).
X Start the data transfer on the external Blue-
tooth ®
device (see the operating instruc-
tions for the device).
The number of vCards received is dis-
played.
X To end reception: pressWor the %
back button.
COMAND Online then reconnects to the
mobile phone.
Received vCards are identified by the ®
symbol in the address book.
i If you switch to another main function,
e.g. navigation, while receiving vCards, the
reception of vCards will be terminated. Deleting contacts
X Select Address book
Address book in the address book
or, if the telephone basic menu is shown,
select Telephone Telephone by slidingVÆand turn-
ing cVd the COMAND controller and press
W to confirm.
A menu appears.
X Select Delete contacts
Delete contacts and pressWto
confirm.
X Select one of the following options:
R Internal contacts
Internal contacts
R Contacts from storage device
Contacts from storage device
R Received business cards
Received business cards
R Delete all
Delete all
A prompt corresponding to your selection
appears.
X Select Yes
YesorNo
No and press Wto confirm.
If you select Yes
Yes, the contacts are deleted
according to your selection.
If you select No No, the process will be cancel-
led.
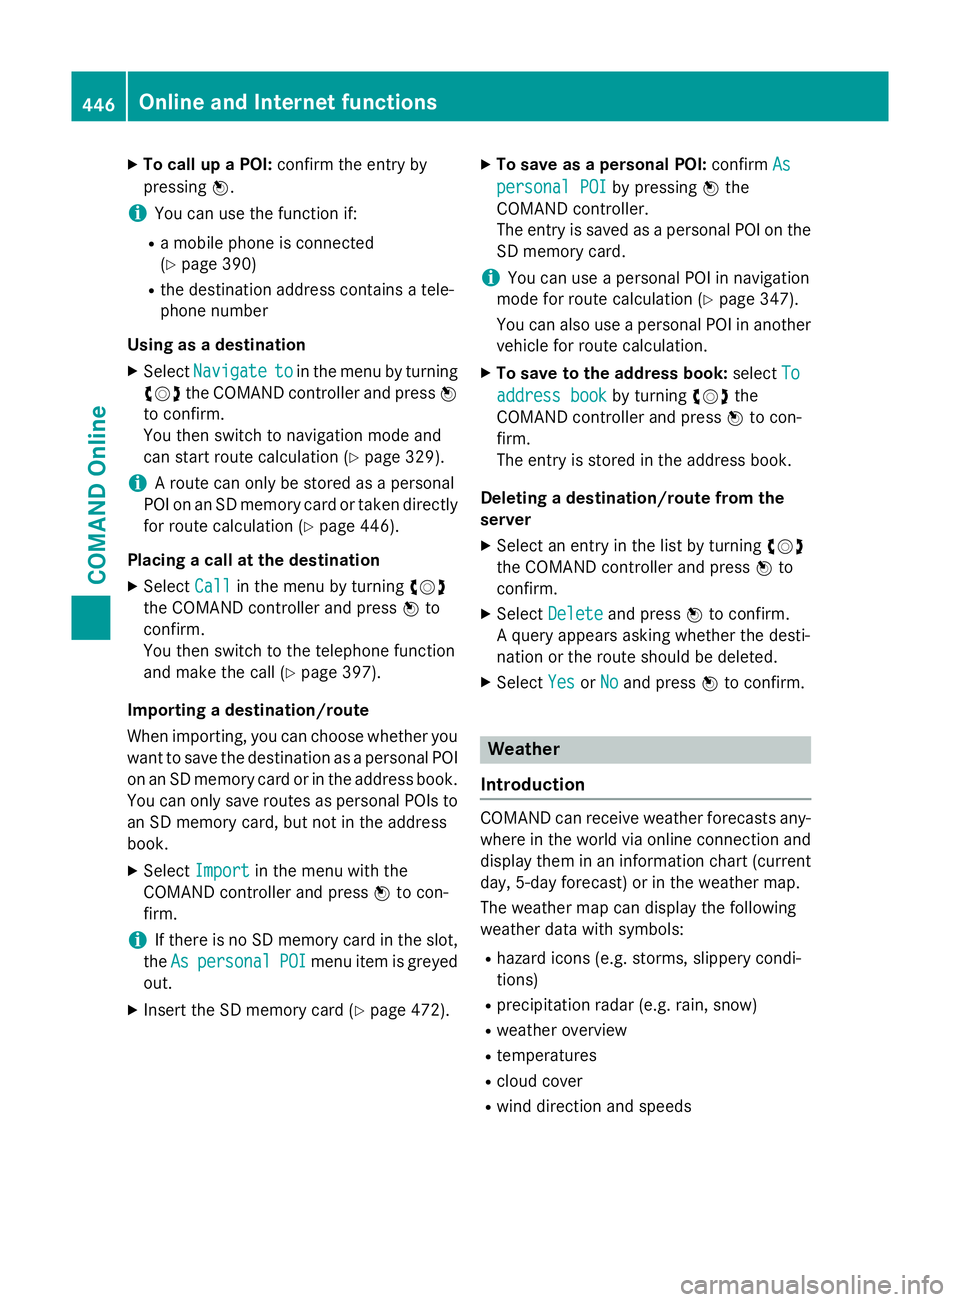
Switching import of contacts on/off You can choose to have contacts downloaded
automatically when a mobile phone is con-
nected with COMAND Online or to have this
function suppressed.
Connect the mobile phone (Y page 390)418
TelephoneCOMAND Online
Page 446 of 637
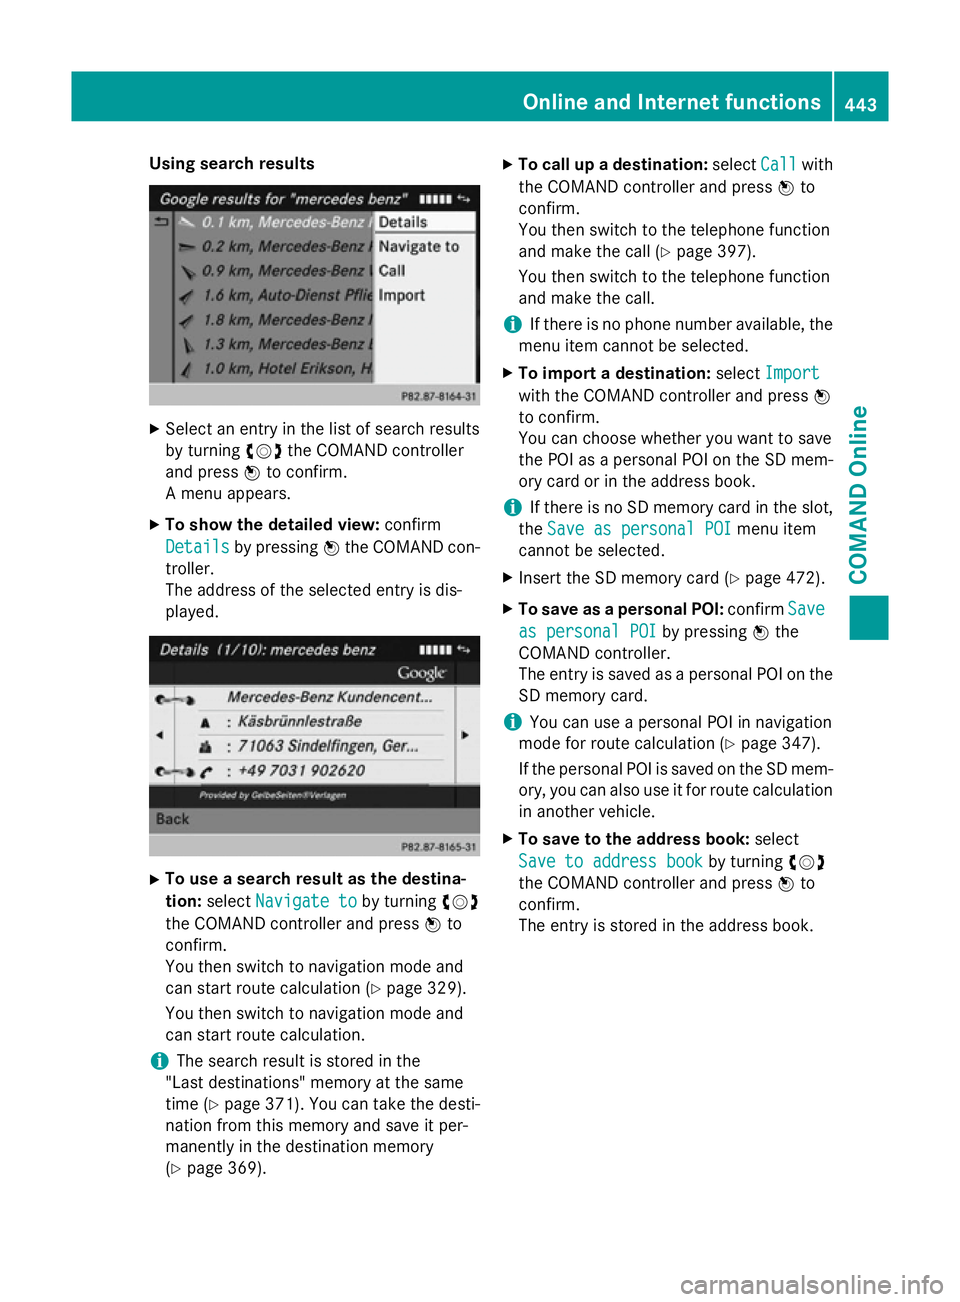
Using search results
X
Select an entry in the list of search results
by turning cVdthe COMAND controller
and press Wto confirm.
A menu appears.
X To show the detailed view: confirm
Details
Details by pressing Wthe COMAND con-
troller.
The address of the selected entry is dis-
played. X
To use a search result as the destina-
tion: select Navigate to
Navigate to by turningcVd
the COMAND controller and press Wto
confirm.
You then switch to navigation mode and
can start route calculation (Y page 329).
You then switch to navigation mode and
can start route calculation.
i The search result is stored in the
"Last destinations" memory at the same
time (Y page 371). You can take the desti-
nation from this memory and save it per-
manently in the destination memory
(Y page 369). X
To call up a destination: selectCall
Call with
the COMAND controller and press Wto
confirm.
You then switch to the telephone function
and make the call (Y page 397).
You then switch to the telephone function
and make the call.
i If there is no phone number available, the
menu item cannot be selected.
X To import a destination: selectImport Import
with the COMAND controller and press W
to confirm.
You can choose whether you want to save
the POI as a personal POI on the SD mem-
ory card or in the address book.
i If there is no SD memory card in the slot,
the Save as personal POI Save as personal POI menu item
cannot be selected.
X Insert the SD memory card (Y page 472).
X To save as a personal POI: confirmSave Save
as personal POI as personal POI by pressingWthe
COMAND controller.
The entry is saved as a personal POI on the
SD memory card.
i You can use a personal POI in navigation
mode for route calculation (Y page 347).
If the personal POI is saved on the SD mem-
ory, you can also use it for route calculation
in another vehicle.
X To save to the address book: select
Save to address book
Save to address book by turningcVd
the COMAND controller and press Wto
confirm.
The entry is stored in the address book. Online and Internet functions
443COMAND Online Z
Page 449 of 637
X
To call up a POI: confirm the entry by
pressing W.
i You can use the function if:
R a mobile phone is connected
(Y page 390)
R the destination address contains a tele-
phone number
Using as a destination
X Select Navigate
Navigate to toin the menu by turning
cVd the COMAND controller and press W
to confirm.
You then switch to navigation mode and
can start route calculation (Y page 329).
i A route can only be stored as a personal
POI on an SD memory card or taken directly
for route calculation (Y page 446).
Placing a call at the destination X Select Call
Call in the menu by turning cVd
the COMAND controller and press Wto
confirm.
You then switch to the telephone function
and make the call (Y page 397).
Importing a destination/route
When importing, you can choose whether you want to save the destination as a personal POI
on an SD memory card or in the address book.
You can only save routes as personal POIs to an SD memory card, but not in the address
book.
X Select Import Import in the menu with the
COMAND controller and press Wto con-
firm.
i If there is no SD memory card in the slot,
the As
As personal
personal POI
POImenu item is greyed
out.
X Insert the SD memory card (Y page 472).X
To save as a personal POI: confirmAs
As
personal POI
personal POI by pressingWthe
COMAND controller.
The entry is saved as a personal POI on the SD memory card.
i You can use a personal POI in navigation
mode for route calculation (Y page 347).
You can also use a personal POI in another
vehicle for route calculation.
X To save to the address book: selectTo To
address book
address book by turningcVdthe
COMAND controller and press Wto con-
firm.
The entry is stored in the address book.
Deleting a destination/route from the
server X Select an entry in the list by turning cVd
the COMAND controller and press Wto
confirm.
X Select Delete Delete and press Wto confirm.
A query appears asking whether the desti-
nation or the route should be deleted.
X Select Yes
Yes orNo No and press Wto confirm. Weather
Introduction COMAND can receive weather forecasts any-
where in the world via online connection and
display them in an information chart (current
day, 5-day forecast) or in the weather map.
The weather map can display the following
weather data with symbols:
R hazard icons (e.g. storms, slippery condi-
tions)
R precipitation radar (e.g. rain, snow)
R weather overview
R temperatures
R cloud cover
R wind direction and speeds 446
Online and Internet functionsCOMAND Online
Page 457 of 637
The data transfer rate of a station is displayed
while receiving data.
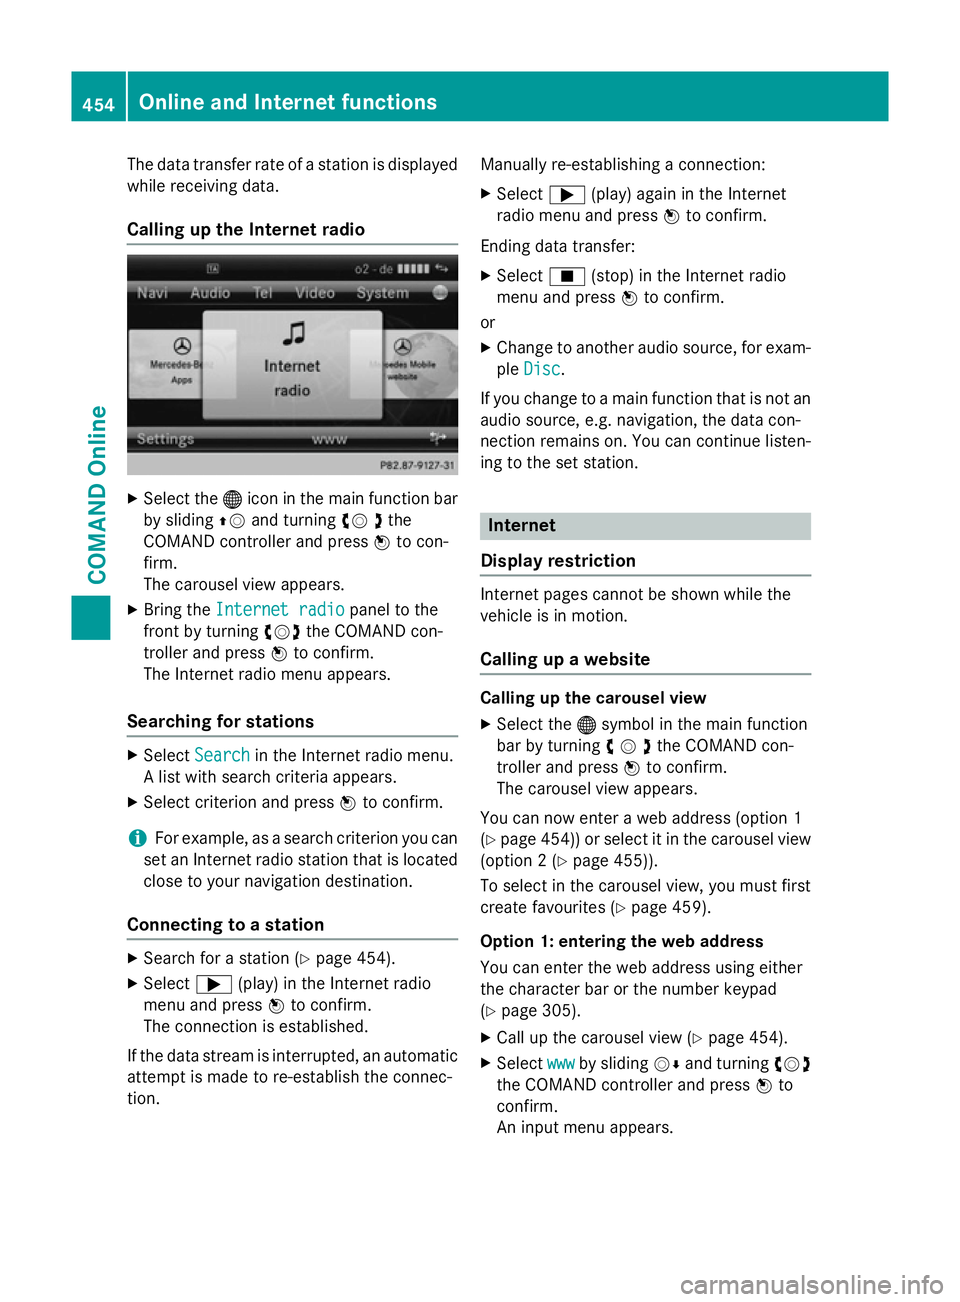
Calling up the Internet radio X
Select the ®icon in the main function bar
by sliding ZVand turning cV dthe
COMAND controller and press Wto con-
firm.
The carousel view appears.
X Bring the Internet radio
Internet radio panel to the
front by turning cVdthe COMAND con-
troller and press Wto confirm.
The Internet radio menu appears.
Searching for stations X
Select Search Search in the Internet radio menu.
A list with search criteria appears.
X Select criterion and press Wto confirm.
i For example, as a search criterion you can
set an Internet radio station that is located
close to your navigation destination.
Connecting to a station X
Search for a station (Y page 454).
X Select ;(play) in the Internet radio
menu and press Wto confirm.
The connection is established.
If the data stream is interrupted, an automatic attempt is made to re-establish the connec-
tion. Manually re-establishing a connection:
X Select ;(play) again in the Internet
radio menu and press Wto confirm.
Ending data transfer: X Select É(stop) in the Internet radio
menu and press Wto confirm.
or X Change to another audio source, for exam-
ple Disc
Disc.
If you change to a main function that is not an
audio source, e.g. navigation, the data con-
nection remains on. You can continue listen-
ing to the set station. Internet
Display restriction Internet pages cannot be shown while the
vehicle is in motion.
Calling up a website Calling up the carousel view
X Select the ®symbol in the main function
bar by turning cVdthe COMAND con-
troller and press Wto confirm.
The carousel view appears.
You can now enter a web address (option 1
(Y page 454)) or select it in the carousel view
(option 2 (Y page 455)).
To select in the carousel view, you must first
create favourites (Y page 459).
Option 1: entering the web address
You can enter the web address using either
the character bar or the number keypad
(Y page 305).
X Call up the carousel view (Y page 454).
X Select www wwwby sliding VÆand turning cVd
the COMAND controller and press Wto
confirm.
An input menu appears. 454
Online and Internet functionsCOMAND Online