2012 MERCEDES-BENZ GLK SUV light
[x] Cancel search: lightPage 85 of 381
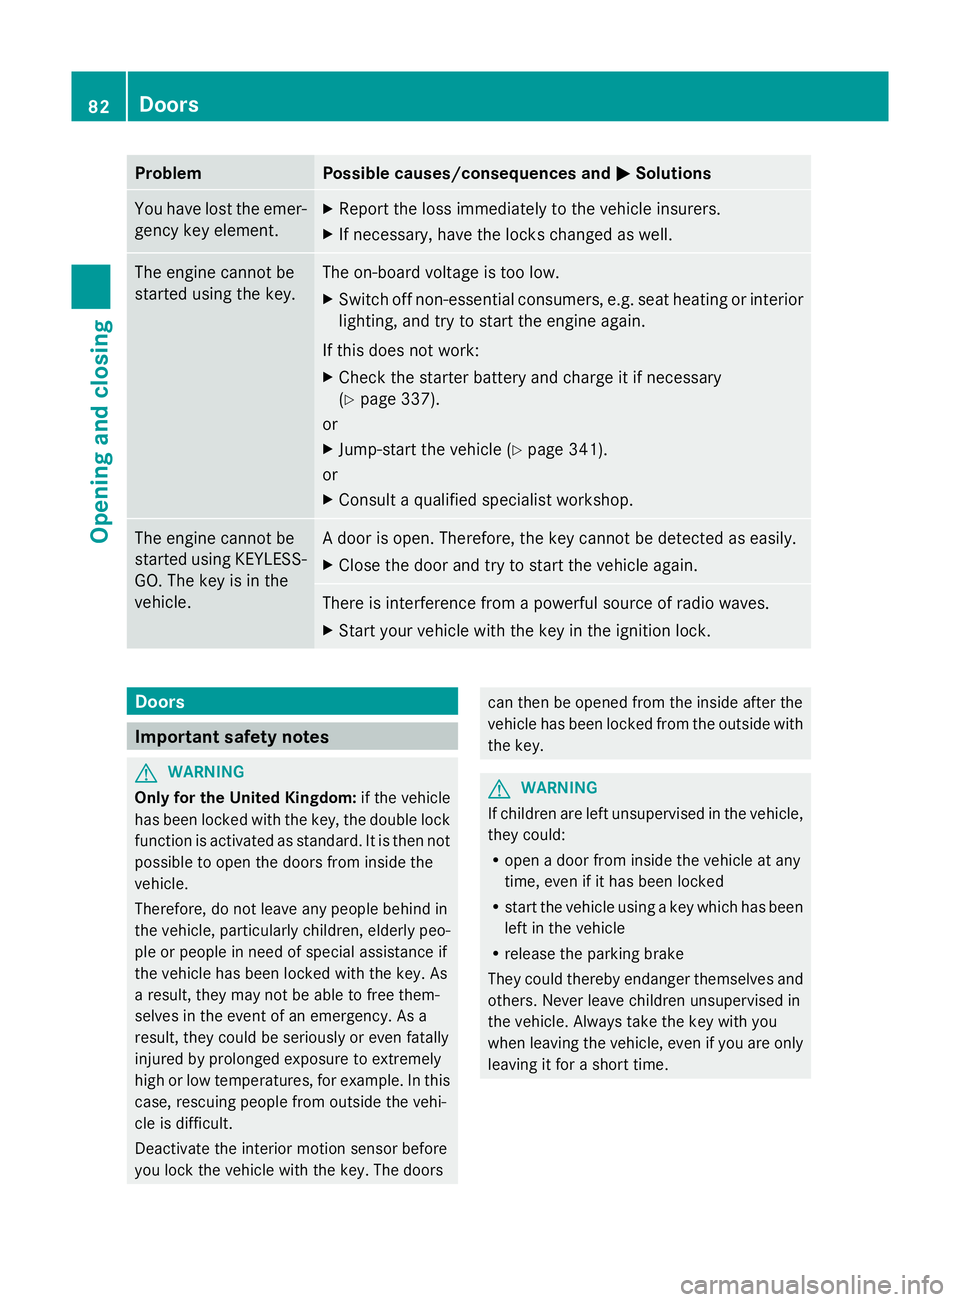
Problem Possible causes/consequences and
M
MSolutions You have lost the emer-
gency key element. X
Report the loss immediately to the vehicle insurers.
X If necessary, have the locks changed as well. The engine cannot be
started using the key. The on-board voltage is too low.
X
Switch off non-essential consumers, e.g. seat heating or interior
lighting, and try to start the engine again.
If this does not work:
X Check the starter battery and charge it if necessary
(Y page 337).
or
X Jump-start the vehicle (Y page 341).
or
X Consult a qualified specialist workshop. The engine cannot be
started using KEYLESS-
GO. The key is in the
vehicle. A door is open. Therefore, the key cannot be detected as easily.
X
Close the door and try to start the vehicle again. There is interference from a powerful source of radio waves.
X
Start your vehicle with the key in the ignition lock. Doors
Important safety notes
G
WARNING
Only for the United Kingdom: if the vehicle
has been locked with the key, the double lock
function is activated as standard. It is then not
possible to open the doors from inside the
vehicle.
Therefore, do not leave any people behind in
the vehicle, particularly children, elderly peo-
ple or people in need of special assistance if
the vehicle has been locked with the key. As
a result, they may not be able to free them-
selves in the event of an emergency. As a
result, they could be seriously or even fatally
injured by prolonged exposure to extremely
high or low temperatures, for example. In this
case, rescuing people from outside the vehi-
cle is difficult.
Deactivate the interior motion sensor before
you lock the vehicle with the key. The doors can then be opened from the inside after the
vehicle has been locked from the outside with
the key.
G
WARNING
If children are left unsupervised in the vehicle,
they could:
R open a door from inside the vehicle at any
time, even if it has been locked
R start the vehicle using a key which has been
left in the vehicle
R release the parking brake
They could thereby endanger themselves and
others. Never leave children unsupervised in
the vehicle. Always take the key with you
when leaving the vehicle, even if you are only
leaving it for a short time. 82
DoorsOpening and closing
Page 94 of 381
X
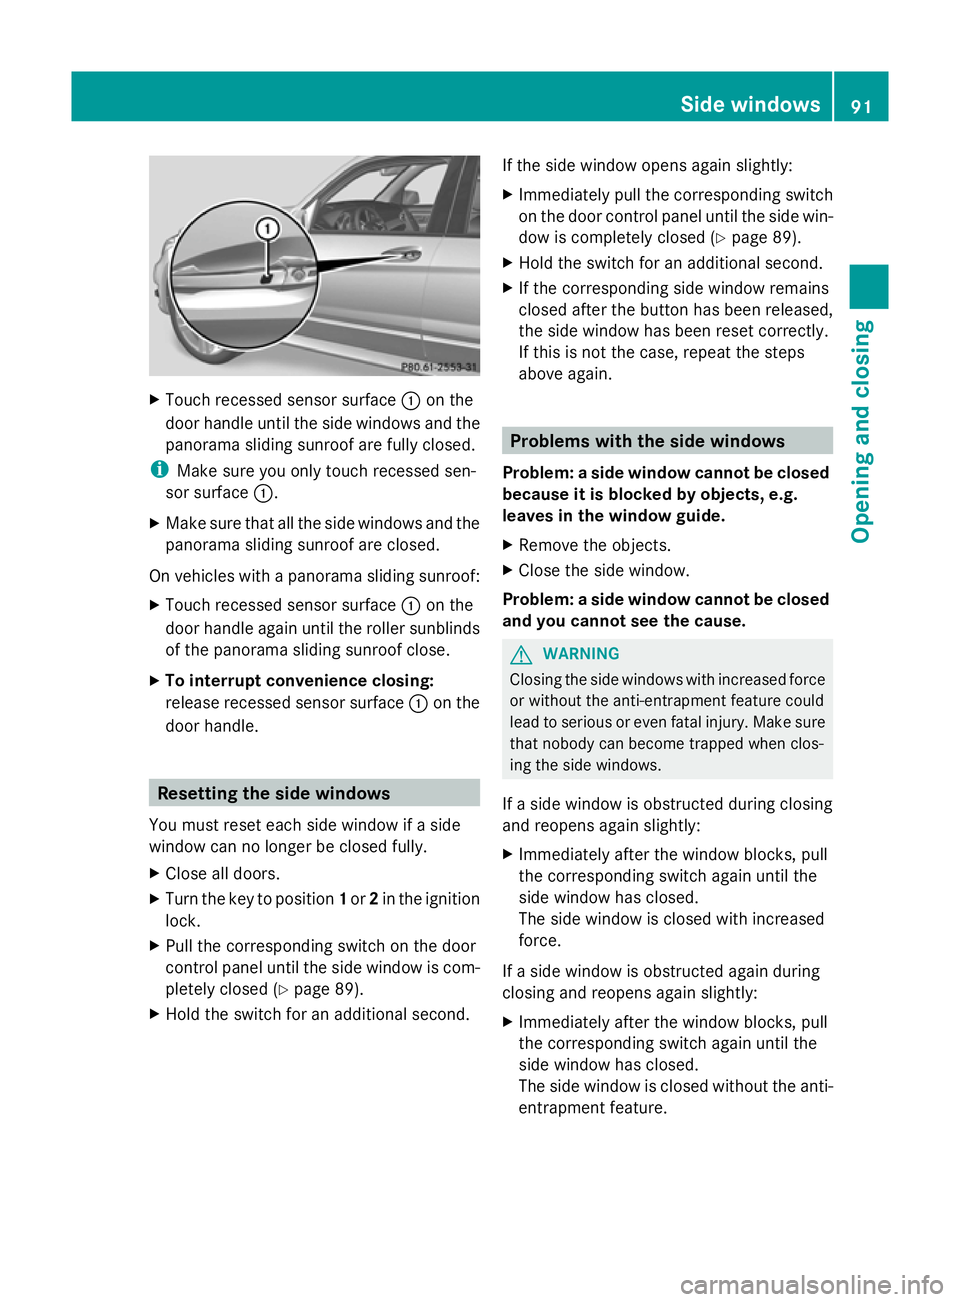
Touch recessed sensor surface :on the
door handle until the side windows and the
panorama sliding sunroof are fully closed.
i Make sure you only touch recessed sen-
sor surface :.
X Make sure that all the side windows and the
panorama sliding sunroof are closed.
On vehicles with a panorama sliding sunroof:
X Touch recessed sensor surface :on the
door handle again until the roller sunblinds
of the panorama sliding sunroof close.
X To interrupt convenience closing:
release recessed sensor surface :on the
door handle. Resetting the side windows
You must reset each side window if a side
window can no longer be closed fully.
X Close all doors.
X Turn the key to position 1or 2in the ignition
lock.
X Pull the corresponding switch on the door
control panel until the side window is com-
pletely closed (Y page 89).
X Hold the switch for an additional second. If the side window opens again slightly:
X
Immediately pull the corresponding switch
on the door control panel until the side win-
dow is completely closed (Y page 89).
X Hold the switch for an additional second.
X If the corresponding side window remains
closed after the button has been released,
the side window has been reset correctly.
If this is not the case, repeat the steps
above again. Problems with the side windows
Problem: a side window cannot be closed
because it is blocked by objects, e.g.
leaves in the window guide.
X Remove the objects.
X Close the side window.
Problem: a side window cannot be closed
and you cannot see the cause. G
WARNING
Closing the side windows with increased force
or without the anti-entrapment feature could
lead to serious or even fatal injury. Make sure
that nobody can become trapped when clos-
ing the side windows.
If a side window is obstructed during closing
and reopens again slightly:
X Immediately after the window blocks, pull
the corresponding switch again until the
side window has closed.
The side window is closed with increased
force.
If a side window is obstructed again during
closing and reopens again slightly:
X Immediately after the window blocks, pull
the corresponding switch again until the
side window has closed.
The side window is closed without the anti-
entrapment feature. Side windows
91Opening and closing Z
Page 95 of 381
Sliding sunroof
Important safety notes
In the following section, the term "sliding sun-
roof" refers to the panorama sliding sunroof. G
WARNING
Make sure that nobody can become trapped
when opening and closing the sliding sunroof.
If there is a risk of entrapment, release the
switch immediately. During automatic opera-
tion, push the switch briefly in any direction
to stop the sliding sunroof. G
WARNING
Children could injure themselves if they oper-
ate the sliding sunroof.
Never leave children unsupervised in the vehi-
cle. Always take the key with you when leaving
the vehicle, even if you are only leaving it for
a short time. G
WARNING
The glass in the panorama sunroof could
break in an accident. If you are not wearing a
seat belt, there is a risk that you could be
thrown through the opening in the event of the
vehicle overturning. Therefore, always wear a
seat belt to reduce the risk of injuries.
! Only open the panorama sliding sunroof
if it is free of snow and ice. Otherwise, mal-
functions may occur.
Do not allow anything to protrude from the
sliding sunroof. Otherwise, the seals could
be damaged.
i Resonance noises can occur in addition
to the usual airflow noises when the sliding
sunroof is open. They are caused by minor
pressure fluctuations in the vehicle interior.
Change the position of the sliding sunroof
or open a side window slightly to reduce or
eliminate these noises. Operating the panorama sliding sun-
roof
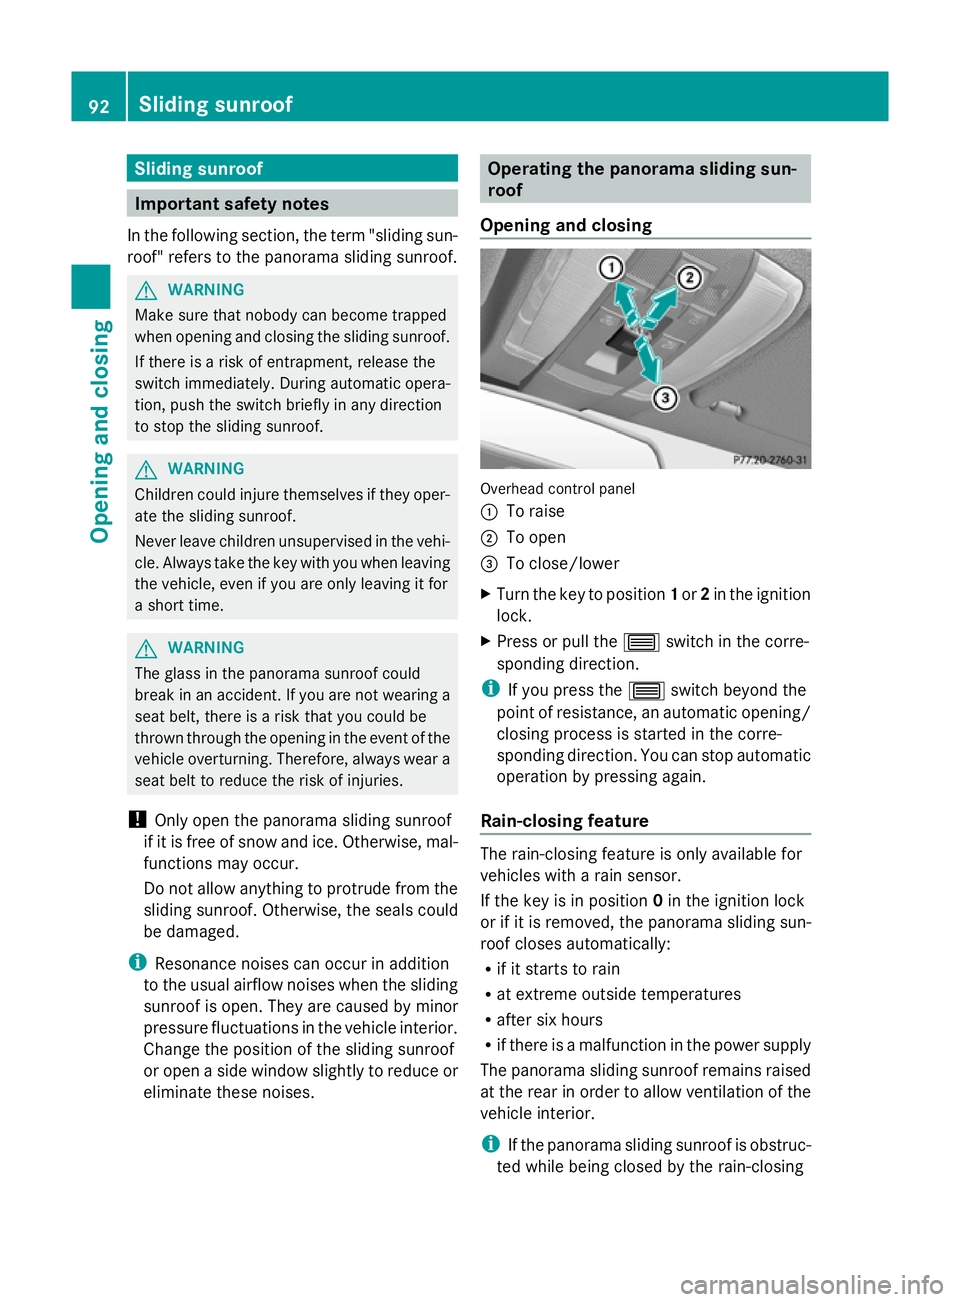
Opening and closing Overhead control panel
:
To raise
; To open
= To close/lower
X Turn the key to position 1or 2in the ignition
lock.
X Press or pull the 3switch in the corre-
sponding direction.
i If you press the 3switch beyond the
point of resistance, an automatic opening/
closing process is started in the corre-
sponding direction. You can stop automatic
operation by pressing again.
Rain-closing feature The rain-closing feature is only available for
vehicles with a rain sensor.
If the key is in position
0in the ignition lock
or if it is removed, the panorama sliding sun-
roof closes automatically:
R if it starts to rain
R at extreme outside temperatures
R after six hours
R if there is a malfunction in the power supply
The panorama sliding sunroof remains raised
at the rear in order to allow ventilation of the
vehicle interior.
i If the panorama sliding sunroof is obstruc-
ted while being closed by the rain-closing 92
Sliding sunroofOpening and closing
Page 96 of 381

feature, it opens again slightly. The rain-
closing feature is then deactivated.
The panorama sliding sunroof does not close
if:
R it is raised at the rear.
R it is blocked.
R no rain is falling on the area of the wind-
screen being monitored by the rain sensor,
e.g. because the vehicle is under a bridge. Operating the panorama sliding sun-
roof roller sunblinds
General notes The roller sunblinds shield the vehicle interior
from sunlight. The two roller sunblinds can
only be opened and closed together when the
panorama sliding sunroof is closed. G
WARNING
Make sure that nobody can become trapped
as you open or close the roller sunblinds.
Opening and closing Overhead control panel
:
To open
; To open
= To close
X Turn the key to position 1or 2in the ignition
lock.
X Press or pull the 3switch in the corre-
sponding direction. i
If you press the 3switch beyond the
point of resistance, an automatic opening/
closing process is started in the corre-
sponding direction. You can stop automatic
operation by pressing again.
Resetting the panorama sliding sunroof
and the roller sunblinds Reset the panorama sliding sunroof and the
roller sunblinds if the panorama sliding sun-
roof or the roller sunblinds do not move
smoothly.
X
Turn the key to position 1or 2in the ignition
lock.
X Press the 3switch to the point of resist-
ance in the direction of arrow ;and hold
it until the panorama sliding sunroof has
opened about 10 cm.
X Pull the 3switch repeatedly to the point
of resistance in the direction of arrow =
until the panorama sliding sunroof is fully
closed.
X Keep the 3switch pulled for an addi-
tional second.
X Press the 3switch to the point of resist-
ance in the direction of arrow ;and hold
it until the roller sunblinds are open
10 cm.
X Pull the 3switch repeatedly to the point
of resistance in the direction of arrow =
until the roller sunblinds are fully closed.
X Keep the 3switch pulled for an addi-
tional second.
X Make sure that the panorama sliding sun-
roof and the roller sunblinds can be fully
opened and closed again (Y page 92).
X If this is not the case, repeat the steps
above again.
! If the panorama sliding sunroof and the
roller sunblind cannot be fully opened or
closed after resetting, contact a qualified
specialist workshop. Sliding sunroof
93Opening and closing Z
Page 97 of 381
Problems with the sliding sunroof
In the following section, the term "sliding sun-
roof" refers to the panorama sliding sunroof.
Problem: the sunroof cannot be closed
and you cannot see the cause. G
WARNING
You could be severely or even fatally injured
when closing the sliding sunroof with
increased closing force or if the anti-entrap-
ment feature is deactivated. Make sure that
nobody can become trapped when closing the
sliding sunroof.
If the sliding sunroof is obstructed during
closing and reopens again slightly:
X Immediately after the sliding sunroof
blocks, pull the 3switch in the over-
head control panel down to the point of
resistance and hold it until the sliding sun-
roof is closed.
The sliding sunroof is closed with increased
force.
If the sliding sunroof is obstructed again dur-
ing closing and reopens again slightly:
X Immediately after the sliding sunroof
blocks, pull the 3switch in the over-
head control panel down to the point of
resistance and hold it until the sliding sun-
roof is closed.
The sliding sunroof is closed without the
anti-entrapment feature. 94
Sliding sunroofOpening and closing
Page 99 of 381
Useful information
i This Owner's Manual describes all mod-
els, series and optional equipment for your
vehicle that were available at the time of
going to press. National variations are pos-
sible. Note that your vehicle may not be
equipped with all of the functions descri-
bed. This is also the case for systems and
functions relevant to safety.
i Read the information on qualified special-
ist workshops: (Y page 27). Correct driver's seat position
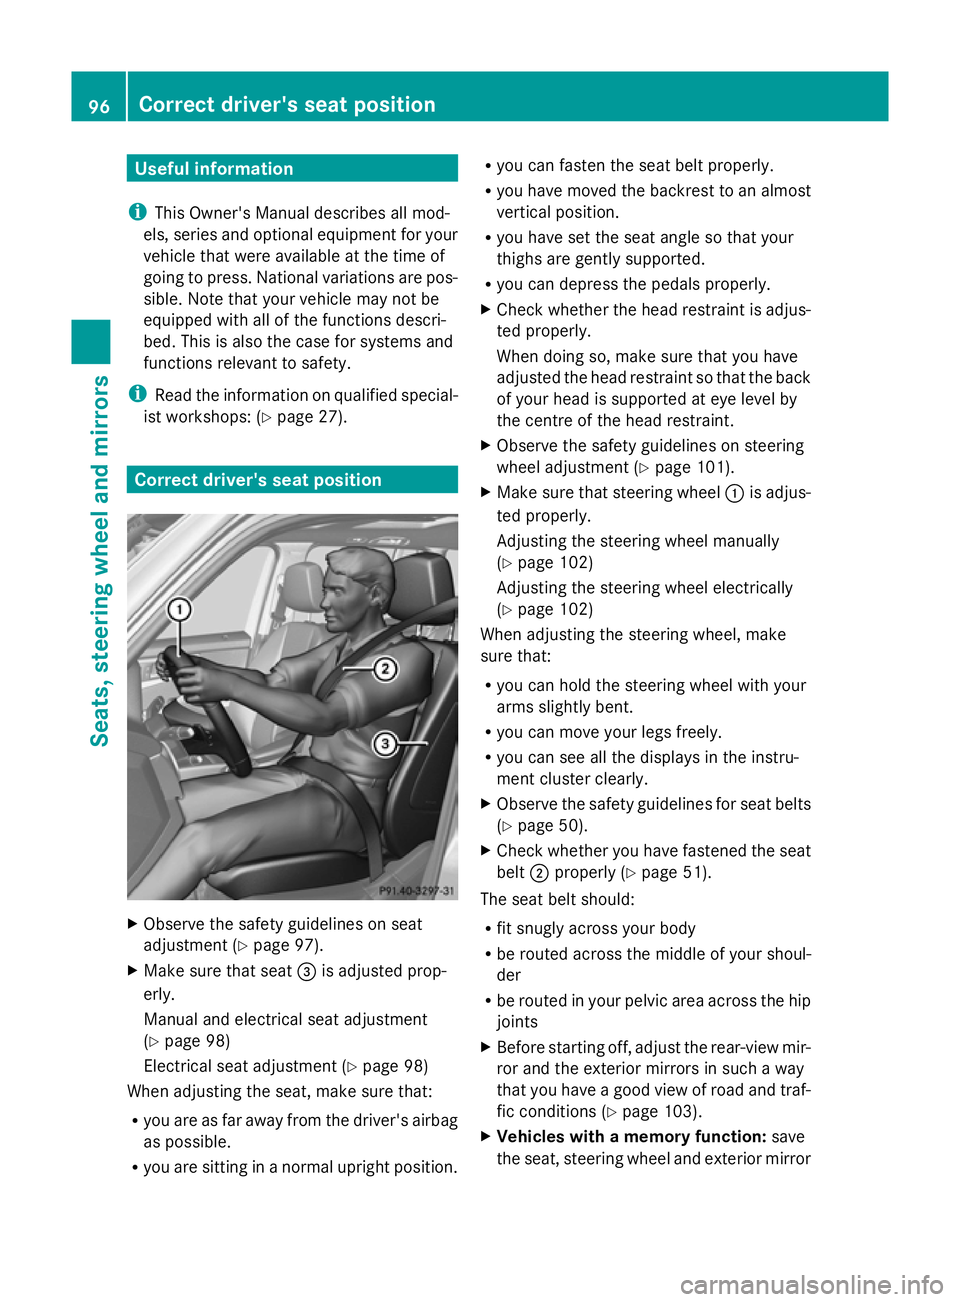
X
Observe the safety guidelines on seat
adjustment (Y page 97).
X Make sure that seat =is adjusted prop-
erly.
Manual and electrical seat adjustment
(Y page 98)
Electrical seat adjustment (Y page 98)
When adjusting the seat, make sure that:
R you are as far away from the driver's airbag
as possible.
R you are sitting in a normal upright position. R
you can fasten the seat belt properly.
R you have moved the backrest to an almost
vertical position.
R you have set the seat angle so that your
thighs are gently supported.
R you can depress the pedals properly.
X Check whether the head restraint is adjus-
ted properly.
When doing so, make sure that you have
adjusted the head restraint so that the back
of your head is supported at eye level by
the centre of the head restraint.
X Observe the safety guidelines on steering
wheel adjustment (Y page 101).
X Make sure that steering wheel :is adjus-
ted properly.
Adjusting the steering wheel manually
(Y page 102)
Adjusting the steering wheel electrically
(Y page 102)
When adjusting the steering wheel, make
sure that:
R you can hold the steering wheel with your
arms slightly bent.
R you can move your legs freely.
R you can see all the displays in the instru-
ment cluster clearly.
X Observe the safety guidelines for seat belts
(Y page 50).
X Check whether you have fastened the seat
belt ;properly (Y page 51).
The seat belt should:
R fit snugly across your body
R be routed across the middle of your shoul-
der
R be routed in your pelvic area across the hip
joints
X Before starting off, adjust the rear-view mir-
ror and the exterior mirrors in such a way
that you have a good view of road and traf-
fic conditions (Y page 103).
X Vehicles with a memory function: save
the seat, steering wheel and exterior mirror 96
Correct driver's seat positionSeats, steering wheel and mirrors
Page 101 of 381
For more information, contact a qualified
specialist workshop.
i Further related subjects:
R Luggage compartment enlargement
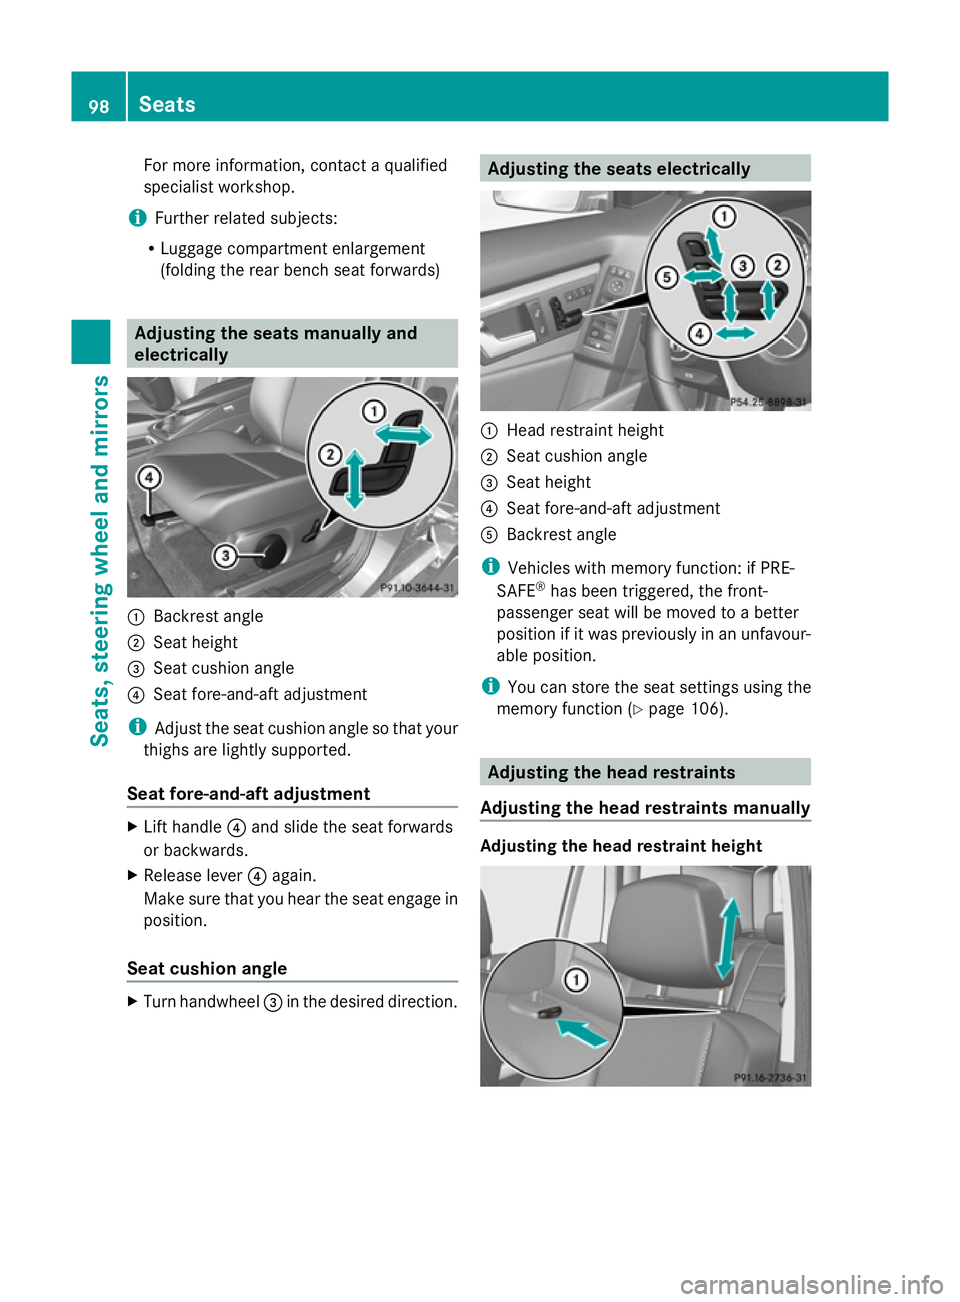
(folding the rear bench seat forwards) Adjusting the seats manually and
electrically :
Backrest angle
; Seat height
= Seat cushion angle
? Seat fore-and-aft adjustment
i Adjust the seat cushion angle so that your
thighs are lightly supported.
Seat fore-and-aft adjustment X
Lift handle ?and slide the seat forwards
or backwards.
X Release lever ?again.
Make sure that you hear the seat engage in
position.
Seat cushion angle X
Turn handwheel =in the desired direction. Adjusting the seats electrically
:
Head restraint height
; Seat cushion angle
= Seat height
? Seat fore-and-aft adjustment
A Backrest angle
i Vehicles with memory function: if PRE-
SAFE ®
has been triggered, the front-
passenger seat will be moved to a better
position if it was previously in an unfavour-
able position.
i You can store the seat settings using the
memory function (Y page 106). Adjusting the head restraints
Adjusting the head restraints manually Adjusting the head restraint height98
SeatsSeats, steering wheel and mirrors
Page 104 of 381
The system automatically switches down
from level 3to level 2after approximately
eight minutes.
The system automatically switches down
from level 2to level 1after approximately ten
minutes.
The system automatically switches off
approximately 20 minutes after it is set to
level 1.
X Make sure that the key is in position 1or
2 in the ignition lock.
X To switch on: press button:repeatedly
until the desired heating level is set.
X To switch off: press button:repeatedly
until all the indicator lamps go out.
Problems with the seat heating The seat heating has switched off prema-
turely or cannot be switched on. The vehicle's
electrical system voltage is too low because
too many electrical consumers are switched
on.
X Switch off electrical consumers that you do
not need, such as the rear window heating
or interior lighting. Switching the seat ventilation on/off
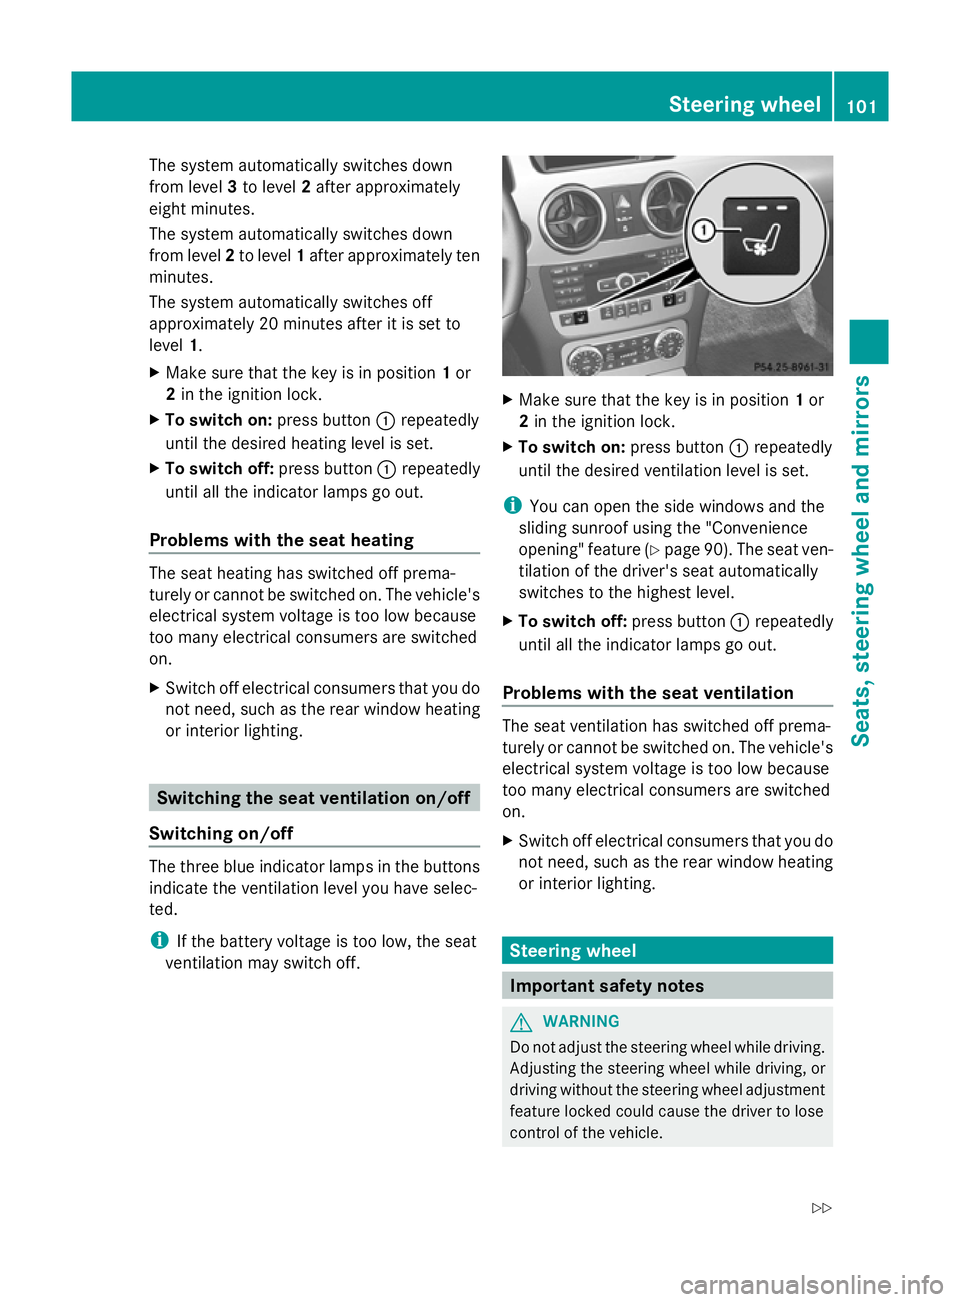
Switching on/off The three blue indicator lamps in the buttons
indicate the ventilation level you have selec-
ted.
i If the battery voltage is too low, the seat
ventilation may switch off. X
Make sure that the key is in position 1or
2 in the ignition lock.
X To switch on: press button:repeatedly
until the desired ventilation level is set.
i You can open the side windows and the
sliding sunroof using the "Convenience
opening" feature (Y page 90). The seat ven-
tilation of the driver's seat automatically
switches to the highest level.
X To switch off: press button:repeatedly
until all the indicator lamps go out.
Problems with the seat ventilation The seat ventilation has switched off prema-
turely or cannot be switched on. The vehicle's
electrical system voltage is too low because
too many electrical consumers are switched
on.
X
Switch off electrical consumers that you do
not need, such as the rear window heating
or interior lighting. Steering wheel
Important safety notes
G
WARNING
Do not adjust the steering wheel while driving.
Adjusting the steering wheel while driving, or
driving without the steering wheel adjustment
feature locked could cause the driver to lose
control of the vehicle. Steering wheel
101Seats, steering wheel and mirrors
Z