2012 MERCEDES-BENZ GLK SUV service
[x] Cancel search: servicePage 171 of 381
quickly and protecting them against corro-
sion.
Limited braking performance on salt-
treated roads If you drive on salt-treated roads, a layer of
salt may form on the brake discs and pads.
This can increase the braking distance con-
siderably.
R Brake occasionally to remove any possible
salt residue. Ensure that you do not endan-
ger other road users when doing so.
R Carefully depress the brake pedal at the
end of the journey and when starting the
next journey.
R Maintain a much greater distance to the
vehicle in front.
New brake pads/linings New brake pads/brake pads and discs that
have been replaced only achieve optimum
braking effect after several hundred kilome-
tres of driving. Compensate for the reduced
braking effect by applying greater force to the
brake pedal.
For safety reasons, Mercedes-Benz recom-
mends that you only have brake pads/linings
fitted to your vehicle which have been
approved for Mercedes-Benz vehicles or
which correspond to an equivalent quality
standard. Brake pads/linings which have not
been approved for Mercedes-Benz vehicles or
which are not of an equivalent quality could
affect your vehicle's operating safety.
Parking brake G
WARNING
If you must brake the vehicle with the parking
brake, the braking distance is considerably
longer and the wheels could lock. This increa-
ses the risk of skidding and an accident.
Only use the parking brake to brake the vehi-
cle when the service brake is faulty. Do not
apply the parking brake too firmly. If the wheels lock, release the parking brake until
the wheels begin turning again.
If you brake the vehicle with the parking
brake, the brake lamps will not light up.
If you drive on wet roads or dirt-covered sur-
faces, road salt and/or dirt could get into the
parking brake.
In order to prevent corrosion and a reduction
in the braking power of the parking brake,
observe the following:
R Gently depress the parking brake from time
to time before beginning the journey.
R Drive for approximately 100 m at a maxi-
mum speed of 20 km/h. Driving on wet roads
Aquaplaning If water has accumulated to a certain depth
on the road surface, there is a danger of aqua-
planing occurring, even if:
R you are driving at low speeds
R the tyres have adequate tread depth.
For this reason, do not drive in tyre ruts, and
brake carefully.
Driving on flooded roads If you have to drive on stretches of road on
which water has collected, please bear in
mind that:
R the maximum permissible still water depth
is 30 cm.
R you should drive no faster than walking
pace.
! Bear in mind that vehicles travelling in
front or in the opposite direction create
waves. This may cause the maximum per-
missible water depth to be exceeded.
These notes must be observed under all
circumstances. You could otherwise dam-
age the engine, the electronics or the trans-
mission. 168
Driving tipsDriving and parking
Page 173 of 381
Slippery road surfaces
G
WARNING
If you shift down on a slippery road surface in
an attempt to increase the engine's braking
effect, the drive wheels could lose their grip.
This increases the risk of skidding and having
an accident.
Do not shift down for additional engine brak-
ing on a slippery road surface.
You should drive particularly carefully on slip-
pery road surfaces. Avoid sudden accelera-
tion, steering and braking manoeuvres.
If the vehicle threatens to skid or cannot be
stopped when moving at low speed:
X Move the transmission to position N.
X Try to bring the vehicle under control by
using corrective steering.
i For more information on driving with
snow chains, see (Y page 353).Off-road driving
Important safety notes G
WARNING
If you drive up a steep incline at an angle or
turn on a steep incline, the vehicle could slip
sideways, tip and overturn. There is a risk of
an accident.
When driving up an incline, drive into the line
of fall (upwards or downwards in a straight
line) and do not turn.
When driving off-road, substances such as
sand, mud and water or water mixed with oil
may get into the brakes. This may lead to a
reduction in braking performance or total
brake failure as a result of increased wear.
The braking characteristics will vary depend-
ing on the substances that get into the
brakes. Clean the brakes after driving off-
road. If you notice grinding noises or a reduc-
tion in braking performance, have the brake
system checked at a qualified specialist work- shop immediately. Adapt your driving style to
the altered braking characteristics.
Driving off-road increases the possibility of
damage to the vehicle, which may cause
assemblies or systems to fail. Adapt your
driving style to the conditions of the terrain.
Drive carefully. Have vehicle damage rectified
immediately at a qualified specialist work-
shop.
Do not shift into transmission position
N
when driving off-road. You could lose control
of the vehicle if you attempt to brake the
vehicle using the service brake. If the gradient
is too steep for your vehicle, back up in
reverse gear.
General notes H
Environmental note
Protection of the environment is of primary
importance. Treat nature with respect.
Observe all prohibiting signs.
Read this section before driving your vehicle
off-road. Practise by travelling over more gen-
tle off-road terrain first.
Off-road driving is only possible with the Off-
Road Engineering package (Y page 215).
The following driving systems are specially
adapted to off-road driving:
R Off-road drive program (Y page 215)
R Off-road ABS (Y page 65)
R Off-road 4ETS (Y page 68)
R Off-road ESP ®
(Y page 69)
R DSR (Downhill Speed Regulation)
(Y page 213)
Observe the following notes:
R Stop your vehicle and, if necessary, select
the off-road drive program (Y page 215)
before driving off-road.
R To avoid damaging the vehicle, make sure
there is always sufficient ground clearance.
R Check that items of luggage and loads are
stowed safely and are well secured
(Y page 299). 170
Driving tipsDriving and parking
Page 200 of 381
manoeuvring. This applies to the areas
behind, in front of and next to the vehicle. You
could otherwise endanger yourself and oth-
ers. G
WARNING
Under the following circumstances, the
reversing camera will not function, or will
function in a limited manner:
R if the boot lid/tailgate is open
R in heavy rain, snow or fog
R at night or in very dark places
R if the camera is exposed to very bright light
R if the area is lit by fluorescent light (the dis-
play may flicker)
R if there is a sudden change in temperature,
e.g. when driving into a heated garage in
winter
R if the camera lens is dirty or obstructed
R if the rear of your vehicle is damaged. In this
event, have the camera position and setting
checked at a qualified specialist workshop.
Mercedes-Benz recommends that you use
a Mercedes-Benz Service Centre for this
purpose.
Do not use the reversing camera in these
types of situation. You could otherwise injure
others or damage objects and your vehicle
while you are parking.
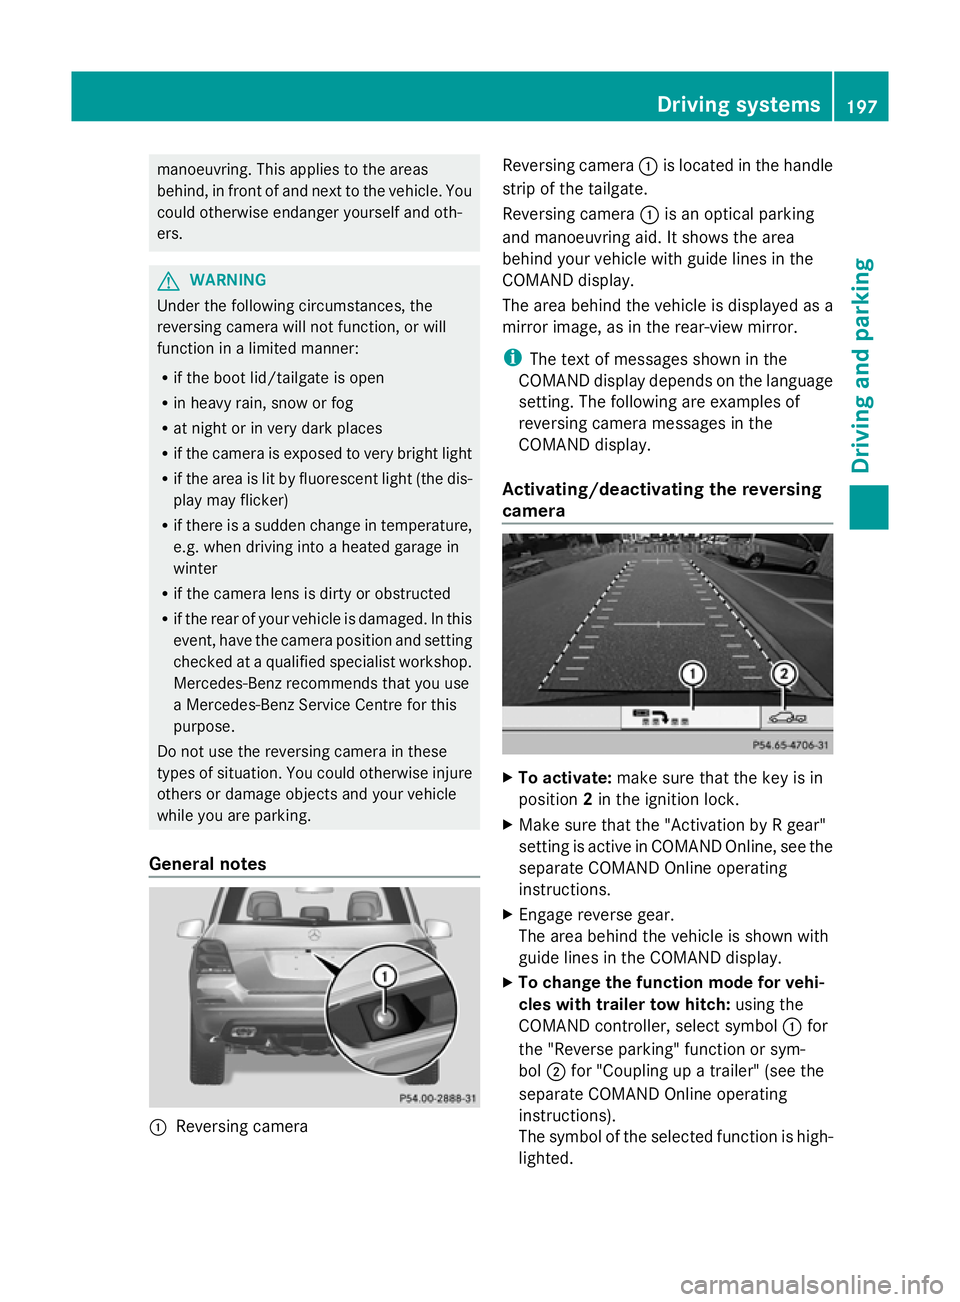
General notes :
Reversing camera Reversing camera
:is located in the handle
strip of the tailgate.
Reversing camera :is an optical parking
and manoeuvring aid. It shows the area
behind your vehicle with guide lines in the
COMAND display.
The area behind the vehicle is displayed as a
mirror image, as in the rear-view mirror.
i The text of messages shown in the
COMAND display depends on the language
setting. The following are examples of
reversing camera messages in the
COMAND display.
Activating/deactivating the reversing
camera X
To activate: make sure that the key is in
position 2in the ignition lock.
X Make sure that the "Activation by R gear"
setting is active in COMAND Online, see the
separate COMAND Online operating
instructions.
X Engage reverse gear.
The area behind the vehicle is shown with
guide lines in the COMAND display.
X To change the function mode for vehi-
cles with trailer tow hitch: using the
COMAND controller, select symbol :for
the "Reverse parking" function or sym-
bol ;for "Coupling up a trailer" (see the
separate COMAND Online operating
instructions).
The symbol of the selected function is high-
lighted. Driving systems
197Driving and parking Z
Page 220 of 381
The maximum noseweight of the trailer draw-
bar on the ball coupling is 80 kg. However,
the actual noseweight may not be higher than
the value which is given on the trailer tow
hitch or trailer identification plates. The low-
est weight applies.
! Use a drawbar noseweight as close as
possible to the maximum permissible nose-
weight. Do not use a noseweight of less
than 50kg, otherwise the trailer may come
loose.
Note that the payload and the rear axle load
are reduced by the actual payload.
i The height of the ball coupling changes
with the load of the vehicle. If necessary,
use a trailer with a height-adjustable draw-
bar.
Driving tips i
Observe the notes on ESP ®
trailer stabi-
lisation (Y page 69).
The maximum permissible speed for vehicle/
trailer combinations depends on the type of
trailer. Before beginning the journey, check
the trailer's documents to see what the max-
imum permitted speed is. Observe the legally
prescribed maximum speed in the relevant
country.
For certain Mercedes-Benz vehicles, the max-
imum permissible rear axle load is increased
when towing a trailer. Refer to the "Technical
data" section to find out whether this applies
to your vehicle. If you utilise any of the added
maximum rear axle load when towing a trailer,
the vehicle/trailer combination may not
exceed a maximum speed of 100 km/h for
reasons concerning the operating permit.
This also applies in countries in which the
permissible maximum speed for vehicle/
trailer combinations is above 100 km/h.
When towing a trailer, your vehicle's handling
characteristics will be different in comparison
to when driving without a trailer, and it will
consume more fuel. Change into a lower gear in good time on long
and steep downhill gradients. On vehicles
with automatic transmission, you have to
select shift range
1,2or 3.
i This also applies if you have activated
cruise control or SPEEDTRONIC.
This will use the braking effect of the engine,
so less braking will be required to prevent the
vehicle from gaining speed. This relieves the
load on the brake system and prevents the
brakes from overheating and wearing too
quickly. If you need additional braking,
depress the brake pedal repeatedly rather
than continuously.
Driving tips R
Maintain a greater distance from the vehi-
cle in front than when driving without a
trailer.
R Avoid braking abruptly. If possible, brake
gently at first to allow the trailer to run on.
Then, increase the braking force rapidly.
R The values given for gradient-climbing
capabilities from a standstill refer to sea
level. When driving in mountainous areas,
note that the power output of the engine,
and consequently the vehicle's gradient-
climbing capability, decrease with increas-
ing altitude.
If the trailer swings from side to side:
X Do not accelerate.
X Do not countersteer.
X Brake if necessary. Fitting the ball coupling
X Make a note of the ball coupling key num-
ber.
i You can use this number to obtain a
replacement key from a Mercedes-Benz
Service Centre. Towing a trailer
217Driving and parking Z
Page 227 of 381
Useful information
i This Owner's Manual describes all mod-
els, series and optional equipment for your
vehicle that were available at the time of
going to press. National variations are pos-
sible. Note that your vehicle may not be
equipped with all of the functions descri-
bed. This is also the case for systems and
functions relevant to safety.
i Read the information on qualified special-
ist workshops: (Y page 27). Important safety notes
G
WARNING
Only use the on-board computer when road
and traffic conditions permit. You would oth-
erwise be distracted and unable to concen-
trate properly on driving, and could cause an
accident. G
WARNING
No messages will be displayed if either the
instrument cluster or the multifunction dis-
play is inoperative.
As a result, you will not be able to see infor-
mation about your driving conditions, such as
speed, outside temperature, warning and indi-
cator lamps, display messages or system fail-
ures. Driving characteristics may be impaired.
Adjust your driving style and vehicle speed
accordingly.
Contact a qualified specialist workshop
immediately. G
WARNING
The on-board computer only records and dis-
plays malfunctions and warnings from certain
systems. For this reason, you should always
make sure that your vehicle is safe to use. You
could otherwise cause an accident by driving
an unsafe vehicle. G
WARNING
The operating safety of your vehicle could be
impaired if maintenance work is carried out
incorrectly. This could cause you to lose con-
trol of your vehicle and cause an accident.
Moreover, the safety systems may no longer
be able to protect you or others as they are
designed to do.
Always have service work carried out at a
qualified specialist workshop.
Illustration of the instrument cluster
R 4-button multifunction steering wheel, see
(Y page 31)
R 12-button multifunction steering wheel,
see (Y page 33) Displays and operation (4-button mul-
tifunction steering wheel)
Instrument cluster lighting
The lighting in the instrument cluster, in the
displays and the controls in the vehicle inte-
rior can be adjusted using the brightness con-
trol knob.
The brightness control knob is located on the
bottom left of the instrument cluster
(Y page 33).
X Turn the brightness control knob clockwise
or anti-clockwise.
If the light switch is set to Ã,Tor
L, the brightness is dependent upon
the brightness of the ambient light.
i The light sensor in the instrument cluster
automatically controls the brightness of
the multifunction display.
In daylight, the displays in the instrument
cluster are not illuminated. Coolant temperature gauge
The coolant temperature gauge is in the
instrument cluster on the left-hand side. 224
Displays and operation (4-button multifunction steering wheel)On-board computer and displays
Page 228 of 381
Under normal operating conditions and with
the specified coolant level, the coolant tem-
perature may rise to 120 †.
At high outside temperatures and when driv-
ing uphill, the coolant temperature may rise
to the end of the scale. Rev counter
The red band in the rev counter indicates the
engine's overrevving range.
! Do not drive in the overrevving range.
Doing so will damage the engine.
The fuel supply is interrupted to protect the
engine when the red band is reached. Outside temperature display
The outside temperature display is in the
instrument cluster (Y page 31).G
WARNING
At temperatures just above freezing point, the
street may be icy, especially in wooded areas
or on bridges. If you do not adapt your driving
style to the conditions, the vehicle could skid.
For this reason, adapt your driving style and
speed to the weather conditions.
Changes in the outside temperature are dis-
played after a short delay. Operating the on-board computer
The on-board computer is activated as soon
as you turn the key to position 1in the ignition
lock. You can use the on-board computer to
call up information relating to your vehicle
and to make and adjust settings.
i You can have certain functions set at a
qualified specialist workshop, e.g. a
Mercedes-Benz Service Centre. Examples:
R
automatic door locking
R speed limit for winter tyres
You can obtain information about this at
any Mercedes-Benz Service Centre.
You can control the multifunction display and
the settings in the on-board computer using
the buttons on the multifunction steering
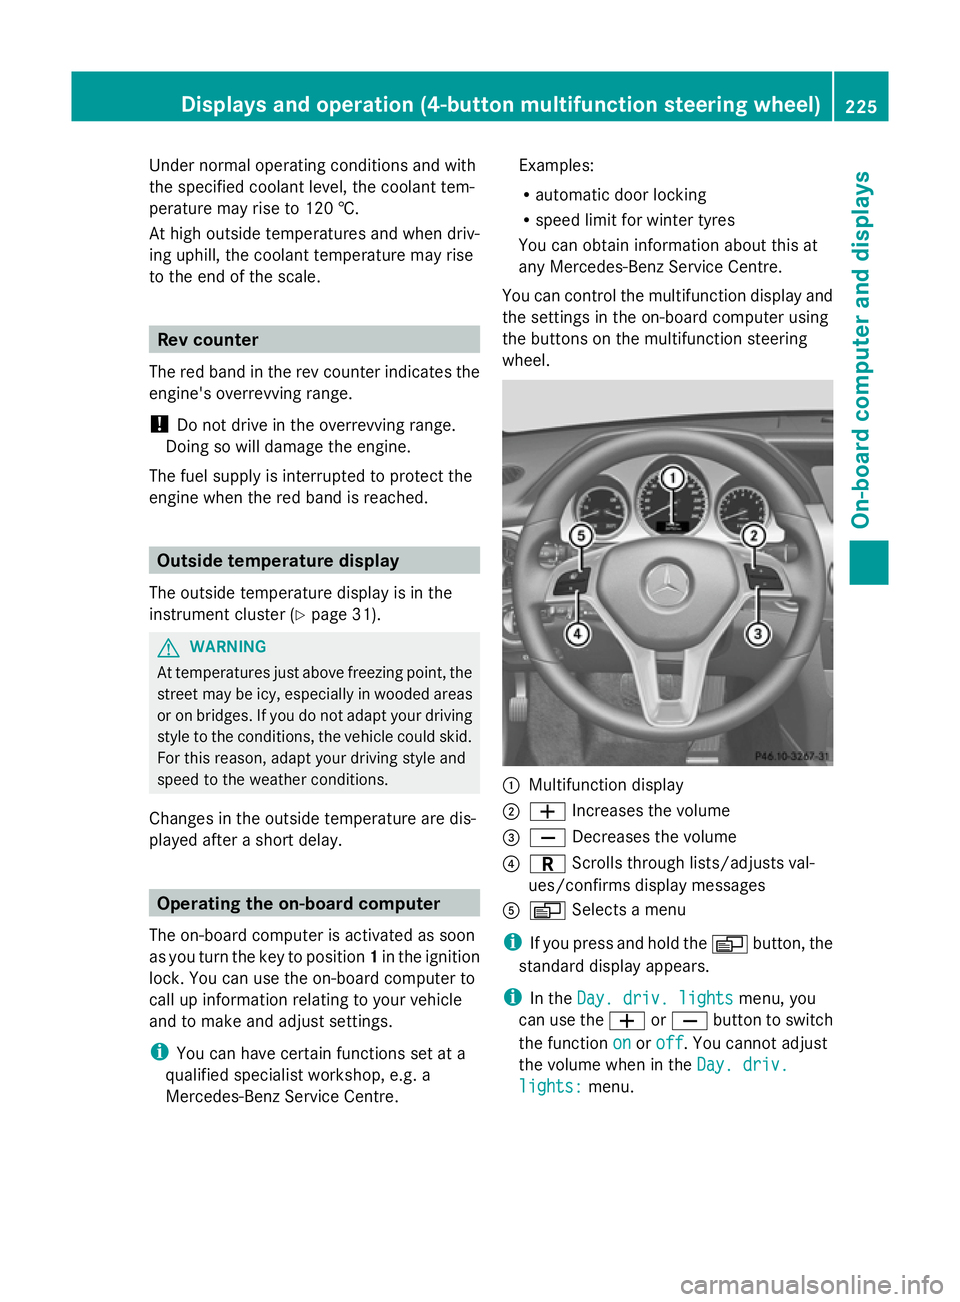
wheel. :
Multifunction display
; W Increases the volume
= X Decreases the volume
? C Scrolls through lists/adjusts val-
ues/confirms display messages
A V Selects a menu
i If you press and hold the Vbutton, the
standard display appears.
i In the Day. driv. lights Day. driv. lights menu, you
can use the WorX button to switch
the function on
onoroff
off. You cannot adjust
the volume when in the Day. driv.
Day. driv.
lights:
lights: menu. Displays and operation (4-button multifunction steering wheel)
225On-board computer and displays Z
Page 229 of 381
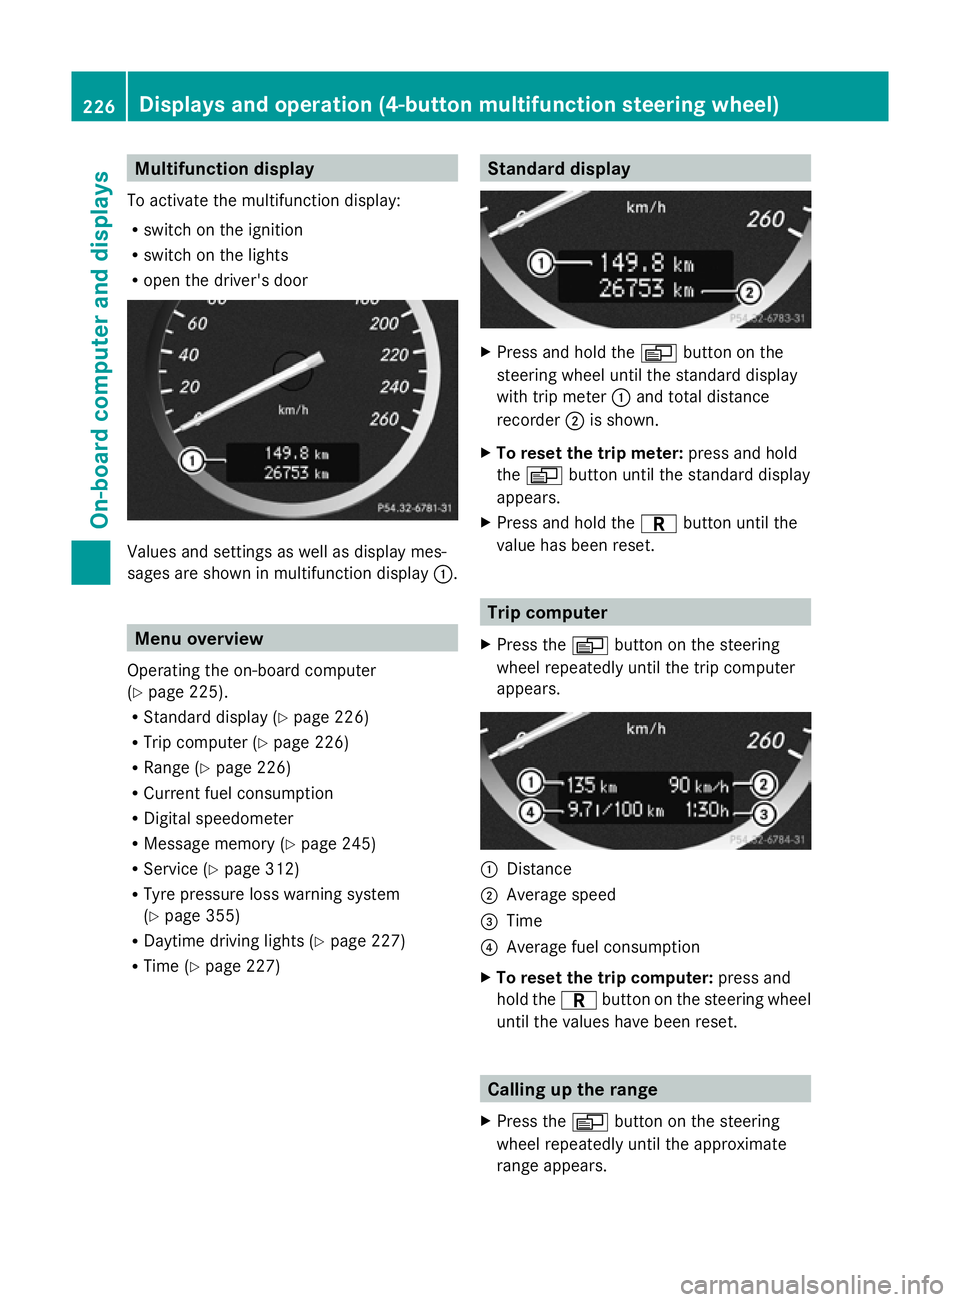
Multifunction display
To activate the multifunction display:
R switch on the ignition
R switch on the lights
R open the driver's door Values and settings as well as display mes-
sages are shown in multifunction display :.Menu overview
Operating the on-board computer
(Y page 225).
R Standard display (Y page 226)
R Trip computer (Y page 226)
R Range (Y page 226)
R Current fuel consumption
R Digital speedometer
R Message memory (Y page 245)
R Service (Y page 312)
R Tyre pressure loss warning system
(Y page 355)
R Daytime driving lights (Y page 227)
R Time (Y page 227) Standard display
X
Press and hold the Vbutton on the
steering wheel until the standard display
with trip meter :and total distance
recorder ;is shown.
X To reset the trip meter: press and hold
the V button until the standard display
appears.
X Press and hold the Cbutton until the
value has been reset. Trip computer
X Press the Vbutton on the steering
wheel repeatedly until the trip computer
appears. :
Distance
; Average speed
= Time
? Average fuel consumption
X To reset the trip computer: press and
hold the Cbutton on the steering wheel
until the values have been reset. Calling up the range
X Press the Vbutton on the steering
wheel repeatedly until the approximate
range appears. 226
Displays and operation (4-button multifunction steering wheel)On-board computer and displays
Page 238 of 381
i
You can obtain further information about
suitable mobile phones and connecting
mobile phones via Bluetooth ®
:
R from any Mercedes Benz Service Centre
R on the Internet at: http://
www.mercedes-benz.com/connect G
WARNING
Observe the legal requirements of the country
in which you are currently driving regarding
the use of mobile phones in the vehicle.
If it is permitted to use mobile phones while
the vehicle is in motion, you should only use
them when the road and traffic conditions
allow. Otherwise, you may be distracted from
the traffic conditions, cause an accident and
injure yourself and others.
X Switch on the mobile phone and audio sys-
tem or COMAND Online; see the separate
operating instructions.
X Press the =or; button on the steer-
ing wheel to select the Tel
Tel menu.
You will see one of the following display mes-
sages in the multifunction display:
R Please Please enter
enterPIN
PIN: the mobile phone has
been placed in the mobile phone bracket
and the PIN has not been entered.
When you enter your PIN via the mobile
phone, LINGUATRONIC, the audio system
or COMAND Online, the mobile phone
searches for a network.
R Telephone Telephone ready
readyor the name of the net-
work provider: the mobile phone has found
a network and is ready to receive.
R Telephone No service Telephone No service : there is no net-
work available or the mobile phone is
searching for a network.
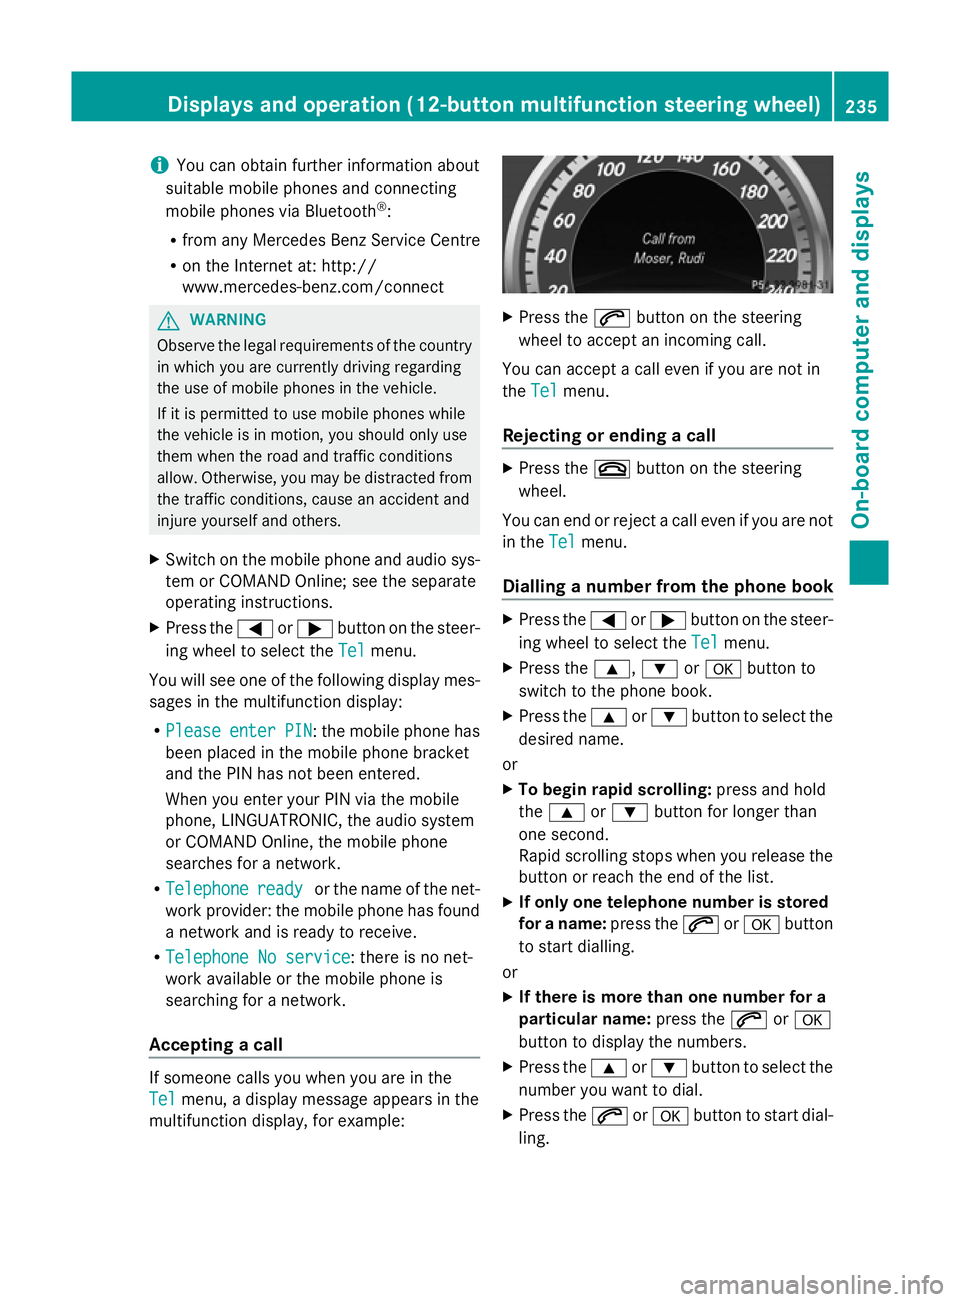
Accepting a call If someone calls you when you are in the
Tel Tel
menu, a display message appears in the
multifunction display, for example: X
Press the 6button on the steering
wheel to accept an incoming call.
You can accept a call even if you are not in
the Tel Tel menu.
Rejecting or ending a call X
Press the ~button on the steering
wheel.
You can end or reject a call even if you are not
in the Tel Telmenu.
Dialling a number from the phone book X
Press the =or; button on the steer-
ing wheel to select the Tel
Telmenu.
X Press the 9,:ora button to
switch to the phone book.
X Press the 9or: button to select the
desired name.
or
X To begin rapid scrolling: press and hold
the 9 or: button for longer than
one second.
Rapid scrolling stops when you release the
button or reach the end of the list.
X If only one telephone number is stored
for a name: press the6ora button
to start dialling.
or
X If there is more than one number for a
particular name: press the6ora
button to display the numbers.
X Press the 9or: button to select the
number you want to dial.
X Press the 6ora button to start dial-
ling. Displays and operation (12-button multifunction steering wheel)
235On-board computer and displays Z