2012 MERCEDES-BENZ GL SUV reset
[x] Cancel search: resetPage 97 of 441
Change the position of the slidin
gsunroof
or open aside window. The noise will be
reduced or eliminated.
Your vehicle may be fitted with asliding sun-
roof or apanorama sliding sunroof. In this
section, the term "sliding sunroof" refers to
both types of sliding sunroof. Operating the sliding sunroof
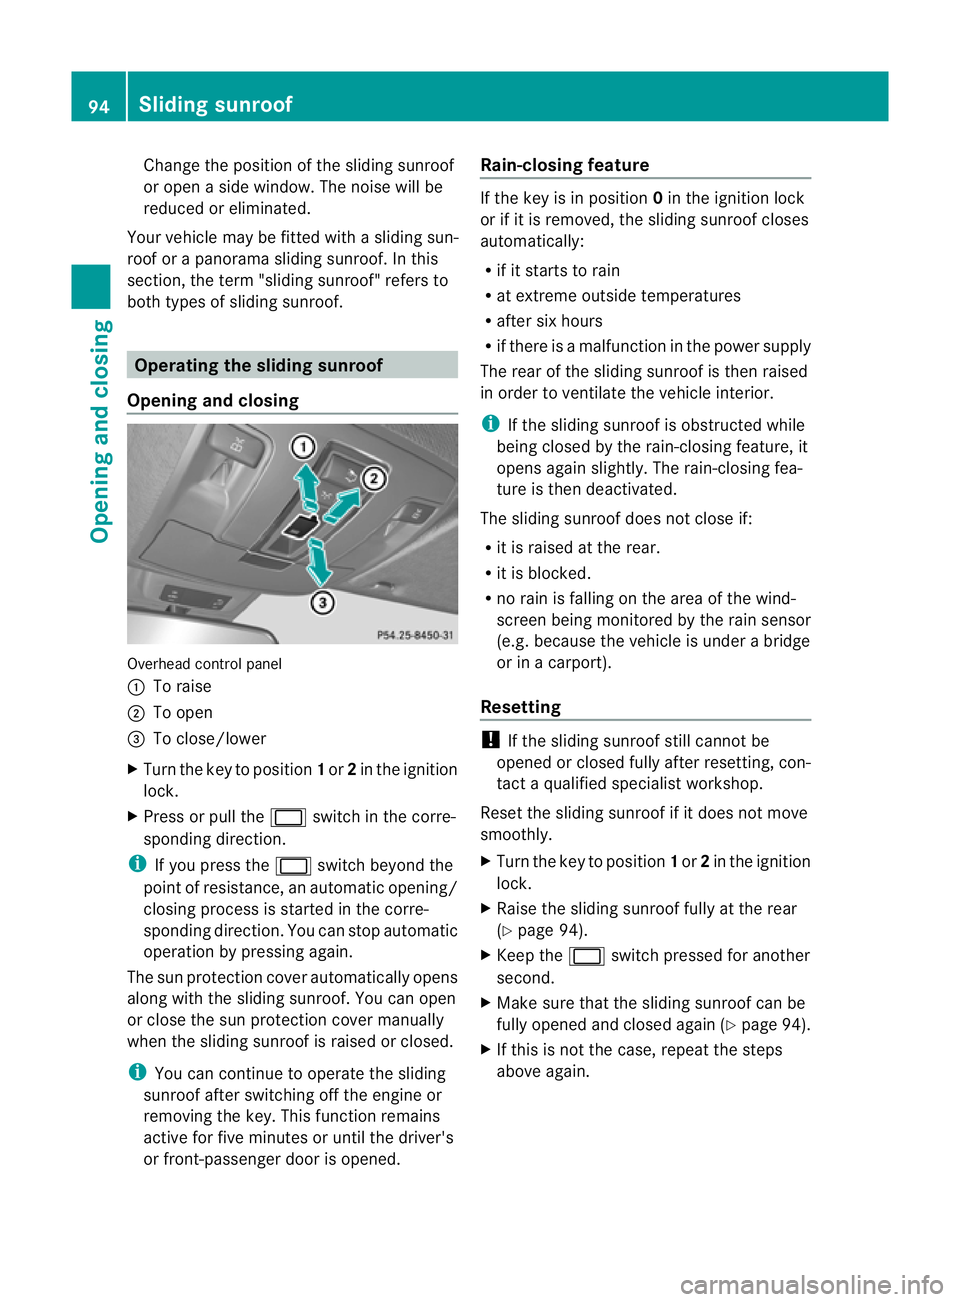
Opening and closing Overhead control panel
:
To raise
; To open
= To close/lower
X Turn the key to position 1or 2in the ignition
lock.
X Press or pull the 2switch in the corre-
sponding direction.
i If you press the 2switch beyond the
point of resistance, an automatic opening/
closing process is started in the corre-
sponding direction. You can stop automatic
operation by pressing again.
The sun protection cover automatically opens
along with the sliding sunroof. You can open
or close the sun protection cover manually
when the sliding sunroof is raised or closed.
i You can continue to operate the sliding
sunroof after switching off the engine or
removing the key. This function remains
active for five minutes or until the driver's
or front-passenger door is opened. Rain-closing featu
re If
the key is in position 0in the ignition lock
or if it is removed, the sliding sunroo fcloses
automatically:
R if it starts to rain
R at extreme outside temperatures
R after six hours
R if there is amalfunction in the power supply
The rear of the sliding sunroof is then raised
in order to ventilate the vehicle interior.
i If the sliding sunroof is obstructed while
being closed by the rain-closing feature, it
opens again slightly. The rain-closing fea-
ture is then deactivated.
The sliding sunroof does not close if:
R it is raised at the rear.
R it is blocked.
R no rain is falling on the area of the wind-
screen being monitored by the rain sensor
(e.g. because the vehicle is under abridge
or in acarport).
Resetting !
If the sliding sunroof still cannot be
opened or closed fully after resetting, con-
tact aqualified specialist workshop.
Reset the sliding sunroof if it does not move
smoothly.
X Turn the key to position 1or 2in the ignition
lock.
X Raise the sliding sunroof fully at the rear
(Y page 94).
X Keep the 2switch presse dfor another
second.
X Make sure that the slidin gsunroof can be
fully opened and closed again (Y page 94).
X If this is not the case, repeat the steps
above again. 94
Sliding sunroofOpenin
gand closing
Page 99 of 441
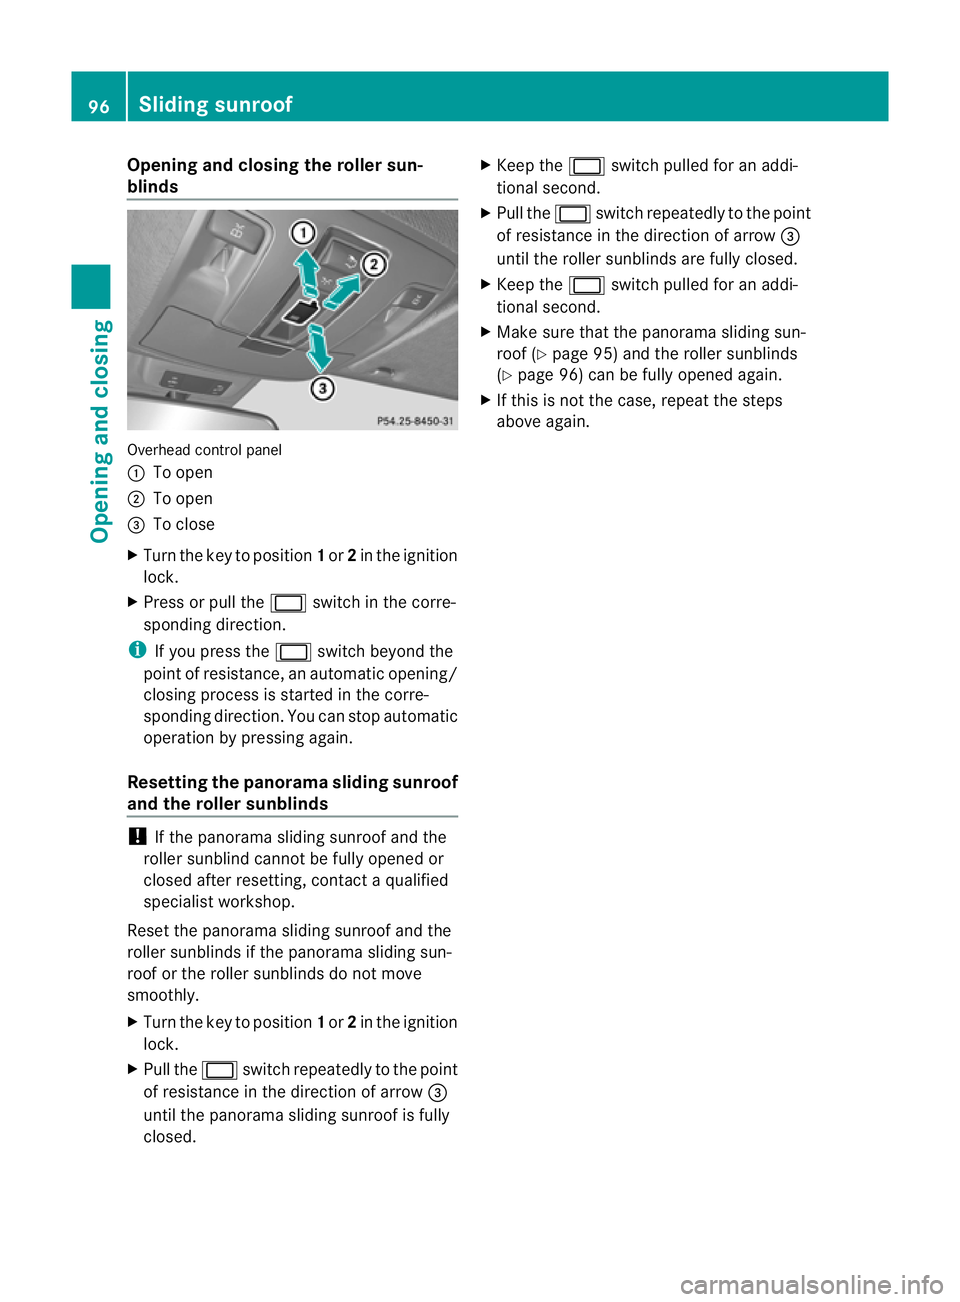
Opening and closing th
eroller sun-
blinds Overhead control panel
:
To open
; To open
= To close
X Turn the key to position 1or 2in the ignition
lock.
X Press or pull the 2switch in the corre-
sponding direction.
i If you press the 2switch beyond the
point of resistance, an automatic opening/
closing process is started in the corre-
sponding direction. You can stop automatic
operation by pressing again.
Resetting the panorama sliding sunroof
and the roller sunblinds !
If the panoram asliding sunroof and the
roller sunblind cannot be fully opened or
closed after resetting, contact aqualified
specialist workshop.
Reset the panorama sliding sunroof and the
roller sunblinds if the panorama sliding sun-
roof or the roller sunblinds do not move
smoothly.
X Turn the key to position 1or 2in the ignition
lock.
X Pull the 2switch repeatedly to the point
of resistance in the direction of arrow =
until the panorama sliding sunroof is fully
closed. X
Keep the 2switch pulled for an addi-
tional second.
X Pull the 2switch repeatedly to the point
of resistance in the direction of arrow =
until the roller sunblinds are fully closed.
X Keep the 2switch pulled for an addi-
tional second.
X Make sure that the panorama sliding sun-
roof (Y page 95) and the roller sunblinds
(Y page 96) can be fully opened again.
X If this is not the case, repeat the steps
above again. 96
Sliding sunroofOpenin
gand closing
Page 116 of 441
X
Make sur ethat the key is in position 1or
2 in the ignition lock.
X Press button :for the left-hand exterior
mirror or button ;for the right-hand exte-
rior mirror.
The indicator lam pint he corresponding
button lights up in red.
The indicator lam pgoes out again after
some time. You can adjust the selected
mirror using adjustment button =as long
as the indicator lam pislit.
X Press adjustment button =up, down, or
to the left or right until you have adjusted
the exterior mirror to the correct position.
You should have agood overview of traffic
conditions.
The convex exterior mirror sprovide alarger
field of vision.
The exterior mirrors are automatically heated
if the rear window heating is switched on and
the outside temperature is low.
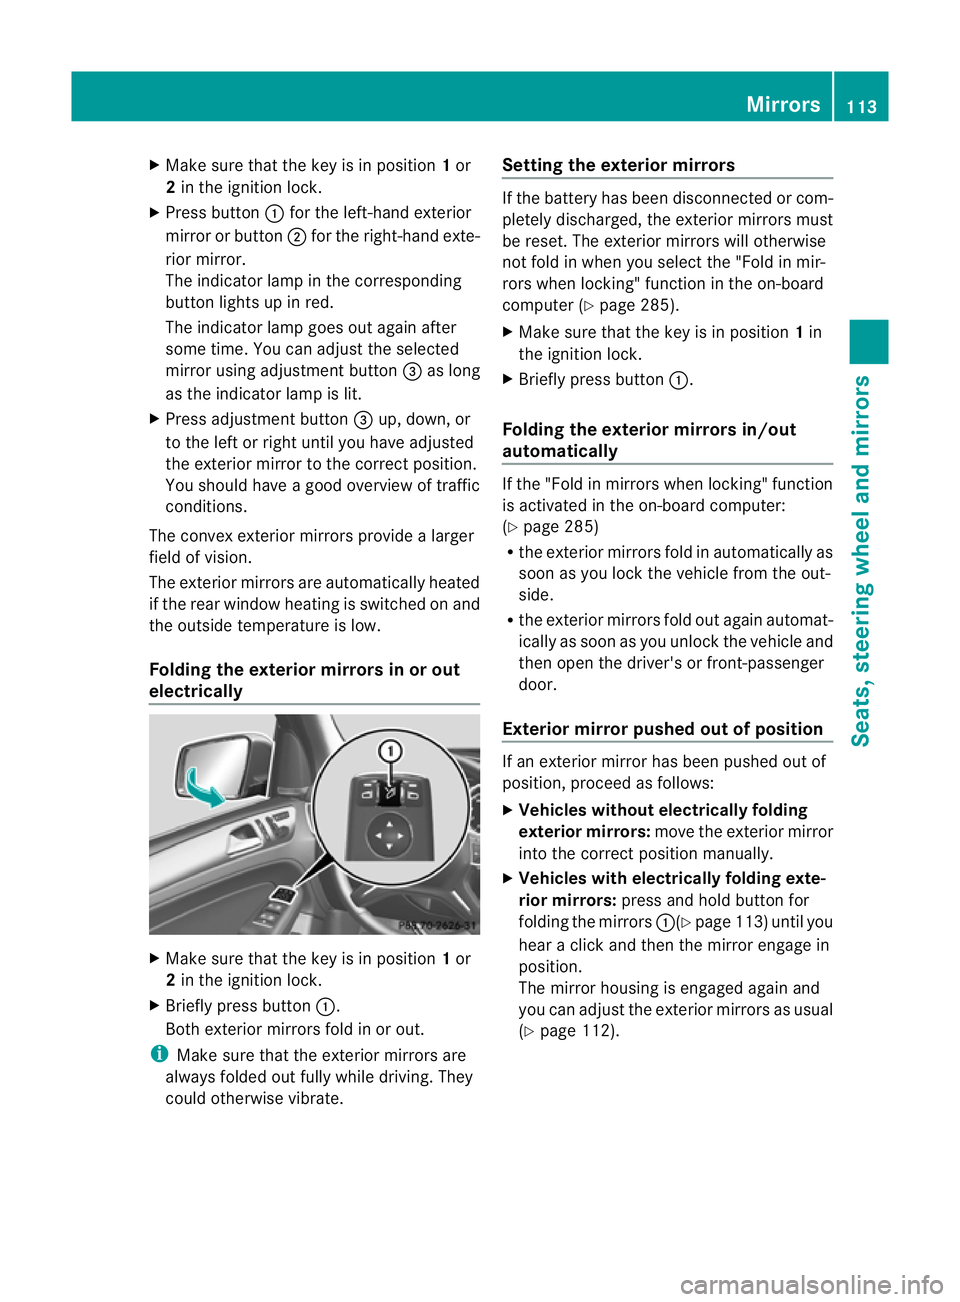
Folding the exterior mirrors in or out
electrically X
Make sure that the key is in position 1or
2 in the ignition lock.
X Briefly press button :.
Both exterior mirrors fold in or out.
i Make sure that the exterior mirrors are
always folded out fully while driving. They
could otherwise vibrate. Setting the exterior mirrors If the battery has been disconnected or com-
pletely discharged
,the exterior mirrors must
be reset .The exterior mirrors will otherwise
not fol dinwhen you selec tthe "Fold in mir-
ror sw hen locking" func tion in the on-board
computer (Y page 285).
X Make sure that the key is in position 1in
the ignition lock.
X Briefl ypres sbutton :.
Folding the exterior mirrors in/out
automatically If the "Fold in mirrors when locking" function
is activated in the on-board computer:
(Y
page 285)
R the exterior mirrors fold in automatically as
soo nasyou lock the vehicle from the out-
side.
R the exterior mirror sfold out again automat-
ically as soon as you unloc kthe vehicle and
then open the driver's or front-passenger
door.
Exterior mir rorp ushe dout of position If an exterior mirro
rhas been pushe dout of
position, proceed as follows:
X Vehicles without electrically folding
exterior mirrors: move the exterior mirror
into the correct position manually.
X Vehicles with electrically folding exte-
rior mirrors: press and hold button for
folding the mirrors :(Ypage 113 )until you
hea rac lick and then the mirror engage in
position.
The mirror housing is engaged again and
you can adjust the exterior mirrors as usual
(Y page 112). Mirrors
113Seats, steerin gwhee land mirrors Z
Page 117 of 441

Automati
canti-dazzle mirrors G
WA
RNING
If inciden tlight fro mheadlamps is prevented
from striking the sensor in the rear-view mir-
ror ,for instance, by luggage piled too high in
the vehicle, the mirror's automatic anti-dazzle
fun ction will not operate.
Incident light could then blind you. This may
distrac tyou from the traffic condition sand,
as aresult, you may cause an accident.
The rear-view mirror and the exterior mirror
on the driver' sside automatically go int oanti-
dazzle mode if the following conditions are
met simultaneously:
R the ignition is switched on and
R incide ntlight from headlamps strikes the
sensor in the rear-view mirror.
The mirror sdonot go int oanti-dazzle mode if
reverse gea risengaged or if the interior light-
ing is switched on. Parking position for the exterior mir-
ror on the front-passenge
rside
Setting and storing the parking position Using reverse gear
:
Button for the driver' sside exterior mirror
; Button for the passenger side exterior
mirror
= Adjustmen tbutton
? Memory button M You can set the front-passenger side exterior
mirror so that you can see the rear wheel on
that side as soo
nasyou engage revers egear.
You can stor ethis position.
X Make sur ethat the vehicle is stationary and
that the key is in position 2in the ignition
lock.
X Press button ;for the exterior mirror on
the front-passenger side.
X Engage revers egear.
The exterior mirror on the front-passenger
side moves to the preset parkin gposition.
X Use adjustment button =to adjust the
exterior mirror to aposition that allows you
to see the rea rwheel and the kerb.
The parkin gposition is stored.
i If you shift the transmission to anot her
po sition ,the exterior mirror on the front-
passenger side retur nsto the driving posi-
tion.
Usin gthe memory button :
Button for th edriver's side exterior mirror
; Button for th efront-passenge rside exte-
rior mirror
= Adjustmen tbutton
? Memory button M
You can set the front-passenger side exterior
mirror so that you can see the rear wheel on
that side as soo nasyou engage revers egear.
This setting can be stored using memory but-
ton M?. 114
MirrorsSeats, steering wheel and mirrors
Page 118 of 441

X
Make sur ethat the key is in position 2in
the ignition lock.
X With the exterior mirror on the front-
passenger side activated, use adjustment
button =to adjust the exterior mirror. In
the exterior mirror, the rea rwheel and the
ker bshould be visible.
X Press memory button M? and one of the
arrow sona djustment button =within
three seconds.
The parking position is stored if the exterior
mirror does not move.
X If the mirror moves out of position, repeat
the steps.
Calling up astore dparkin gposition set-
ting :
Button for the driver's sid eexterio rmirror
; Button for the passenger side exterior
mirror
= Adjustment button
? Memo rybutton M
X Turn the key to position 2in the ignition
lock.
X Adjust the exterior mir roront he front-
pa ssenger side usin gbutton ;.
X Engage reverse gear.
The exterior mirror on the front-passenger
side moves to the stored parking posi tion. The exterior mir
roront he front-passenger
side moves bac ktoits original position:
R as soo nasyou exceed aspeed of
15 km/h
R if you press button :for the exterior mir-
ror on the driv er'sside Me
mo ry function Storing settings
G
WARNING
Only use the memory function on the driver's
side when the vehicle is stationary. You could
otherwise be distracted fro mthe traffic con-
diti ons by th esteerin gwheel and seat moving
of their own accord, and as aresult ,cause an
accident. G
WARNING
The memory function can still be used when
the key has been removed. For this reason,
children shoul dnever be left unsupervised in
the vehicle. They could otherwise become
trapped when adjusting the seat or the steer-
ing wheel.
With the mem ory function,you can store up
to three differen tsettings, e.g. for three dif-
ferent people.
The followi ngsettings ar estore dasa single
mem orypreset:
R position of the seat ,backrest and head
restraint
R driver's side: steerin gwheel position
R driver' sside: position of the exterior mir-
ror so nthe driver' sand front-passenger
sides Memory function
115Seats, steering wheel and mirrors Z
Page 126 of 441

The hazar
dwarning lamps automatically
switch on if:
R an airbag is deployed.
R the vehicle decelerates rapidly from a
spee dofm ore than 70 km /hand come sto
as tandstill.
The hazard warning lamps switch off auto-
maticall yifthe vehicle reaches aspeed of
over 10 km/ hagain after afull brake appli-
cation.
i The hazard warning lamps still operate if
the ignition is switched off. Headlamp cleanin
gsystem
Th eh eadlamps are cleane dautomaticall yif
the "Wip ewithw ashe rfluid" function is oper-
ated fiv etimes (Y page 131 )while the lights
ar eona nd the engine is running. Whe nyou
switc hoff th eignition, the automatic head-
lam pcleaning system is reset and countin gis
resumed from 0. Intelligent Light Sys
tem
General notes Th
eI ntelligent Light System is asystem that
adjusts the headlamps automatically to suit
the prevailing drivin gand weather conditions.
It offers advanced functions for improved illu-
mination of the road surface, e.g. depending
on the vehicle speed or weather conditions.
The system includes the active light function,
cornering light function, motorway mode and
extended range foglamps. The system is only
active when it is dark.
You can activate or deactivate the "Intelligent
Light System" using the on-board computer
(Y page 281). Active light function
The active light function is
asystem that
moves the headlamps according to the steer-
ing movements of the front wheels. In this
way, relevant areas remain illuminated while
driving. This allows you to recognise pedes-
trians, cyclists and animals.
Active: when the lights are switched on.
Cornering light function The cornering ligh
tfunction improves the illu-
mination of the road over awide angle in the
direction you are turning, enabling better vis-
ibility in tight bends, for example. It can only
be activated when the dipped-beam head-
lamps are switched on.
Active:
R if you are drivin gatspeeds below
40 km/ hand the turn si gnal is activatedor
the steerin gwheel is turned.
R if you ar edriving at speeds between
40 km/h and 70 km/h and tur nthe steer-
ing wheel. Exterior lighting
123Lightsand windscreen wipers Z
Page 202 of 441
G
WARNING
DISTRONIC PLUS canno ttake account of road
and traffic conditions. If DISTRONI Cdoes not
recognise or no longer recognises the vehicle
in front, do not activate DISTRONIC or, if it is
alr eady active, deactivate it. This is especially
the case:
R befor ecorners
R on filter lanes
R when changing to alane with faster moving
traffic
R in comple xdriving situations or where lanes
are diverte d,e.g. at roadworks on amotor-
way
DISTRONIC PLU Sotherwise maintains the
current spe ed setbyyou or accelerates up to
the set speed.
DISTRONIC PLU Scannot take account of
weather conditions. Deactivate, or do not
activate, DISTRONI CPLUS:
R if th eroads are slippery, snow-covered or
icy .The wheels coul dlose their grip when
brakin goraccelerating .The vehicle could
star ttos kid.
R if the sensors are dirty or there is poo rvis-
ibility, e.g. due to snow, rain or fog. Dis-
tance control may be impaired.
Always pay attention to traffic conditions
even when DISTRONIC PLU Sisactivate d.
Otherwise, you ma yfail to recognise dangers
in time, caus eanaccident and injure yourself
and others. G
WARNING
DISTRONIC PLUS brake syourvehicle up to a
maximu mof4m /s2
depending on its speed.
This corresponds to approximately 40% of
your vehicle's maximum braking power. You
must als oapply the brakes yourself if this
braking power is not sufficient.
If DISTRONI CPLUS detect sarisk of collision
with avehicle in front, an intermit tent warning
tone sounds. In addition, the ·distance
warning lamp in the instrument cluste rlights
up. Brak etoavoidac ollision. G
WAR
NING
The vehicle can be braked when DISTRONIC
PLUS is activated. For this reason, deactivate
DISTRONIC PLUS if the vehicle is to be set in
motion by othe rmeans (e.g. in acar wash or
by towing).
The radar senso rsystem is switched off auto-
matically in the vicinity of radio teles cope
facilities (Y page 433).
If you want DISTRONIC PLUS to assist you,
the radar sensor syste mmust be activated
(Y page 283 )and operational.
General notes DISTRONIC PLUS regulates the speed and
automati
cally helps you maintain the dis-
tanc etot he vehicle detected in front. DI S-
TRONIC PLU Sbrake sautomatically so that
the set spee disnot exceeded.
On long and steep downhil lgradients, espe-
ciall yifthe vehicle is laden or towing atrailer,
yo um ust select shift range 1,2or 3in good
time. By doing so, you will make use of the
braking effec tofthe engine. This relieves the
load on the brake system and prevents the
brakes from overheating and wearing too
quickly.
If DI STRONIC PLUS detects aslower-moving
vehicle in front ,your vehicle is braked in order
to maintain the preset distance to the vehicle
in front.
If ther eisnov ehicle in front ,DISTRONIC
PLUS operate sinthe sam eway as cruise
control in the spee drange between
30 km/h and 200 km/h. If avehicle is driving
in fron tofyou, DI STRONIC operates in the
speed range betwee n0km/h and
200 km/h.
Do not us eDISTRONIC PLUS on roa dswith
steep gradients. Driving systems
199Drivinga nd parking Z
Page 236 of 441
R
if you are cur rently using COM ANDOnline
or ma kingatelephon ecall with it
R if the tim ehas been set incorrectly
R in active drivin gsituations, such as when
you change lanes or change your speed
Warning and display messages in the
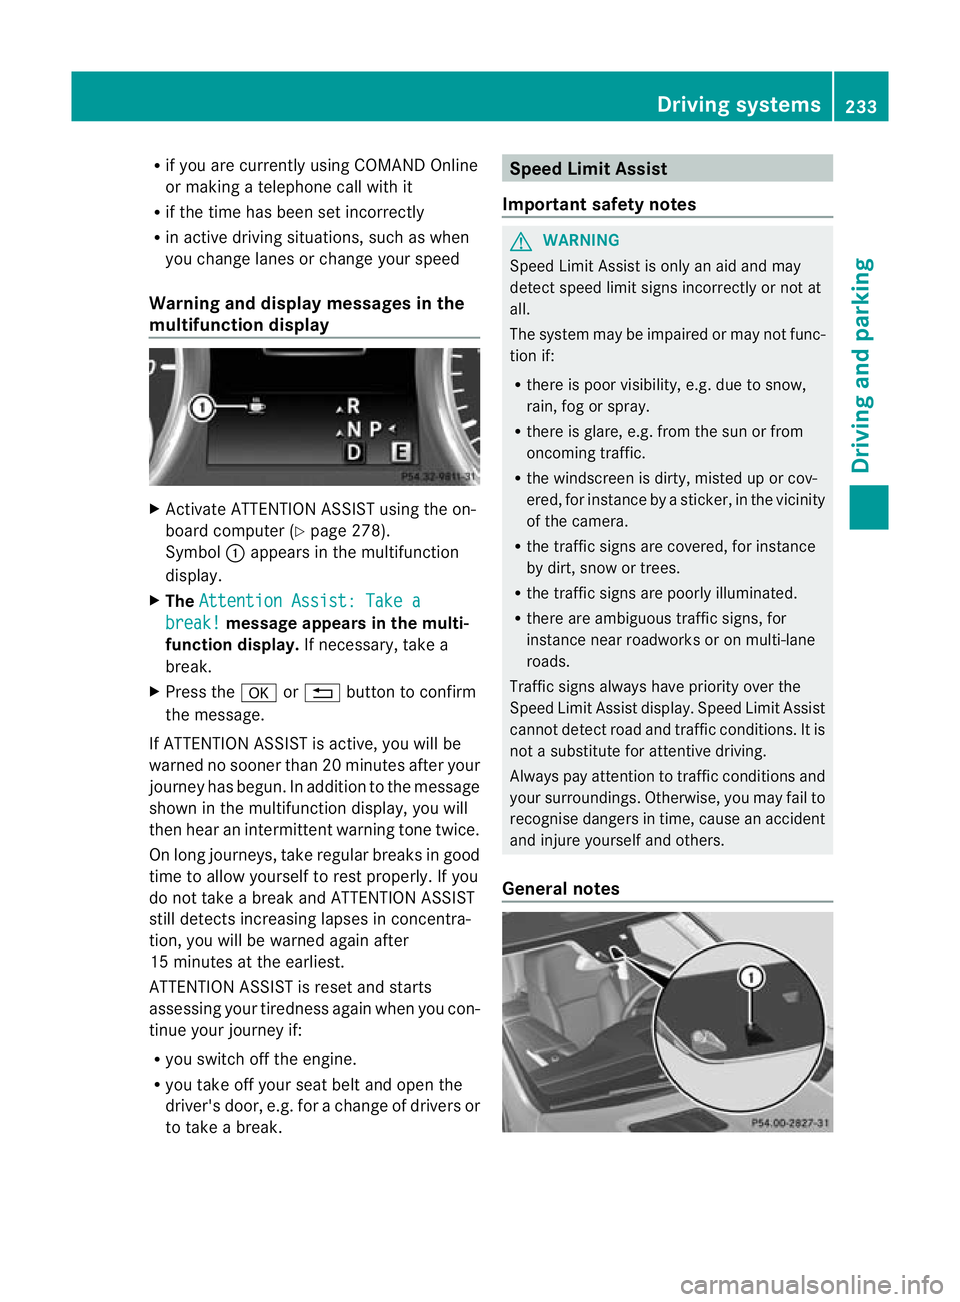
multifunction display X
Activate ATTE NTION ASSIS Tusing the on-
boar dcomputer (Y page 278).
Symbol :appears in the multifunction
display.
X The Attentio nA ssist: Take a break! mess
agea ppears in th emulti-
function display. If necessary, takea
break.
X Press the aor% button to confirm
the message.
If ATTENTION ASSI STis active, you will be
warne dnosooner than 20 minutes after your
journey has begun. In additio ntothe message
shown in the multifunc tion display, you will
then hear an intermit tent warning tone twice.
On long journeys ,take regular breaks in good
time to allow yourself to rest properly. If you
do not take abrea kand ATTENTION ASSIST
stil ldetect sincreasing lapses in concentra-
tion, you will be warned agai nafter
15 minutes at th eearliest.
ATTENTION ASSIST is reset and starts
assessing your tiredness again when you con-
tinue your journey if:
R you switch off the engine.
R you take off your seat belt and open the
driver' sdoor, e.g. for achange of driver sor
to take abreak. Speed Limit Assist
Important safety notes G
WARNING
Speed Limit Assis tiso nly an aid and may
detect speed limit signs incorrectly or not at
all.
The system may be impaired or may not func-
tion if:
R there is poo rvisibility, e.g. due to snow,
rain, fog or spray.
R there is glare, e.g. from the sun or from
oncoming traffic.
R the windscreen is dirty, misted up or cov-
ered, for instance by asticker, in the vicinity
of the camera.
R the traffic signs are covered, for instance
by dirt, snow or trees.
R the traffic signs are poorly illuminated.
R there are ambiguous traffic signs, for
instance near roadworks or on multi-lane
roads.
Traffic signs alway shave priority over the
Speed Limit Assis tdisplay .Speed Limit Assist
cannot detec troad and traffic conditions. It is
not asubstitute for atten tivedriving.
Alway spay atten tion to traffic condition sand
your surroundings. Otherwise ,you may fai lto
recognise dangers in time ,cause an accident
and injure yourself and others.
General notes Driving systems
233Drivingand parking Z