2012 MERCEDES-BENZ G-CLASS SUV cruise control
[x] Cancel search: cruise controlPage 191 of 357

briefly up
:or down ;beyond the pres-
sure point.
The last stored speed increases or decrea-
ses in 10 km/h increments.
i DISTRONIC PLUS is not deactivated if you
depress the accelerator pedal. If you accel-
erate to overtake, DISTRONIC PLUS
adjusts the vehicle's speed to the last
speed stored after you have finished over-
taking.
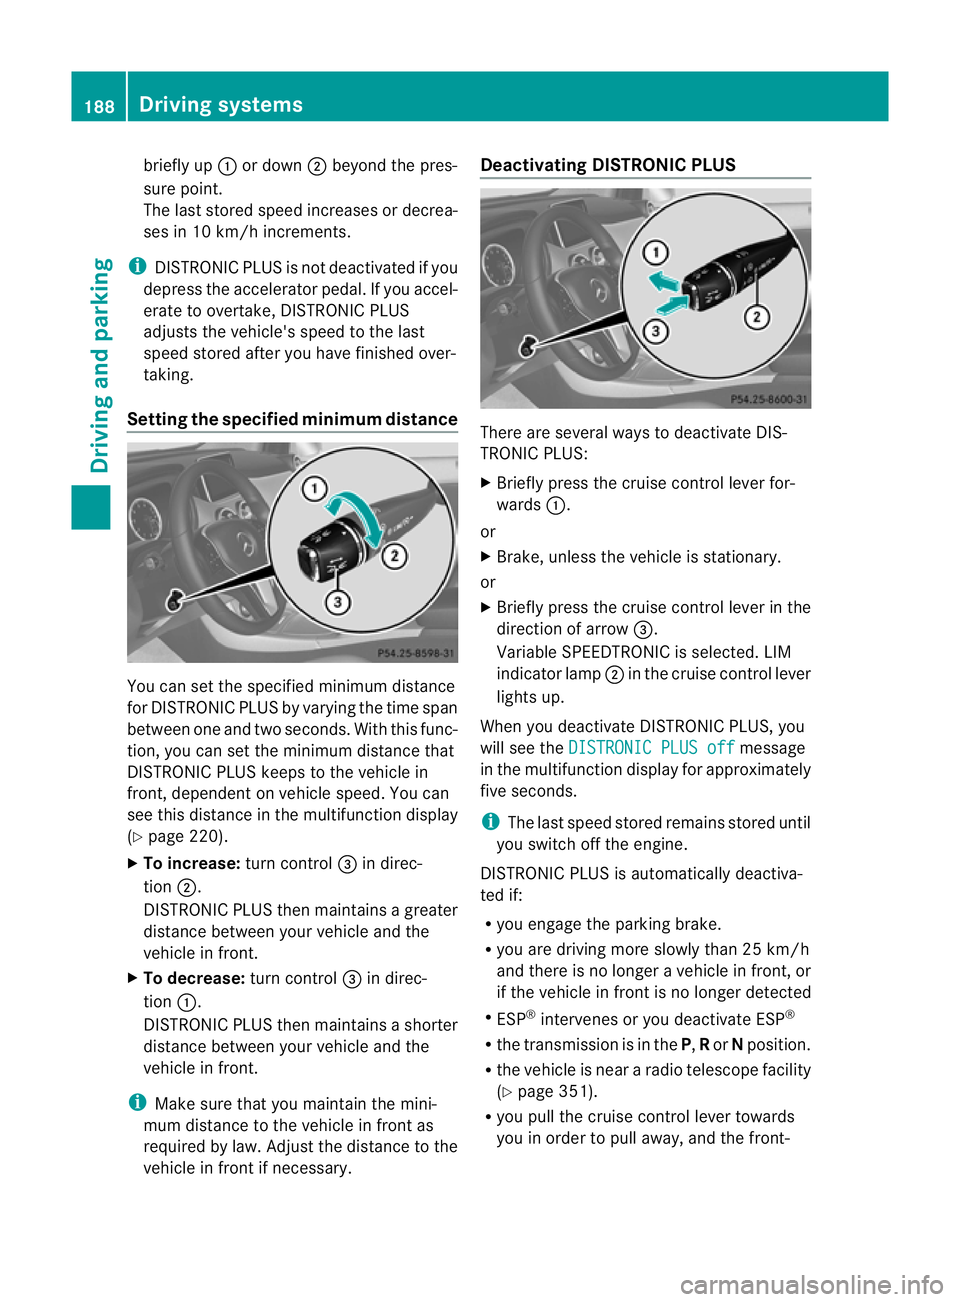
Setting the specified minimum distance You can set the specified minimum distance
for DISTRONIC PLUS by varying the time span
between one and two seconds. With this func-
tion, you can set the minimum distance that
DISTRONIC PLUS keeps to the vehicle in
front, dependen
tonvehicle speed. You can
see this distance in the multifunction display
(Y page 220).
X To increase: turn control=in direc-
tion ;.
DISTRONIC PLUS then maintains a greater
distance between your vehicle and the
vehicle in front.
X To decrease: turn control=in direc-
tion :.
DISTRONIC PLUS then maintains a shorter
distance between your vehicle and the
vehicle in front.
i Make sure that you maintain the mini-
mum distance to the vehicle in front as
required by law. Adjust the distance to the
vehicle in front if necessary. Deactivating DISTRONIC PLUS
There are several ways to deactivate DIS-
TRONIC PLUS:
X
Briefly press the cruise control lever for-
wards :.
or
X Brake, unless the vehicle is stationary.
or
X Briefly press the cruise control lever in the
direction of arrow =.
Variable SPEEDTRONIC is selected. LIM
indicator lamp ;in the cruise control lever
lights up.
When you deactivate DISTRONIC PLUS, you
will see the DISTRONIC PLUS off message
in the multifunction display for approximately
five seconds.
i The last speed stored remains stored until
you switch off the engine.
DISTRONIC PLUS is automatically deactiva-
ted if:
R you engage the parking brake.
R you are driving more slowly than 25 km/h
and there is no longer avehicle in front, or
if the vehicle in front is no longer detected
R ESP ®
intervenes or you deactivate ESP ®
R the transmission is in the P,Ror Nposition.
R the vehicle is near a radio telescope facility
(Y page 351).
R you pull the cruise control lever towards
you in order to pull away, and the front- 188
Driving systemsDriving and parking
Page 210 of 357

for a maximu
mload; see the tyre pressure
table in the fuel filler flap (Y page 325).
You will find installation dimensions and loads
in the technical data (Y page 350).
The maximum permissible trailer drawbar
noseweight on the ball coupling is:
R 140 kg (G-Class long-wheelbase version)
R 115 kg (G-Class Cabriolet)
However, the actual noseweight must not
exceed the value given on the trailer tow hitch
or trailer identification plates. The lowest
weight applies.
i When towing a trailer, set the tyre pres-
sure on the rear axle of the towing vehicle
for a maximum load; see the tyre pressure
table in the fuel filler flap (Y page 325).
Please note that when towing a trailer, PARK-
TRONIC (Y page 197) and Blind Spot Assist
(Y page 190) are only available with limita-
tions, or not at all.
i On vehicles without level control, the
height of the ball coupling will alter accord-
ing to the load placed on the vehicle. If nec-
essary, use a trailer with a height-adjusta-
ble drawbar.
Driving tips X
On long and steep downhill gradients,
select shift range 1,2or 3(Y page 153) in
good time.
i This also applies if you have activated
cruise control or SPEEDTRONIC.
X If necessary, shift the transfer case to LOW
RANGE(Y page 202).
This will use the braking effect of the
engine, so less braking will be required to
prevent the vehicle from gaining speed.
This relieves the load on the brake system
and prevents the brakes from overheating
and wearing too quickly. If you need addi-
tional braking, depress the brake pedal
repeatedly rather than continuously. The maximum permissible speed for vehicle/
trailer combinations depends on the type of
trailer. Before beginning the journey, check
the trailer's documents to see what the max-
imum permitted speed is. Observe the legally
prescribed maximum speed in the relevant
country.
For certain Mercedes-Benz vehicles, the max-
imum permissible rear axle load is increased
when towing a trailer. Refer to the "Technical
data" section to find out whether this applies
to your vehicle. If you utilise any of the added
maximum rear axle load when towing a trailer,
the vehicle/trailer combination may not
exceed a maximum speed of 100 km/h for
reasons concerning the operating permit.
This also applies in countries in which the
permissible maximum speed for vehicle/
trailer combinations is above 100 km/h.
When towing a trailer, your vehicle's handling
characteristics will be different in comparison
to when driving without a trailer, and it will
consume more fuel.
Driving tips
If the trailer swings from side to side:
X
Do not accelerate.
X Do not countersteer.
X Brake if necessary.
R Maintain a greater distance from the vehi-
cle in front than when driving without a
trailer.
R Avoid braking abruptly. If possible, brake
gently at first to allow the trailer to run on.
Then, increase the braking force rapidly.
R The values given for gradient-climbing
capabilities from a standstill refer to sea
level. When driving in mountainous areas,
note that the power output of the engine,
and consequently the vehicle's gradient-
climbing capability, decrease with increas-
ing altitude. Towing
atrailer
207Driving an d parking Z
Page 215 of 357

=
Rev counter (Y page 212)
? Coolan ttemperature (Y page 212)
A Fuel gauge
B Instrument cluster lighting (Y page 212)Instrument cluster lighting
The lighting in the instrument cluster, in the
displays and the controls in the vehicle inte-
rior can be adjusted using the brightness con-
trol knob.
The brightness control knob is located on the
bottom left of the instrument cluster
(Y page 211).
X Turn the brightness control knob clockwise
or anti-clockwise.
If the light switch is set to Ã,Tor
L, the brightness is dependen tupon
the brightness of the ambient light.
i The light senso rinthe instrumentc luster
automatically controls the brightness of
the multifunction display.
In daylight, the displays in the instrument
cluster are not illuminated. Displaying the coolant temperature
The coolan ttemperature gauge is in the
instrument cluster on the right-hand side
(Y page 211).
The reading may rise up to 120 †undernor-
mal driving conditions if the coolant has been
filled correctly.
At high outside temperatures and when driv-
ing uphill, the coolant temperature may rise
to the end of the scale. Rev counter
! Do not drive in the overrevving range.
Doing so will damage the engine.
The red band in the rev counter indicates the
engine's overrevving range. The fuel supply is interrupted to protec
tthe
engine when the red band is reached. Outside temperature display
G
WARNING
At temperatures just above freezing point, the
street may be icy, especially in wooded areas
or on bridges. If you do not adapt your driving
style to the conditions, the vehicle could skid.
For this reason, adapt your driving style and
speed to the weather conditions.
The outside temperature displayi s in the mul-
tifunction display (Y page 214).
Changes in the outside temperature are dis-
played after a short delay. Speedometer with segments
The segments in the speedometer indicate
which speed range is available.
R Cruise control activated (Y page 173):
The segments light up from the stored
speed to the maximum speed.
R Variable SPEEDTRONIC activated
(Y page 178):
The segments light up from the start of the
scale to the selected limit speed.
R DISTRONIC PLUS activated (Y page 184):
One or two segments in the set speed
range light up.
R DISTRONIC PLUS detects avehicle in front:
The segments between the speed of the
vehicle in fron tand the stored speed light
up. 212
Displays and operationOn-board computer and displays
Page 217 of 357

W
X R
Adjusts the volume 8 R
Mute Back button
%
Press briefly:
R
Back
R Switches off LINGUATRONIC,
see the separate operating
instructions
R Hides display messages/calls
up the last Trip menu function
used
R Exits the telephone book/redial
memory %
Press and hold:
R
Calls up the standard display in
the Trip menu
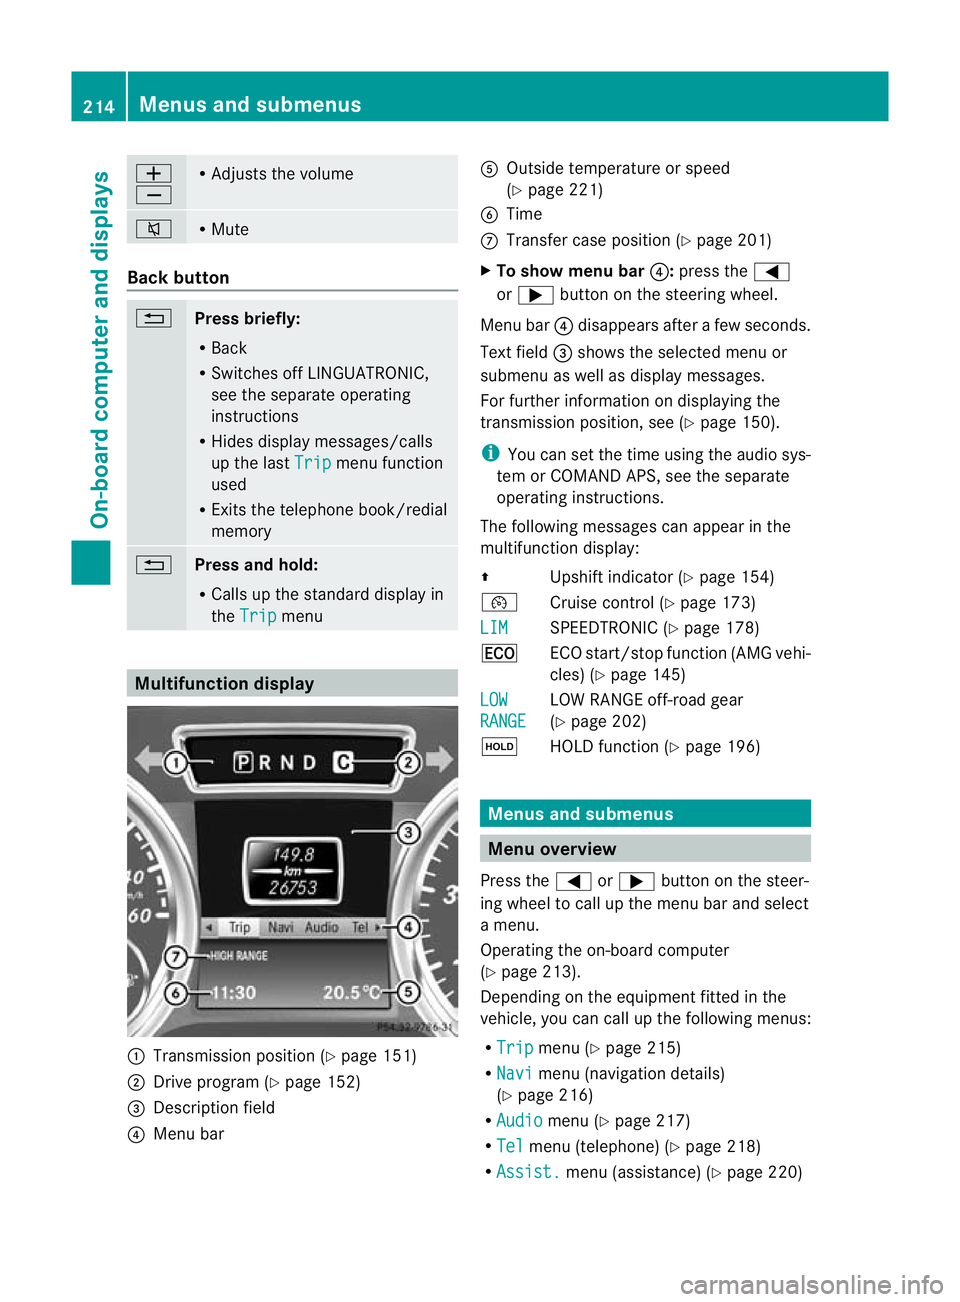
Multifunction display
:
Transmission positio n(Ypage 151)
; Drive program (Y page 152)
= Description field
? Menu bar A
Outside temperature or speed
(Ypage 221)
B Time
C Transfer case position (Y page 201)
X To show menu bar ?:press the =
or ; button on the steering wheel.
Menu bar ?disappears after a few seconds.
Text field =shows the selected menu or
submenu as well as display messages.
For further information on displaying the
transmission position, see (Y page 150).
i You can set the time using the audio sys-
tem or COMAND APS, see the separate
operating instructions.
The following messages can appear in the
multifunction display:
Z Upshift indicator (Y page 154)
¯ Cruise control (Y page 173)
LIM SPEEDTRONIC (Y
page 178)
¤ ECO start/stop function (AMG vehi-
cles) (Ypage 145)
LOW RANGE LOW RANGE off-road gear
(Y
page 202)
ë HOLD function (Y page 196) Menus and submenus
Menu overview
Press the =or; button on the steer-
ing wheel to call up the menu bar and select
a menu.
Operating the on-board computer
(Y page 213).
Depending on the equipment fitted in the
vehicle, you can call up the following menus:
R Trip menu (Y
page 215)
R Navi menu (navigation details)
(Y page 216)
R Audio menu (Y
page 217)
R Tel menu (telephone) (Y
page 218)
R Assist. menu (assistance) (Y
page 220)214
Menus and submenusOn-board computer and displays
Page 224 of 357

Settings menu
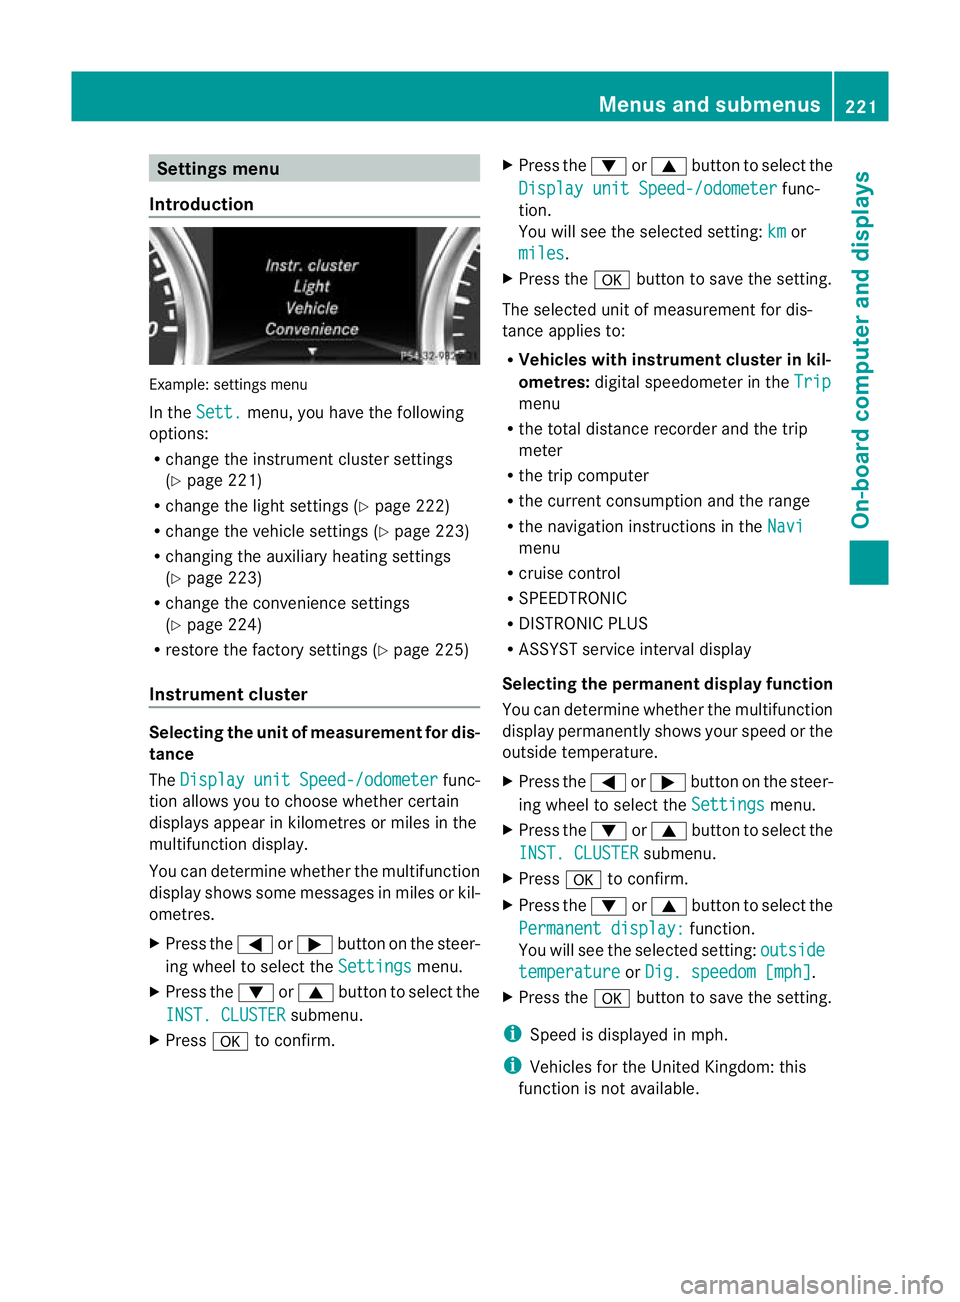
Introduction Example: settings menu
In the
Sett. menu, you have the following
options:
R change the instrument cluster settings
(Y page 221)
R change the light settings (Y page 222)
R change the vehicle settings (Y page 223)
R changing the auxiliary heating settings
(Y page 223)
R change the convenience settings
(Y page 224)
R restore the factory settings (Y page 225)
Instrument cluster Selecting the unit of measurement for dis-
tance
The
Display unit Speed-/odometer func-
tion allows you to choose whether certain
displays appear in kilometres or miles in the
multifunction display.
You can determine whether the multifunction
display shows some messages in miles or kil-
ometres.
X Press the =or; button on the steer-
ing wheel to select the Settings menu.
X Press the :or9 button to select the
INST. CLUSTER submenu.
X Press ato confirm. X
Press the :or9 button to select the
Display unit Speed-/odometer func-
tion.
You will see the selected setting: km or
miles .
X Press the abutton to save the setting.
The selected unit of measurement for dis-
tance applies to:
R Vehicles with instrument cluster in kil-
ometres: digital speedometer in the Trip menu
R the total distance recorder and the trip
meter
R the trip computer
R the current consumption and the range
R the navigation instructions in the Navi menu
R cruise control
R SPEEDTRONIC
R DISTRONIC PLUS
R ASSYST service interval display
Selecting the permanent display function
You can determine whether the multifunction
display permanently shows your speed or the
outside temperature.
X Press the =or; button on the steer-
ing wheel to select the Settings menu.
X Press the :or9 button to select the
INST. CLUSTER submenu.
X Press ato confirm.
X Press the :or9 button to select the
Permanent display: function.
You will see the selected setting: outside temperature or
Dig. speedom [mph] .
X Press the abutton to save the setting.
i Speed is displayed in mph.
i Vehicles for the United Kingdom: this
function is not available. Menus and submenus
221On-board computer and displays Z
Page 248 of 357

Display messages Possible causes/consequences and
M Solutions
Cr. control and
SPEEDTRONIC inop‐
erative SPEEDTRONIC and cruise control are malfunctioning.
X
Visit a qualified specialist workshop. Limit
--- km/h While depressing the accelerato
rpedal beyond the pressure point
(kickdown), SPEEDTRONIC cannot be activated. Cruise control
--- km/h A condition for activating cruise control has not been met.
You have tried to store
aspeed below 30 km/h, for example.
X If conditions permit, drive faster than 30 km/h and store the
speed.
X Check the activation conditions for cruise control
(Y page 173). 120 km/h
Maximum speed
exceeded Only for certain countries: the maximum speed has been excee-
ded.
In addition, the multifunction display shows
120 km/h .
X Drive more slowly. Tyres
Display messages Possible causes/consequences and
M Solutions
Tyre pressure dis‐
played only after
driving for a few
minutes The tyre pressure monitor is measuring the tyre pressure.
X
Drive on.
The tyre pressures appear in the multifunction display after you
have been driving for a few minutes. Tyre pressure mon‐
itor inoperative The tyre pressure monitor is faulty.
X
Visit a qualified specialist workshop. Tyre press. moni‐
tor inoperative No
wheel sensors The wheels fitted do not have a suitable tyre pressure sensor. The
tyre pressure monitor is deactivated.
X
Fit wheels with suitable tyre pressure sensors.
The tyre pressure monitor is activated automatically after driv-
ing for a few minutes. Display messages
245On-board computer and displays Z
Page 260 of 357

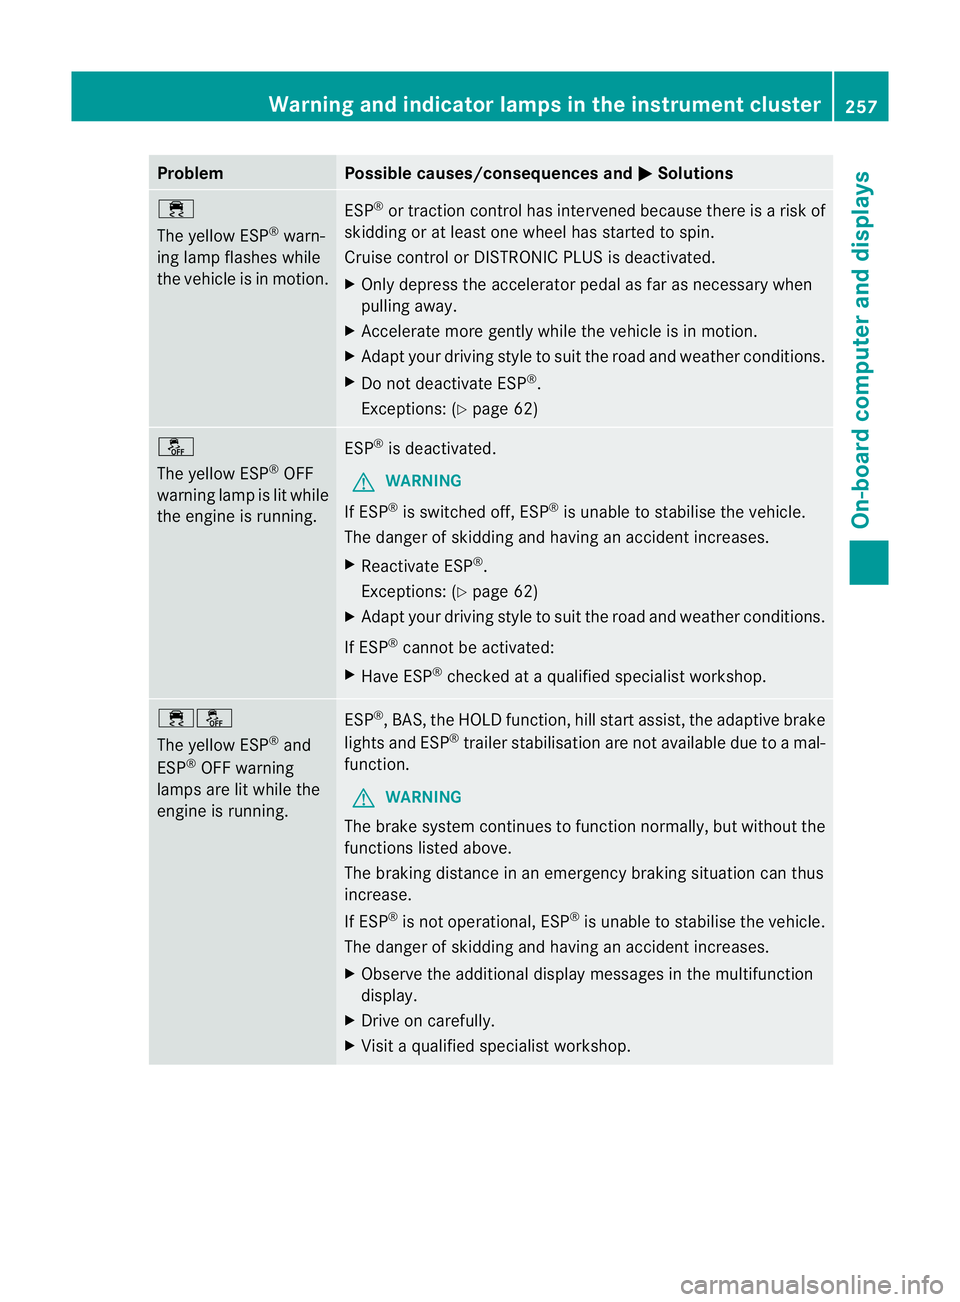
Problem Possible causes/consequences and
M Solutions
÷
The yellow ESP
®
warn-
ing lamp flashes while
the vehicle is in motion. ESP
®
or traction control has intervened because there is a risk of
skidding or at least one wheel has started to spin.
Cruise control or DISTRONIC PLUS is deactivated.
X Only depress the accelerator pedal as far as necessary when
pulling away.
X Accelerate more gently while the vehicle is in motion.
X Adapt your driving style to suit the road and weather conditions.
X Do not deactivate ESP ®
.
Exceptions: (Y page 62) å
The yellow ESP
®
OFF
warning lamp is lit while
the engine is running. ESP
®
is deactivated.
G WARNING
If ESP ®
is switched off, ESP ®
is unable to stabilise the vehicle.
The danger of skidding and having an accident increases.
X Reactivate ESP ®
.
Exceptions: (Y page 62)
X Adapt your driving style to suit the road and weather conditions.
If ESP ®
cannot be activated:
X Have ESP ®
checked at a qualified specialist workshop. ֌
The yellow ESP
®
and
ESP ®
OFF warning
lamps are lit while the
engine is running. ESP
®
, BAS, the HOLD function, hill start assist, the adaptive brake
lights and ESP ®
trailer stabilisation are not available due to a mal-
function.
G WARNING
The brake system continues to function normally, but without the
functions listed above.
The braking distance in an emergency braking situation can thus
increase.
If ESP ®
is not operational, ESP ®
is unable to stabilise the vehicle.
The danger of skidding and having an accident increases.
X Observe the additional display messages in the multifunction
display.
X Drive on carefully.
X Visit a qualified specialist workshop. Warning and indicator lamps in the instrument cluster
257On-board computer and displays Z