2012 MERCEDES-BENZ G-CLASS SUV ignition
[x] Cancel search: ignitionPage 84 of 357
If the sliding sunroof is obstructed during
closing and reopens again slightly:
X Immediately after the sliding sunroof
blocks, pull the ¡switch in the over-
head control panel down to the point of
resistance and hold it until the sliding sun-
roof is closed.
If the sliding sunroof is obstructed again dur-
ing closing and reopens again slightly:
X Immediately after the sliding sunroof
blocks, pull the ¡switch in the over-
head control panel down to the point of
resistance and hold it until the sliding sun-
roof is closed. Soft top (G-Class Cabriolet)
Important safety notes
G
WARNING
If the closed soft top is not locked, it can open
while the vehicle is in motion. This could
cause you to lose control of the vehicle .There
is a risk of an accident.
Only drive with the soft top fully open or
closed.
! Never sit on the soft top or store heavy
objects on it. Otherwise, the soft top will be
damaged.
! The soft top swings upwards when it is
opened or closed. In order to avoid dam-
aging the soft top or other parts of the vehi-
cle when opening or closing the soft top,
observe the following:
R there must be sufficient clearance above
the vehicle.
R the tonneau cover must not be attached
to the opened soft top.
R the luggage compartmentc over must
not be pushed up by the load.
R there must not be any objects on the lug-
gage compartment cover.
R no roof rack must be fitted. R
the outside temperature must be over
−15 †.
R the fabric must not be dirty, wet or fro-
zen.
R the vehicle must not be parked at a steep
angle, e.g. off-road.
R zip fasteners and quick-release fasteners
must be closed.
The soft top can only be opened and closed if
the vehicle is stationary.
i Make sure the soft top is dry before open-
ing it. Water could otherwise enter the vehi-
cle interior or luggage compartment.
i Avoid repeatedly opening and closing the
soft top. This discharges the battery. Operating the soft top
Opening X
Move the selector lever to P.
X Apply the parking brake.
X Turn the key to position 2in the ignition
lock.
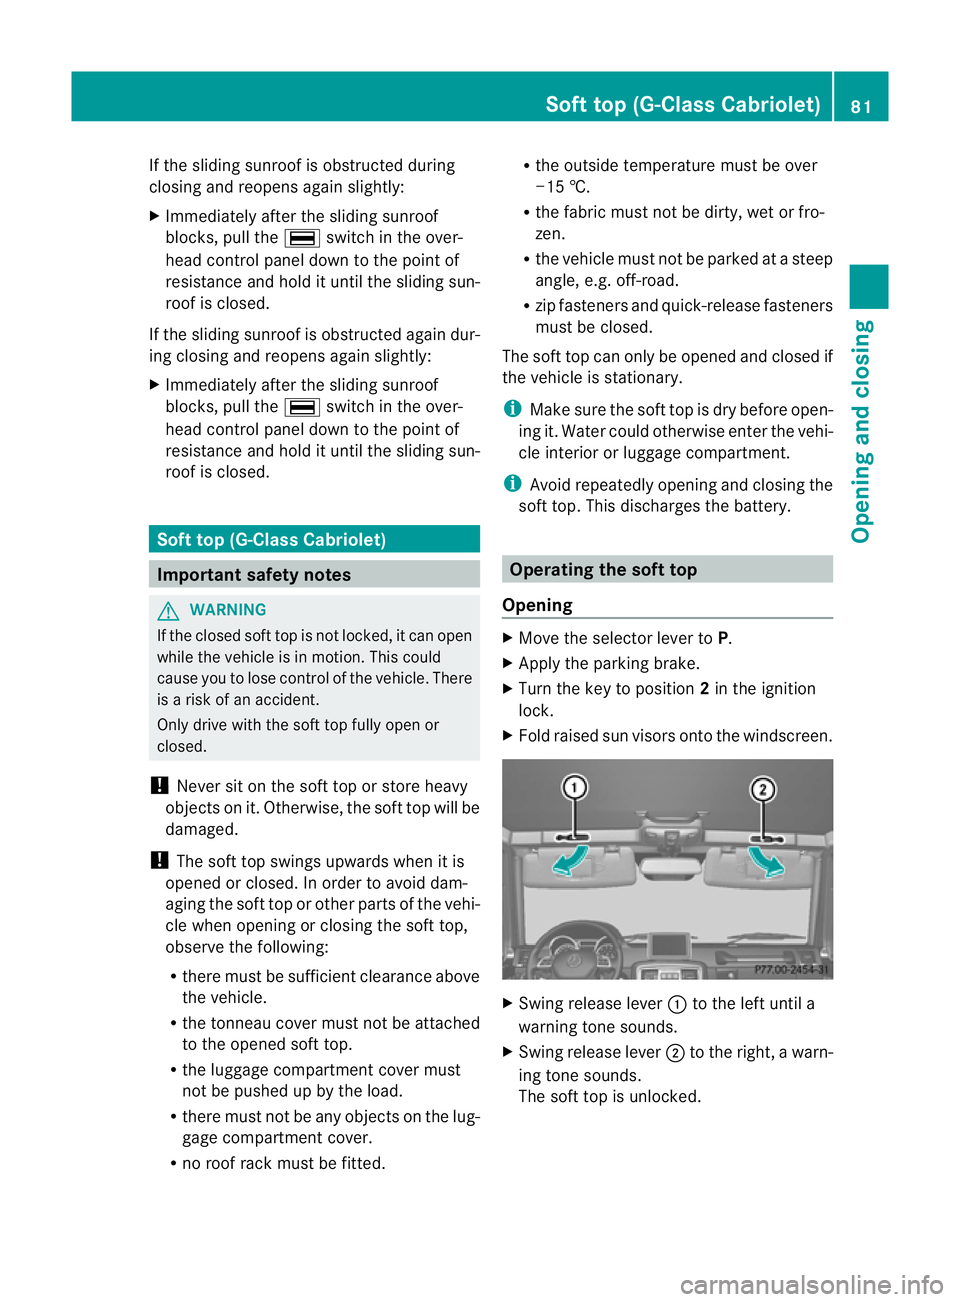
X Fold raised sun visors onto the windscreen. X
Swing release lever :to the left until a
warning tone sounds.
X Swing release lever ;to the right, a warn-
ing tone sounds.
The soft top is unlocked. Soft top (G-Class Cabriolet)
81Opening and closing Z
Page 85 of 357
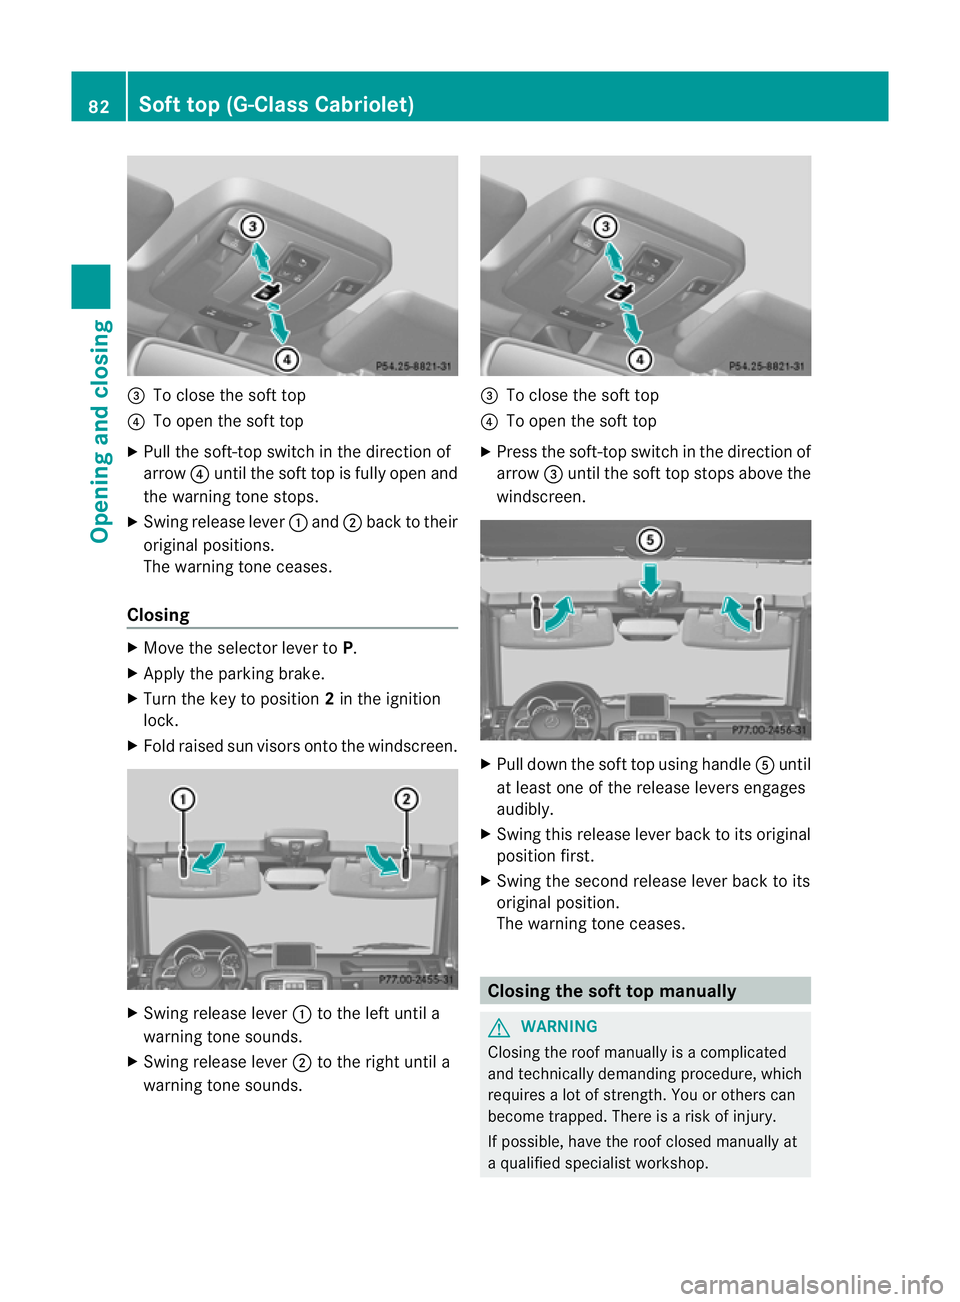
=
To close the soft top
? To open the soft top
X Pull the soft-top switch in the direction of
arrow ?until the soft top is fully open and
the warning tone stops.
X Swing release lever :and ;back to their
original positions.
The warning tone ceases.
Closing X
Move the selector lever to P.
X Apply the parking brake.
X Turn the key to position 2in the ignition
lock.
X Fold raised sun visors onto the windscreen. X
Swing release lever :to the left until a
warning tone sounds.
X Swing release lever ;to the right until a
warning tone sounds. =
To close the soft top
? To open the soft top
X Press the soft-top switch in the direction of
arrow =until the soft top stops above the
windscreen. X
Pull down the soft top using handle Auntil
at least one of the release levers engages
audibly.
X Swing this release lever back to its original
position first.
X Swing the second release lever back to its
original position.
The warning tone ceases. Closing the soft top manually
G
WARNING
Closing the roof manually is a complicated
and technically demanding procedure, which
requires a lot of strength. You or others can
become trapped. There is a risk of injury.
If possible, have the roof closed manually at
a qualified specialist workshop. 82
Soft top (G-Class Cabriolet)Opening and closing
Page 86 of 357
G
WARNING
If anywhere other than the indicated gripping
points is gripped, you or others can become
trapped or stuck. There is a risk of injury.
Take off jewellery and watches. Only hold the
indicated gripping points. Do not reach
between the cover halves and into the hinges.
X Move the selector leve rtoP.
X Apply the parking brake.
X Remove the key from the ignition lock.
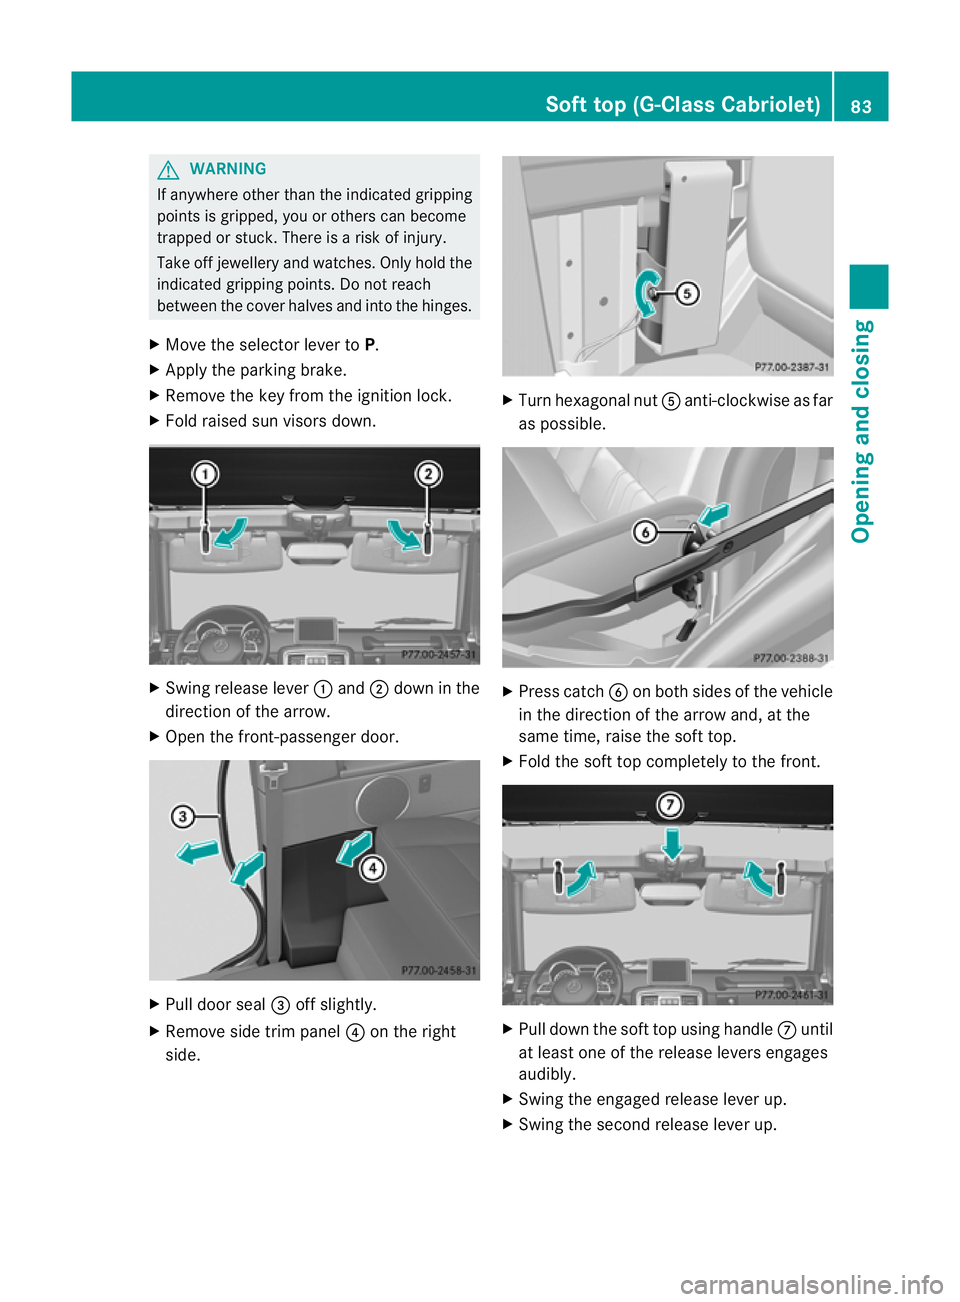
X Fold raised su nvisors down. X
Swing release lever :and ;down in the
direction of the arrow.
X Open the front-passenger door. X
Pull door seal =off slightly.
X Remove side trim panel ?on the right
side. X
Turn hexagonal nut Aanti-clockwise as far
as possible. X
Press catch Bon both sides of the vehicle
in the direction of the arrow and, at the
same time, raise the soft top.
X Fold the soft top completely to the front. X
Pull down the soft top using handle Cuntil
at least one of the release levers engages
audibly.
X Swing the engaged release lever up.
X Swing the second release lever up. Soft top (G-Class Cabriolet)
83Opening and closing Z
Page 90 of 357
Problems with the soft top
Problem Possible causes/consequences and
M Solutions
The soft top cannot be
opened or closed. The soft top closing procedure has been interrupted.
X Wait approximately five seconds, then repeat the procedure. The fuse is faulty.
X
Check the fuse and replace it if necessary (Y page 318). The hydraulic pump is overheated.
X
Wait several minutes, then repeat the procedure. The control unit is malfunctioning because the closing procedure
was interrupted.
X
Turn the key to position 0and then back to 2(Ypage 143) in
the ignition lock.
X Close the soft top again.
If it still cannot be closed electrically:
X Close the soft top manually (Y page 82).
X Have the system checked at a qualified specialist workshop. Soft top (G-Class Cabriolet)
87Opening and closing Z
Page 94 of 357
Seats
Important safety notes
G
WARNING
The seats can still be adjusted when there is
no key in the ignition lock. For this reason,
children should never be left unsupervised in
the vehicle. They could adjust the seats and
become trapped. G
WARNING
Only adjust the driver's seat when the vehicle
is stationary. You will otherwise be distracted
from the road and traffic conditions and you
could lose control of the vehicle as a result of
the seat moving. This could cause an acci-
dent. G
WARNING
If you adjust the seat height carelessly, you or
others could be trapped and thereby injured.
Children in particular could unintentionally
press the buttons to electrically adjust the
seats and become trapped.
Take care that:
R while moving the seats, your hands do not
get under the lever assembly of the seat
adjustment system.
R children in the vehicle do not slide their
hands under the levers. G
WARNING
Make sure that nobody can become trapped
when adjusting the seats.
Observe the notes on airbags.
Secure children as recommended; see the
"Children in the vehicle" section. G
WARNING
Make sure that the back of your head is sup-
ported at eye level by the central area of the
head restraint .Ifyour head is not supported
correctly by the head restraint, you could suf-
fer a severe neck injury in the event of an accident
.Never drive if the head restraints are
not engaged and set correctly. G
WARNING
Occupants should only travel sitting on seats
which have the head restraints fitted. On a
seat which is occupied, move the head
restraint into the upright position .This
reduces the risk of injury to the passenger in
the event of an accident. G
WARNING
As eat belt can only offer its intended degree
of protection when the backrest is almost ver-
tical and the occupant is sitting upright. Avoid
seat positions that do not allow the seat belt
to be routed correctly. Adjust the backrest so
that it is as upright as possible. Never travel
with the backrest reclined too far backwards.
You could otherwise be seriously or even
fatally injured in the event of an accident or
sudden braking.
! To avoid damage to the seats and the seat
heating, observe the following information:
R do not spill any liquids on the seats. If
liquid is spilled on the seats, dry them as
soon as possible.
R if the seat covers are damp or wet, do not
switch on the seat heating. The seat
heating should also not be used to dry
the seats.
R clean the seat covers as recommended;
see the "Interior care" section.
R do not transport heavy loads on the
seats. Do not place sharp objects on the
seat cushions, e.g. knives, nails or tools.
The seats should only be occupied by
passengers, if possible.
R when the seat heating is in operation, do
not cover the seats with insulating mate-
rials, e.g. blankets, coats, bags, seat cov-
ers, child seats or booster seats.
! Make sure that there are no objects in the
footwell or behind the seats when moving Seats
91Seats, steering wheel and mirrors Z
Page 97 of 357
Adjusting the multicontour seat
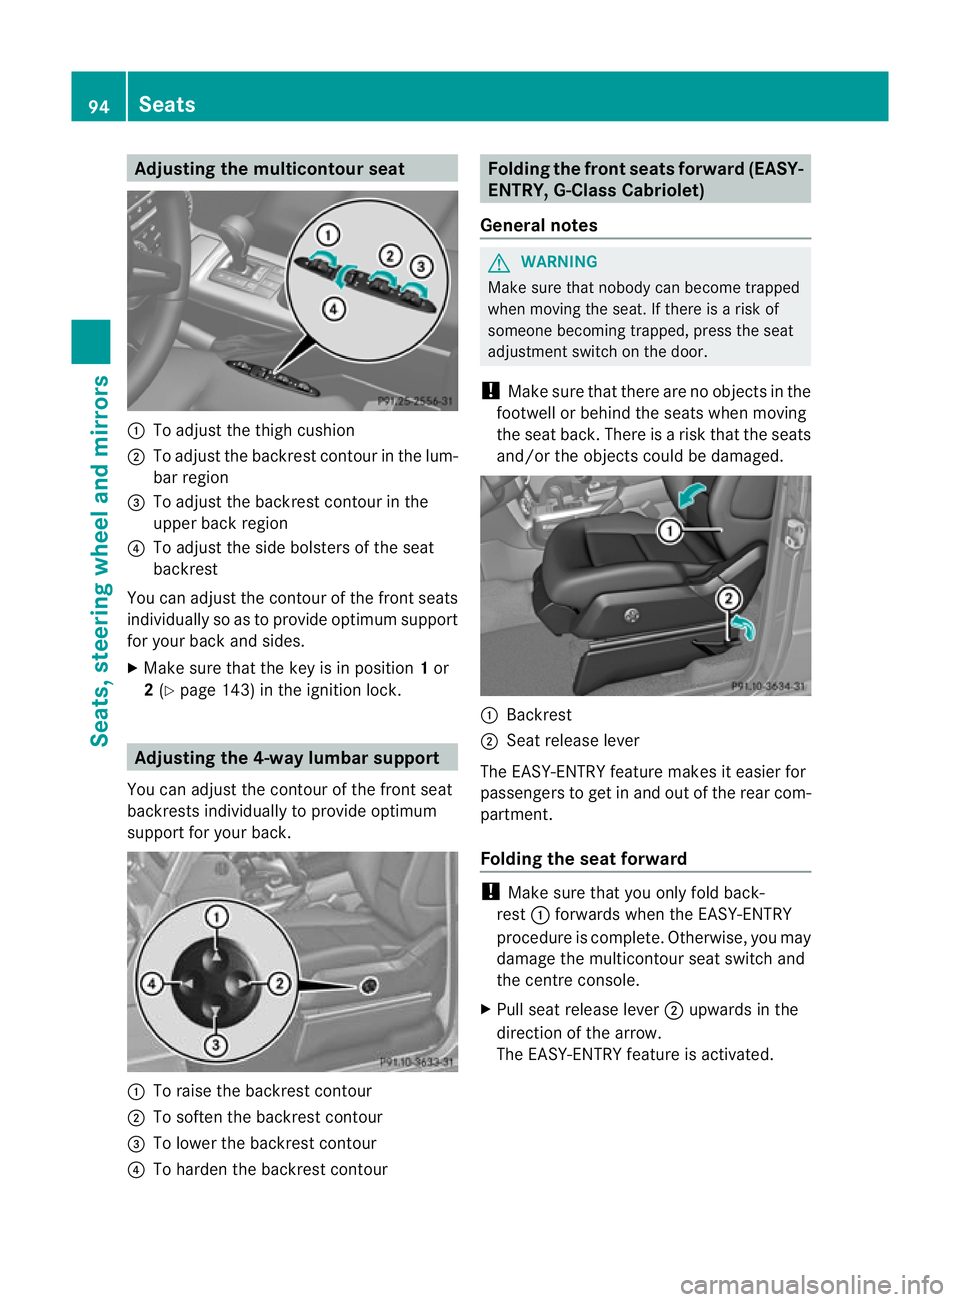
:
To adjust the thigh cushion
; To adjust the backrest contour in the lum-
bar region
= To adjust the backrest contour in the
upper bac kregion
? To adjust the side bolsters of the seat
backrest
You can adjust the contour of the fron tseats
individually so as to provide optimum support
for your back and sides.
X Make sure that the key is in position 1or
2 (Y page 143) in the ignition lock. Adjusting the 4-way lumbar support
You can adjust the contour of the front seat
backrests individually to provide optimum
support for your back. :
To raise the backrest contour
; To soften the backrest contour
= To lower the backrest contour
? To harden the backrest contour Folding the front seats forwar
d(EASY-
ENTRY, G-Class Cabriolet)
General notes G
WARNING
Make sure that nobody can become trapped
when moving the seat. If there is a risk of
someone becoming trapped, press the seat
adjustmen tswitch on the door.
! Make sure that there are no objects in the
footwell or behind the seats when moving
the seat back .There is a risk that the seats
and/or the objects could be damaged. :
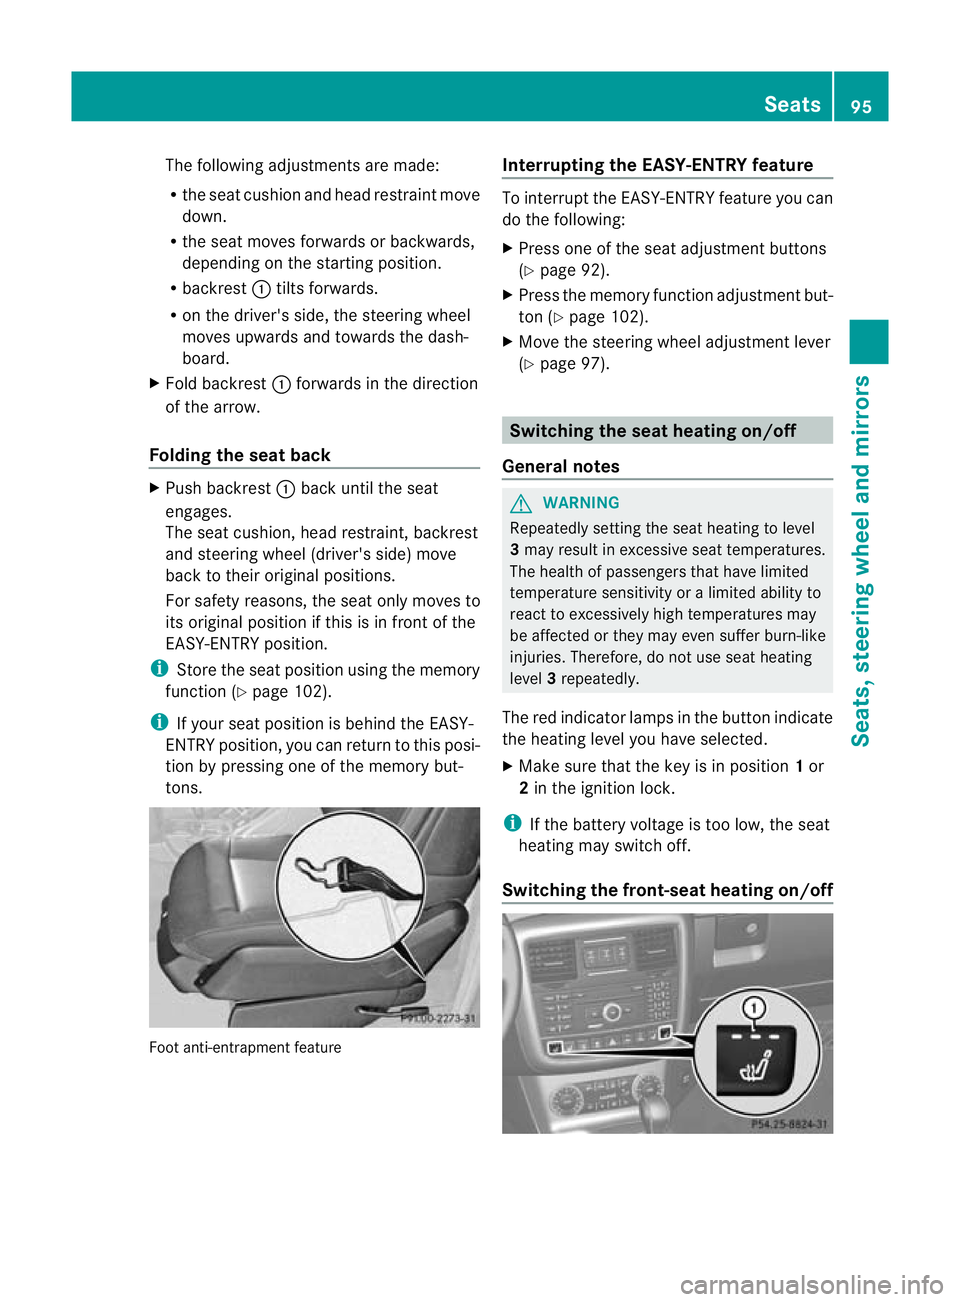
Backrest
; Seat release lever
The EASY-ENTRY feature makes it easier for
passengers to get in and out of the rear com-
partment.
Folding the seat forward !
Make sure that you only fold back-
rest :forwards when the EASY-ENTRY
procedure is complete. Otherwise, you may
damage the multicontour seat switch and
the centre console.
X Pull seat release lever ;upwards in the
direction of the arrow.
The EASY-ENTRY feature is activated. 94
SeatsSeats, steering wheel and mirrors
Page 98 of 357
The following adjustments are made:
R
the seat cushion and head restraint move
down.
R the seat moves forwards or backwards,
depending on the starting position.
R backrest :tilts forwards.
R on the driver's side, the steering wheel
moves upwards and towards the dash-
board.
X Fold backrest :forwards in the direction
of the arrow.
Folding the seat back X
Push backrest :back until the seat
engages.
The seat cushion, head restraint, backrest
and steering wheel (driver's side) move
back to their original positions.
For safety reasons, the seat only moves to
its original position if this is in frontoft he
EASY-ENTRY position.
i Store the seat position using the memory
function (Y page 102).
i If your seat position is behind the EASY-
ENTRY position, you can return to this posi-
tion by pressing one of the memory but-
tons. Foot anti-entrapment feature Interrupting the EASY-ENTRY feature To interrupt the EASY-ENTRY feature you can
do the following:
X
Press one of the seat adjustment buttons
(Y page 92).
X Press the memory function adjustment but-
ton (Y page 102).
X Move the steering wheel adjustment lever
(Y page 97). Switching the seat heating on/off
General notes G
WARNING
Repeatedly setting the seat heating to level
3 may result in excessive seat temperatures.
The health of passengers that have limited
temperature sensitivity or a limited ability to
react to excessively high temperatures may
be affected or they may even suffer burn-like
injuries. Therefore, do not use seat heating
level 3repeatedly.
The red indicator lamps in the button indicate
the heating level you have selected.
X Make sure that the key is in position 1or
2 in the ignition lock.
i If the battery voltage is too low, the seat
heating may switch off.
Switching the front-seat heating on/off Seats
95Seats, steering wheel and mirrors Z
Page 99 of 357
X
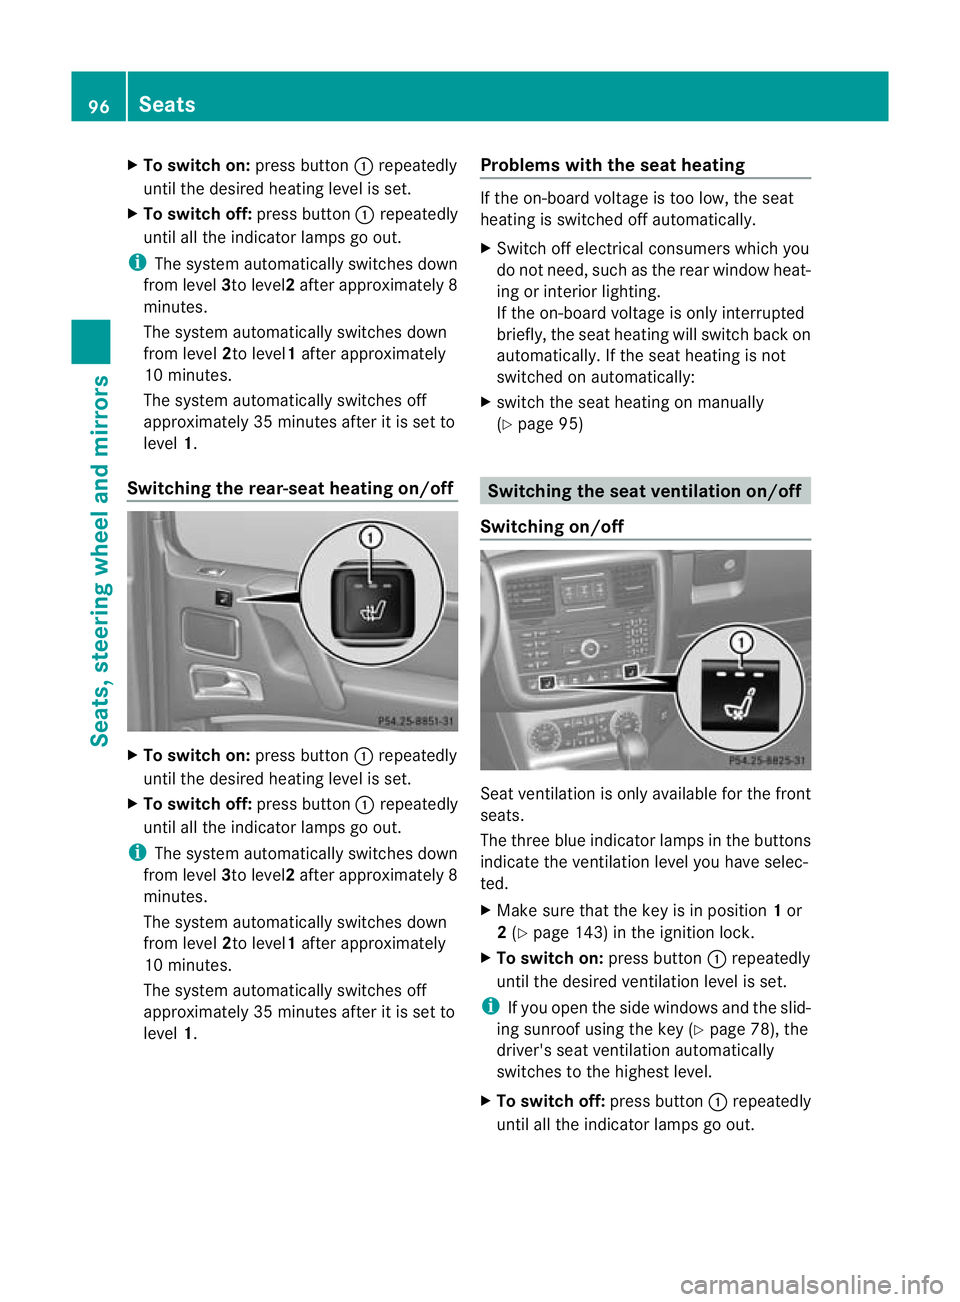
To switc hon:press button :repeatedly
until the desired heating level is set.
X To switch off: press button:repeatedly
until all the indicator lamps go out.
i The system automatically switches down
from level 3to level2after approximately 8
minutes.
The system automatically switches down
from level 2to level1 after approximately
10 minutes.
The system automatically switches off
approximately 35 minutes after it is set to
level 1.
Switching the rear-seat heating on/off X
To switch on: press button:repeatedly
until the desired heating level is set.
X To switch off: press button:repeatedly
until all the indicator lamps go out.
i The system automatically switches down
from level 3to level2after approximately 8
minutes.
The system automatically switches down
from level 2to level1 after approximately
10 minutes.
The system automatically switches off
approximately 35 minutes after it is set to
level 1. Problems with the seat heating If the on-board voltage is too low, the seat
heating is switched off automatically.
X
Switch off electrical consumers which you
do not need, such as the rear window heat-
ing or interior lighting.
If the on-board voltage is only interrupted
briefly, the seat heating will switch back on
automatically. If the seat heating is not
switched on automatically:
X switch the seat heating on manually
(Y page 95) Switching the seat ventilation on/off
Switching on/off Seat ventilation is only available for the front
seats.
The three blue indicator lamps in the buttons
indicate the ventilation level you have selec-
ted.
X
Make sure that the key is in position 1or
2 (Y page 143) in the ignition lock.
X To switch on: press button:repeatedly
until the desired ventilation level is set.
i If you open the side windows and the slid-
ing sunroof using the key (Y page 78), the
driver's seat ventilation automatically
switches to the highest level.
X To switch off: press button:repeatedly
until all the indicator lamps go out. 96
SeatsSeats, steering wheel and mirrors