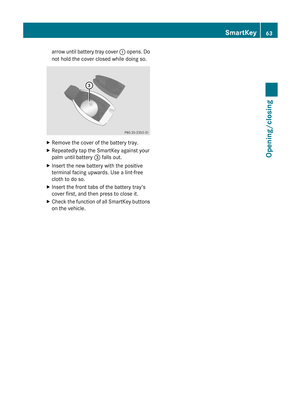
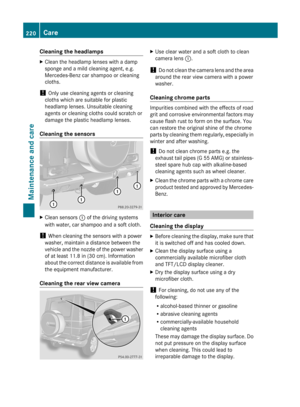
Page 145 of 284

truck or a pneumatic drill could cause the
ultrasonic backing up aid to malfunction.
Minimum distance Center Approximately 8 in
(approximately 20 cm)
Corners Approximately 8 in
(approximately 20 cm)
If there is an obstacle within this range, all
warning displays flash and a warning tone
sounds. If the distance falls below the
minimum, the distance may no longer be
shown.
Warning displays
The warning display shows the distance
between the sensors and the obstacle.
The warning display is in the rear
compartment next to the rear door.
The warning display is divided into four yellow
and two red segments :. The ultrasonic
backing
up
aid is ready for use when you hear
a warning tone and segment ; lights up
briefly.
One or more segments : light up as the
vehicle approaches an obstacle, depending
on the distance from the obstacle. From the:
R
fourth segment you will hear an
intermittent warning tone
R fifth segment you will hear a faster
intermittent warning tone
R sixth segment you will hear a very fast
intermittent warning tone. This indicates
that you have now reached the minimum
distance. Driving systems
143
Driving and parking Z
Page 146 of 284

Problems with the ultrasonic backing-up aid
Problem Possible causes/consequences and
M SolutionsYou hear a warning
signal when backing
up. The ultrasonic backing up aid sensors are dirty or there is
interference.
X
Clean the ultrasonic backing up aid sensors ( Y page 220).
X Switch the ignition back on. The problem may be caused by an external source of radio or
ultrasound waves. The ultrasonic backing up aid is switched off.
X
See if the ultrasonic backing up aid functions in a different
location. You hear a warning
tone when backing up
or you do not hear a
warning tone and none
of the segments light
up. The ultrasonic backing up aid has malfunctioned and has switched
itself off.
X
Have the ultrasonic backing up aid checked at a qualified
specialist workshop as soon as possible. Rear view camera
Important safety notes The rear view camera is an optical parking aid.
It shows the area behind your vehicle in the
COMAND display.
G
WARNING
Make sure that no persons or animals are in
the maneuvering range. Otherwise, they
could be injured.
The rear view camera is in the tailgate above
the rear window wiper. :
Rear view camera
View through the camera The area behind the vehicle is displayed in a
mirror-inverted manner, as in the rear-view
mirror.
G
WARNING
The rear view camera is only an aid and may
show a distorted view of obstacles, show
them incorrectly or not at all. The rear view
camera is not a substitute for paying
attention. The
camera cannot show objects in
the following areas: 144
Driving systems
Driving and parking
Page 147 of 284

R
very close to the rear bumper
R under the rear bumper
R under the spare wheel
R behind and close to the spare wheel
You are always responsible for safety and
must continue to pay attention to your
immediate surroundings when parking and
maneuvering. This applies to the areas
behind, in front of and beside the vehicle.
Otherwise, you could endanger yourself and
others. G
WARNING
Under the following circumstances, the rear
view camera
will not function, or will function
in a limited manner:
R the tailgate is open
R in heavy rain, snow or fog
R at night or in very dark places
R if the camera is exposed to very bright light
R if the area is lit by fluorescent light or LED
lighting (the display may flicker)
R if there is a sudden change in temperature,
e.g. when driving into a heated garage in
winter
R if the camera lens is dirty or obstructed
R if the rear of your vehicle is damaged. In this
event, have the camera position and setting
checked at a qualified specialist workshop.
Do not use the rear view camera in these
types of situation. You could otherwise injure
others or damage objects and your vehicle
while you are parking.
Activating the rear view camera X
Make
sure that the SmartKey is in position
2 in the ignition lock.
X Make sure that the "rear view camera"
function is selected in COMAND (see the separate operating instructions for
COMAND).
X Engage reverse gear.
The area
behind the vehicle is shown in the
COMAND display. Off-road driving systems
Transfer case
General information The vehicle has permanent all-wheel drive.
Power is always transmitted to both axles.
For further information on driving off-road,
see (
Y
page 134). Off-road driving systems
145
Driving and parking Z
Page 148 of 284

Shift ranges
H HIGH
Position for all normal on-road
driving conditions.
L LOW
Low-range position for driving off-
road.
Also for use on steep uphill or
downhill gradients, especially
when towing a trailer.
!
When the
transfer case is in the
off-road driving position LOW
range, the automatic
transmission does not shift up,
even when the engine has
reached the overrevving limit.
There is then a risk of engine
damage. Make sure that you do
not exceed the maximum
permissible engine speed.
The vehicle travels around half the
speed of on-road driving range
HIGH. The tractive power is
correspondingly higher. N Neutral
Neutral position.
No power is transmitted to the
drive wheels.
Shifting the transfer case
General information
G
WARNING
If you do not wait for the gear change process
to complete, it may not be correctly
implemented. The transfer case may then be
in neutral and the power transmission
between the engine and the drive axles may
be disengaged. The vehicle can then move
freely, even if a gear is engaged, and may
inadvertently start moving, particularly if it is
on a slope. There is therefore a risk of an
accident. Always wait for the gear change process from
HIGH to LOW and from LOW to HIGH to
complete. Do not turn off the engine while
changing
gear
and do not shift the automatic
transmission to another gear.
Observe the relevant messages in the
multifunction display. :
Current shift range
; Current transfer case position
Current shift range : and transfer case
position ; are shown in the instrument
cluster multifunction display.
The switch for the transfer case is on the
lower section of the center console. Transfer case switch
From HIGH to LOW
!
Only carry out the gear selection if:
R the engine is running.
R the vehicle is rolling.146
Off-road driving systems
Driving and parking
Page 149 of 284

R
the automatic transmission is in selector
lever position N.
R you are driving no faster than 25 mph
(40 km/h).
You could otherwise damage the transfer
case.
X Push the transfer case switch to LOW.
When the shift procedure is complete, the
L transfer case position appears in the
multifunction display.
X Shift the transmission to position D.
From LOW to HIGH
! Only carry out the gear selection if:
R the engine is running.
R the vehicle is rolling.
R the automatic
transmission is in selector
lever position N.
R you are driving no faster than 43 mph
(70 km/h).
You could otherwise damage the transfer
case.
X Push the transfer case switch to HIGH.
When the shift procedure is complete, the
H transfer case position appears in the
multifunction display.
If the gear change is not completed, the
following messages could appear in the
display:
R TC shift conditions not fulfilled
You have not met one or more shift
conditions.
R TC in neutral
The transfer case has canceled the gear
change process and is in N. The N transfer
case position appears in the multifunction
display. G
WARNING
If the transfer case is in Neutral, the park
position P of the automatic transmission will not hold the vehicle. The parking brake must
be engaged to hold the vehicle in place.
R TC shift procedure canceled
The transfer case has not performed the
gear change process.
X Carry out the gear change process again.
Make sure to meet all conditions for
changing gears.
R Transfer case Consult workshop
There is
a malfunction in the transfer case.
X Do not shift the transfer case.
X Have the vehicle checked as soon as
possible at
a qualified specialist workshop.
Shifting to neutral G
WARNING
If the transfer case is in Neutral, the park
position P of the automatic transmission will
not hold the vehicle. The parking brake must
be engaged to hold the vehicle in place.
X Turn the SmartKey to position 2 in the
ignition lock.
X Apply the parking brake.
X Depress the brake pedal.
X Move the selector lever to
position N (Y page 120).
X Push the transfer case switch to LOW for
about 30 seconds.
When the shift procedure is complete, the
N transfer case position appears in the
multifunction display.
i If the transfer case is in N, the SmartKey
is in the ignition lock and you open the
driver's door,
the TC in neutral message
appears in the multifunction display. If you
then release the parking brake, a warning
tone will sound. Off-road driving systems
147
Driving and parking Z
Page 150 of 284

Differential locks
General information Differential locks improve the traction of the
vehicle.
G
WARNING
Never drive on firm road surfaces with
differential locks engaged. Never drive on
narrow bends
with front-axle differential locks
engaged. With differential locks engaged, the
vehicle's ability to steer is severely restricted
and the danger of accidents is therefore
higher.
Do not engage or disengage differential locks
while driving on a bend. The vehicle may
otherwise make a jerking movement. You
could thus lose control of the vehicle and
cause an accident.
If you select a differential lock, ABS, 4ETS,
ESP ®
and BAS will be deactivated.
Your vehicle is equipped with a differential
lock for:
R the transfer case: this controls the balance
between the front and rear axles.
R the rear axle: this controls the balance
between the wheels on the rear axle.
R the front axle: this controls the balance
between the wheels on the front axle.
! In order to avoid damage to the transfer
case, you must operate the vehicle on a
dynamometer (1-axle dynamometer) only
if:
R the axle not driven on is jacked up
or
R the corresponding propeller shaft is
disconnected
and
R the differential lock of the transfer case
is engaged.
Otherwise, the transfer case can be
damaged. Information about differentials and
differential locks When
the vehicle drives around a corner, the
wheels on
the outside of the bend must cover
a greater distance. Therefore, the wheels turn
more rapidly than on the inside. The
differential, a transmission in the drivetrain,
balances out the different rotational speeds
and therefore enables driving through bends.
The disadvantage of a differential is that more
power is transferred to the wheels that have
the least grip. Example: a wheel on a driven
axle stands on snow-covered ground and thus
has no traction. This wheel receives the
strongest driving power from the differential,
as the force progression takes the path of
least resistance. The opposite wheel on this
axle, however, which stands on firm ground
and could therefore allow propulsion,
receives no driving power. 4ETS eliminates
this disadvantage. It provides good
steerability by automatically braking the
spinning wheel. As a result, 4ETS directs
more driving power to the wheel standing on
firm ground, which is therefore able to
provide propulsion.
ESP® and 4ETS are traction systems that are
ideal for road driving and suitable for light off-
road driving. Off-road gear LOW likewise
improves off-road capabilities.
Moreover, the more difficult conditions in off-
road driving require further measures such as
locking one or several differentials. Your
vehicle is equipped with three differential
locks:
R a central differential lock for the transfer
case,
R a differential lock for the front axle and
R a differential lock for the rear axle.
Each differential lock can be engaged with the
respective switch on the center console.
When the central differential lock for the
transfer case is locked, the speed of the front
wheels is equal to that of the rear wheels.
When the differential for the rear axle is
locked, both rear wheels turn equally fast, 148
Off-road driving systems
Driving and parking
Page 151 of 284

independent of their respective torques.
Keep
in
mind that by engaging the differential
locks, vehicle steerability is severely
restricted.
For your own safety, the safety of others and
to prevent damage to your vehicle, the
differential locks must not be activated on
paved roads. Keep in mind that when driving
on firm road surfaces, the function of the
differentials is necessary and therefore they
must never be locked on firm road surfaces.
The steerability of the vehicle would
otherwise be lost and steering would no
longer be possible. For this reason, the
differential locks must be engaged
exclusively during off-road driving, and only
when activating the other driving systems
(4ETS, ESP ®
and LOW range off-road gear) is
no longer sufficient.
Activating the differential lock General information
G
WARNING
Never drive on firm road surfaces with
differential locks engaged. Never drive on
narrow bends
with front-axle differential locks
engaged. With differential locks engaged, the
vehicle's ability to steer is severely restricted
and the danger of accidents is therefore
higher.
Do not engage or disengage differential locks
while driving on a bend. The vehicle may
otherwise make a jerking movement. You
could thus lose control of the vehicle and
cause an accident.
If you select a differential lock, ABS, 4ETS,
ESP ®
and BAS will be deactivated.
Activate the differential locks:
R off-road
R to deactivate ABS, 4ETS, ESP ®
and BAS
while off-road
R when fording
For further information on driving off-road,
see ( Y page 134). The switches are located on the center
console.
:
Function indicator lamps (red)
;
Differential lock for the front axle
=
Differential lock for the transfer case
?
Differential lock for the rear axle
A
Activation indicator lamps (yellow)
!
Only activate the differential locks when:
R you are driving at walking pace.
R the driven wheels are not spinning.
R you are
not driving on a firm road surface.
i You can only engage the differential locks
when the transfer case is in LOW range off-
road gear (Y page 145).
i You can activate the differential locks in
the following order =, ?, ;.
Differential lock for the transfer case
X To engage: switch the transfer case to off-
road gear LOW
(Y page 145).
X Press switch =.
The yellow activation indicator lamp under
switch = lights
up when the transfer case
is in off-road gear LOW.
The å warning lamp in the instrument
panel lights up.
The red function indicator lamp above
switch = lights up when the differential is
locked.
In the multifunction display you see the: Off-road driving systems
149
Driving and parking Z
Page 152 of 284

ABS not available Differential
Locked message.
The
å!÷ warning
lamps light up
in the instrument cluster.
The differential lock for the transfer case is
engaged.
4ETS, ESP ®
, BAS and ABS are deactivated.
The vehicle's ability to steer is severely
restricted. Drive carefully and accelerate
gently for optimum traction.
i You can now engage differential lock for
the rear
axle ? and differential lock for the
front axle ; as desired.
Differential lock for the rear axle
X To engage: press switch ?.
First, the yellow activation indicator lamp
lights up, followed by the red function
indicator lamp.
The differential lock for the rear axle is
engaged.
Differential lock for the front axle
X To engage: press switch ;.
First, the yellow activation indicator lamp
lights up, followed by the red function
indicator lamp.
The differential lock for the front axle is
engaged.
Deactivating the differential lock You can deactivate the differential locks in
the reverse order: ;, ?, =.
X
To simultaneously deactivate all
differential locks: press switch =.
Yellow activation indicator lamps A go
out. Red
function indicator lamps : go out
once the differential locks have
disengaged.
After approximately three seconds of
normal driving, ABS, 4ETS, ESP ®
and BAS
are activated.
The ABS not available Differential
Locked message disappears from the multifunction display and the
å, !
and ÷ warning
lamps in the instrument
cluster go out.
X Switch the transfer case to road gear
HIGH(Y page 145).
i If red function indicator lamps : do not
go out
when you disengage the differential
locks, bring the vehicle to a stop, while
paying attention to road and traffic
conditions, then begin driving again. The
load change can disengage the differential
locks. G
WARNING
Always remember to disengage the
differential locks when returning to drive on
paved roads, see "A few words about
differentials and differential locks". 150
Off-road driving systems
Driving and parking