2012 MERCEDES-BENZ E-CLASS ESTATE change wheel
[x] Cancel search: change wheelPage 10 of 457
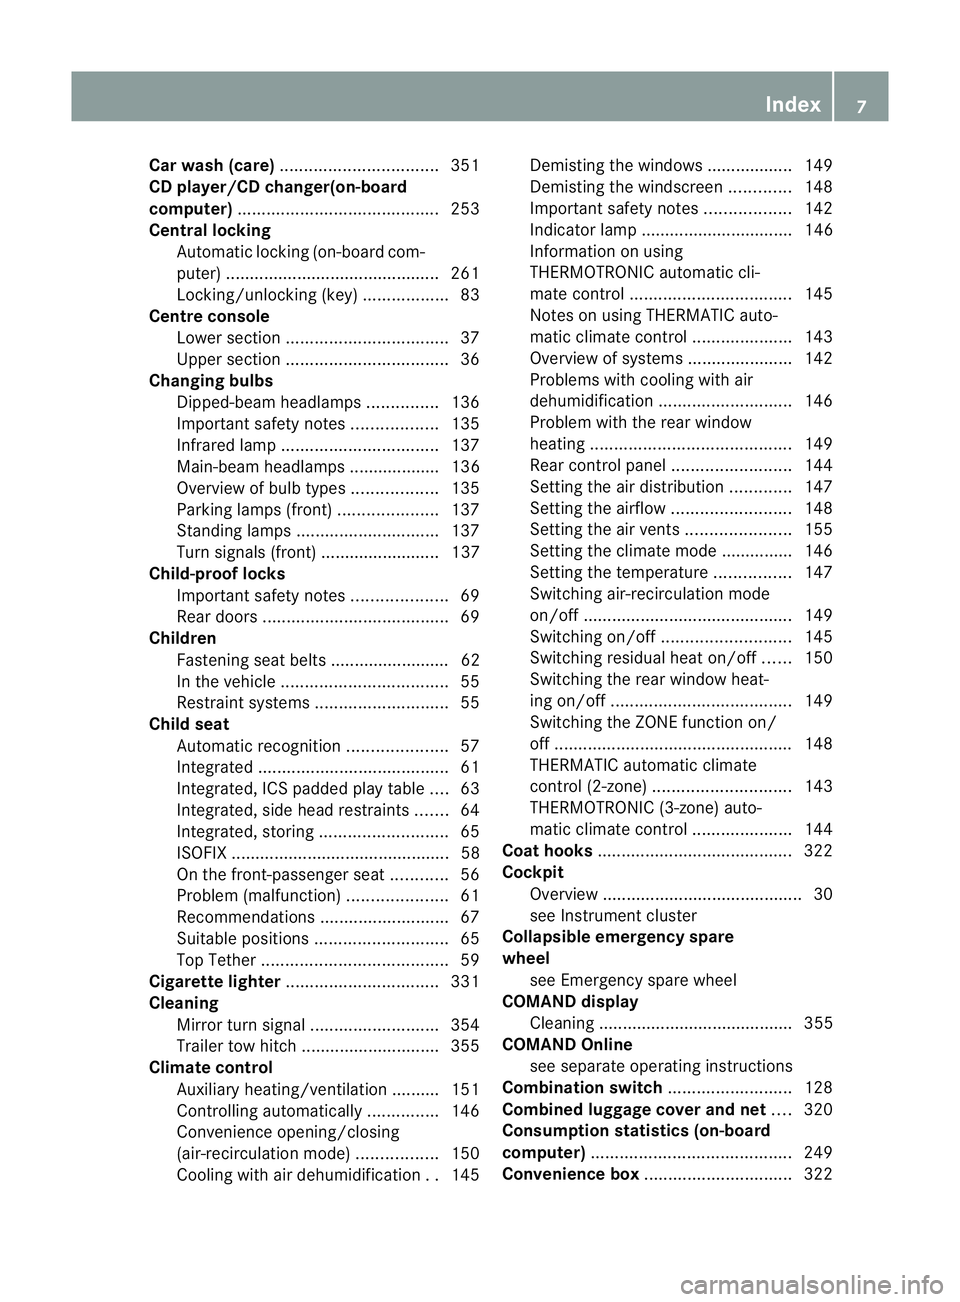
Car wash (care)
................................. 351
CD player/CD changer(on-board
computer) .......................................... 253
Central locking Automatic locking (on-board com-
puter) ............................................. 261
Locking/unlocking (key ).................. 83
Centre console
Lowe rsection .................................. 37
Uppe rsection .................................. 36
Changing bulbs
Dipped-bea mheadlamps ............... 136
Important safety notes ..................135
Infrared lamp ................................. 137
Main-beam headlamps ................... 136
Overview of bul btypes .................. 135
Parking lamps (front) .....................137
Standing lamps .............................. 137
Turn signals (front) ......................... 137
Child-proof locks
Important safety notes ....................69
Rea rdoors ....................................... 69
Children
Fastening seat belts ......................... 62
In the vehicle ................................... 55
Restraint systems ............................ 55
Child seat
Automatic recognition .....................57
Integrated ........................................ 61
Integrated, ICS padded pla ytable ....63
Integrated, side head restraints .......64
Integrated ,storing ........................... 65
ISOFIX .............................................. 58
On the front-passenger sea t............ 56
Problem (malfunction) .....................61
Recommendations ...........................67
Suitable positions ............................ 65
Top Tether ....................................... 59
Cigarette lighter ................................ 331
Cleaning Mirro rturn signal ........................... 354
Trailer tow hitch ............................. 355
Climate control
Auxiliary heating/ventilation .......... 151
Controlling automatically ...............146
Convenience opening/closing
(air-recirculatio nmode) ................. 150
Cooling with aird ehumidification..145 Demisting the windows .................. 149
Demisting the windscreen .............148
Important safety notes ..................142
Indicator lamp ................................ 146
Information on using
THERMOTRONIC automatic cli-
mate control .................................. 145
Notes on using THERMATIC auto-
matic climate control .....................143
Overview of systems ......................142
Problems with cooling with air
dehumidification ............................ 146
Problem with the rear window
heating .......................................... 149
Rea rcontrol panel ......................... 144
Setting the aird istribution.............147
Setting the airflow .........................148
Setting the airv ents...................... 155
Setting the climate mode .............. .146
Setting the temperature ................147
Switching air-recirculation mode
on/off ............................................ 149
Switching on/off ........................... 145
Switching residual hea ton/off ......150
Switching the rear window heat-
ing on/off ...................................... 149
Switching the ZONE function on/
off .................................................. 148
THERMATIC automatic climate
control (2-zone) ............................. 143
THERMOTRONIC (3-zone) auto-
matic climate control .....................144
Coat hooks ......................................... 322
Cockpit Overview .......................................... 30
see Instrument cluster
Collapsible emergency spare
wheel
see Emergency spare wheel
COMAND display
Cleaning ......................................... 355
COMAND Online
see separate operating instructions
Combination switch ..........................128
Combine dluggage cover and net ....320
Consumption statistics (on-board
computer) .......................................... 249
Convenience box ............................... 322 Index
7
Page 91 of 457
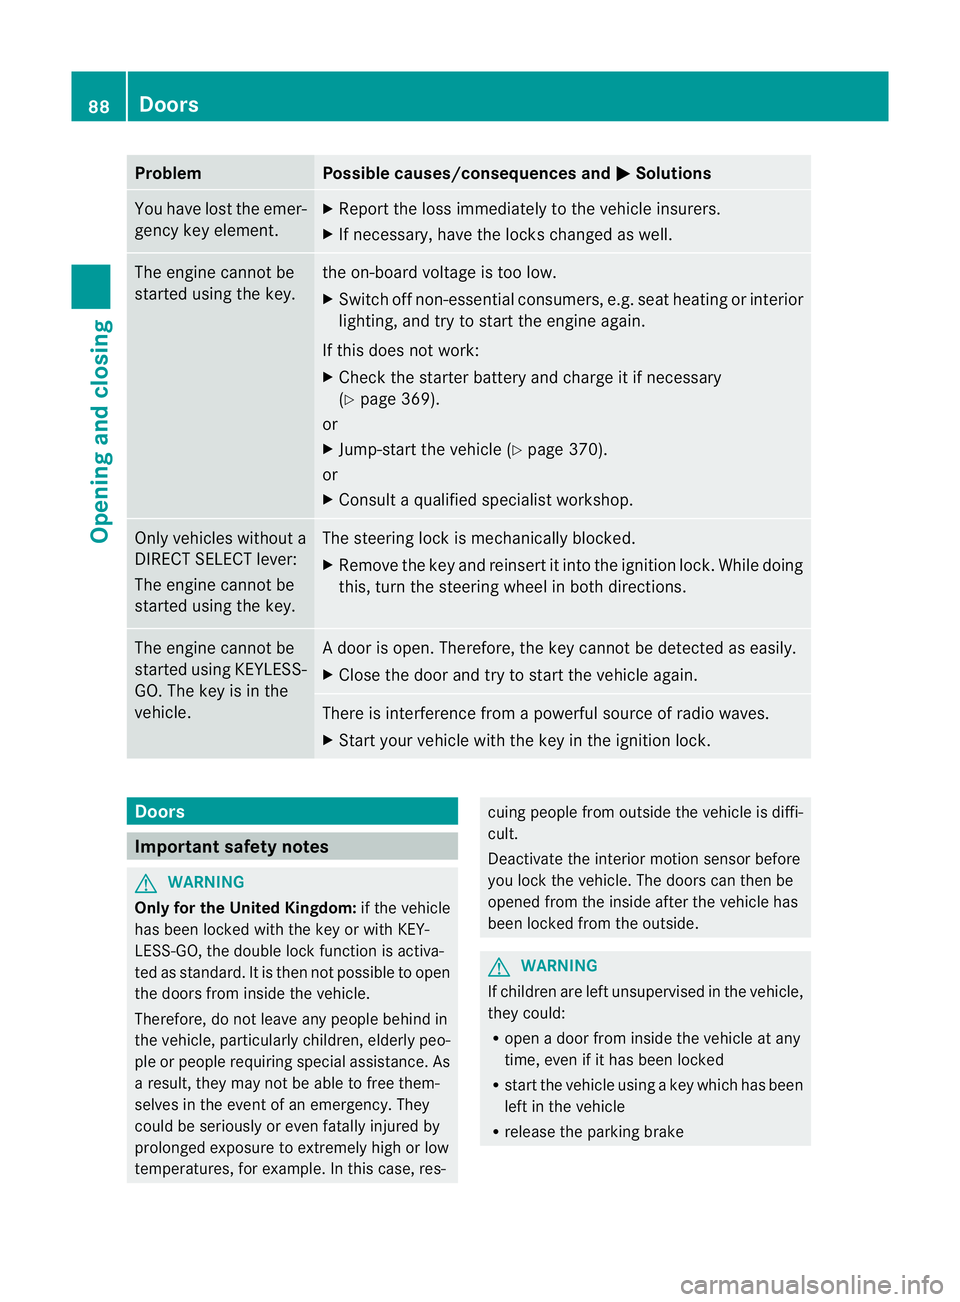
Problem Possible causes/consequences and
M Solutions
You have lost the emer-
gency key element. X
Report the loss immediately to the vehicle insurers.
X If necessary, have the locks changed as well. The engine cannot be
started using the key. the on-board voltage is too low.
X
Switch off non-essential consumers, e.g. seat heating or interior
lighting, and try to start the engine again.
If this does not work:
X Check the starter battery and charge it if necessary
(Y page 369).
or
X Jump-start the vehicle (Y page 370).
or
X Consult a qualified specialist workshop. Only vehicles without a
DIRECT SELECT lever:
The engine cannot be
started using the key. The steering lock is mechanically blocked.
X
Remove the key and reinsert it into the ignition lock. While doing
this, turn the steering wheel in both directions. The engine cannot be
started using KEYLESS-
GO. The key is in the
vehicle. Ad
oor is open. Therefore, the key cannot be detected as easily.
X Close the door and try to start the vehicle again. There is interference from a powerful source of radio waves.
X
Start your vehicle with the key in the ignition lock. Doors
Important safety notes
G
WARNING
Only for the United Kingdom: if the vehicle
has been locked with the key or with KEY-
LESS-GO, the double lock function is activa-
ted as standard. It is then not possible to open
the doors from inside the vehicle.
Therefore, do not leave any people behind in
the vehicle, particularly children, elderly peo-
ple or people requiring special assistance. As
a result, they may not be able to free them-
selves in the event of an emergency. They
could be seriously or even fatally injured by
prolonged exposure to extremely high or low
temperatures, for example. In this case, res- cuing people from outside the vehicle is diffi-
cult.
Deactivate the interior motion sensor before
you lock the vehicle. The doors can then be
opened from the inside after the vehicle has
been locked from the outside.
G
WARNING
If children are left unsupervised in the vehicle,
they could:
R open a door from inside the vehicle at any
time, even if it has been locked
R start the vehicle using akey which has been
left in the vehicle
R release the parking brake 88
DoorsOpening and closing
Page 116 of 457
X
To switc hon:press button ?once or
twice until the desired level is set.
One or two indicator lamps in button ?
light up. The air cushions in the lumbar
region vibrate for approximately
20 minutes. Adjusting the lumbar support
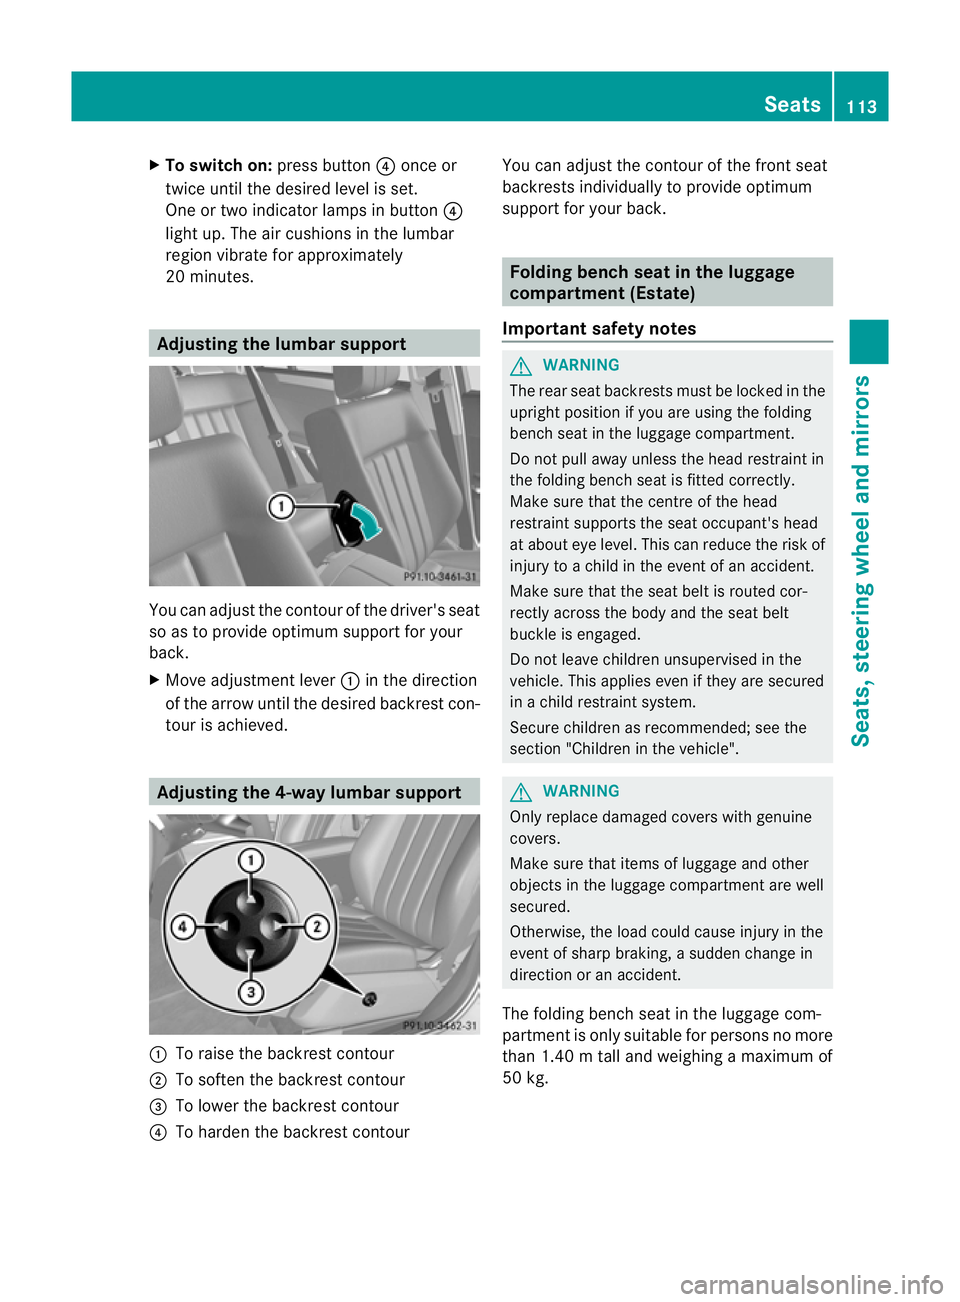
You can adjust the contour of the driver's seat
so as to provide optimum support for your
back.
X Move adjustment lever :in the direction
of the arrow until the desired backrest con-
tour is achieved. Adjusting the 4-way lumbar support
:
To raise the backrest contour
; To soften the backrest contour
= To lower the backrest contour
? To harden the backrest contour You can adjust the contour of the front seat
backrests individually to provide optimum
support for your back. Folding bench seat in the luggage
compartment (Estate)
Important safety notes G
WARNING
The rear seat backrests must be locked in the
upright position if you are using the folding
bench seat in the luggage compartment.
Do not pull away unless the head restraint in
the folding bench seat is fitted correctly.
Make sure that the centre of the head
restraint supports the seat occupant's head
at about eye level. This can reduce the risk of
injury to a child in the event of an accident.
Make sure that the seat belt is routed cor-
rectly across the body and the seat belt
buckle is engaged.
Do not leave children unsupervised in the
vehicle. This applies even if they are secured
in a child restraint system.
Secure children as recommended; see the
section "Children in the vehicle". G
WARNING
Only replace damaged covers with genuine
covers.
Make sure that items of luggage and other
objects in the luggage compartment are well
secured.
Otherwise, the load could cause injury in the
event of sharp braking, a sudden change in
direction or an accident.
The folding bench seat in the luggage com-
partmen tis only suitable for persons no more
than 1.40 m tall and weighing a maximum of
50 kg. Seats
113Seats, steering wheel and mirrors Z
Page 166 of 457
30seconds after a cold start. The sound of
the engine may change during this time.
Manual transmission X
Depress the brake pedal and keep it
depressed.
X Fully depress the clutch pedal.
X Shift to neutral N.
i You can only start the engine whe nthe
clutch pedal is fully depressed.
Automatic transmission X
Shift the transmission to position P.
The transmission position displayint he
multifunction display shows P.
i You can also start the engine when the
transmission is in position N.
Starting procedure with the key i
To start the engine using the key instead
of KEYLESS-GO, pull the Start/Stop button
out of the ignition lock.
X To start a petrol engine: turn the key to
position 3in the ignition lock
(Y page 161) and release it as soon as the
engine is running.
X To startad iesel engine: turn the key to
position 2in the ignition lock
(Y page 161).
The % preglow indicator lamp in the
instrumen tcluster lights up.
X When the %erlischt, den Schlüssel auf
Stellung 3(Ypage 161) and release it as
soon as the engine is running.
i You can start the engine without preglow
if the engine is warm.
i Vehicles with automatic transmis-
sion: you can also use the touch-star tfunc-
tion .To do this, turn the key to position
3(Y page 161) and release it immediately.
The engine then starts automatically. Using KEYLESS-GO to startt
he engine G
WARNING
You rvehicle can be started using a valid KEY-
LESS-GO key. For this reason, children should
never be left unsupervised in the vehicle.
Always take the key with you when leaving the
vehicle, even if you are only leaving it for a
short time.
i The Start/Stop button can be used to
start the vehicle manually without inserting
the key into the ignition lock. The key must
be in the vehicle and the Start/Stop button
must be inserted in the ignition lock. This
mode for starting the engine operates inde-
pendently of the ECO start/stop automatic
engine start function.
X Depress the brake pedal and keep it
depressed.
X To star tapetrol engine: press the Start/
Stop button (Y page 161) once.
The engine starts.
X To start adiesel engine: press the Start/
Stop button (Y page 161) once.
Preglow is activated and the engine starts. Pulling away
Manual transmission !
Change gear in good time and avoid spin-
ning the wheels. Otherwise, you could dam-
age the vehicle.
X Depress the brake pedal and keep it
depressed.
X Fully depress the clutch pedal.
X Shift to either first gear or reverse gear R.
X Release the parking brake (Y page 184).
X Release the brake pedal.
X Slowly release the clutch pedal and gently
depress the accelerato rpedal.
i Follow the shift recommendations in the
multifunction display for an economical
driving style (Y page 170). Driving
163Driving and parking Z
Page 172 of 457
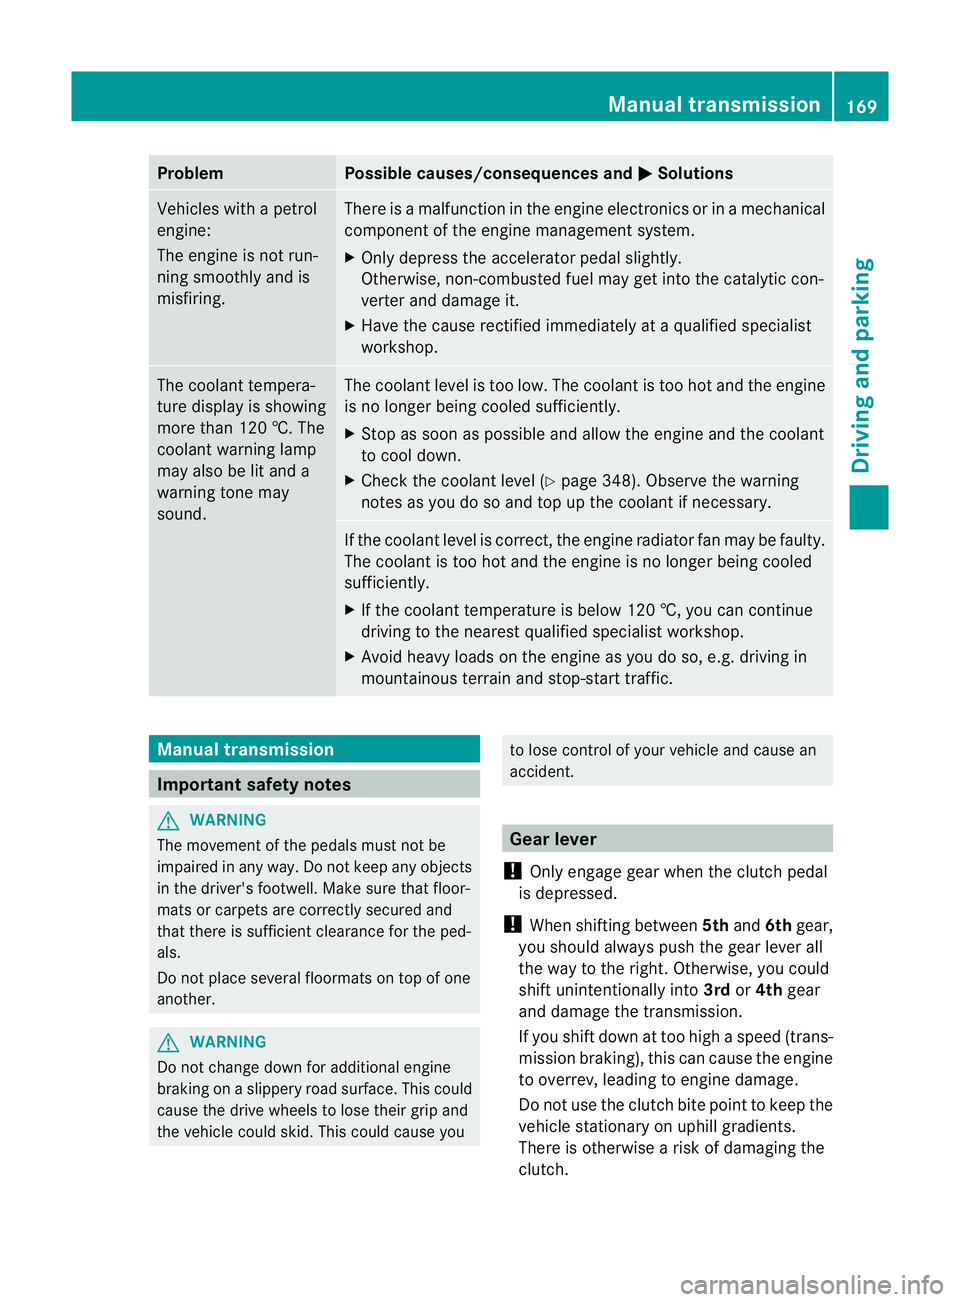
Problem Possible causes/consequences and
M Solutions
Vehicles with a petrol
engine:
The engine is not run-
ning smoothly and is
misfiring. There is a malfunction in the engine electronics or in a mechanical
component of the engine management system.
X
Only depress the accelerator pedal slightly.
Otherwise, non-combusted fuel may get into the catalytic con-
verter and damage it.
X Have the cause rectified immediately at a qualified specialist
workshop. The coolant tempera-
ture display is showing
more than 120 †. The
coolant warning lamp
may also be lit and a
warning tone may
sound. The coolant level is too low. The coolant is too hot and the engine
is no longer being cooled sufficiently.
X Stop as soon as possible and allow the engine and the coolant
to cool down.
X Check the coolant level (Y page 348). Observe the warning
notes as you do so and top up the coolant if necessary. If the coolant level is correct, the engine radiator fan may be faulty.
The coolant is too hot and the engine is no longer being cooled
sufficiently.
X If the coolant temperature is below 120 †, you can continue
driving to the nearest qualified specialist workshop.
X Avoid heavy loads on the engine as you do so, e.g. driving in
mountainous terrain and stop-start traffic. Manual transmission
Important safety notes
G
WARNING
The movement of the pedals must not be
impaired in any way. Do not keep any objects
in the driver's footwell. Make sure that floor-
mats or carpets are correctly secured and
that there is sufficient clearance for the ped-
als.
Do not place several floormats on top of one
another. G
WARNING
Do not change down for additional engine
braking on a slippery road surface. This could
cause the drive wheels to lose their grip and
the vehicle could skid. This could cause you to lose control of your vehicle and cause an
accident.
Gear lever
! Only engage gear when the clutch pedal
is depressed.
! When shifting between 5thand 6thgear,
you should always push the gear lever all
the way to the right. Otherwise, you could
shift unintentionally into 3rdor4th gear
and damage the transmission.
If you shift down at too high a speed (trans-
mission braking), this can cause the engine
to overrev, leading to engine damage.
Do not use the clutch bite point to keep the
vehicle stationary on uphill gradients.
There is otherwise a risk of damaging the
clutch. Manual transmission
169Driving and parking Z
Page 178 of 457
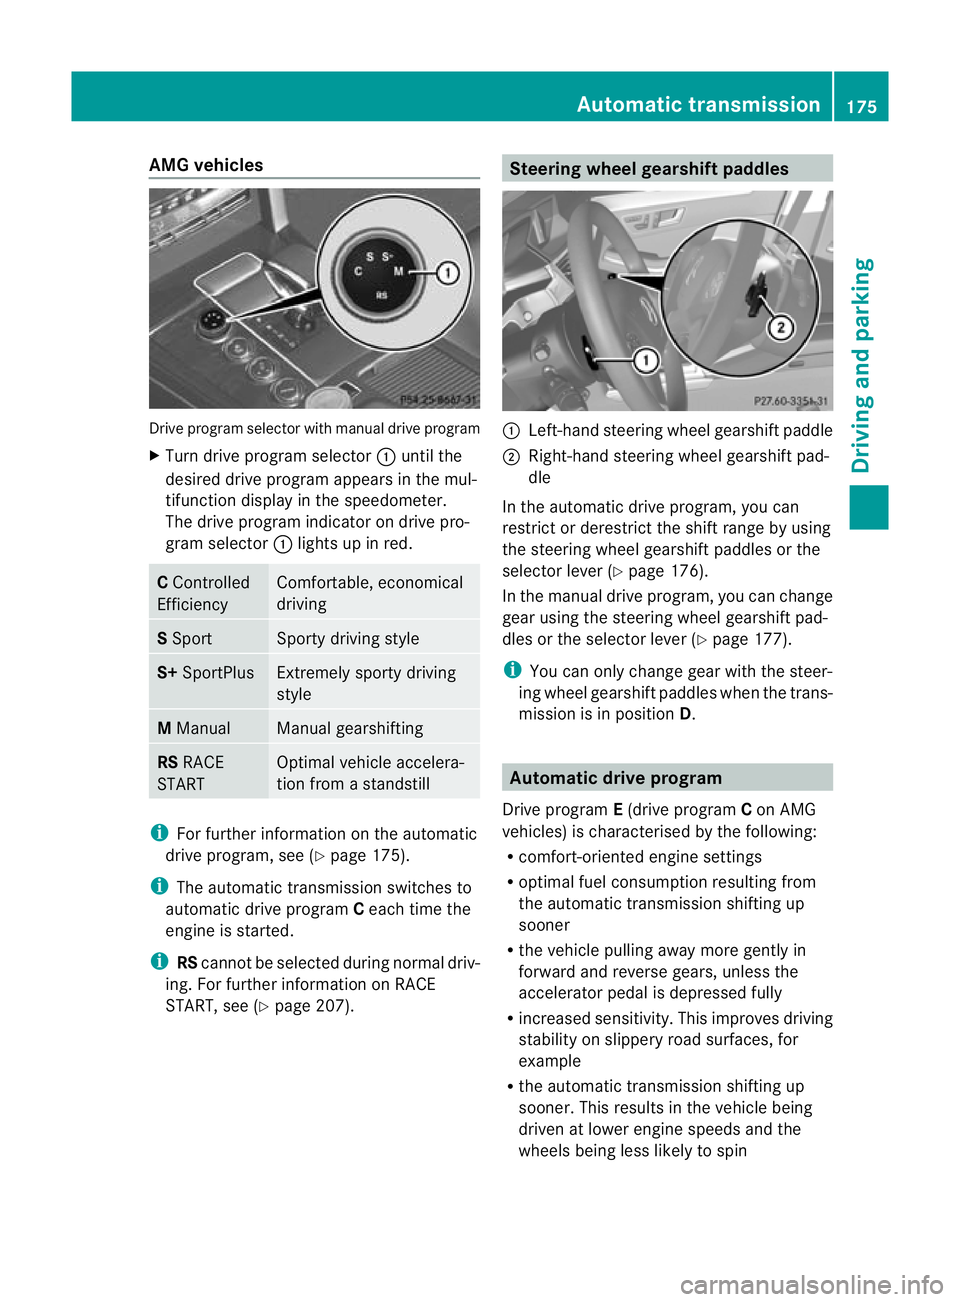
AMG vehicles
Drive progra
mselector with manual drive program
X Turn drive program selector :until the
desired drive program appears in the mul-
tifunction display in the speedometer.
The drive program indicato rondrive pro-
gram selector :lights up in red. C
Controlled
Efficiency Comfortable, economical
driving
S
Sport Sporty driving style
S+
SportPlus Extremely sporty driving
style
M
Manual Manual gearshifting
RS
RACE
START Optimal vehicle accelera-
tion from a standstill
i
For further information on the automatic
drive program, see (Y page 175).
i The automatic transmission switches to
automatic drive program Ceach time the
engine is started.
i RScannot be selected during normal driv-
ing. For further information on RACE
START, see (Y page 207). Steering wheel gearshift paddles
:
Left-hand steering wheel gearshift paddle
; Right-hand steering wheel gearshift pad-
dle
In the automatic drive program, you can
restrict or derestrict the shift range by using
the steering wheel gearshift paddles or the
selector leve r(Ypage 176).
In the manual drive program, you can change
gear using the steering wheel gearshift pad-
dles or the selector lever (Y page 177).
i You can only change gear with the steer-
ing wheel gearshift paddles when the trans-
mission is in position D. Automatic drive program
Drive program E(drive program Con AMG
vehicles) is characterised by the following:
R comfort-oriented engine settings
R optimal fuel consumption resulting from
the automatic transmission shifting up
sooner
R the vehicle pulling away more gently in
forward and reverse gears, unless the
accelerator pedal is depressed fully
R increased sensitivity. This improves driving
stability on slippery road surfaces, for
example
R the automatic transmission shifting up
sooner .This results in the vehicle being
driven at lower engine speeds and the
wheels being less likely to spin Automatic transmission
175Driving and parking Z
Page 180 of 457
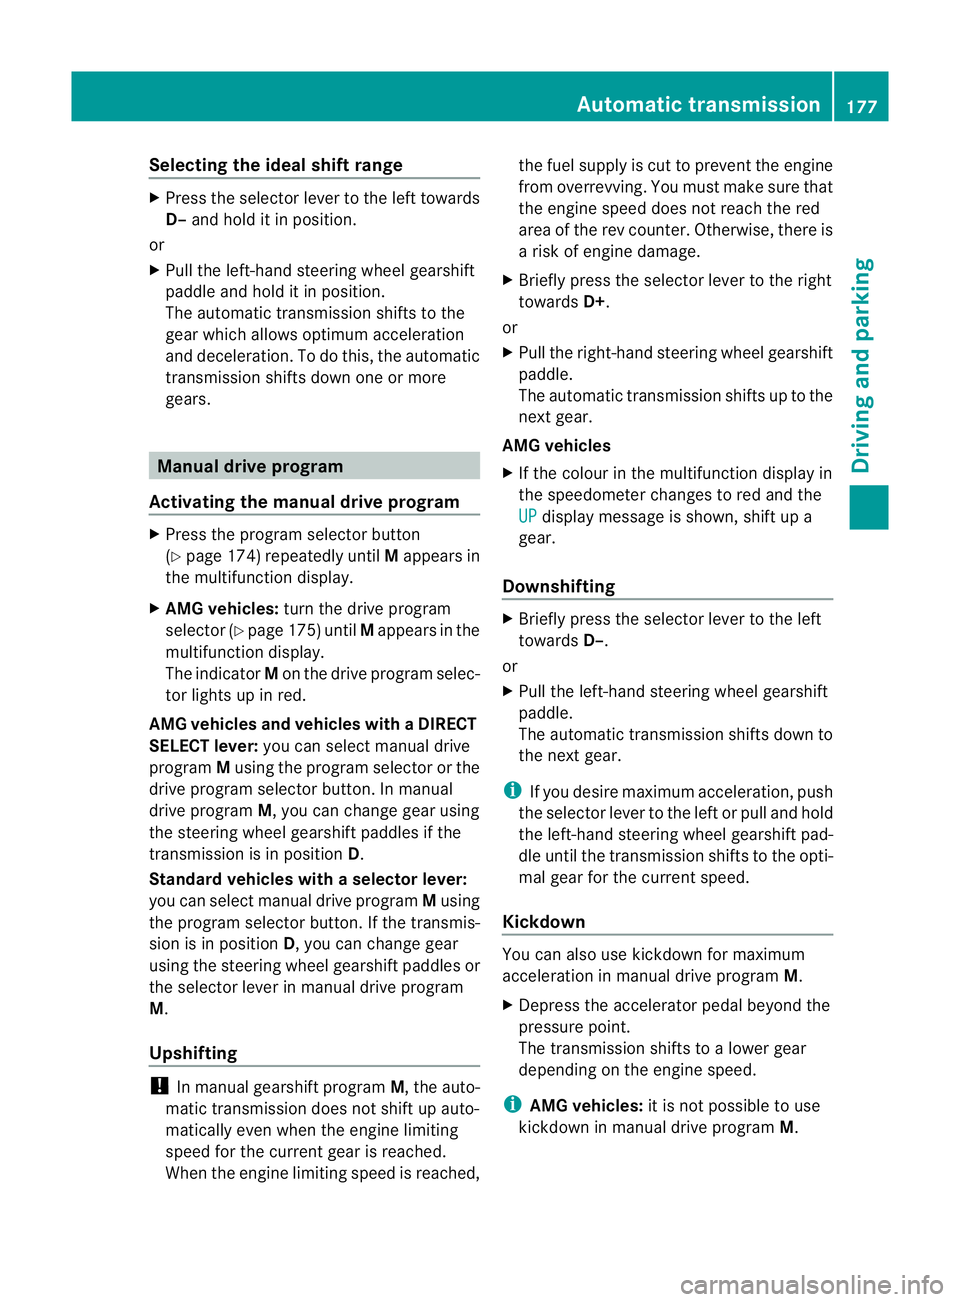
Selecting the ideal shift range
X
Press the selector lever to the left towards
D– and hold it in position.
or
X Pull the left-hand steering wheel gearshift
paddle and hold it in position.
The automatic transmission shifts to the
gear which allows optimum acceleration
and deceleration. To do this, the automatic
transmission shifts down one or more
gears. Manual drive program
Activating the manual drive program X
Press the program selector button
(Y page 174) repeatedly until Mappears in
the multifunction display.
X AMG vehicles: turn the drive program
selector (Y page 175) until Mappears in the
multifunction display.
The indicator Mon the drive program selec-
tor lights up in red.
AMG vehicles and vehicles with aDIRECT
SELECT lever: you can select manual drive
program Musing the program selector or the
drive program selector button. In manual
drive program M, you can change gear using
the steering wheel gearshif tpaddles if the
transmission is in position D.
Standar dvehicles with aselector lever:
you can selec tmanual drive program Musing
the program selector button. If the transmis-
sion is in position D, you can change gear
using the steering wheel gearshif tpaddles or
the selecto rlever in manual drive program
M.
Upshifting !
In manual gearshift program M, the auto-
matic transmission does not shift up auto-
matically even when the engine limiting
speed for the curren tgear is reached.
When the engine limiting speed is reached, the fuel supply is cut to preven
tthe engine
from overrevving. You must make sure that
the engine speed does not reach the red
area of the rev counter. Otherwise, there is
a risk of engine damage.
X Briefly press the selector lever to the right
towards D+.
or
X Pull the right-hand steering wheel gearshift
paddle.
The automatic transmission shifts up to the
next gear.
AMG vehicles
X If the colour in the multifunction display in
the speedometer changes to red and the
UP display message is shown, shift up a
gear.
Downshifting X
Briefly press the selector lever to the left
towards D–.
or
X Pull the left-hand steering wheel gearshift
paddle.
The automatic transmission shifts down to
the next gear.
i If you desire maximum acceleration, push
the selector lever to the left or pull and hold
the left-hand steering wheel gearshift pad-
dle until the transmission shifts to the opti-
mal gear for the current speed.
Kickdown You can also use kickdown for maximum
acceleration in manual drive program
M.
X Depress the accelerator pedal beyond the
pressure point.
The transmission shifts to a lower gear
depending on the engine speed.
i AMG vehicles: it is not possible to use
kickdown in manual drive program M. Automatic transmission
177Driving and parking Z
Page 189 of 457
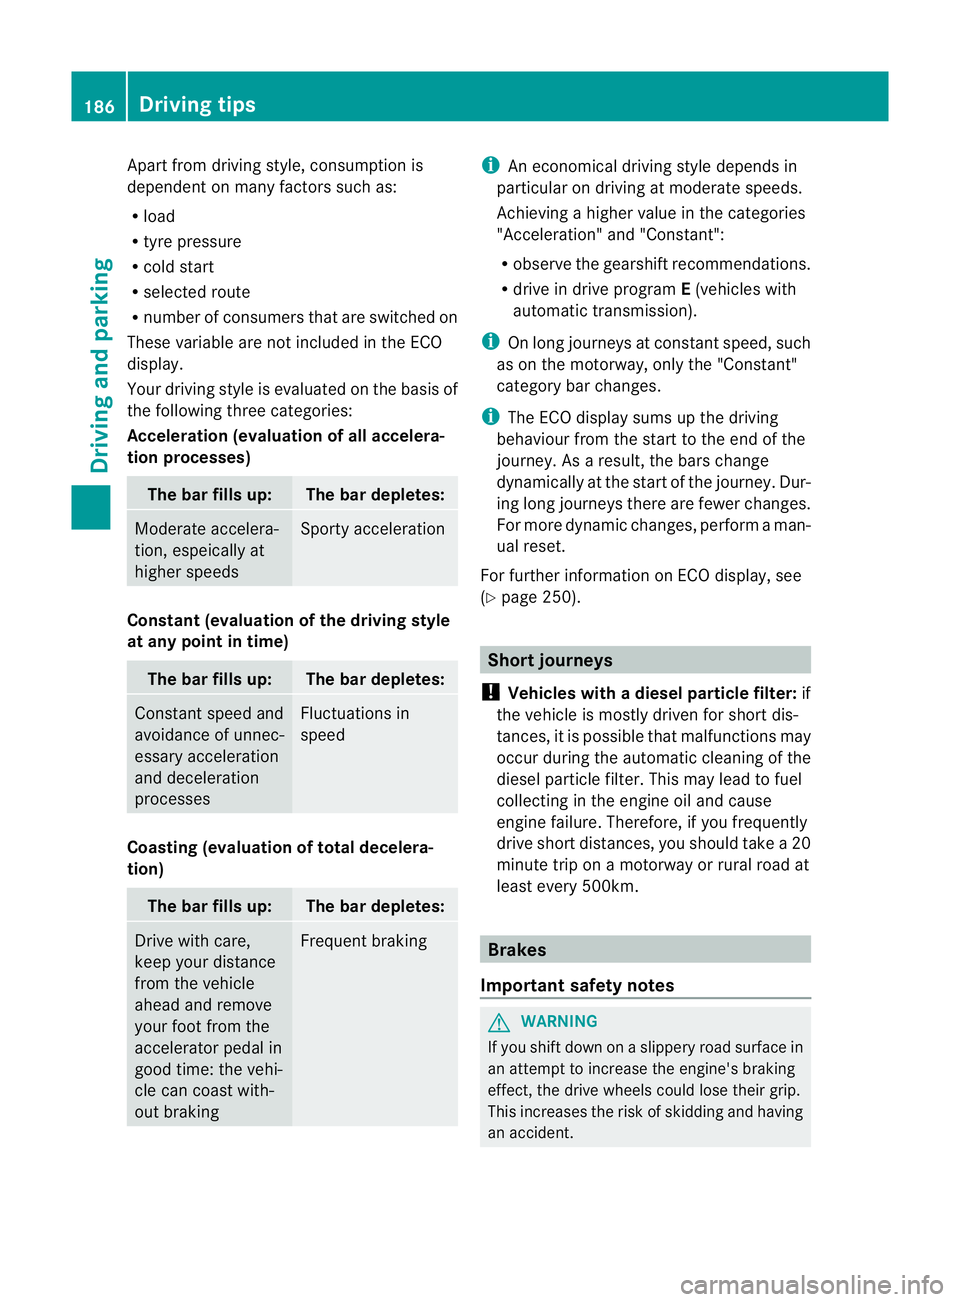
Apart from driving style, consumption is
dependent on many factors such as:
R load
R tyre pressure
R cold start
R selected route
R numbe rofconsumers that are switched on
These variable are not included in the ECO
display.
Your driving style is evaluated on the basis of
the following three categories:
Acceleration (evaluation of all accelera-
tion processes) The bar fills up: The bar depletes:
Moderate accelera-
tion, espeically at
higher speeds Sporty acceleration
Constant (evaluation of the driving style
at any point in time)
The bar fills up: The bar depletes:
Constant speed and
avoidance of unnec-
essary acceleration
and deceleration
processes Fluctuations in
speed
Coasting (evaluation of total decelera-
tion)
The bar fills up: The bar depletes:
Drive with care,
keep your distance
from the vehicle
ahead and remove
your foot from the
accelerator pedal in
good time: the vehi-
cle can coast with-
out braking Frequent braking i
An economical driving style depends in
particular on driving at moderate speeds.
Achieving a higher value in the categories
"Acceleration" and "Constant":
R observe the gearshift recommendations.
R drive in drive program E(vehicles with
automatic transmission).
i On long journeys at constant speed, such
as on the motorway, only the "Constant"
category bar changes.
i The ECO display sums up the driving
behaviour from the start to the end of the
journey. As a result, the bars change
dynamically at the start of the journey. Dur-
ing long journeys there are fewer changes.
For more dynamic changes, perform a man-
ual reset.
For further information on ECO display, see
(Y page 250). Short journeys
! Vehicles with adiesel particle filter: if
the vehicle is mostly driven for short dis-
tances, it is possible that malfunctions may
occur during the automatic cleaning of the
diesel particle filter. This may lead to fuel
collecting in the engine oil and cause
engine failure. Therefore, if you frequently
drive short distances, you should take a 20
minute trip on a motorway or rural road at
least every 500km. Brakes
Important safety notes G
WARNING
If you shift down on a slippery road surface in
an attempt to increase the engine's braking
effect, the drive wheels could lose their grip.
This increases the risk of skidding and having
an accident. 186
Driving tipsDriving and parking