2012 MERCEDES-BENZ CLS COUPE wipers
[x] Cancel search: wipersPage 6 of 373
Index
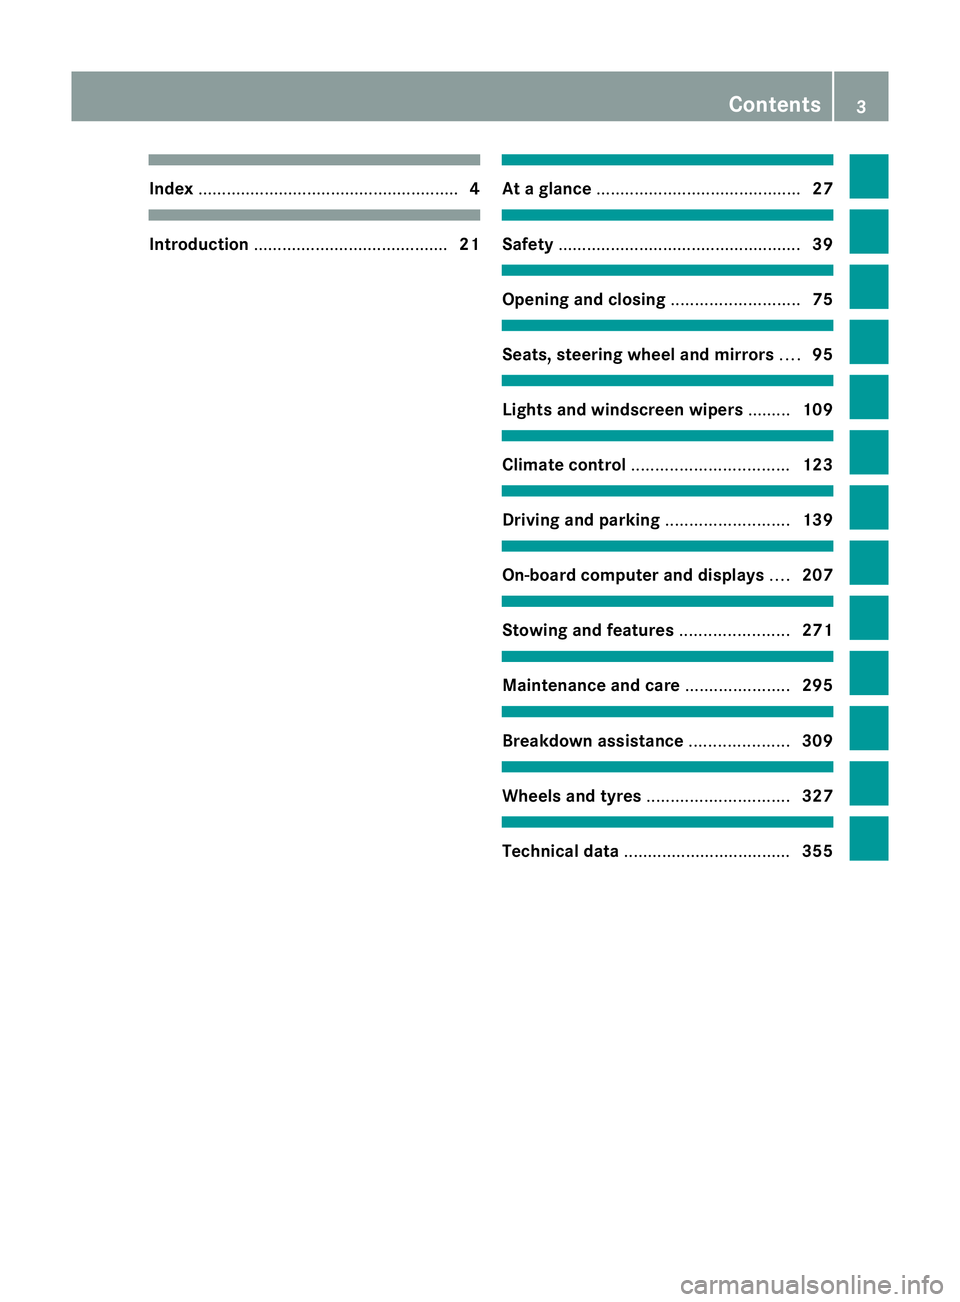
....................................................... 4Introduction
......................................... 21 At
ag lance ........................................... 27 Safety
................................................... 39 Opening and closing
...........................75 Seats, steering wheel and mirrors
....95 Lights and windscreen wipers
.........109 Climat
econtrol ................................. 123 Driving and parking
..........................139 On-boar
dcomputer and displays ....207 Stowing and features
.......................271 Maintenance and care
......................295 Breakdown assistance
.....................309 Wheels and tyres
.............................. 327 Technical data
................................... 355 Contents
3
Page 23 of 373
Reserv
efuel ................................... 267
Seat bel t........................................ 259
SRS ................................................ 266
Tyr ep ressure monitor ...................270
Warning triangle ................................ 310
Washer fluid Display message ............................ 256
Whee lboltt ightening torque ...........340
Whee lchock ...................................... 337
Wheels Changing/replacing .......................336
Changing awheel .......................... 336
Checking ........................................ 329
Cleaning ......................................... 303
Cleaning (warning) .........................337
Emergency spare wheel .................351
Fitting anew wheel ........................ 340
Fitting awheel ............................... 337
Important safety notes ..................328
Removing awheel .......................... 339
Storing ........................................... 337
Tightening torqu e........................... 340
Whee lsize/tyre size ...................... 341
Windowbag
Operation ........................................ .46
Windows
Cleaning ......................................... 304
see Side windows
Windscreen
Demisting ...................................... 130
Windscreen washe rfluid
see Windscreen washer system
Windscreen washer system
Notes ............................................. 366
Topping up ..................................... 299
Windscreen wipers
Problem (malfunction) ...................122
Replacing the wiper blades ............121
Switching on/off ........................... 121
Winte roperation
Important safety notes ..................330
Radiator cover ............................... 297
Slippery road surfaces ...................165
Snow chains .................................. 331
Winte rtyres
Limiting the spee d(on-board com-
puter) ............................................. 224
M+S tyres ...................................... 330Wiper blades
Cleaning ......................................... 304
Important safety notes ..................121
Replacing ....................................... 121
Wooden trim (cleaning instruc-
tions) .................................................. 306
Workshop see Qualified specialist workshop 20
Index
Page 112 of 373
Useful information
............................110
Exterior lighting ................................ 110
Interior lighting ................................. 118
Replacing bulbs ................................. 119
Windscreen wipers ...........................121 109Lights and windscreen wipers
Page 113 of 373
Useful information
i This Owner's Manual describes all mod-
els, series and optional equipment for your
vehicle that were available at the time of
going to press. National variation sare pos-
sible. Not ethat your vehicle may not be
equipped with all of the function sdescri-
bed. This is also the case for system sand
function srelevan ttosafety.
i Read the information on qualified special-
ist workshops: (Y page 23). Exterior lighting
Important safet
ynotes
For reason sofsafety, Mercedes-Benz recom-
mends that you drive with the lights switched
on even during the daytime. In some coun-
tries ,operation of the headlamps varies due
to legal requirements and self-imposed obli-
gations. Driving abroad
Symmetrical dipped-beam headlamps If your journey takes you to countries where
vehicles are driven on the opposite side of the
road to the country in which the vehicle is
registered, your headlamps must be switched
to symmetrical dipped beam. This prevents
oncoming traffic from being dazzled. Sym-
metrical lights do not illuminate as large an
area of the edge of the carriageway.
Conver tthe headlamps as close to the border
as possible before driving in these countries
(Y page 223).
Asymmetrical dipped beam Convert the headlamps back to asymmetrical
dipped beam as soon as possible after cross-
ing the border (Y page 223).
If the headlamps are converted to symmetri-
cal dipped beam, the "motorway mode" and "extended range foglamps" functions (Intelli-
gent Light System) are not available. Setting the exterior lighting
Setting options Exterior lighting can be set using the:
R
light switch
R combination switch (Y page 113)
R on-board computer (Y page 222)
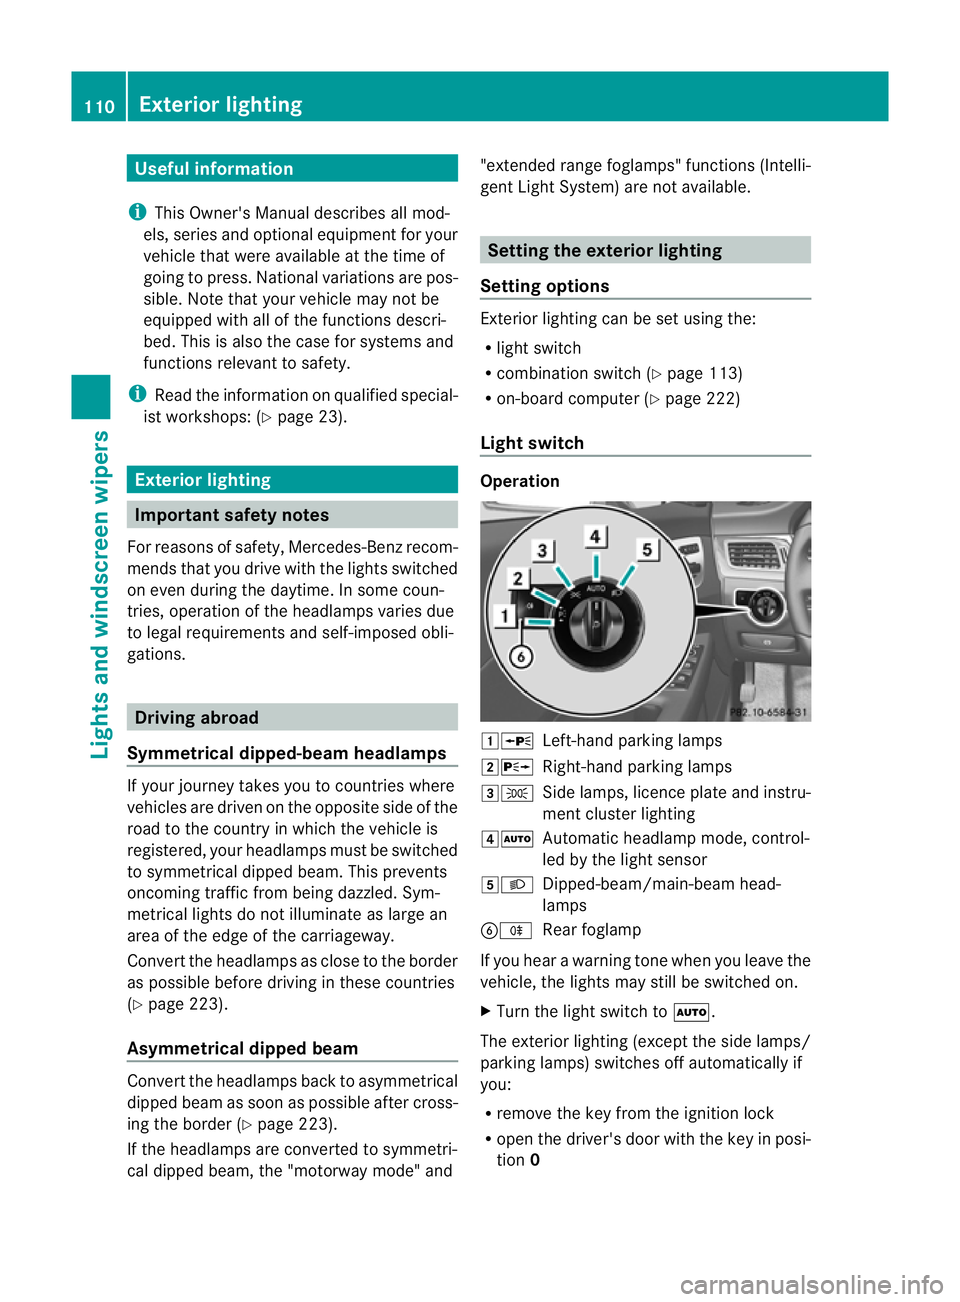
Light switch Operation
1W
Left-hand parking lamps
2X Right-hand parking lamps
3T Side lamps, licence plate and instru-
ment cluster lighting
4Ã Automatic headlamp mode, control-
led by the light sensor
5L Dipped-beam/main-beam head-
lamps
BR Rear foglamp
If you hear awarning tone when you leave the
vehicle, the lights may still be switched on.
X Turn the light switch to Ã.
The exterior lighting (except the side lamps/
parking lamps) switches off automatically if
you:
R remove the key from the ignition lock
R open the driver's door with the key in posi-
tion 0 110
Exterior lightingLights and windscreen wipers
Page 114 of 373
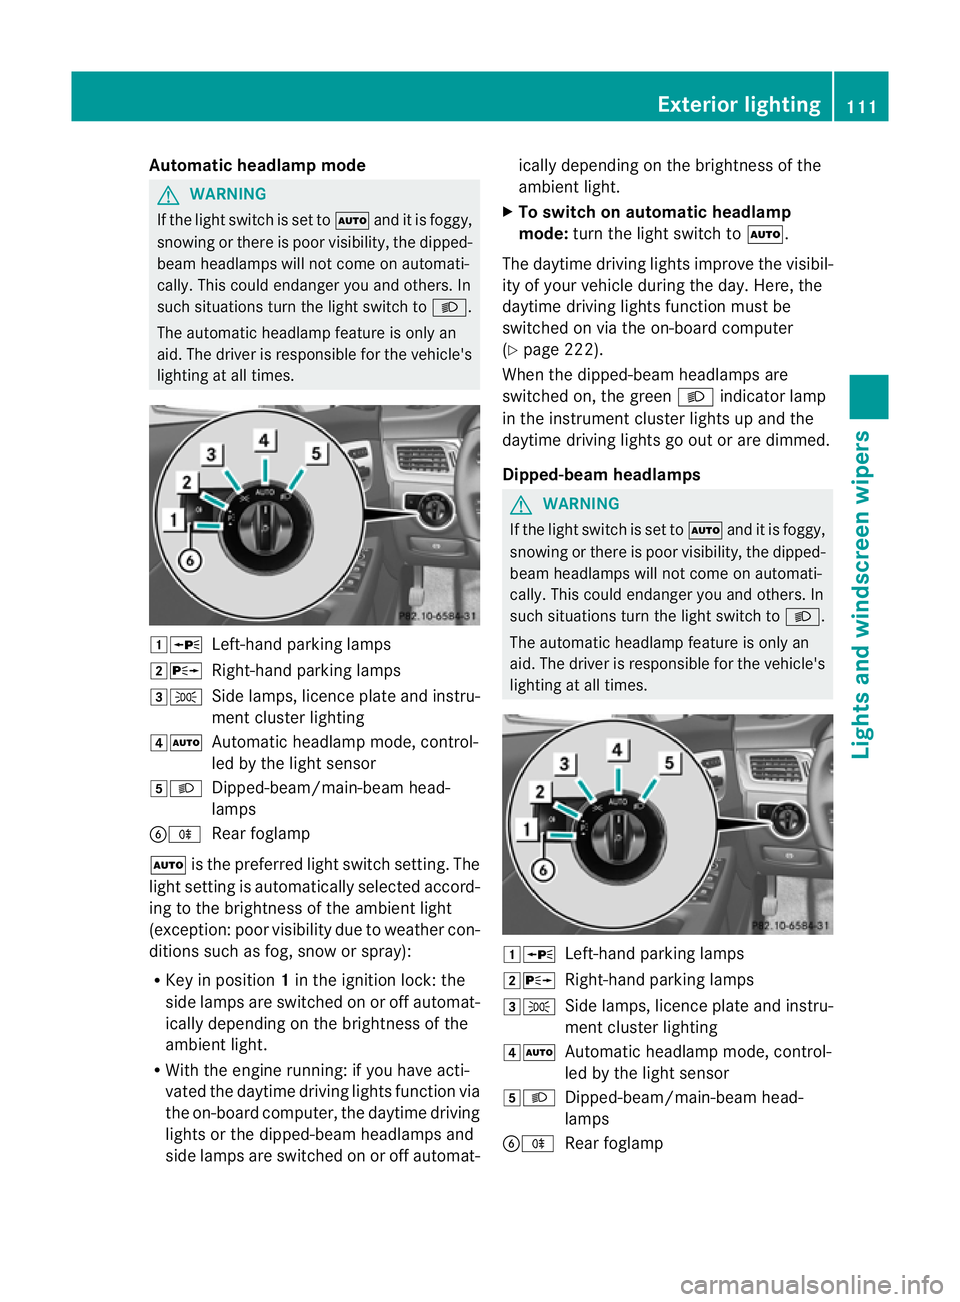
Automatic headlamp mode
G
WARNING
If th eligh tswitc hiss et to à and it is foggy,
snowing or there is poor visibility, th edipped-
beam headlamp swill not com eonautomati-
cally. This could endange ryou and others. In
such situations turn the light switch to L.
The automatic headlamp feature is only an
aid. The driver is responsible for the vehicle's
lighting at all times. 1W
Left-hand parking lamps
2X Right-hand parking lamps
3T Side lamps, licence plate and instru-
ment cluster lighting
4Ã Automatic headlamp mode, control-
led by the light sensor
5L Dipped-beam/main-beam head-
lamps
BR Rear foglamp
à is the preferred light switch setting. The
light setting is automatically selected accord-
ing to the brightnes softhe ambient light
(exception: poor visibility due to weather con-
ditions such as fog, snow or spray):
R Key in position 1in the ignition lock: the
side lamps are switched on or off automat-
ically depending on the brightnes softhe
ambient light.
R With the engine running: if you have acti-
vated the daytime driving lights function via
the on-board computer, the daytime driving
lights or the dipped-beam headlamps and
side lamps are switched on or off automat- ically depending on the brightness of the
ambient light.
X To switch on automatic headlamp
mode: turn the light switch to Ã.
The daytime driving lights improve the visibil-
ity of your vehicle during the day. Here, the
daytime driving lights function must be
switched on via the on-board computer
(Y page 222).
When the dipped-beam headlamps are
switched on, the green Lindicator lamp
in the instrument cluster lights up and the
daytime driving lights go out or are dimmed.
Dipped-beam headlamps G
WARNING
If the light switch is set to Ãand it is foggy,
snowing or there is poor visibility, the dipped-
beam headlamps will not come on automati-
cally. This could endanger you and others. In
such situations turn the light switch to L.
The automatic headlamp feature is only an
aid. The driver is responsible for the vehicle's
lighting at all times. 1W
Left-hand parking lamps
2X Right-hand parking lamps
3T Side lamps, licence plate and instru-
ment cluster lighting
4Ã Automatic headlamp mode, control-
led by the light sensor
5L Dipped-beam/main-beam head-
lamps
BR Rear foglamp Exterior lighting
111Lights and windscreen wipers Z
Page 115 of 373
Even if the ligh
tsensor does not detec tthat
is dark, the side lamps and dipped-beam
headlamps switch on when the key is inserted
into the ignition lock and the light switch is
set to the Lposition. This is aparticularly
useful function in the event of rain and fog.
X To switch on the dipped-beam head-
lamps: turn the key in the ignition lock to
position 2or start the engine.
X Turn the light switch to L.
The green Lindicator lamp in the instru-
ment cluster lights up.
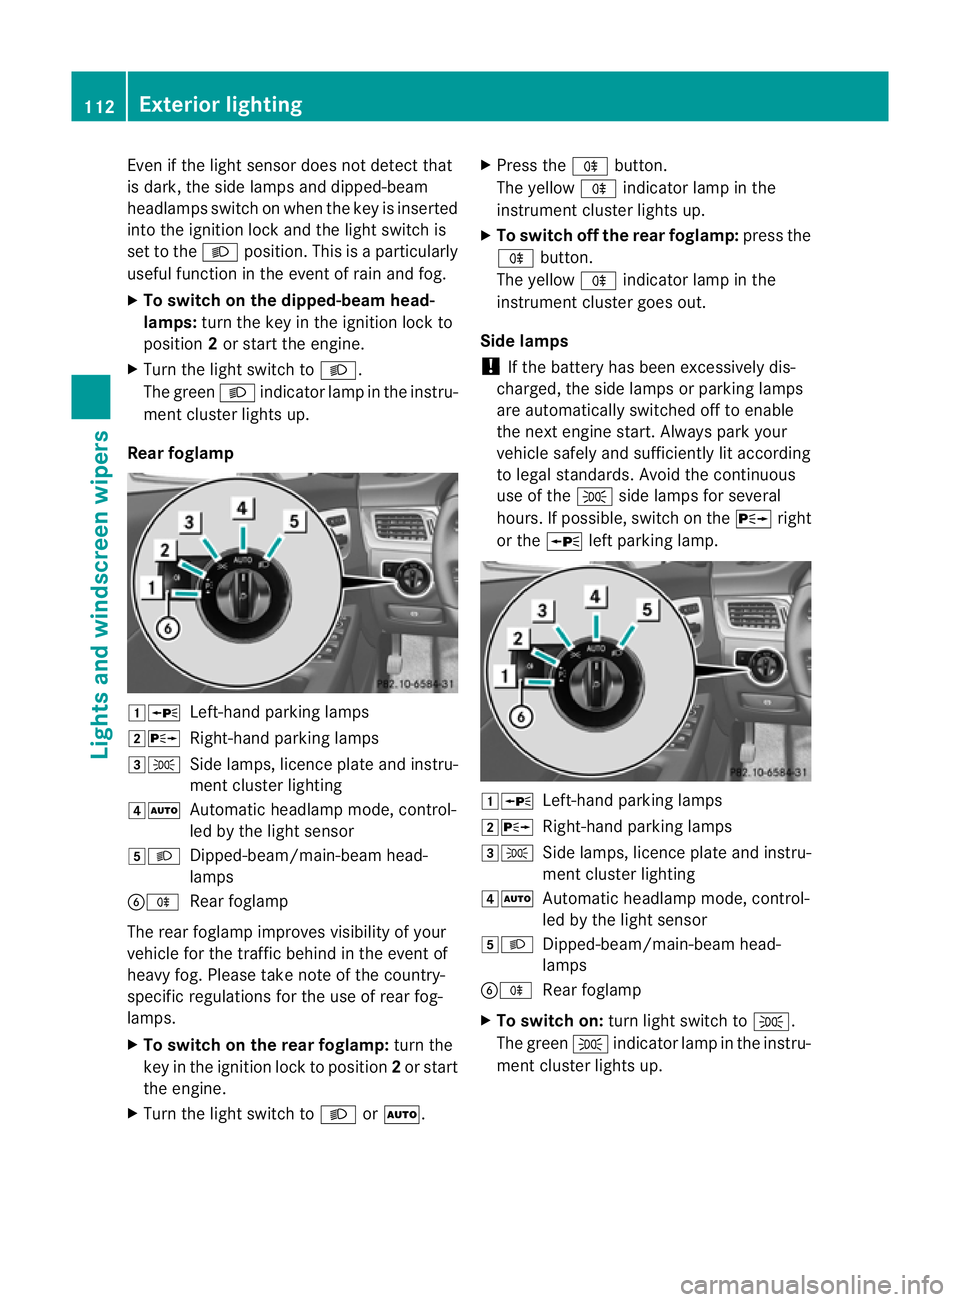
Rear foglamp 1W
Left-hand parking lamps
2X Right-hand parking lamps
3T Side lamps, licence plate and instru-
ment cluster lighting
4Ã Automatic headlamp mode, control-
led by the light sensor
5L Dipped-beam/main-beam head-
lamps
BR Rear foglamp
The rear foglamp improves visibility of your
vehicle for the traffic behind in the event of
heavy fog. Please take note of the country-
specific regulations for the use of rear fog-
lamps.
X To switch on the rear foglamp: turn the
key in the ignition lock to position 2or start
the engine.
X Turn the light switch to LorÃ. X
Press the Rbutton.
The yellow Rindicator lamp in the
instrumentc luster lightsup.
X To switch off th erear foglamp: pressthe
R button.
The yellow Rindicator lamp in the
instrumen tcluster goes out.
Side lamps
! If the battery has been excessively dis-
charged, the side lamps or parking lamps
are automatically switched off to enable
the nex tengine start. Alway sparky our
vehicl esafelya nd sufficiently li taccording
to lega lstandards. Avoi dthe continuous
us eoft heT sidelam ps for several
hours. If possible ,switch on the Xright
or the Wleft parking lamp. 1W
Left-hand parking lamps
2X Right-hand parking lamps
3T Sidelam ps,licence plate and instru-
ment cluster lighting
4Ã Automati cheadlamp mode, control-
led by the light sensor
5L Dipped-beam/main-beam head-
lamps
BR Rear foglamp
X To switch on: turn light switch to T.
The green Tindicator lamp in the instru-
ment cluster lights up. 112
Exterior lightingLights and windscreen wipers
Page 116 of 373
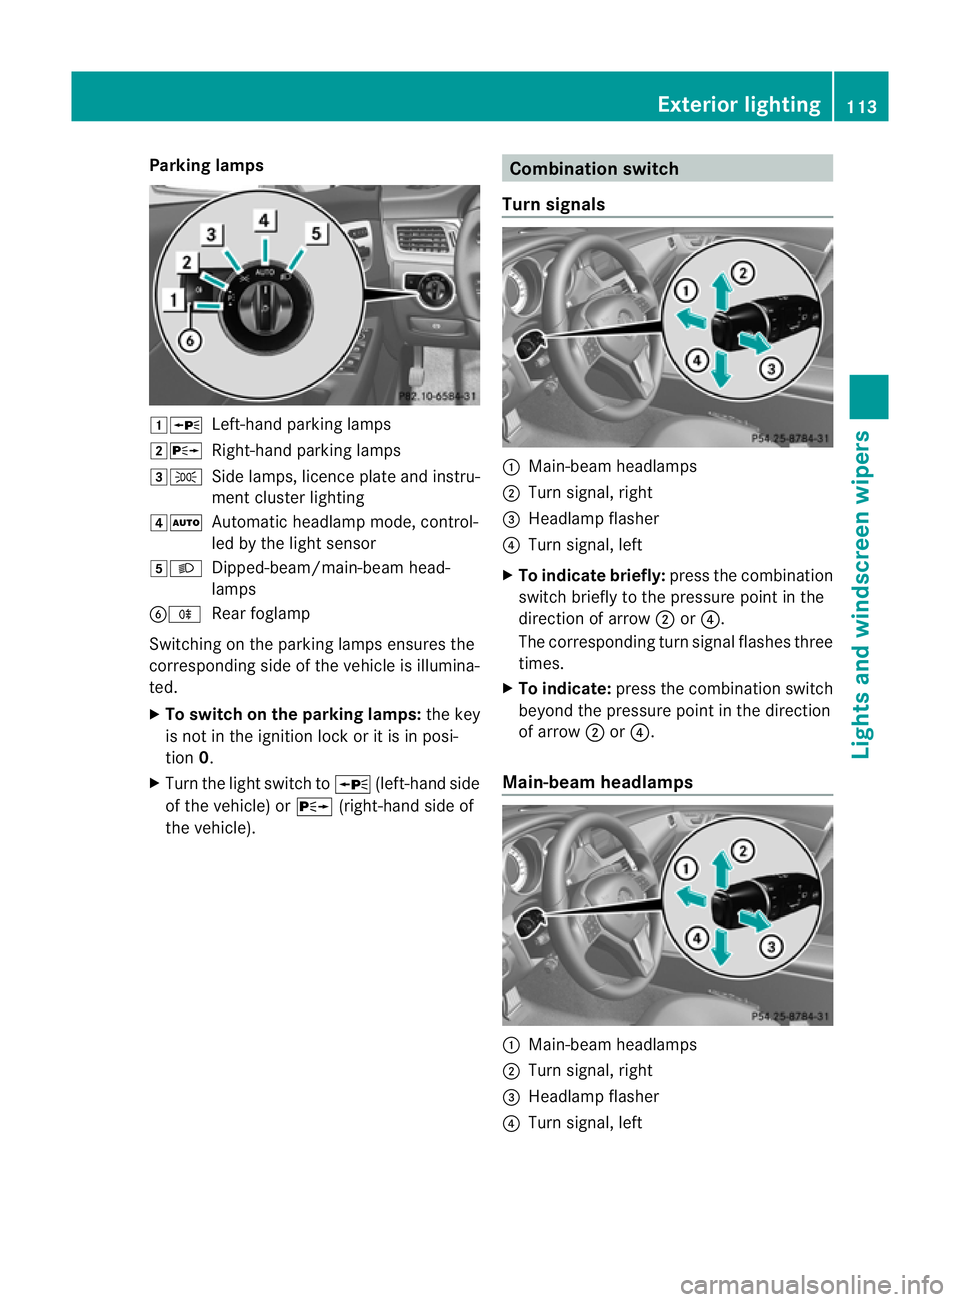
Parking lamps
1W
Left-hand parking lamps
2X Right-hand parking lamps
3T Side lamps, licence plate and instru-
ment cluster lighting
4Ã Automatic headlamp mode, control-
led by the light sensor
5L Dipped-beam/main-beam head-
lamps
BR Rear foglamp
Switchingont he parking lamps ensures the
correspondin gside of the vehicle is illumina-
ted.
X To switch on the parking lamps: the key
is not in the ignition lock or it is in posi-
tion 0.
X Turn the light switch to W(left-hand side
of the vehicle) or X(right-hand side of
the vehicle). Combination switch
Turns ignals :
Main-beam headlamps
; Turn signal, right
= Headlamp flasher
? Turn signal, left
X To indicate briefly: press the combination
switch briefly to the pressure point in the
direction of arrow ;or?.
The correspondin gturn signal flashes three
times.
X To indicate: press the combination switch
beyond the pressure point in the direction
of arrow ;or?.
Main-beam headlamps :
Main-beam headlamps
; Turn signal, right
= Headlamp flasher
? Turn signal, left Exterior lighting
113Lights and windscreen wipers Z
Page 117 of 373
X
To switc honthe main-beam head-
lamps: turnthe key in the ignition lock to
position 2or start the engine.
X Turn the light switch to LorÃ.
X Press the combinatio nswitc hbeyond the
pressure point in the direction of
arrow :.
In the Ãposition ,the main-beam head-
lamps are only switched on when it is dark
and the engin eisrunning.
The blue Kindicator lamp in the instru-
ment cluster lights up when the main-beam
headlamps are switched on.
X To switch off the main-beam head-
lamps: move the combination switch back
to its normal position.
The blue Kindicator lamp in the instru-
ment cluster goes out.
i Vehicles with Adaptiv eHighbeam Assist:
when Adaptiv eHighbeam Assist is active,
it controls activation of the main-beam
headlamps (Y page 116).
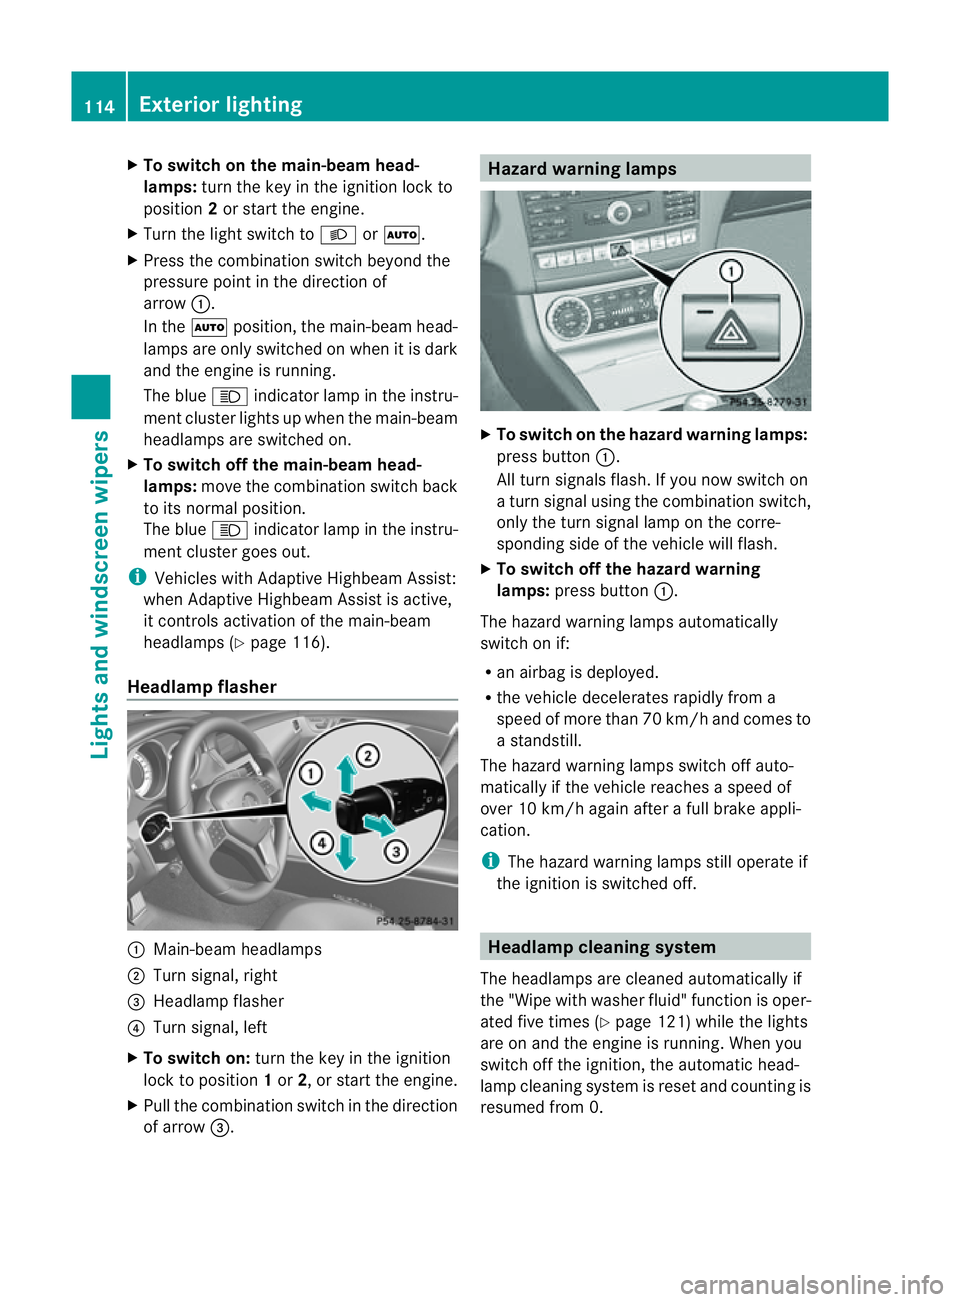
Headlamp flasher :
Main-beam headlamps
; Turn signal, right
= Headlamp flasher
? Turn signal, left
X To switch on: turn the key in the ignition
lock to position 1or 2,ors tart the engine.
X Pull the combination switch in the direction
of arrow =. Hazard warning lamps
X
To switch on the hazard warning lamps:
press button :.
All turn signals flash. If you now switch on
at urn signal using the combination switch,
only the turn signal lamp on the corre-
spondin gside of the vehicle will flash.
X To switch off the hazard warning
lamps: press button :.
The hazard warning lamps automatically
switch on if:
R an airbag is deployed.
R the vehicle decelerates rapidly from a
speed of more than 70 km/ha nd comesto
as tandstill.
The hazar dwarning lamps switch off auto-
maticall yifthe vehicl ereache saspeed of
ove r10k m/h agai nafter afullb rake appli-
cation.
i The hazar dwarning lamps still operate if
the ignition is switched off. Headlamp cleanin
gsystem
The headlamps ar ecleane dautomaticall yif
the "Wip ewithw ashe rfluid" function is oper-
ated five times (Y page 121)while the lights
are on and the engine is running. When you
switc hoff the ignition, the automatic head-
lamp cleaning system is reset and countin gis
resumed fro m0.114
Exterior lightingLight
sand windscreen wipers