2012 MERCEDES-BENZ CLS COUPE sensor
[x] Cancel search: sensorPage 113 of 373
Useful information
i This Owner's Manual describes all mod-
els, series and optional equipment for your
vehicle that were available at the time of
going to press. National variation sare pos-
sible. Not ethat your vehicle may not be
equipped with all of the function sdescri-
bed. This is also the case for system sand
function srelevan ttosafety.
i Read the information on qualified special-
ist workshops: (Y page 23). Exterior lighting
Important safet
ynotes
For reason sofsafety, Mercedes-Benz recom-
mends that you drive with the lights switched
on even during the daytime. In some coun-
tries ,operation of the headlamps varies due
to legal requirements and self-imposed obli-
gations. Driving abroad
Symmetrical dipped-beam headlamps If your journey takes you to countries where
vehicles are driven on the opposite side of the
road to the country in which the vehicle is
registered, your headlamps must be switched
to symmetrical dipped beam. This prevents
oncoming traffic from being dazzled. Sym-
metrical lights do not illuminate as large an
area of the edge of the carriageway.
Conver tthe headlamps as close to the border
as possible before driving in these countries
(Y page 223).
Asymmetrical dipped beam Convert the headlamps back to asymmetrical
dipped beam as soon as possible after cross-
ing the border (Y page 223).
If the headlamps are converted to symmetri-
cal dipped beam, the "motorway mode" and "extended range foglamps" functions (Intelli-
gent Light System) are not available. Setting the exterior lighting
Setting options Exterior lighting can be set using the:
R
light switch
R combination switch (Y page 113)
R on-board computer (Y page 222)
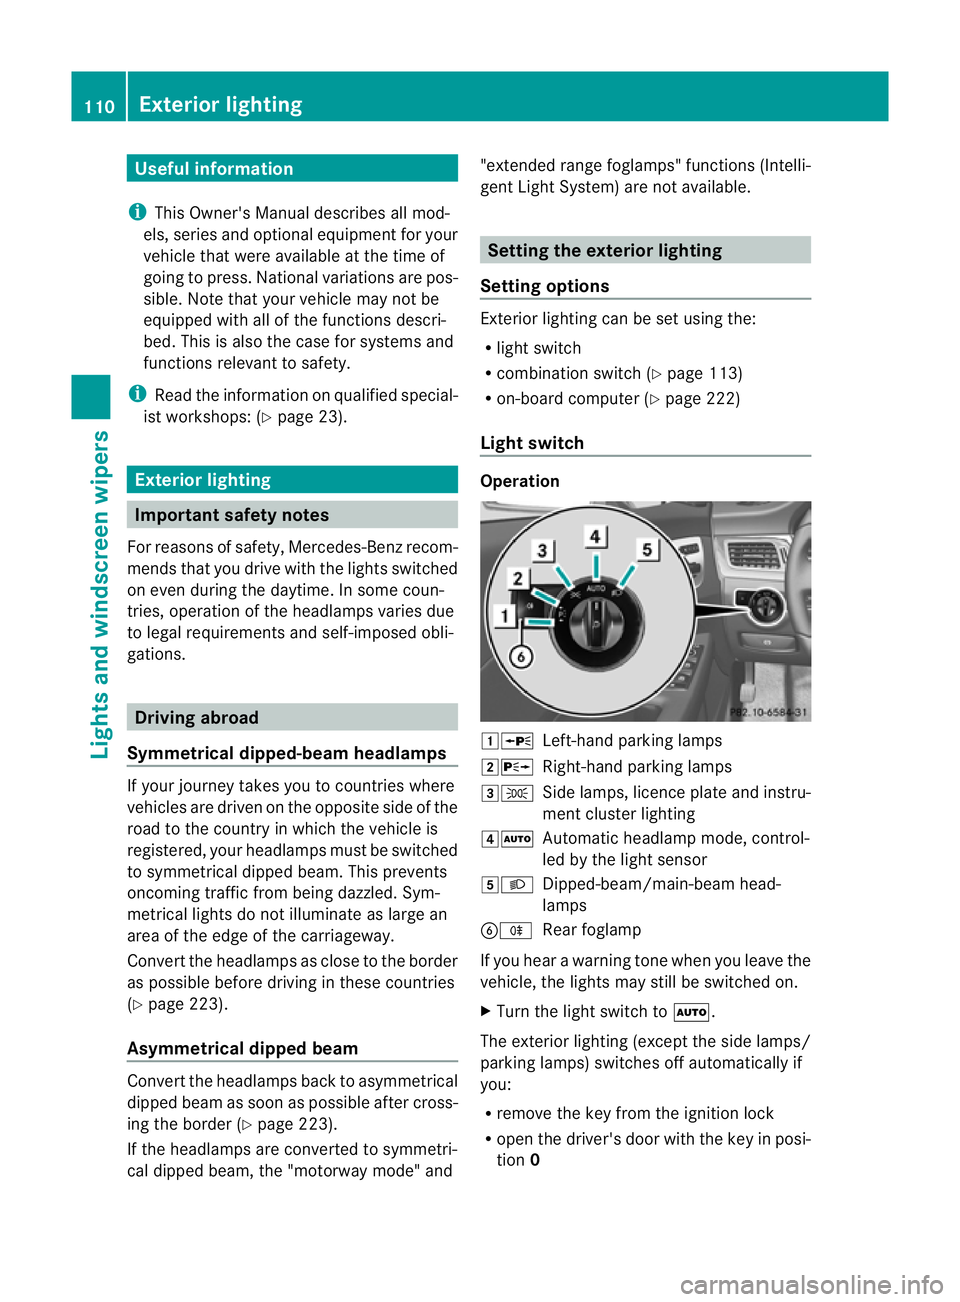
Light switch Operation
1W
Left-hand parking lamps
2X Right-hand parking lamps
3T Side lamps, licence plate and instru-
ment cluster lighting
4Ã Automatic headlamp mode, control-
led by the light sensor
5L Dipped-beam/main-beam head-
lamps
BR Rear foglamp
If you hear awarning tone when you leave the
vehicle, the lights may still be switched on.
X Turn the light switch to Ã.
The exterior lighting (except the side lamps/
parking lamps) switches off automatically if
you:
R remove the key from the ignition lock
R open the driver's door with the key in posi-
tion 0 110
Exterior lightingLights and windscreen wipers
Page 114 of 373
Automatic headlamp mode
G
WARNING
If th eligh tswitc hiss et to à and it is foggy,
snowing or there is poor visibility, th edipped-
beam headlamp swill not com eonautomati-
cally. This could endange ryou and others. In
such situations turn the light switch to L.
The automatic headlamp feature is only an
aid. The driver is responsible for the vehicle's
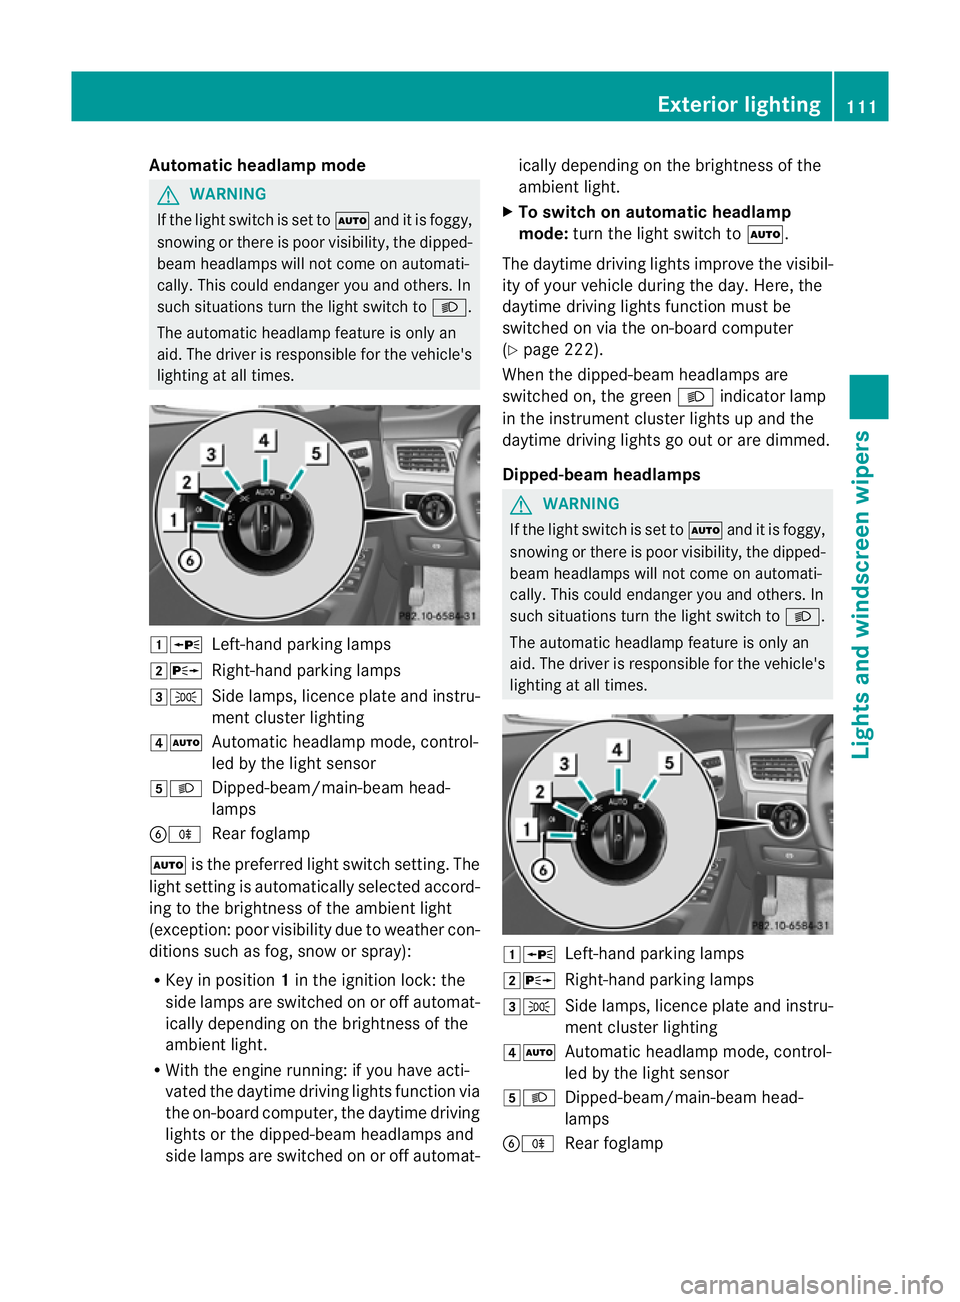
lighting at all times. 1W
Left-hand parking lamps
2X Right-hand parking lamps
3T Side lamps, licence plate and instru-
ment cluster lighting
4Ã Automatic headlamp mode, control-
led by the light sensor
5L Dipped-beam/main-beam head-
lamps
BR Rear foglamp
à is the preferred light switch setting. The
light setting is automatically selected accord-
ing to the brightnes softhe ambient light
(exception: poor visibility due to weather con-
ditions such as fog, snow or spray):
R Key in position 1in the ignition lock: the
side lamps are switched on or off automat-
ically depending on the brightnes softhe
ambient light.
R With the engine running: if you have acti-
vated the daytime driving lights function via
the on-board computer, the daytime driving
lights or the dipped-beam headlamps and
side lamps are switched on or off automat- ically depending on the brightness of the
ambient light.
X To switch on automatic headlamp
mode: turn the light switch to Ã.
The daytime driving lights improve the visibil-
ity of your vehicle during the day. Here, the
daytime driving lights function must be
switched on via the on-board computer
(Y page 222).
When the dipped-beam headlamps are
switched on, the green Lindicator lamp
in the instrument cluster lights up and the
daytime driving lights go out or are dimmed.
Dipped-beam headlamps G
WARNING
If the light switch is set to Ãand it is foggy,
snowing or there is poor visibility, the dipped-
beam headlamps will not come on automati-
cally. This could endanger you and others. In
such situations turn the light switch to L.
The automatic headlamp feature is only an
aid. The driver is responsible for the vehicle's
lighting at all times. 1W
Left-hand parking lamps
2X Right-hand parking lamps
3T Side lamps, licence plate and instru-
ment cluster lighting
4Ã Automatic headlamp mode, control-
led by the light sensor
5L Dipped-beam/main-beam head-
lamps
BR Rear foglamp Exterior lighting
111Lights and windscreen wipers Z
Page 115 of 373
Even if the ligh
tsensor does not detec tthat
is dark, the side lamps and dipped-beam
headlamps switch on when the key is inserted
into the ignition lock and the light switch is
set to the Lposition. This is aparticularly
useful function in the event of rain and fog.
X To switch on the dipped-beam head-
lamps: turn the key in the ignition lock to
position 2or start the engine.
X Turn the light switch to L.
The green Lindicator lamp in the instru-
ment cluster lights up.
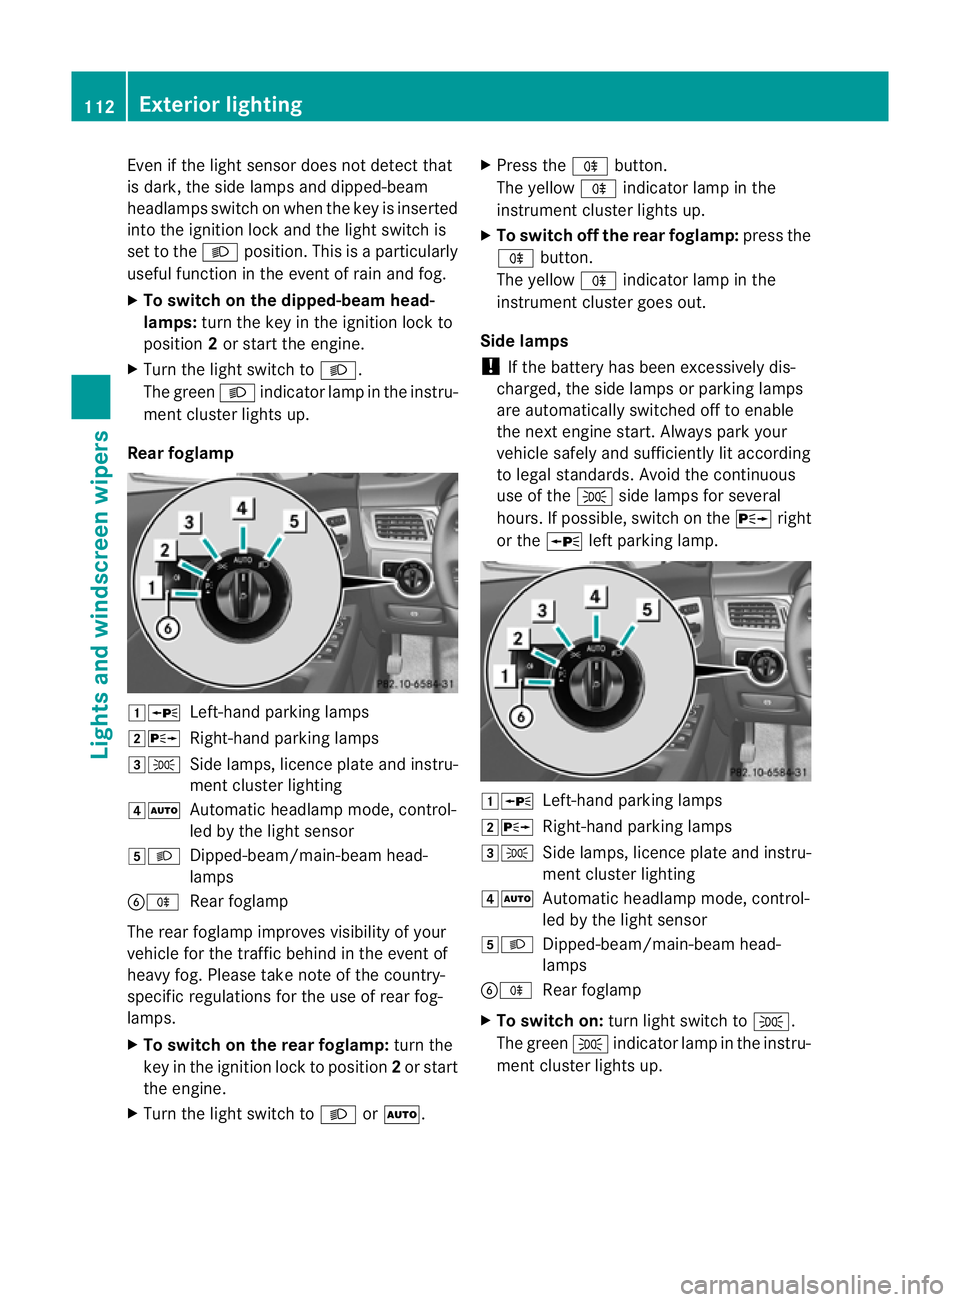
Rear foglamp 1W
Left-hand parking lamps
2X Right-hand parking lamps
3T Side lamps, licence plate and instru-
ment cluster lighting
4Ã Automatic headlamp mode, control-
led by the light sensor
5L Dipped-beam/main-beam head-
lamps
BR Rear foglamp
The rear foglamp improves visibility of your
vehicle for the traffic behind in the event of
heavy fog. Please take note of the country-
specific regulations for the use of rear fog-
lamps.
X To switch on the rear foglamp: turn the
key in the ignition lock to position 2or start
the engine.
X Turn the light switch to LorÃ. X
Press the Rbutton.
The yellow Rindicator lamp in the
instrumentc luster lightsup.
X To switch off th erear foglamp: pressthe
R button.
The yellow Rindicator lamp in the
instrumen tcluster goes out.
Side lamps
! If the battery has been excessively dis-
charged, the side lamps or parking lamps
are automatically switched off to enable
the nex tengine start. Alway sparky our
vehicl esafelya nd sufficiently li taccording
to lega lstandards. Avoi dthe continuous
us eoft heT sidelam ps for several
hours. If possible ,switch on the Xright
or the Wleft parking lamp. 1W
Left-hand parking lamps
2X Right-hand parking lamps
3T Sidelam ps,licence plate and instru-
ment cluster lighting
4Ã Automati cheadlamp mode, control-
led by the light sensor
5L Dipped-beam/main-beam head-
lamps
BR Rear foglamp
X To switch on: turn light switch to T.
The green Tindicator lamp in the instru-
ment cluster lights up. 112
Exterior lightingLights and windscreen wipers
Page 116 of 373
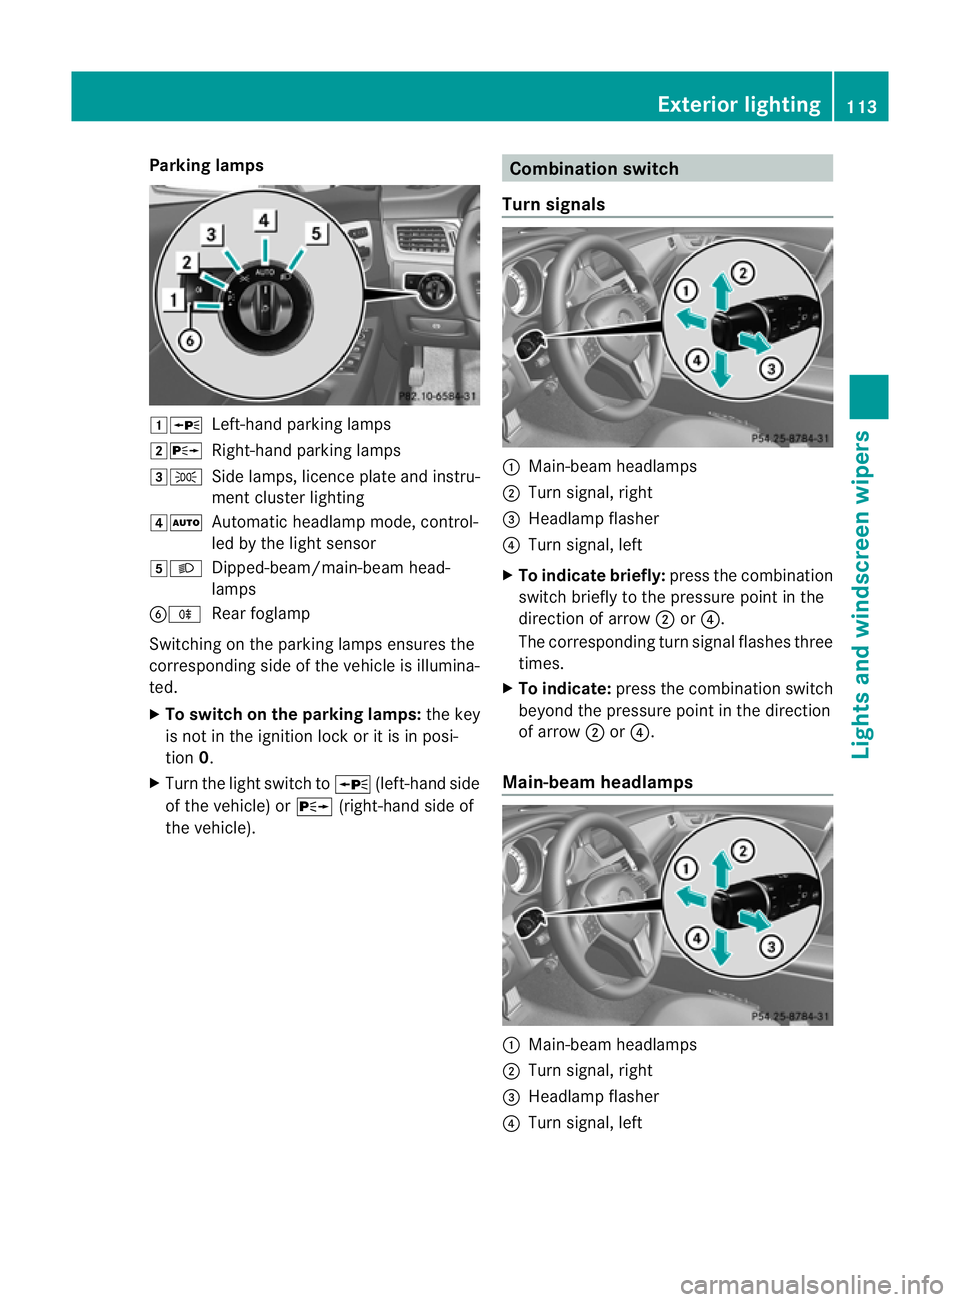
Parking lamps
1W
Left-hand parking lamps
2X Right-hand parking lamps
3T Side lamps, licence plate and instru-
ment cluster lighting
4Ã Automatic headlamp mode, control-
led by the light sensor
5L Dipped-beam/main-beam head-
lamps
BR Rear foglamp
Switchingont he parking lamps ensures the
correspondin gside of the vehicle is illumina-
ted.
X To switch on the parking lamps: the key
is not in the ignition lock or it is in posi-
tion 0.
X Turn the light switch to W(left-hand side
of the vehicle) or X(right-hand side of
the vehicle). Combination switch
Turns ignals :
Main-beam headlamps
; Turn signal, right
= Headlamp flasher
? Turn signal, left
X To indicate briefly: press the combination
switch briefly to the pressure point in the
direction of arrow ;or?.
The correspondin gturn signal flashes three
times.
X To indicate: press the combination switch
beyond the pressure point in the direction
of arrow ;or?.
Main-beam headlamps :
Main-beam headlamps
; Turn signal, right
= Headlamp flasher
? Turn signal, left Exterior lighting
113Lights and windscreen wipers Z
Page 119 of 373
Active:
if you are driving at aspeed above
110 km/ hand do not make any large steering
movements for at leas t1000 morify ouare
drivin gatas peedabove 130 km/h.
Not active: if you are driving at speed sbelow
80 km/ hfollowing activation.
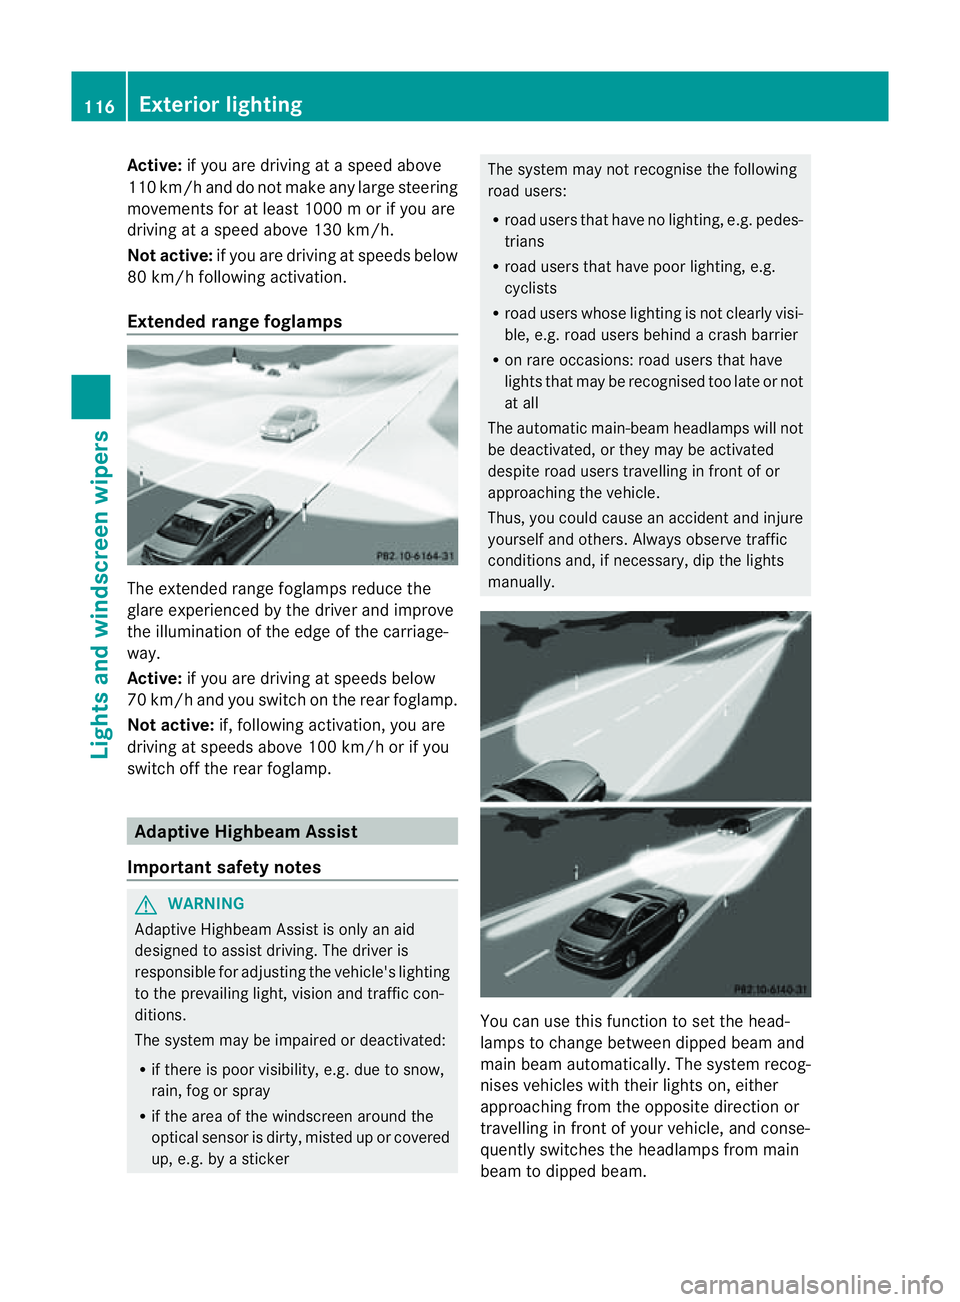
Extended range foglamps The extended range foglamps reduce the
glare experienced by the driver and improve
the illumination of the edge of the carriage-
way.
Active: if you are driving at speeds below
70 km/ hand yo uswitch on the rea rfoglamp.
Not active: if, following activation ,you are
driving at speeds above 100 km/ho rifyou
switch off the rear foglamp. Adaptive Highbeam Assist
Important safety notes G
WARNING
Adaptive Highbeam Assist is only an aid
designed to assist driving. The driver is
responsible for adjusting the vehicle's lighting
to the prevailing light, vision and traffic con-
ditions.
The system may be impaired or deactivated:
R if there is poor visibility, e.g. due to snow,
rain, fog or spray
R if the area of the windscreen around the
optical sensor is dirty, misted up or covered
up, e.g. by asticker The system may not recognise the following
road users:
R
road users that have no lighting, e.g. pedes-
trians
R road users that have poor lighting, e.g.
cyclists
R road users whose lighting is not clearly visi-
ble, e.g. road users behind acrash barrier
R on rare occasions: road users that have
lights that may be recognised too late or not
at all
The automatic main-beam headlamps will not
be deactivated, or they may be activated
despite road users travelling in front of or
approaching the vehicle.
Thus, you could cause an accident and injure
yourself and others. Always observe traffic
conditions and, if necessary, dip the lights
manually. You can use this function to set the head-
lamps to change between dipped beam and
main beam automatically. The system recog-
nises vehicles with their lights on, either
approaching from the opposite direction or
travelling in front of your vehicle, and conse-
quently switches the headlamps from main
beam to dipped beam.116
Exterior lightingLights and windscreen wipers
Page 120 of 373
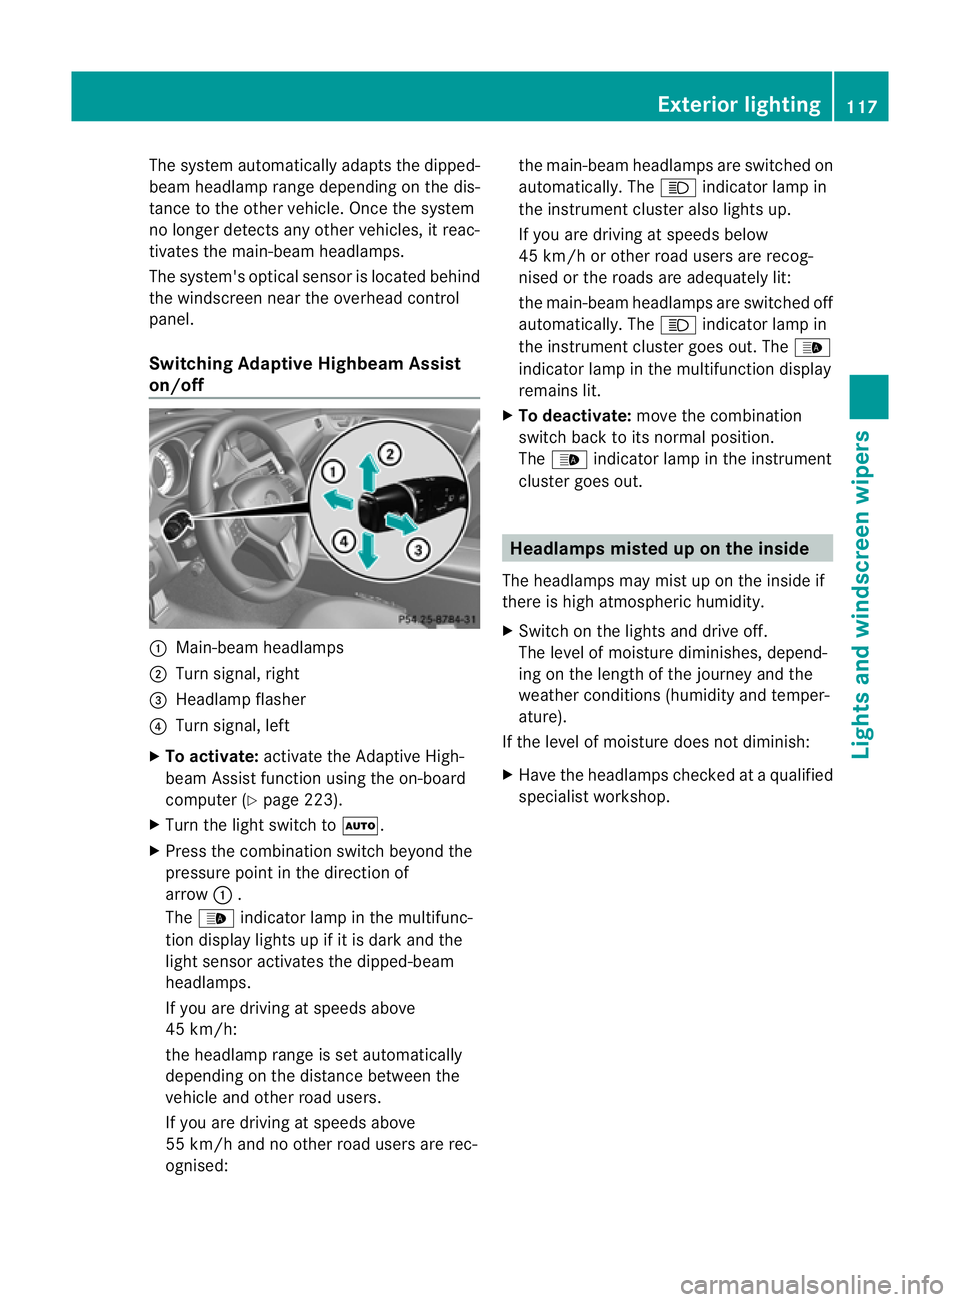
The system automatically adapts the dipped-
beam headlamp range depending on the dis-
tancetot he other vehicle. Oncet he system
no longer detect sany other vehicles, it reac-
tivates the main-beam headlamps.
The system's optical sensor is located behind
the windscreen near the overhead control
panel.
Switching Adaptive Highbeam Assist
on/off :
Main-beam headlamps
; Turn signal, right
= Headlamp flasher
? Turn signal, left
X To activate: activatethe Adaptive High-
beam Assist function using the on-board
computer (Y page 223).
X Turn the light switch to Ã.
X Press the combination switch beyond the
pressure point in the direction of
arrow :.
The _ indicator lamp in the multifunc-
tion display lights up if it is dark and the
light sensor activates the dipped-beam
headlamps.
If you are driving at speeds above
45 km/h:
the headlamp range is set automatically
depending on the distanc ebetween the
vehicle and other road users.
If you are driving at speeds above
55 km/ha nd no other road users are rec-
ognised: the main-beam headlamps are switched on
automatically. The
Kindicator lamp in
the instrument cluster also lights up.
If you are driving at speeds below
45 km/ho rother road users are recog-
nised or the roads are adequately lit:
the main-beam headlamps are switched off
automatically. The Kindicator lamp in
the instrument cluster goes out. The _
indicator lamp in the multifunction display
remains lit.
X To deactivate: move the combination
switch back to its normal position.
The _ indicator lamp in the instrument
cluster goes out. Headlamps misted up on the inside
The headlamps may mist up on the inside if
there is high atmospheric humidity.
X Switc hont he lights and drive off.
The level of moisture diminishes, depend-
ing on the length of the journey and the
weather conditions (humidity and temper-
ature).
If the level of moisture does not diminish:
X Have the headlamps checked at aqualified
specialist workshop. Exterior lighting
117Lights and windscreen wipers Z
Page 124 of 373
X
Insert bulbh older=into the lamp and turn
it clockwise.
X Reinsert the lamp cluster.
X Tighten four nuts :.
X Push in connector ;until it engages.
X Insert the side panelling. Windscreen wipers
Switching the windscreen wipers on/
off G
WARNING
The windscree nwill not longer be wiped prop-
erly if the wiper blades are worn .This could
prevent you from observing the traffic condi-
tions, thereby causing an accident. Replace
the wiper blades twice ayear, ideally in spring
and autumn.
! Do not operate the windscreen wipers
when the windscreen is dry, as this could
damage the wiper blades. Moreover, dust
that has collected on the windscreen can
scratcht he glass if wiping takes place when
the windscreen is dry.
If it is necessary to switch on the wind-
screen wipers in dry weather conditions,
always operate them using washer fluid.
! If the windscreen wipers leave smears on
the windscreen after the vehicle has been
washed in an automatic car wash, this may
be due to wax or other residue. Cleant he
windscreen with washer fluid after an auto-
matic car wash.
! Intermittent wiping with rain sensor: due
to optical influences and the windscreen
becoming dirty in dry weather conditions,
the windscreen wipers may be activated
inadvertently. This could damage the wind-
screen wiper blades or scratcht he wind-
screen.
For this reason, you should always switch
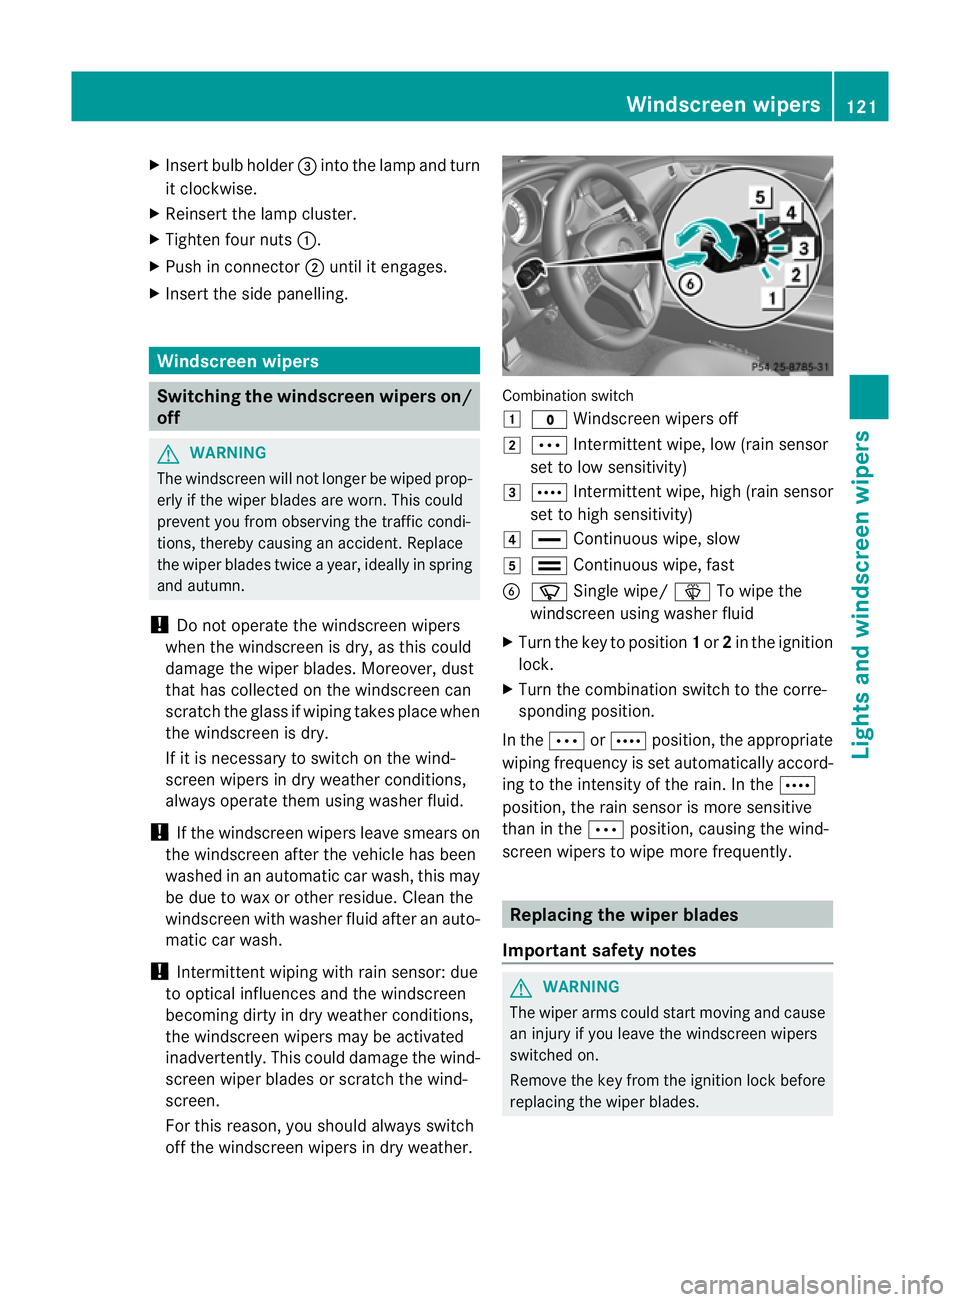
off the windscreen wipers in dry weather. Combination switch
1
$ Windscreen wipers off
2 Ä Intermittent wipe, low (rain sensor
set to low sensitivity)
3 Å Intermittent wipe, high (rain sensor
set to high sensitivity)
4 ° Continuous wipe, slow
5 ¯ Continuous wipe, fast
B í Single wipe/ îTo wipe the
windscreen using washer fluid
X Turn the key to position 1or 2in the ignition
lock.
X Turn the combination switch to the corre-
sponding position.
In the ÄorÅ position, the appropriate
wiping frequency is set automatically accord-
ing to the intensity of the rain. In the Å
position, the rain sensor is more sensitive
than in the Äposition, causing the wind-
screen wipers to wipe more frequently. Replacing the wiper blades
Important safety notes G
WARNING
The wiper arms could start moving and cause
an injury if you leave the windscreen wipers
switched on.
Remove the key from the ignition lock before
replacing the wiper blades. Windscreen wipers
121Lights and windscreen wipers Z
Page 174 of 373
G
WARNING
DISTRONIC PLUS cannot take account of road
and traffic conditions. If DISTRONIC does not
recognise or no longer recognise sthe vehicle
in front, do not activate DISTRONIC or, if it is
already active, deactivate it. This is especially
the case:
R before corners
R on filter lanes
R when changing to alane with faster moving
traffic
R in comple xdriving situations or where lanes
are diverted ,e.g. at roadworks on amotor-
way
DISTRONIC PLUS otherwise maintains the
current spee dset by you or accelerates up to
the set speed.
DISTRONIC PLUS cannot take account of
weather conditions. Deactivate, or do not
activate, DISTRONIC PLUS:
R if the road sare slippery ,snow-covered or
icy. The wheels could lose their grip when
braking or accelerating. The vehicl ecould
start to skid.
R if the sensors are dirty or there is poor vis-
ibility ,e.g. due to snow, rain or fog. Dis-
tance control may be impaired.
Always pay attention to traffic conditions
even when DISTRONIC PLUS is activated.
Otherwise, you may fail to recognise dangers
in time, caus eanaccident and injure yourself
and others. G
WARNING
DISTRONIC PLUS brakes yourv ehicle up to a
maximum of 4m/s2
depending on its speed.
This corresponds to approximately 40% of
your vehicle's maximum braking power. You
must also apply the brakes yourself if this
braking power is not sufficient.
If DISTRONIC PLUS detect sarisk of collision
with avehicle in front, an intermittent warning
tones ounds. In addition, the ·distance
warning lamp in the instrument cluster lights
up. Brak etoavoidacollision. General notes DISTRONIC PLUS regulates the speed and
automatically helps you maintain the dis-
tanc
etot he vehicle detected in front. DIS-
TRONIC PLUS brakes automatically so that
the set speed is not exceeded.
On long and steep downhill gradients, you
must select shift range 1,2or 3in good time.
By doing so, you will make use of the braking
effec tofthe engine. This relieves the load on
the brake system and prevents the brakes
from overheating and wearing too quickly.
If DISTRONIC PLUS detectsas lower-moving
vehicle in front,y our vehicle is braked in order
to maintain the preset distance to the vehicle
in front.
The radar sensor system is switched off auto-
matically in the vicinity of radio telescope
facilities (Y page 368).
If you want DISTRONIC PLUS to assist you,
the radar sensor system must be activated
(Y page 225) and operational.
If there is no vehicle in front,D ISTRONIC
PLUS operates in the same way as cruise
control in the speed range between
30 km/h and 200 km/h. If avehicle is driving
in fron tofyou, DISTRONIC operates in the
speed range between 0km/h and
200 km/h.
Do not use DISTRONIC PLUS on road swith
steep gradients. Driving systems
171Driving and parking Z